My neighbor Maria asked me last Tuesday why I couldn’t just use Greek yogurt instead of mayo in my turkey sliders. I started to explain why that wouldn’t work — then stopped. Honestly, I had no good reason. I just assumed the texture would be off, or it would taste too tangy, or it would break the whole “leftover makeover” magic I was going for.
Maria is the kind of cook who throws things together without measuring and somehow it always works. I’m the opposite — I measure, I test, I tweak. So when she suggested swapping half the mayo for plain Greek yogurt, I almost laughed. But I didn’t. I grabbed the yogurt from my fridge, shrugged, and said, “Fine, let’s try it your way.”
Two hours later, I was eating a slider with one hand and texting her a photo with the other. The texture was creamier, the tang was subtle but perfect against the savory stuffing, and somehow the whole thing felt lighter without losing any of that post-Thanksgiving comfort. I mean, I was wrong. Completely wrong. And I’ve never been happier to admit it.
That’s how these Lightened-Up Leftover Turkey Sliders with Stuffing were born — not from a carefully planned recipe test, but from a neighbor who didn’t know she was teaching me something. Maybe you’ve been there, too. You get stuck in your ways, convinced a swap won’t work, and then someone casually proves you wrong. These sliders are the delicious result of that moment.
Why You’ll Love This Recipe
These aren’t just another way to use up turkey. These sliders have become the thing I actually look forward to after Thanksgiving — sometimes more than the main event. Here’s why they’ve earned a permanent spot in my post-holiday rotation:
- Quick & Easy: From fridge to table in under 25 minutes. Perfect for those days when you’re tired of cooking but still want something warm and satisfying.
- Simple Ingredients: You likely have everything already. Leftover turkey, leftover stuffing, some cheese, slider buns, and a few pantry staples. No fancy grocery trips required.
- Perfect for Leftover Season: Whether it’s the day after Thanksgiving, a holiday party, or just a Tuesday when you have extra rotisserie chicken, these sliders fit the moment.
- Crowd-Pleaser: I’ve brought these to post-holiday gatherings and watched people go back for thirds. Kids love them, adults love them, and nobody guesses they’re lightened up.
- Unbelievably Delicious: The combination of tender turkey, herby stuffing, melted cheese, and that secret creamy sauce is pure comfort. But because we’ve trimmed the fat, you don’t feel heavy afterward.
What makes these different from every other leftover slider recipe? It’s the yogurt-mayo swap, honestly. That one change keeps everything moist and creamy without the greasy aftermath. Plus, I add a touch of Dijon mustard and a splash of apple cider vinegar to the sauce — it brightens up all those rich Thanksgiving flavors in a way that makes you wonder why you never tried it before.
This recipe isn’t just good — it’s the kind that makes you close your eyes after the first bite. It’s comfort food reimagined, lighter but with the same soul-soothing satisfaction. Perfect for feeding a crowd without stress, or turning a simple leftover meal into something you actually crave.
What Ingredients You Will Need
This recipe uses simple, wholesome ingredients to deliver bold flavor and satisfying texture without the fuss. Most of these are likely sitting in your fridge right now, waiting for a second chance to shine.
For the Creamy Sauce
- 1/4 cup plain Greek yogurt (I prefer full-fat or 2% for best texture — nonfat works but is thinner)
- 1/4 cup light mayonnaise (I like Hellmann’s or Duke’s for flavor)
- 1 tablespoon Dijon mustard (adds tang and depth)
- 1 teaspoon apple cider vinegar (brightens everything up)
- 1/2 teaspoon garlic powder
- Salt and black pepper to taste
For the Sliders
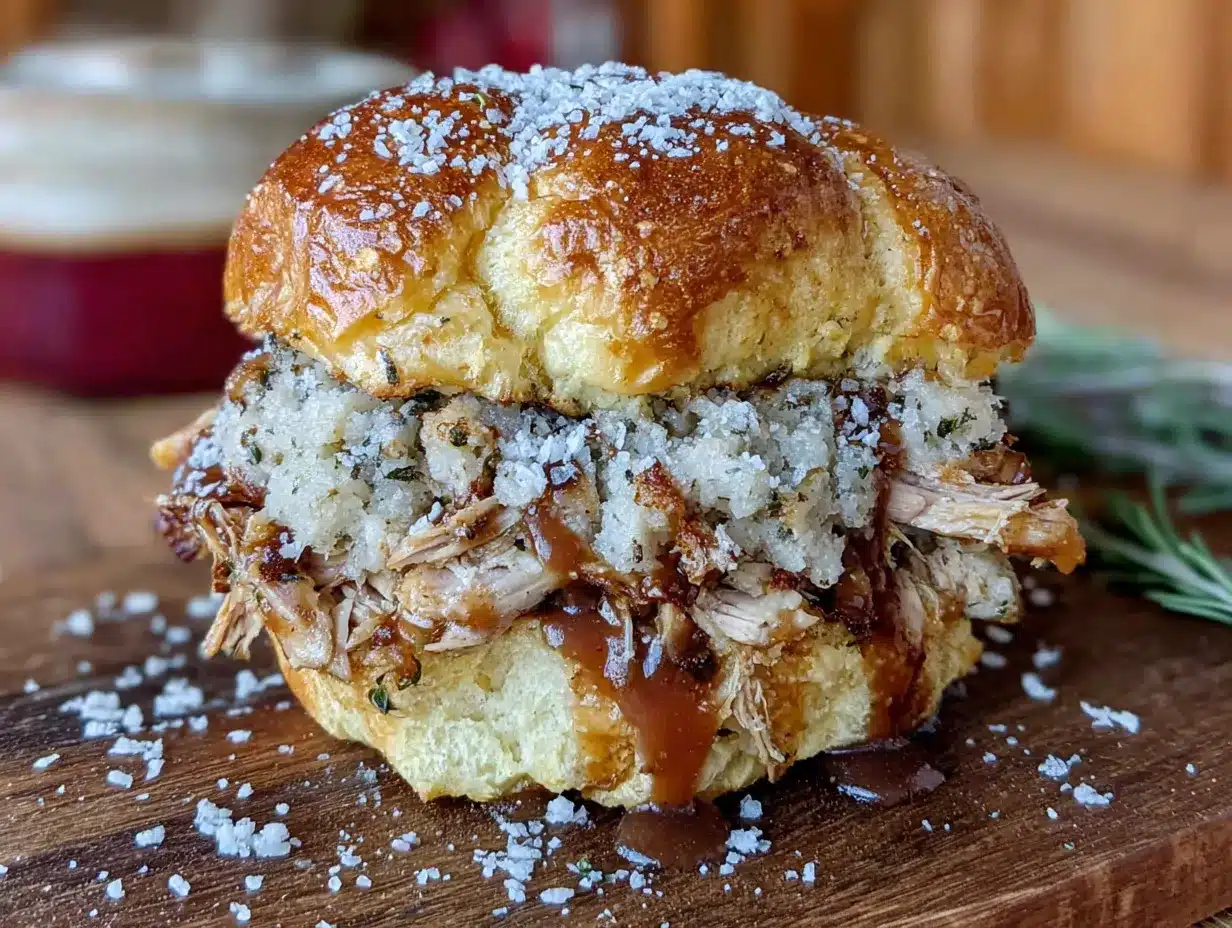
- 12 slider buns (I use Martin’s potato rolls — they’re soft and hold up well)
- 2 cups cooked turkey, shredded or chopped (leftover dark and white meat both work great)
- 1 1/2 cups leftover stuffing (any kind — sage, cornbread, or classic bread stuffing all work)
- 6 slices provolone or Swiss cheese (or 1 1/2 cups shredded mozzarella)
- 2 tablespoons unsalted butter, melted
- 1 teaspoon poppy seeds (optional, but adds a nice crunch)
- 1/2 teaspoon dried parsley (for color)
A few notes on ingredients. For the turkey, I actually prefer a mix of white and dark meat — the dark meat stays juicier, and the white meat adds that classic texture. If your turkey is on the drier side, don’t worry. The sauce and stuffing will add plenty of moisture.
For the stuffing, any variety works. I’ve used classic sage stuffing, cornbread stuffing, and even a wild rice stuffing my aunt makes every year. The key is that it’s already seasoned — you don’t need to add extra herbs or salt. If your stuffing is very dry, add a tablespoon of chicken broth before assembling.
As for the cheese, provolone is my go-to because it melts beautifully without being too greasy. Swiss adds a nice nuttiness that pairs well with turkey. If you want something sharper, try white cheddar. For a dairy-free option, use your favorite plant-based cheese slices — just check that they melt well.
If you don’t have leftover stuffing, you can use 1 1/2 cups of seasoned croutons mixed with 1/4 cup chicken broth and 1 teaspoon dried sage. Let it sit for 5 minutes before using. It’s not quite the same, but it works in a pinch.
Equipment Needed
You don’t need much for these sliders, which is part of the beauty. Here’s what I use:
- 9×13-inch baking dish — This is the perfect size for 12 sliders. If you don’t have one, a 9×9 dish works but you’ll need to crowd them a bit.
- Small bowl — For mixing the sauce.
- Sharp knife and cutting board — For shredding or chopping the turkey.
- Pastry brush — For brushing the melted butter on top. You can use a spoon if you don’t have one.
- Aluminum foil — To cover the dish while baking so the buns don’t burn.
- Measuring spoons and cups — For the sauce ingredients.
I’ve made these in a cast iron skillet before, and honestly, it works great. The edges get a little crispier, which I actually love. Just make sure your skillet is at least 10 inches wide. If you’re using a disposable aluminum pan for a party, go for it — just reduce the baking time by 5 minutes since those pans heat up faster.
One tip: if your baking dish is glass, reduce the oven temperature by 25 degrees. Glass holds heat longer and can burn the bottoms of the buns otherwise. Learned that one the hard way.
Preparation Method
Let’s make these sliders. I promise, it’s almost embarrassingly easy. Here’s how it goes:
- Preheat your oven to 350°F (175°C). While it’s heating, lightly grease your 9×13 baking dish with cooking spray or a thin layer of butter.
- Make the creamy sauce. In a small bowl, combine the Greek yogurt, light mayonnaise, Dijon mustard, apple cider vinegar, garlic powder, and a pinch of salt and pepper. Whisk until smooth. Taste it — you want it tangy but balanced. If it’s too sharp, add a tiny pinch of sugar. Set aside.
- Prepare the turkey. If your turkey is in large chunks, shred or chop it into bite-sized pieces. I like to use two forks for shredding — it takes about 2 minutes. If your turkey is dry, toss it with 1 tablespoon of the sauce to add moisture.
- Slice the buns in half. Using a serrated knife, carefully cut the entire slab of 12 slider buns in half horizontally. Place the bottom half in your prepared baking dish. If your buns are separate, just arrange them close together in the dish.
- Spread half the sauce on the bottom buns. Use a spatula or the back of a spoon to spread it evenly. This layer is important — it keeps the buns from getting soggy from the turkey and adds flavor from the start.
- Layer the turkey. Distribute the shredded turkey evenly over the bottom buns. Don’t pile it too high in one spot — you want every slider to have a good amount of meat. Press it down gently with your hands.
- Add the stuffing. Spoon the leftover stuffing over the turkey. If your stuffing is in large clumps, break it up a bit as you go. Spread it evenly so each slider gets some of that herby goodness.
- Top with cheese. Lay the cheese slices over the stuffing. If using slices, I like to tear them in half and overlap them slightly — it ensures better coverage. If using shredded cheese, sprinkle it evenly.
- Place the top buns. Carefully put the top half of the buns over the cheese. Press down gently to compact everything.
- Spread the remaining sauce on top. Use a spatula to spread the rest of the creamy sauce over the top buns. Don’t worry about being perfect — it’ll melt and soak in as it bakes.
- Brush with melted butter. In a small microwave-safe bowl, melt the 2 tablespoons of butter (about 20 seconds in the microwave). Brush it over the top buns. Sprinkle with poppy seeds and dried parsley if using.
- Cover and bake. Tent the dish loosely with aluminum foil. Bake for 15 minutes. The foil traps steam and helps everything meld together without drying out.
- Uncover and bake again. Remove the foil and bake for another 5-7 minutes, until the tops are golden brown and the cheese is bubbly. Keep an eye on them — you want them toasted, not burnt.
- Let them rest. Remove from the oven and let the sliders sit for 5 minutes before cutting. This is crucial — it lets the cheese set slightly so the sliders hold together when you cut them. I know it’s hard to wait, but trust me.
- Cut and serve. Use a sharp knife to cut between the buns. Serve warm, with extra sauce on the side if you like.
A few sensory cues as you go: when you’re layering the turkey and stuffing, you should smell that familiar Thanksgiving aroma — sage, thyme, and roasted meat. When the sliders come out of the oven, the tops should be a deep golden brown, and you’ll see the cheese peeking out from the edges. The butter and poppy seeds will smell nutty and inviting. That first bite should be warm, creamy, and slightly crunchy on top.
If you’re making these ahead, assemble them completely but don’t bake. Cover and refrigerate for up to 24 hours. Add 5-7 minutes to the covered baking time since they’ll be cold from the fridge.
Cooking Tips & Techniques
After making these sliders about a dozen times (not exaggerating), I’ve picked up a few tricks that make a real difference.
Don’t skip the rest time. The first time I made these, I was so excited I cut into them immediately. Big mistake. The cheese was lava-hot, and the sliders fell apart into a delicious but messy pile. Letting them rest for 5 minutes allows the cheese to set and the buns to absorb some of the sauce. They’ll hold together much better.
Watch your stuffing moisture. If your stuffing is very dry, it can suck moisture out of the turkey and make everything feel a bit sad. Before assembling, take a look at your stuffing. If it seems dry, add 2-3 tablespoons of chicken broth and mix it in. If it’s already moist (like my aunt’s cornbread stuffing that’s basically a casserole), you’re good to go.
Use a serrated knife to cut the buns. I learned this after smooshing too many soft potato rolls with a dull chef’s knife. A serrated knife cuts through without compressing the bread, keeping those fluffy interiors intact.
Toast the bottom buns if you have time. For extra crunch, you can pop the bottom buns in the oven for 3-4 minutes before assembling. It creates a barrier that keeps them from getting too soggy. I don’t always do this, but when I do, I’m always glad.
Double the sauce. Honestly, I always make a double batch of the creamy sauce. Half goes on the sliders, and the other half goes in a small bowl for dipping. It’s that good, and people always ask for more.
One mistake I made early on: I used nonfat Greek yogurt and wondered why the sauce was watery. Full-fat or 2% yogurt has less whey and stays thicker. If you only have nonfat, strain it through a coffee filter or paper towel for 10 minutes before using.
Variations & Adaptations
These sliders are surprisingly flexible. Here are some ways I’ve changed them up:
Turkey and Cranberry Sliders: Add a thin layer of leftover cranberry sauce between the turkey and stuffing. The tartness cuts through the richness beautifully. I did this last year and it was a hit at our post-Thanksgiving gathering.
Chicken and Stuffing Sliders: No turkey? No problem. Use shredded rotisserie chicken instead. The flavors work just as well, and honestly, I’ve made these in March just because I was craving them. Same method, same delicious result.
Vegetarian Version: Swap the turkey for 2 cups of sautéed mushrooms (cremini or baby bella work best) mixed with 1/2 cup cooked lentils. The mushrooms add that savory, umami flavor that mimics the richness of turkey. My vegetarian friend Sarah requests these every year.
Gluten-Free Option: Use gluten-free slider buns and gluten-free stuffing. Most store-bought gluten-free bread crumbs work well for making stuffing. Just check the labels — some are drier than others, so you may need extra broth.
Spicy Kick: Add 1 teaspoon of sriracha or hot sauce to the creamy sauce, or sprinkle red pepper flakes over the turkey layer. The heat pairs surprisingly well with the sweet, herby stuffing.
Breakfast Sliders: Okay, this one is weird but good. Use the same setup but add a fried egg on top of each slider before serving. The runny yolk mixed with the sauce and stuffing is next-level. I discovered this on a lazy Saturday morning when I had leftover stuffing and no plans.
For a lower-carb version, use large portobello mushroom caps as the “buns.” Roast them for 10 minutes at 375°F first to remove some moisture, then assemble and bake as directed. It’s not quite the same, but it scratches the itch.
Serving & Storage Suggestions
These sliders are best served warm, right after that 5-minute rest. I like to arrange them on a large platter with a small bowl of extra creamy sauce in the center for dipping. A sprinkle of fresh parsley on top adds a nice pop of color.
For sides, keep it simple. A crisp green salad with a lemony vinaigrette cuts through the richness. Roasted Brussels sprouts or green beans also work well. If you’re serving these for a game day spread, pair them with sweet potato fries and a crunchy coleslaw.
For drinks, these sliders love a cold beer — a crisp lager or pale ale works great. If you’re doing wine, go with a lightly oaked Chardonnay or a dry rosé. For non-alcoholic options, sparkling water with a squeeze of lemon or a tart apple cider are perfect.
Storage: Leftover sliders (if you have any) can be stored in an airtight container in the refrigerator for up to 3 days. The buns will soften a bit, but the flavor actually gets better as everything melds together.
Reheating: The best way to reheat is in a 350°F oven for 8-10 minutes, covered with foil. This brings back the warmth without drying out the turkey. You can also use an air fryer at 325°F for 4-5 minutes — the tops get slightly crispier, which I love. Avoid the microwave if you can; it makes the buns soggy and the cheese rubbery.
Freezing: These freeze beautifully. Assemble the sliders completely but don’t bake. Wrap the entire dish tightly in plastic wrap, then aluminum foil. Freeze for up to 3 months. To bake, thaw overnight in the refrigerator, then bake as directed, adding 5-7 minutes to the covered baking time.
One thing I’ve noticed: the flavors deepen after a day in the fridge. The second day, the sauce has fully soaked into the buns and stuffing, and everything tastes more cohesive. Honestly, I sometimes make these a day ahead on purpose.
Nutritional Information & Benefits
Here’s an approximate nutritional breakdown per slider (based on 12 sliders using light mayo, full-fat Greek yogurt, and provolone cheese):
| Nutrient | Amount per Slider |
|---|---|
| Calories | 245 |
| Total Fat | 9g |
| Saturated Fat | 4g |
| Cholesterol | 45mg |
| Sodium | 520mg |
| Total Carbohydrates | 26g |
| Dietary Fiber | 2g |
| Sugars | 4g |
| Protein | 18g |
The health benefits here are subtle but real. Using Greek yogurt instead of all mayo cuts the fat significantly while adding protein and probiotics. Turkey is a lean protein source rich in B vitamins and selenium, which supports immune function. The stuffing adds fiber and complex carbohydrates for sustained energy.
If you’re watching sodium, use low-sodium turkey and stuffing, and go easy on the added salt in the sauce. You can also use a reduced-sodium cheese. For a lower-carb version, serve the filling in lettuce wraps instead of buns.
Potential allergens: dairy (yogurt, cheese, butter), gluten (buns, stuffing), and eggs (mayonnaise). Use dairy-free yogurt and cheese, gluten-free buns and stuffing, and vegan mayo to accommodate dietary needs.
From a wellness perspective, I love that these sliders let me enjoy the flavors of Thanksgiving without the heavy, sluggish feeling that often follows. They’re satisfying enough to feel like a treat, but light enough that I don’t regret that second slider. That’s the sweet spot, honestly.
FAQs
Can I use rotisserie chicken instead of turkey?
Absolutely. Shredded rotisserie chicken works perfectly. The flavors are similar enough that you won’t miss the turkey. I’ve made these with chicken in the middle of summer just because I was craving them.
Can I make these sliders dairy-free?
Yes. Use dairy-free yogurt (coconut or almond-based work best), dairy-free cheese slices, and vegan butter. Just check that your cheese melts well — some plant-based cheeses don’t melt as smoothly. Daiya and Violife are good options.
How do I keep the bottom buns from getting soggy?
Two tricks: First, toast the bottom buns for 3-4 minutes before assembling. Second, don’t skip the sauce layer on the bottom buns — it actually creates a barrier that prevents the moisture from the turkey and stuffing from soaking in too quickly. Also, make sure your stuffing isn’t overly wet.
Can I add vegetables to these sliders?
Definitely. Sautéed mushrooms, caramelized onions, or roasted red peppers all work well. I’ve also added a layer of baby spinach under the cheese — it wilts beautifully in the oven and adds a pop of green. Just make sure any vegetables are cooked first to remove excess moisture.
How far in advance can I assemble these?
You can assemble them up to 24 hours ahead. Just cover and refrigerate. When you’re ready to bake, add 5-7 minutes to the covered baking time since everything will be cold. I’ve also frozen them for up to 3 months — just thaw overnight in the fridge before baking.
Conclusion
These Lightened-Up Leftover Turkey Sliders with Stuffing have become my favorite part of the post-Thanksgiving season. They take everything you loved about the big meal — the tender turkey, the herby stuffing, that warm feeling of comfort — and pack it into a handheld, crowd-pleasing package that comes together in under 30 minutes.
What started as a skeptical experiment with my neighbor Maria turned into a recipe I genuinely look forward to every year. The yogurt-mayo swap was a revelation, and the tangy Dijon sauce ties everything together in a way that feels fresh and bright, not heavy. Whether you’re feeding a crowd or just yourself on a cozy night, these sliders deliver.
I’d love to hear how yours turn out. Did you add your own twist? Did your family go back for thirds? Drop a comment below and let me know. And if you’re looking for more ways to use up those leftovers, check out my leftover turkey soup or these cranberry brie bites — both are reader favorites.
Until next time, happy cooking — and don’t be afraid to let your neighbor prove you wrong. It might just become your new favorite recipe.
Pin This Recipe!
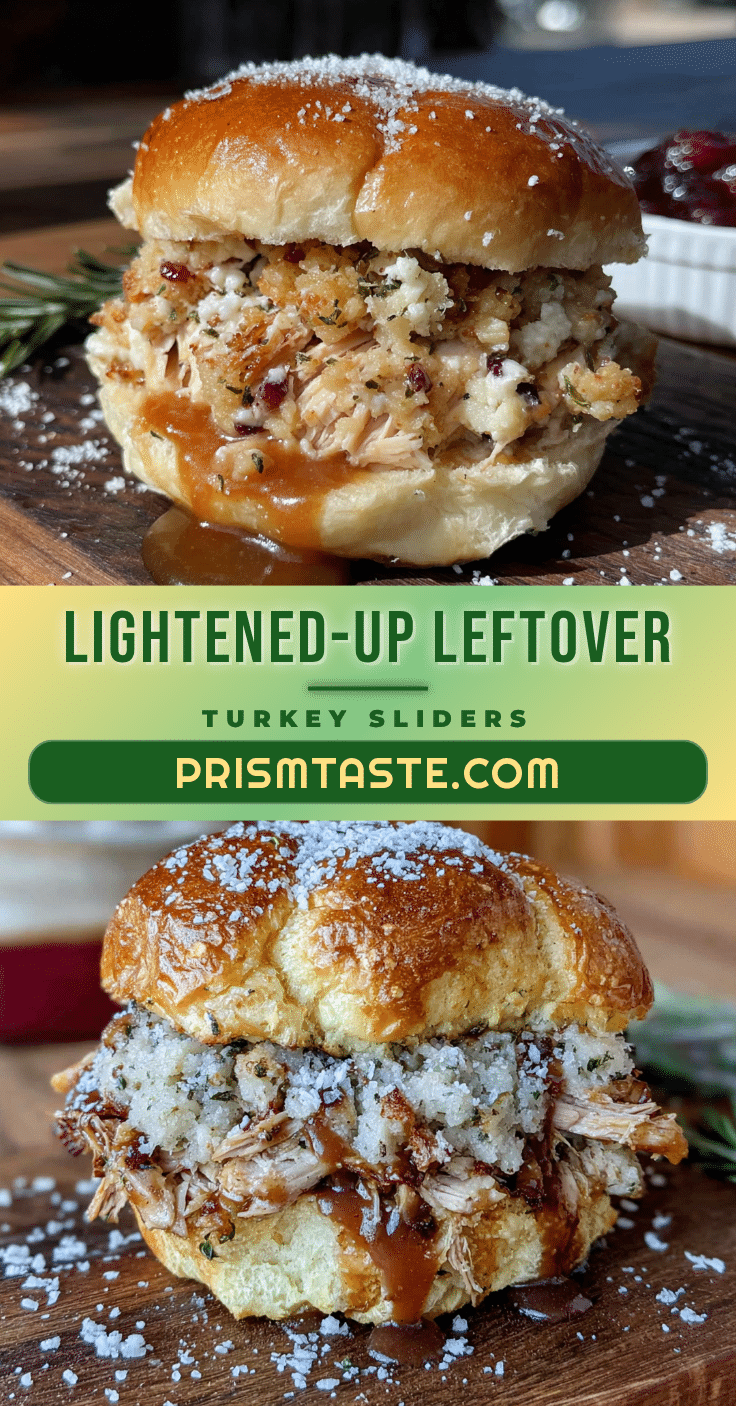
Lightened-Up Leftover Turkey Sliders with Stuffing
These lightened-up leftover turkey sliders combine tender turkey, herby stuffing, melted cheese, and a secret creamy sauce made with Greek yogurt and mayo. Perfect for post-Thanksgiving meals or any time you have leftover turkey, they come together in under 25 minutes and are a crowd-pleaser.
- Prep Time: 10 minutes
- Cook Time: 20 minutes
- Total Time: 30 minutes
- Yield: 12 sliders 1x
- Category: Main Course
- Cuisine: American
Ingredients
- 1/4 cup plain Greek yogurt (full-fat or 2%)
- 1/4 cup light mayonnaise
- 1 tablespoon Dijon mustard
- 1 teaspoon apple cider vinegar
- 1/2 teaspoon garlic powder
- Salt and black pepper to taste
- 12 slider buns (e.g., Martin’s potato rolls)
- 2 cups cooked turkey, shredded or chopped
- 1 1/2 cups leftover stuffing (any variety)
- 6 slices provolone or Swiss cheese (or 1 1/2 cups shredded mozzarella)
- 2 tablespoons unsalted butter, melted
- 1 teaspoon poppy seeds (optional)
- 1/2 teaspoon dried parsley
Instructions
- Preheat your oven to 350°F (175°C). Lightly grease a 9×13-inch baking dish with cooking spray or butter.
- Make the creamy sauce: In a small bowl, combine Greek yogurt, light mayonnaise, Dijon mustard, apple cider vinegar, garlic powder, and a pinch of salt and pepper. Whisk until smooth. Taste and adjust seasoning if needed.
- Prepare the turkey: Shred or chop the turkey into bite-sized pieces. If dry, toss with 1 tablespoon of the sauce.
- Slice the slider buns in half horizontally. Place the bottom half in the prepared baking dish.
- Spread half of the creamy sauce evenly over the bottom buns.
- Layer the shredded turkey evenly over the sauce.
- Spoon the leftover stuffing over the turkey, breaking up any large clumps.
- Top with cheese slices (tear slices in half and overlap for better coverage) or sprinkle shredded cheese evenly.
- Place the top buns over the cheese and press down gently.
- Spread the remaining sauce over the top buns.
- Brush the melted butter over the top buns. Sprinkle with poppy seeds and dried parsley if using.
- Cover the dish loosely with aluminum foil and bake for 15 minutes.
- Remove the foil and bake for another 5-7 minutes, until the tops are golden brown and the cheese is bubbly.
- Let the sliders rest for 5 minutes before cutting. This allows the cheese to set.
- Cut between the buns with a sharp knife and serve warm, with extra sauce on the side if desired.
Notes
For best results, use full-fat or 2% Greek yogurt to avoid a watery sauce. If your stuffing is dry, add 2-3 tablespoons of chicken broth before assembling. Let the sliders rest for 5 minutes after baking to help them hold together. To make ahead, assemble completely but do not bake; cover and refrigerate for up to 24 hours, then add 5-7 minutes to the covered baking time. For freezing, assemble without baking, wrap tightly, and freeze for up to 3 months; thaw overnight in the fridge before baking.
Nutrition
- Serving Size: 1 slider
- Calories: 245
- Sugar: 4
- Sodium: 520
- Fat: 9
- Saturated Fat: 4
- Carbohydrates: 26
- Fiber: 2
- Protein: 18
Keywords: leftover turkey sliders, turkey sliders, Thanksgiving leftovers, lightened-up sliders, turkey stuffing sliders, easy sliders, post-Thanksgiving recipe


