I figured a Halloween treat made from Rice Krispies would be a quick, no-fuss project to do with my niece. It took about ten minutes for the marshmallow mixture to cool into a stubborn, unshapeable blob for me to realize how wrong I was. That first year, we ended up with a sheet pan of vaguely orange-tinted squares that we tried to pass off as pumpkin patches with green frosting.
The next year, I came prepared. I learned that the trick isn’t just in the recipe—it’s in the timing and the temperature. You have to work with the mixture while it’s still warm enough to bend but cool enough not to burn your fingers. It’s a sweet spot that lasts maybe five minutes, and once you miss it, you’re basically making edible construction materials.
These Easy Halloween Rice Krispie Treat Pops are the result of that second-year redemption arc. They’re the treat that finally made my niece say, “Auntie, these actually look like ghosts!” and not, “Is that supposed to be a spider?”
You get the classic, buttery, marshmallow chew we all love, but shaped into something that actually looks festive. No special molds, no complicated techniques—just a little patience and some melted candy melts.
Look, some recipes are about precision. This one is about having fun and getting your hands a little sticky. It is the kind of project that makes you feel like you’ve actually accomplished something, even if your ghost looks a little lopsided.
Why You’ll Love This Recipe
I have made a lot of Rice Krispie treats in my day, from plain squares to elaborate rainbow fruit kabobs for summer parties. But these Halloween pops are different. They are the perfect balance of easy and impressive.
- Super Simple Ingredients: You only need six base ingredients to make the treats themselves. Butter, marshmallows, Rice Krispies cereal, and a few drops of food coloring. That’s it.
- No Bake, No Fuss: There is no oven involved. This is a stovetop and microwave situation, which means you aren’t heating up the whole kitchen. Perfect for a quick afternoon project.
- Kid-Friendly (and Kid-Approved): This is the recipe to make with little hands. They can help stir, shape, and decorate. My niece has been my official taste-tester for three years running.
- Perfect for Parties: These pops are portable, mess-free, and individually portioned. They are great for classroom parties, Halloween potlucks, or just a fun weekend snack.
- Endlessly Customizable: You can make ghosts, pumpkins, mummies, or Frankenstein monsters. The decorating possibilities are only limited by your candy stash.
Honestly, what makes this recipe different from all the others is the texture. We are not just making a marshmallow-cereal brick. We are making pops that stay soft and chewy for days, thanks to a tiny trick with how we handle the marshmallow mixture. It’s the kind of treat that makes you close your eyes after the first bite, even if it’s shaped like a ghost.
What Ingredients You Will Need
This recipe uses simple, pantry-friendly ingredients to deliver that classic, nostalgic flavor. You probably already have most of these on hand.
For the Rice Krispie Treats:
- 3 tablespoons unsalted butter (plus a little extra for greasing your hands and the pan). I use salted butter in a pinch, just skip adding any extra salt.
- 1 package (10 oz) regular marshmallows (or 4 cups of mini marshmallows). Do not use the “jet-puffed” giant ones for this; the mini ones melt more evenly.
- 6 cups Rice Krispies cereal (or any generic crispy rice cereal). I have used store brands, and they work fine, but the texture is slightly less crunchy.
- Orange and green gel food coloring (for pumpkins). I prefer gel colors because they don’t thin out the marshmallow mixture like liquid drops do. Americolor is my go-to brand.
- 1/2 teaspoon vanilla extract (optional, but it rounds out the sweetness nicely).
For Decorating & Assembly:
- 20-24 lollipop sticks (or sturdy paper straws cut in half).
- 1 cup orange candy melts (for pumpkin stems and faces).
- 1 cup white candy melts (for ghost faces).
- 1/2 cup green candy melts (for pumpkin vines).
- Black decorating icing (or a small piping bag with melted dark chocolate).
- Edible googly eyes (optional, but they make everything cuter).
- Non-stick cooking spray (for your hands and the spatula).
Ingredient Tip: For the best texture, use a fresh bag of marshmallows. Stale marshmallows can make the treats hard and crunchy instead of soft and chewy. If you are making these for a party, I recommend buying your candy melts from a craft store. They are usually cheaper there than at the grocery store.
Equipment Needed
You do not need a lot of fancy equipment for this recipe, which is part of its charm. Here is what you will need:
- Large saucepan (at least 4-quart capacity). A heavy-bottomed pan works best to prevent the marshmallows from scorching.
- Large mixing bowl (for the cereal).
- Rubber spatula (silicone is best, it won’t scratch your pan and it’s easy to clean).
- 9×13-inch baking pan (or a rimmed baking sheet). You are not baking anything, but this is where you will press the mixture.
- Parchment paper (for lining the pan).
- Small microwave-safe bowls (for melting the candy melts).
- Lollipop sticks (or paper straws).
- Plastic wrap (for storing the finished pops).
If you don’t have a 9×13 pan, you can use a rimmed baking sheet. The treats will just be a little flatter, which is actually easier for kids to bite into. I have also used a muffin tin to make individual-sized treat cups, but that is a different recipe entirely.
Preparation Method
Alright, let’s get sticky. This process moves fast, so have all your ingredients measured and ready to go before you start.
- Prep Your Pan: Line your 9×13-inch baking pan with parchment paper, leaving some overhang on two sides. Lightly grease the parchment with cooking spray or a little butter. This will make lifting the treats out later a breeze.
- Melt the Butter: In your large saucepan, melt the 3 tablespoons of butter over medium-low heat. You want it fully melted but not bubbling or browning. Swirl the pan occasionally.
- Add the Marshmallows: Pour the entire bag of marshmallows into the melted butter. Stir constantly with your rubber spatula until the marshmallows are completely melted and smooth. This takes about 5-7 minutes. Do not walk away! Burnt marshmallows are a tragedy.
- Add Color and Vanilla: Once the marshmallows are melted, remove the pan from the heat. Stir in the vanilla extract and your gel food coloring. For pumpkins, I use about 15 drops of orange and 2 drops of yellow to get a warm, vibrant color. For ghosts, leave the mixture white.
- Add the Cereal: Pour the 6 cups of Rice Krispies cereal into the melted marshmallow mixture. Fold everything together gently but thoroughly. You want every piece of cereal coated in that sticky, colorful marshmallow goodness. Do not overmix, or the cereal can get crushed.
- Shape the Treats: This is the fun part. Lightly grease your hands with cooking spray or butter. While the mixture is still warm (but not too hot to handle), scoop out a generous portion. For pumpkins, roll it into a ball, then gently flatten it into a round disc shape. For ghosts, shape it into an oval or a teardrop shape. Place each shaped treat onto the prepared parchment paper.
- Insert the Sticks: While the treats are still warm and pliable, gently push a lollipop stick into the bottom of each one. Insert it about halfway through the treat. If the treat is too soft, let it sit for 2-3 minutes to firm up slightly before inserting the stick.
- Let Them Set: Allow the shaped pops to cool and set completely at room temperature. This takes about 30 minutes. Do not refrigerate them, as condensation can make them sticky.
Pro Tip: If your mixture starts to harden before you are done shaping, you can pop it in the microwave for 10-15 seconds to soften it back up. Just do not overdo it, or you will end up with a sticky mess.
Decorating Your Halloween Pops
Once your pops are set, it is time to make them look spooky. This is where you can really let your creativity shine.
- For Ghosts: Melt your white candy melts according to the package directions. Dip the top of each ghost pop into the melted white candy, letting the excess drip off. Place it back on the parchment. While the candy is still wet, press on two edible googly eyes. Use the black decorating icing to draw a small mouth.
- For Pumpkins: Melt the orange candy melts. Dip the top of each pumpkin pop into the orange candy. Let the excess drip off. While the candy is still wet, press a small piece of a pretzel stick into the top for a stem. Use the green candy melts to pipe on a little vine. You can also use black icing to draw a classic jack-o-lantern face.
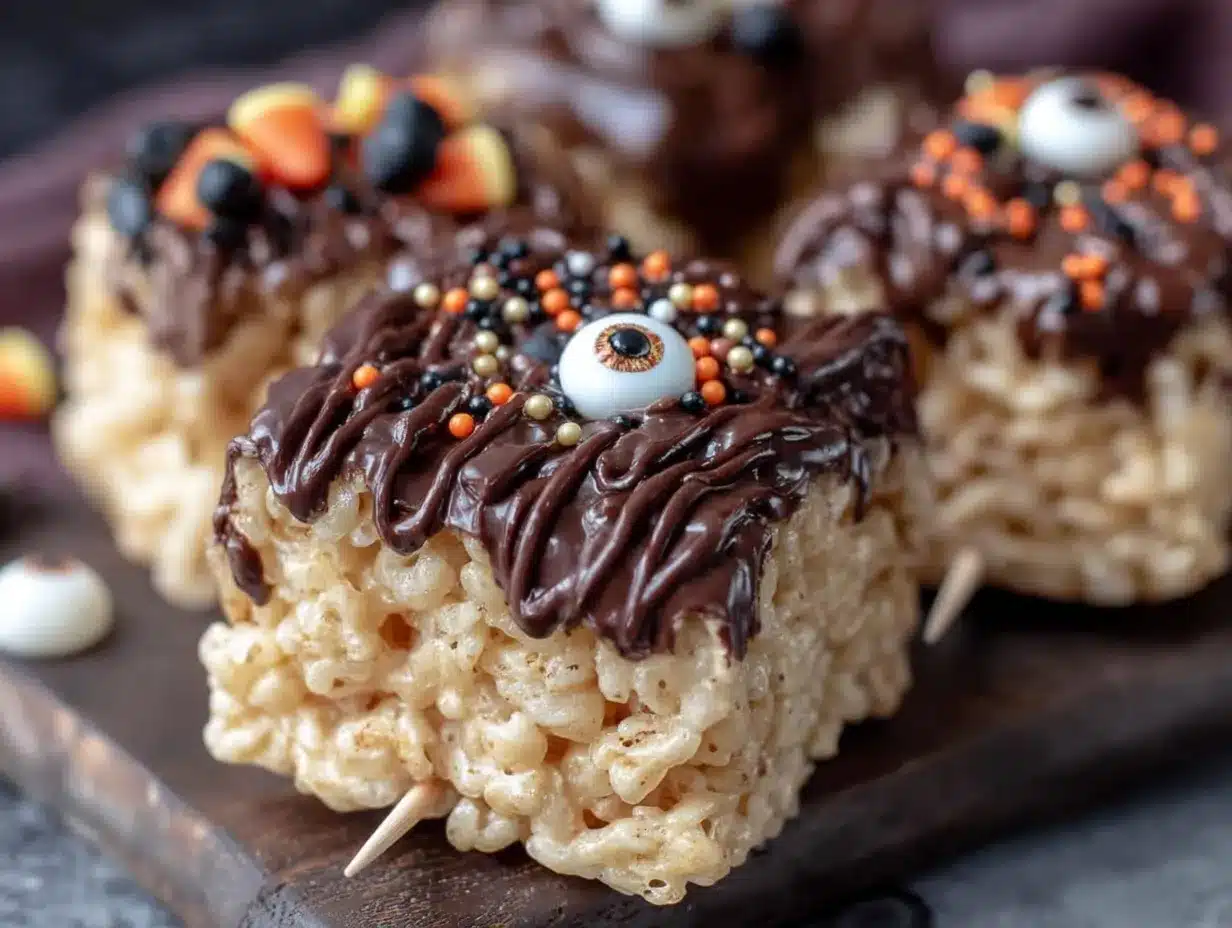
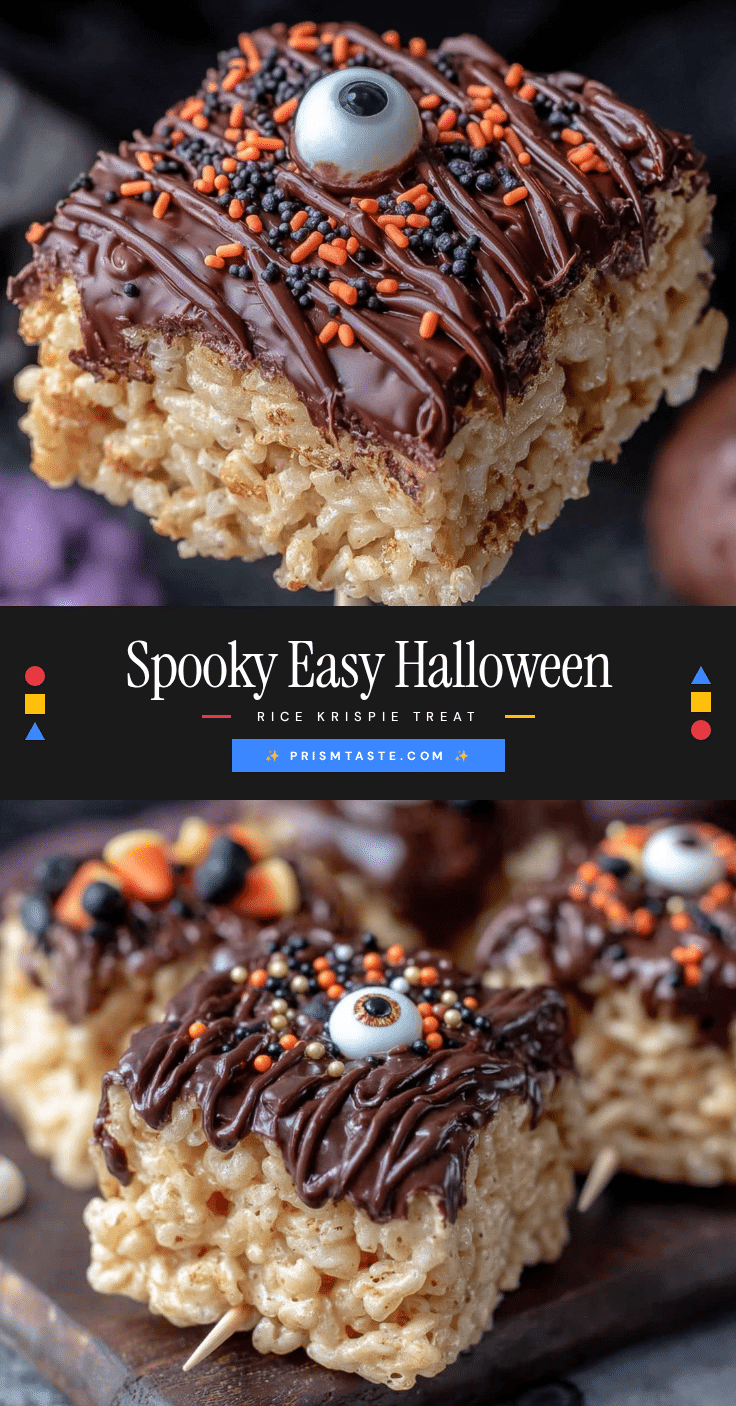
- For Mummies: Dip the top of a white treat pop into the white candy melts. While it is still wet, use a toothpick or a small piping bag filled with melted dark chocolate to drizzle horizontal lines across the pop, leaving a gap for the eyes. Press on two googly eyes.
Let the decorated pops set completely on the parchment paper before serving or storing. This usually takes another 20-30 minutes.
Cooking Tips & Techniques
I have made a lot of mistakes with Rice Krispie treats over the years. Here are the lessons I learned the hard way, so you do not have to.
- The Low and Slow Rule: Always melt your marshmallows over medium-low heat. High heat will scorch them, and you will end up with a burnt, bitter flavor that no amount of sugar can fix.
- Grease Everything: Your hands, your spatula, your pan. Rice Krispie mixture is sticky, and it will stick to anything it touches. A light coating of cooking spray is your best friend.
- Work Quickly but Gently: The mixture sets fast, so you need to be efficient. But do not manhandle it. Overworking the mixture can crush the cereal, resulting in a dense, hard treat instead of a light, chewy one.
- The Texture Test: The perfect Rice Krispie treat should have a slight give when you press on it. It should not be rock hard. If your treats are too hard, you probably overcooked the marshmallows or used stale cereal.
- Room Temperature is Key: Let your finished pops set at room temperature. Do not put them in the fridge. The cold air can cause condensation, which will make your candy melts look streaky and your treats soggy.
I once tried to speed up the setting process by putting my pops in the freezer. Let me tell you, frozen candy melts crack, and the treats themselves turned into hockey pucks. Patience is a virtue, especially with Rice Krispie treats.
Variations & Adaptations
This recipe is a blank canvas. Here are a few ways to make it your own.
- Chocolate Lovers: Add 1/2 cup of mini chocolate chips to the marshmallow mixture along with the cereal. You can also dip the finished pops in melted milk chocolate instead of candy melts.
- Peanut Butter Twist: Stir 1/4 cup of creamy peanut butter into the melted marshmallow mixture before adding the cereal. This gives the treats a salty, nutty flavor that pairs perfectly with the sweetness.
- Spooky Spider Pops: Instead of ghosts or pumpkins, shape the mixture into round balls. Dip them in dark chocolate. While the chocolate is still wet, press in eight pretzel sticks for legs and two candy eyes.
- Gluten-Free Friendly: Rice Krispies are naturally gluten-free, but you should always check the label to be sure. Some store brands may have cross-contamination risks. For a completely gluten-free option, use a certified gluten-free crispy rice cereal.
- Vegan Option: Use vegan butter and vegan marshmallows (like Dandies brand). The texture will be slightly different, but the taste is still delicious.
My personal favorite variation is the peanut butter one. I made it last year for a Halloween party, and I had to hide a few pops just to have some for myself. The combination of peanut butter and chocolate is just unbeatable.
Serving & Storage Suggestions
These pops are best served at room temperature. They are perfect for a Halloween party, a classroom treat, or just a fun afternoon snack.
- Serving: Arrange the pops on a platter or stick them into a foam block covered in festive wrapping. They make a great centerpiece for a Halloween dessert table.
- Storage: Store the pops in an airtight container at room temperature. Separate layers with parchment paper to prevent them from sticking together. They will stay fresh for up to 3 days.
- Freezing: You can freeze the undecorated pops for up to 2 months. Wrap each one tightly in plastic wrap, then place them in a freezer-safe bag. Thaw them at room temperature before decorating. Do not freeze decorated pops, as the candy melts can discolor.
- Reheating: If your pops get a little stale, you can revive them in the microwave for about 10 seconds. This will soften the marshmallow and make them chewy again. Just be careful not to melt the decorations.
I have found that these pops actually taste better the day after they are made. The flavors meld together, and the texture becomes perfectly chewy. So do not be afraid to make them a day ahead of time.
Nutritional Information & Benefits
Let’s be honest, Rice Krispie treats are a treat. They are not a health food, but they are a fun, nostalgic indulgence. Here is a rough estimate of the nutritional information per pop (based on a recipe that makes 20 pops).
- Calories: Approximately 180-220 per pop
- Fat: 8-10g
- Carbohydrates: 28-32g
- Sugar: 18-22g
- Protein: 1-2g
Health Benefits: While not a nutritional powerhouse, Rice Krispies are fortified with iron and B vitamins. The butter provides a small amount of Vitamin A. The real benefit here is the joy they bring—sometimes, a little bit of sugar and nostalgia is good for the soul.
Dietary Considerations: This recipe contains dairy (butter) and is not suitable for vegans unless you use substitutions. It is naturally gluten-free if you use certified gluten-free cereal. The candy melts may contain soy, so check the label if you have allergies.
I always tell people that food is about balance. You can have a healthy cozy crockpot fall harvest chicken stew for dinner and still enjoy a Halloween Rice Krispie treat for dessert. It is all about moderation.
Conclusion
These Easy Halloween Rice Krispie Treat Pops are more than just a recipe. They are a memory in the making. They are the sticky fingers, the laughter over lopsided ghosts, and the pride of creating something cute and delicious with your own hands.
I encourage you to try this recipe and make it your own. Add your favorite candy, experiment with different shapes, and do not worry if it is not perfect. The imperfections are what make them charming. Honestly, the ghost that looks a little squished is the one everyone will remember.
If you make these pops, I would love to hear about it. Leave a comment below and tell me what shapes you created. Did you make pumpkins, ghosts, or something completely different? Share your photos and tag me on social media. I cannot wait to see your spooky creations!
Happy Halloween, and happy snacking!
Frequently Asked Questions
Can I use mini marshmallows instead of regular-sized ones?
Yes, you can use 4 cups of mini marshmallows instead of one 10-ounce bag of regular marshmallows. Mini marshmallows actually melt faster and more evenly, which can make the process a little quicker.
How do I keep the Rice Krispie treats from getting too hard?
The key is to not overcook the marshmallows. Cook them over medium-low heat just until they are melted and smooth. Overcooking them causes the sugar to harden, resulting in a tough treat. Also, use fresh marshmallows and fresh cereal.
Can I make these pops ahead of time?
Absolutely! You can make the undecorated pops up to 2 days in advance. Store them in an airtight container at room temperature. Decorate them the day you plan to serve them for the best appearance.
My candy melts are too thick. What should I do?
If your candy melts are too thick, add a teaspoon of coconut oil or vegetable shortening to the bowl and stir. This will thin them out without affecting the flavor. Do not add water, as this will cause the candy to seize and become lumpy.
Can I use a different cereal?
Yes, you can experiment with other cereals. Cocoa Krispies make for a delicious chocolate version. You can also use Fruity Pebbles for a colorful, fruity twist. Just keep in mind that the texture and flavor will change.
Pin This Recipe!
Easy Halloween Rice Krispie Treat Pops
These Easy Halloween Rice Krispie Treat Pops are a fun, no-bake treat that’s perfect for Halloween parties. Shaped into ghosts, pumpkins, or mummies, they’re easy to make with kids and endlessly customizable.
- Prep Time: 15 minutes
- Cook Time: 10 minutes
- Total Time: 55 minutes
- Yield: 20-24 pops 1x
- Category: Dessert
- Cuisine: American
Ingredients
- 3 tablespoons unsalted butter (plus a little extra for greasing)
- 1 package (10 oz) regular marshmallows (or 4 cups mini marshmallows)
- 6 cups Rice Krispies cereal (or any generic crispy rice cereal)
- Orange and green gel food coloring (for pumpkins)
- 1/2 teaspoon vanilla extract (optional)
- 20–24 lollipop sticks (or sturdy paper straws cut in half)
- 1 cup orange candy melts (for pumpkin stems and faces)
- 1 cup white candy melts (for ghost faces)
- 1/2 cup green candy melts (for pumpkin vines)
- Black decorating icing (or a small piping bag with melted dark chocolate)
- Edible googly eyes (optional)
- Non-stick cooking spray (for your hands and the spatula)
Instructions
- Prep Your Pan: Line your 9×13-inch baking pan with parchment paper, leaving some overhang on two sides. Lightly grease the parchment with cooking spray or a little butter.
- Melt the Butter: In your large saucepan, melt the 3 tablespoons of butter over medium-low heat until fully melted but not bubbling or browning.
- Add the Marshmallows: Pour the entire bag of marshmallows into the melted butter. Stir constantly with a rubber spatula until the marshmallows are completely melted and smooth, about 5-7 minutes.
- Add Color and Vanilla: Remove the pan from the heat. Stir in the vanilla extract and gel food coloring. For pumpkins, use about 15 drops of orange and 2 drops of yellow. For ghosts, leave the mixture white.
- Add the Cereal: Pour the 6 cups of Rice Krispies cereal into the melted marshmallow mixture. Fold together gently but thoroughly until every piece of cereal is coated.
- Shape the Treats: Lightly grease your hands with cooking spray or butter. While the mixture is still warm, scoop out a generous portion. For pumpkins, roll into a ball and flatten into a disc. For ghosts, shape into an oval or teardrop. Place each shaped treat onto the prepared parchment paper.
- Insert the Sticks: While the treats are still warm and pliable, gently push a lollipop stick into the bottom of each one, inserting it about halfway through.
- Let Them Set: Allow the shaped pops to cool and set completely at room temperature, about 30 minutes. Do not refrigerate.
- Decorate: Once set, melt candy melts according to package directions. Dip the top of each pop into the melted candy. For ghosts, add googly eyes and a black icing mouth. For pumpkins, add a pretzel stem and green candy melt vine. For mummies, drizzle with dark chocolate and add googly eyes.
- Let the decorated pops set completely on parchment paper before serving or storing, about 20-30 minutes.
Notes
Work quickly but gently as the mixture sets fast. If it hardens before you’re done shaping, microwave for 10-15 seconds to soften. Do not refrigerate finished pops to avoid condensation. For best texture, use fresh marshmallows and cook over medium-low heat to avoid scorching.
Nutrition
- Serving Size: 1 pop
- Calories: 200
- Sugar: 20
- Sodium: 150
- Fat: 9
- Saturated Fat: 5
- Carbohydrates: 30
- Protein: 1
Keywords: Halloween, Rice Krispie treats, pops, no-bake, kid-friendly, ghost, pumpkin, mummy, easy, party treat


