“Wait—are those hot dogs wrapped in snakes?” my nephew asked, peering over my shoulder as I twisted strips of crescent dough around a row of frankfurters. I hadn’t even thought about how they looked from the side. But he was right. They did look like little coiled snakes before baking. And that’s exactly when these Easy Mummy Hot Dogs with Crescent Dough Wraps became a Halloween tradition in our house.
I’d been scrolling through party food ideas, honestly dreading the usual store-bought candy overload. I wanted something that felt like a real meal but still had that spooky factor. Mummy hot dogs kept popping up, but most versions used pre-made dough that turned dry or doughy in the middle. So I started testing—using crescent rolls, playing with bake times, figuring out how to get that golden, flaky wrap without undercooking the dog. It took a few batches of what I’ll generously call “experimental mummies” before I cracked it.
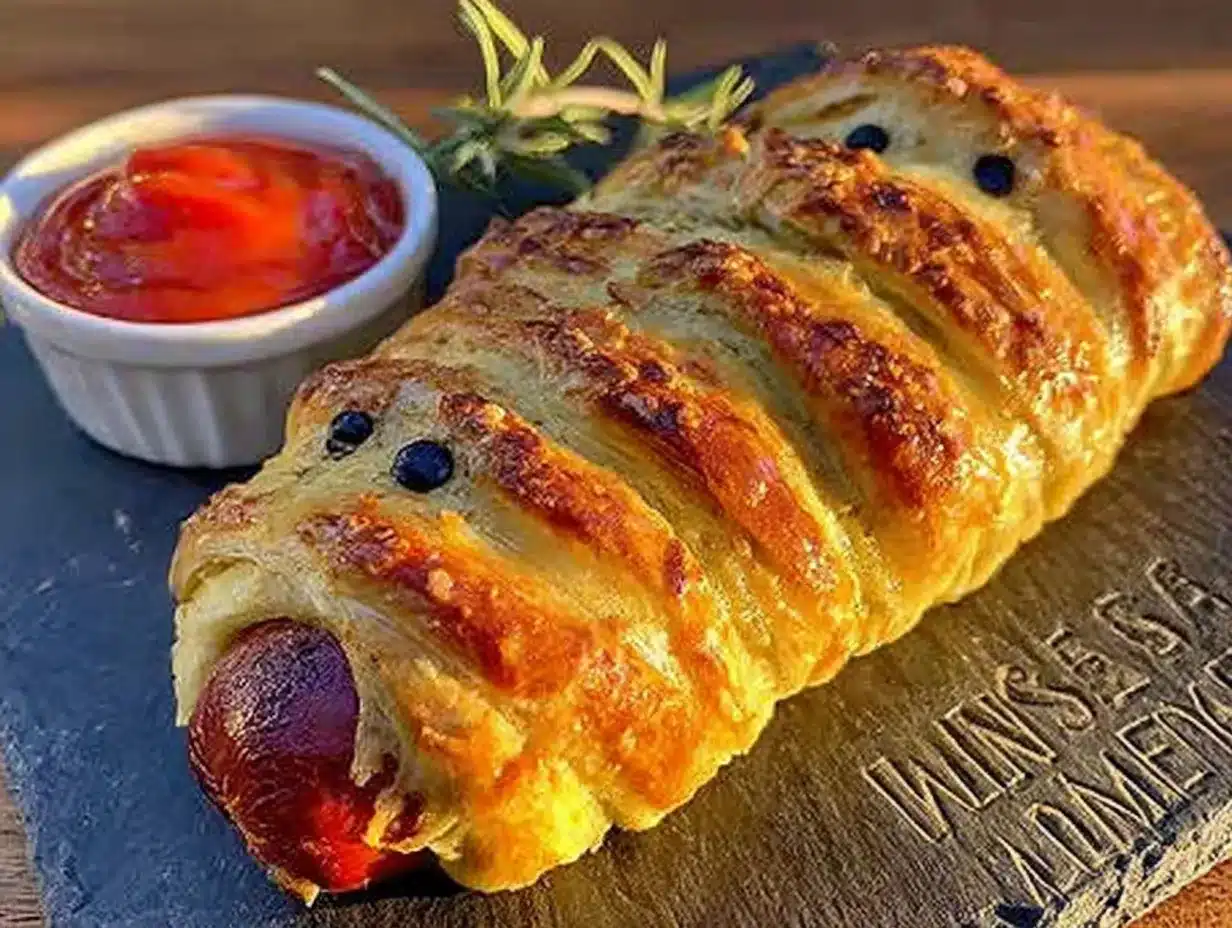
These mummy hot dogs are exactly what they sound like: all-beef hot dogs wrapped in strips of buttery crescent dough, baked until golden, then dotted with mustard or ketchup eyes. They’re silly, they’re simple, and they’re the first thing to disappear at any Halloween party. Honestly, I think the adults love them more than the kids. There’s just something about a hot dog dressed up like a tiny bandaged creature that makes everyone smile.
And here’s the thing—this recipe isn’t about perfection. It’s about the moment you pull a tray of these out of the oven and watch people’s faces light up. That’s why it stuck with me. Not because it’s fancy, but because it’s the kind of food that turns a regular October evening into something worth remembering.
Why You’ll Love This Recipe
Let me tell you why these mummy hot dogs have earned a permanent spot in my Halloween rotation. I’ve tested this recipe across multiple batches—using different dough brands, hot dog types, and baking times—so you’re getting a version that actually works every single time.
- Ready in Under 25 Minutes : From fridge to table, these come together faster than you can decide what Halloween movie to watch. Perfect for last-minute party prep or a fun after-school snack.
- Just 3 Ingredients : Hot dogs, crescent dough, and something for eyes. That’s it. No specialty grocery runs, no obscure spices, no stress.
- Perfect for Halloween Parties : Whether you’re hosting a costume party or just making dinner fun, these fit right in. They’re also great for game day gatherings if you swap the eyes for team-colored toppings.
- Crowd-Pleaser for All Ages : I’ve served these to toddlers, teenagers, and grandparents. Every single age group goes back for seconds. There’s something universally appealing about a hot dog in disguise.
- Unbelievably Cute (and Delicious) : The crescent dough gets perfectly golden and flaky while the hot dog stays juicy inside. The texture combo is pure comfort food magic.
What makes this recipe different from the dozens of versions online is the technique. Most recipes tell you to wrap the dough in a single layer, which leaves bare spots. My method uses a slight overlap and a specific bake temperature that ensures every inch of the hot dog is covered in that buttery, flaky goodness. No sad, bald mummies here.
This isn’t just another Halloween snack. It’s the kind of food that makes you feel like you’ve pulled off something special—even when it took you ten minutes of active work. Perfect for impressing party guests without breaking a sweat, or turning a Tuesday night dinner into something your kids will talk about for weeks.
What Ingredients You Will Need
This recipe uses simple, everyday ingredients to create something that looks way more complicated than it actually is. Here’s what you’ll need and why each one matters.
For the Mummies:
- 1 package (8 count) refrigerated crescent roll dough — I recommend Pillsbury Original or the store-brand version. The buttery layers are what give these mummies their golden, flaky exterior. Look for the seamless sheet style if you want easier cutting, but the perforated triangles work just fine.
- 8 all-beef hot dogs — Standard size works best. I prefer Hebrew National or Oscar Mayer for consistent texture. Avoid jumbo or bun-length hot dogs as they throw off the dough-to-meat ratio. You can also use turkey or chicken hot dogs for a lighter option.
- Mustard or ketchup for eyes — Yellow mustard gives the most “mummy” look with its pale color, but ketchup works too. You’ll only need a tiny squeeze per mummy. I’ve also used sriracha for spicy-eyed mummies when adults are the main audience.
Optional Add-Ons:
- Cooking spray or melted butter — Lightly spraying the baking sheet ensures the bottoms don’t stick. A quick brush of melted butter before baking gives an extra-golden finish.
- Sesame seeds or poppy seeds — Sprinkle these on before baking for a “bandage texture” effect. Totally optional but adds a fun detail.
- Pretzel sticks — Break these in half and insert them into the ends before baking to create “arms” for your mummies. This is my nephew’s favorite variation.
Ingredient Selection Tips:
For the best texture, make sure your crescent dough is cold when you start working with it. If it gets too warm, the dough becomes sticky and hard to cut cleanly. I keep the dough in the fridge until the last possible moment. For the hot dogs, look for ones that are uniform in size so they bake evenly. If you’re using a brand that’s particularly long, you can trim the ends slightly to fit the dough strips better.
Substitution Guidance:
If you need a gluten-free option, look for gluten-free crescent dough (it exists, though the texture is slightly different). For a lower-fat version, use turkey hot dogs and light crescent rolls. You can also swap the hot dogs for vegetarian sausages—just make sure they’re the same thickness as standard hot dogs for even wrapping. If you’re out of crescent dough, puff pastry sheets cut into strips work beautifully, though they puff up more and create a flakier, less “bandage-like” look.
Equipment Needed
You don’t need a fancy kitchen to make these mummy hot dogs. Here’s what I use and a few alternatives if you’re working with limited tools.
- Baking sheet — A standard half-sheet pan works perfectly. If you don’t have one, any rimmed baking sheet will do. I’ve even used a pizza pan in a pinch.
- Parchment paper or silicone baking mat — This prevents sticking and makes cleanup a breeze. Aluminum foil works too, but spray it well with cooking spray.
- Sharp knife or pizza cutter — For cutting the crescent dough into strips. A pizza cutter gives the cleanest cuts, but a sharp chef’s knife works fine. I’ve used kitchen scissors in a hurry—not ideal, but it gets the job done.
- Pastry brush (optional) — For brushing melted butter or egg wash onto the dough. A clean silicone spatula works as a substitute.
- Small piping bag or squeeze bottle — For adding the mustard eyes neatly. Alternatively, use a toothpick to dot the eyes on after baking. I’ve also used the corner of a plastic bag with a tiny snip cut off.
Personal Experience: I’ve made these in a toaster oven when my main oven was occupied with a pumpkin coffee cake. They turned out just fine—just watch them closely as toaster ovens run hotter. The key is to rotate the tray halfway through for even browning.
Budget-Friendly Options: Skip the silicone mat and use parchment paper from a roll. Skip the pastry brush and use a folded paper towel to dab on butter. Skip the piping bag and use a toothpick for the eyes. This recipe truly requires nothing fancy.
Preparation Method
Let me walk you through exactly how to make these mummy hot dogs. I’ve included all the little details I wish someone had told me the first time I made them.
Step 1: Preheat and Prep (2 minutes)
Preheat your oven to 375°F (190°C). Line a baking sheet with parchment paper or a silicone mat. If you’re using aluminum foil, give it a light spray of cooking spray. Take your crescent dough out of the fridge and let it sit on the counter for exactly 2 minutes—any longer and it gets too soft to cut cleanly.
Step 2: Cut the Dough (3 minutes)
Unroll the crescent dough onto a clean cutting board. If you’re using the perforated triangle sheets, press the seams together gently to create one solid rectangle. Use a pizza cutter or sharp knife to cut the dough lengthwise into 8 thin strips—each strip should be about 1/2 inch wide. For narrower bandages, cut 10 strips instead. The strips should look like long ribbons. If the dough starts sticking to your knife, dip the blade in flour.
Step 3: Wrap the Hot Dogs (5 minutes)
Take one hot dog and place a strip of dough at one end. Wrap it around the hot dog at a slight diagonal, overlapping the dough slightly as you go, like you’re wrapping a real bandage. Leave a small gap at the top for the “face” area—about 1 inch of exposed hot dog. Press the end of the dough gently to seal it against the wrap. Repeat with all 8 hot dogs. If a strip tears, just press it back together—the dough is forgiving and the tear won’t show after baking.
Step 4: Arrange and Bake (12-14 minutes)
Place the wrapped hot dogs on the prepared baking sheet, spacing them about 1 inch apart. They don’t spread much, so you can fit all 8 on one standard sheet. Bake for 12-14 minutes, or until the dough is golden brown and the hot dogs are heated through. The dough should look puffed and flaky, with darker golden edges. If your oven runs hot, check at 10 minutes. The kitchen will smell like buttery, toasty goodness—that’s how you know they’re close.
Step 5: Add the Eyes (2 minutes)
Let the mummy hot dogs cool on the baking sheet for 2-3 minutes. They’re too hot to handle right away, and the mustard will just slide off if you add it immediately. Once they’re cool enough to touch, use a toothpick or a small piping bag to add two tiny dots of mustard or ketchup to the exposed hot dog area for eyes. Don’t make them too big—tiny dots look cuter and more mummy-like. For a spooky effect, add the eyes slightly unevenly so it looks like the mummy is looking in different directions.
Step 6: Serve Immediately (1 minute)
Transfer the mummy hot dogs to a serving platter. They’re best served warm, right after the eyes are added. If you’re making them ahead, keep them in a warm oven (200°F) for up to 30 minutes before adding the eyes. Add the eyes just before serving so they don’t smear or soak in.
Troubleshooting Tips:
If your dough is tearing, it’s probably too warm. Pop it back in the fridge for 5 minutes. If the hot dogs are bursting during baking, you might be wrapping too tightly—leave a tiny bit of slack. If the dough isn’t browning evenly, rotate the baking sheet halfway through. If the dough is browning too fast but the hot dogs aren’t hot, your oven runs hot—reduce the temperature to 350°F next time.
Cooking Tips & Techniques
After making these mummy hot dogs more times than I can count (including a few spectacular failures), here are the tips that actually make a difference.
The Cold Dough Rule
Keep your crescent dough cold until the moment you’re ready to cut it. Warm dough is sticky, stretches unevenly, and tears easily. I learned this the hard way when I made a batch for a Halloween party and ended up with dough stuck to my fingers, the counter, and somehow the ceiling. Cold dough cuts cleanly and wraps smoothly. If your kitchen is warm, work in batches—keep half the dough in the fridge while you wrap the first four hot dogs.
The Overlap Technique
This is the secret to mummies that look like mummies, not just hot dogs with dough on them. Overlap each wrap slightly—about 1/4 inch—so there are no gaps. The dough will puff up during baking and fill in any tiny spaces, but starting with a solid wrap ensures every bite has that buttery dough layer. I wrap at a 45-degree angle for the most authentic “bandage” look.
Don’t Overcrowd the Pan
Even though these don’t spread much, leaving space between them allows hot air to circulate and brown the dough evenly. If they’re touching, you’ll end up with pale, doughy spots where they meet. I fit 8 on a standard half-sheet pan with about an inch between each one.
The Toothpick Eye Trick
For perfectly sized eyes, dip the tip of a toothpick into mustard and then dot it onto the hot dog. This gives you control over the size and placement. If you use a squeeze bottle, the mustard tends to blob. A toothpick gives you that cute, tiny dot that makes the mummy look friendly rather than terrifying.
My Biggest Failure
I once tried to make these with puff pastry instead of crescent dough because I thought it would be “fancier.” The puff pastry expanded so much during baking that the mummies looked like they’d been in a horror movie—bloated, misshapen, and unrecognizable. Crescent dough is the way to go. It puffs just enough to look fluffy without losing the bandage shape.
Variations & Adaptations
These mummy hot dogs are endlessly customizable. Here are some variations I’ve tried and loved.
Spicy Mummy Dogs
Swap the regular hot dogs for spicy jalapeño or chipotle-flavored sausages. Add a tiny dot of sriracha to the eyes for a red-eyed, spicy version. These are great for adult parties where you want a little heat. I served these at a Halloween gathering alongside creamy buffalo chicken dip and they were a hit.
Cheese-Stuffed Mummies
Before wrapping, use a sharp knife to cut a slit lengthwise into each hot dog (don’t cut all the way through). Insert a thin strip of cheddar or mozzarella cheese into the slit. Wrap and bake as directed. The cheese melts out slightly during baking, creating a “oozy” effect that looks delightfully gross. My kids request these for every Halloween movie night.
Breakfast Mummies
Use breakfast sausage links instead of hot dogs. Wrap with crescent dough and bake at 375°F for 10-12 minutes. Add mustard eyes and serve with maple syrup for dipping. These are perfect for Halloween morning breakfast before school. I’ve also made them with turkey breakfast links for a lighter option.
Veggie Mummy Dogs
Use vegetarian or vegan hot dogs (I like the Field Roast brand for texture). The rest of the recipe stays the same. For the eyes, use vegan mustard or ketchup. These work surprisingly well—the dough is the star anyway, and the veggie dogs hold up to baking without getting rubbery.
Mini Mummy Bites
Cut each hot dog into 3-4 pieces before wrapping. Use smaller strips of dough (about 1/4 inch wide) and wrap each piece individually. Bake for 8-10 minutes instead of 12-14. These are perfect for parties where you want bite-sized snacks. Kids love the tiny mummies, and they’re easier for little hands to hold.
Serving & Storage Suggestions
Serving Temperature and Presentation
These mummy hot dogs are best served warm, straight from the oven. Arrange them on a dark platter or black serving tray for maximum Halloween effect. Add a few fake spider webs or plastic spiders around the platter for decoration. I like to serve them with small bowls of ketchup, mustard, and ranch dressing for dipping. The dipping sauces add a fun interactive element, especially for kids.
Complementary Dishes
These pair beautifully with other finger foods. Serve them alongside a bowl of slow cooker queso dip for dipping, or with a side of loaded charcuterie board for a full party spread. For a complete Halloween meal, add a simple green salad or some roasted vegetables. For drinks, apple cider or pumpkin punch are perfect non-alcoholic options. For adults, a dark beer or a bourbon cocktail complements the savory flavors nicely.
Storage Instructions
Store leftover mummy hot dogs in an airtight container in the refrigerator for up to 3 days. The dough will soften slightly, but they’re still delicious. Do not add the eyes before storing—the mustard or ketchup will smear and make a mess. Add fresh eyes after reheating.
Reheating Methods
The best way to reheat these is in a 350°F oven for 5-7 minutes. This restores the crispiness of the dough. You can also reheat them in an air fryer at 350°F for 3-4 minutes. Microwave reheating works in a pinch (30 seconds on high), but the dough will be soft rather than crispy. If you’re reheating a large batch, spread them out on a baking sheet so they heat evenly.
How Flavors Develop
These are honestly best fresh, but I’ve found that the flavors meld together nicely after a day in the fridge. The dough absorbs a bit of the hot dog’s smoky flavor, and the whole thing becomes more cohesive. If you’re making them a day ahead, bake them without the eyes, reheat, and add the eyes just before serving.
Nutritional Information & Benefits
While these mummy hot dogs are definitely a treat, here’s what you’re working with nutritionally. Per serving (one mummy hot dog):
- Calories: Approximately 220-250 calories
- Protein: 8-10 grams
- Carbohydrates: 18-22 grams
- Fat: 12-15 grams
- Sodium: 600-700 mg
Health Benefits of Key Ingredients:
Hot dogs get a bad rap, but they do provide a decent amount of protein—about 7 grams per serving. They also contain B vitamins, particularly B12, which is important for energy metabolism. Crescent dough provides carbohydrates for quick energy, which is great for active kids running around at Halloween parties. If you’re looking for a slightly healthier version, turkey hot dogs reduce the fat content by about 30%, and low-fat crescent rolls cut the calories by about 50 per serving.
Dietary Considerations:
This recipe is not gluten-free unless you use gluten-free crescent dough. It contains dairy (the crescent dough has butter), but you can find dairy-free crescent options at some specialty stores. For a lower-sodium version, look for low-sodium hot dogs and skip the added salt. For a lower-carb version, use the mini mummy bites variation with smaller portions.
Potential Allergens:
This recipe contains wheat (gluten), dairy, and soy (in some hot dogs and crescent dough brands). Check labels carefully if you’re cooking for someone with allergies. The mustard and ketchup are generally allergen-free, but always verify.
Personal Wellness Perspective:
I believe in balance. These mummy hot dogs are a fun, occasional treat—not an everyday meal. They’re perfect for holidays, parties, and making memories with kids. I pair them with fresh veggies or fruit on the side to round out the meal. Food should be joyful, and sometimes that means hot dogs wrapped in crescent dough with mustard eyes. Life’s too short for boring food, even if it’s not the most nutrient-dense option.
Conclusion
These Easy Mummy Hot Dogs with Crescent Dough Wraps are proof that Halloween food doesn’t have to be complicated to be memorable. With just three ingredients and about 20 minutes, you can create something that brings genuine joy to both kids and adults. They’re silly, they’re simple, and they’re absolutely delicious.
I love that this recipe invites creativity. Maybe you’ll add cheese eyes instead of mustard, or wrap your mummies extra tight for a more bandaged look. Maybe you’ll serve them with a spicy dipping sauce or turn them into breakfast mummies for a Halloween morning surprise. The beauty of this recipe is that it’s a canvas—you can make it your own.
If you try these mummy hot dogs, I’d love to hear how they turned out. Drop a comment below and let me know your favorite variation, or share a photo of your mummy creations. Did your kids help wrap them? Did you add any unexpected toppings? Every comment makes this little recipe community feel a bit more like a real kitchen table where we’re all sharing food and stories.
Until next time, happy Halloween cooking—and remember, the best mummies are the ones that make everyone at the table smile.
Frequently Asked Questions
Can I make these mummy hot dogs ahead of time?
Yes! You can assemble them completely (without the eyes) up to 24 hours in advance. Store them covered in the refrigerator on the baking sheet. Bake them just before serving, then add the eyes after they’ve cooled slightly. The dough might be slightly less flaky than fresh, but they’ll still be delicious.
Can I use crescent dough sheets instead of the perforated triangles?
Absolutely. Crescent dough sheets (the seamless version) are actually easier to work with because you don’t have to press the perforations together. They cut into clean strips without any fuss. If you can find them, they’re my preferred option for this recipe.
How do I prevent the dough from unraveling during baking?
Make sure you press the end of the dough strip firmly against the wrap when you finish. The dough will stick to itself as it bakes, sealing the end in place. If you’re worried about it, place the mummy on the baking sheet with the end of the dough facing downward—the weight of the hot dog will hold it in place.
Can I bake these in an air fryer?
Yes! Air fryers work beautifully for these. Preheat your air fryer to 350°F (175°C). Place the wrapped mummy hot dogs in the basket in a single layer (you may need to work in batches). Cook for 8-10 minutes, flipping halfway through, until the dough is golden brown. The air fryer gives an extra-crispy exterior.
What can I use instead of mustard or ketchup for the eyes?
Get creative! Small dots of ranch dressing, sour cream, or cream cheese work well for white eyes. You can also use tiny pieces of black olive, capers, or even chocolate chips if you’re making a dessert version. For a truly spooky look, use red food coloring gel for bloodshot eyes.
Pin This Recipe!
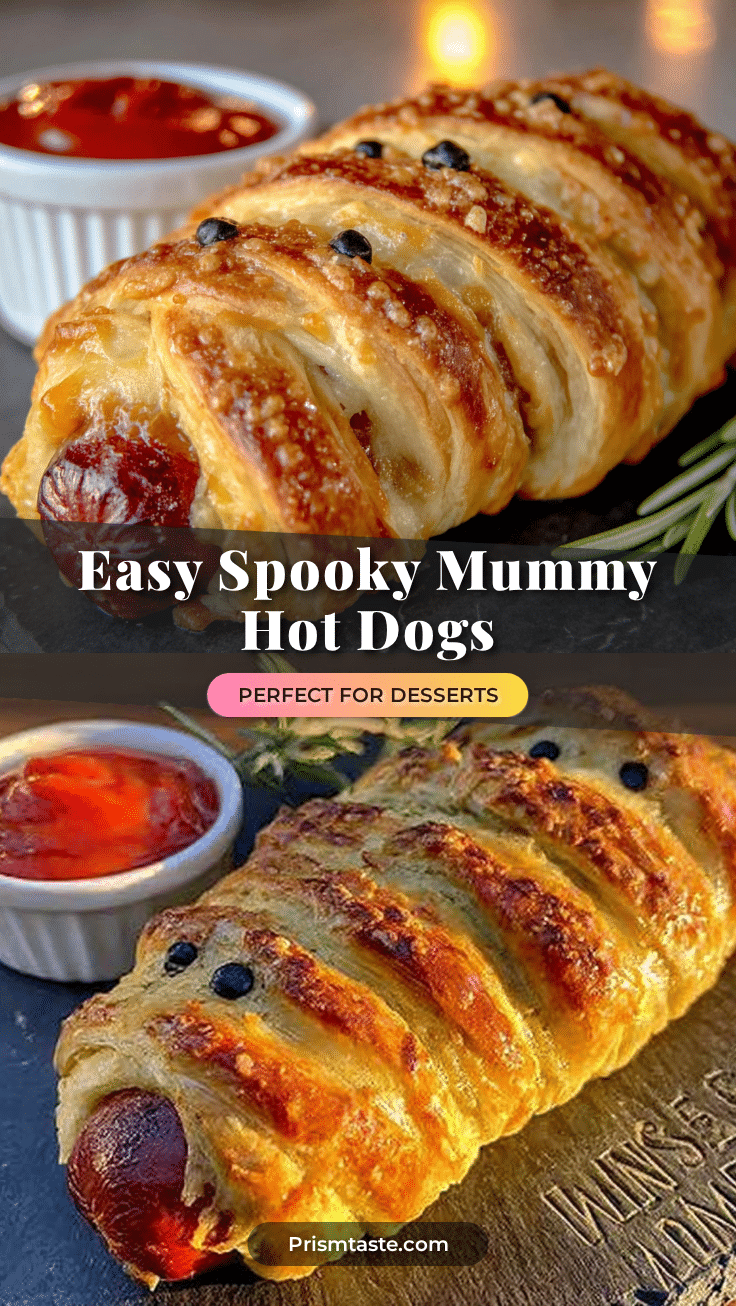
Easy Mummy Hot Dogs Recipe: Best Halloween Appetizer
All-beef hot dogs wrapped in strips of buttery crescent dough, baked until golden, then dotted with mustard or ketchup eyes. They’re silly, simple, and the first thing to disappear at any Halloween party.
- Prep Time: 10 minutes
- Cook Time: 14 minutes
- Total Time: 24 minutes
- Yield: 8 servings 1x
- Category: Appetizer
- Cuisine: American
Ingredients
- 1 package (8 count) refrigerated crescent roll dough
- 8 all-beef hot dogs
- Mustard or ketchup for eyes
- Cooking spray or melted butter (optional)
- Sesame seeds or poppy seeds (optional)
- Pretzel sticks (optional)
Instructions
- Preheat your oven to 375°F (190°C). Line a baking sheet with parchment paper or a silicone mat.
- Unroll the crescent dough onto a clean cutting board. Press the seams together gently to create one solid rectangle. Use a pizza cutter or sharp knife to cut the dough lengthwise into 8 thin strips, each about 1/2 inch wide.
- Take one hot dog and place a strip of dough at one end. Wrap it around the hot dog at a slight diagonal, overlapping the dough slightly as you go. Leave a small gap at the top for the ‘face’ area—about 1 inch of exposed hot dog. Press the end of the dough gently to seal. Repeat with all 8 hot dogs.
- Place the wrapped hot dogs on the prepared baking sheet, spacing them about 1 inch apart. Bake for 12-14 minutes, or until the dough is golden brown and the hot dogs are heated through.
- Let the mummy hot dogs cool on the baking sheet for 2-3 minutes. Use a toothpick or small piping bag to add two tiny dots of mustard or ketchup to the exposed hot dog area for eyes.
- Serve immediately. Transfer to a serving platter and enjoy warm.
Notes
Keep crescent dough cold until ready to cut. Overlap dough strips slightly for best bandage effect. Add eyes just before serving to prevent smearing. For extra golden finish, brush with melted butter before baking.
Nutrition
- Serving Size: 1 mummy hot dog
- Calories: 235
- Sugar: 4
- Sodium: 650
- Fat: 13.5
- Saturated Fat: 4.5
- Carbohydrates: 20
- Protein: 9
Keywords: mummy hot dogs, Halloween appetizer, crescent dough hot dogs, easy Halloween recipe, spooky snacks


