December, just past eleven at night, and the only thing I want is something sweet that doesn’t require turning on the mixer. The house is finally quiet—the last batch of cookies went out the door with my neighbor this afternoon, and the kitchen counters are still sticky with spilled sprinkles. I’ve already washed the stand mixer bowl twice today, and honestly, I’m done. That’s when I remembered a trick I learned a few years ago, when I was testing holiday recipes for a local baking swap and ran out of oven space. I melted chocolate in the microwave, stirred in some crushed candy canes, and poured it into a tiny silicone mold I’d picked up on a whim. What came out wasn’t fancy. But it was exactly what I needed: a little bite of peppermint and chocolate that came together in the time it takes to scroll through Netflix. These easy peppermint bark fudge bites have become my December ritual ever since. Not because they’re impressive (though they are), but because they let me make something special without the production. No stand mixer. No oven. No stress.
I’ve made these for cookie exchanges, teacher gifts, and late-night snacking when the holiday chaos gets loud. And every time, someone asks for the recipe. So here it is.
Why You’ll Love This Recipe
Let me tell you why these little fudge bites have earned a permanent spot in my holiday rotation. First off, they’re ridiculously easy. We’re talking five minutes of active work, maybe less if you’re efficient. You melt, you stir, you pour. That’s it. No candy thermometer, no tempering chocolate, no double boiler drama. I’ve tested this method with multiple types of chocolate chips, and it works every single time—even when I’m half-asleep and not paying attention.
- Quick & Easy: Comes together in about 5 minutes of prep. No baking, no fuss.
- Simple Ingredients: You only need four things—chocolate chips, sweetened condensed milk, peppermint extract, and crushed candy canes. Chances are you already have most of them.
- Perfect for Holiday Gifting: These look beautiful in a little tin or cellophane bag. I’ve given them to teachers, mail carriers, and neighbors, and they always get the same reaction: “Wait, you made these?”
- Crowd-Pleaser: Kids love the crunch, adults love the peppermint-chocolate combo, and nobody can tell they took zero effort.
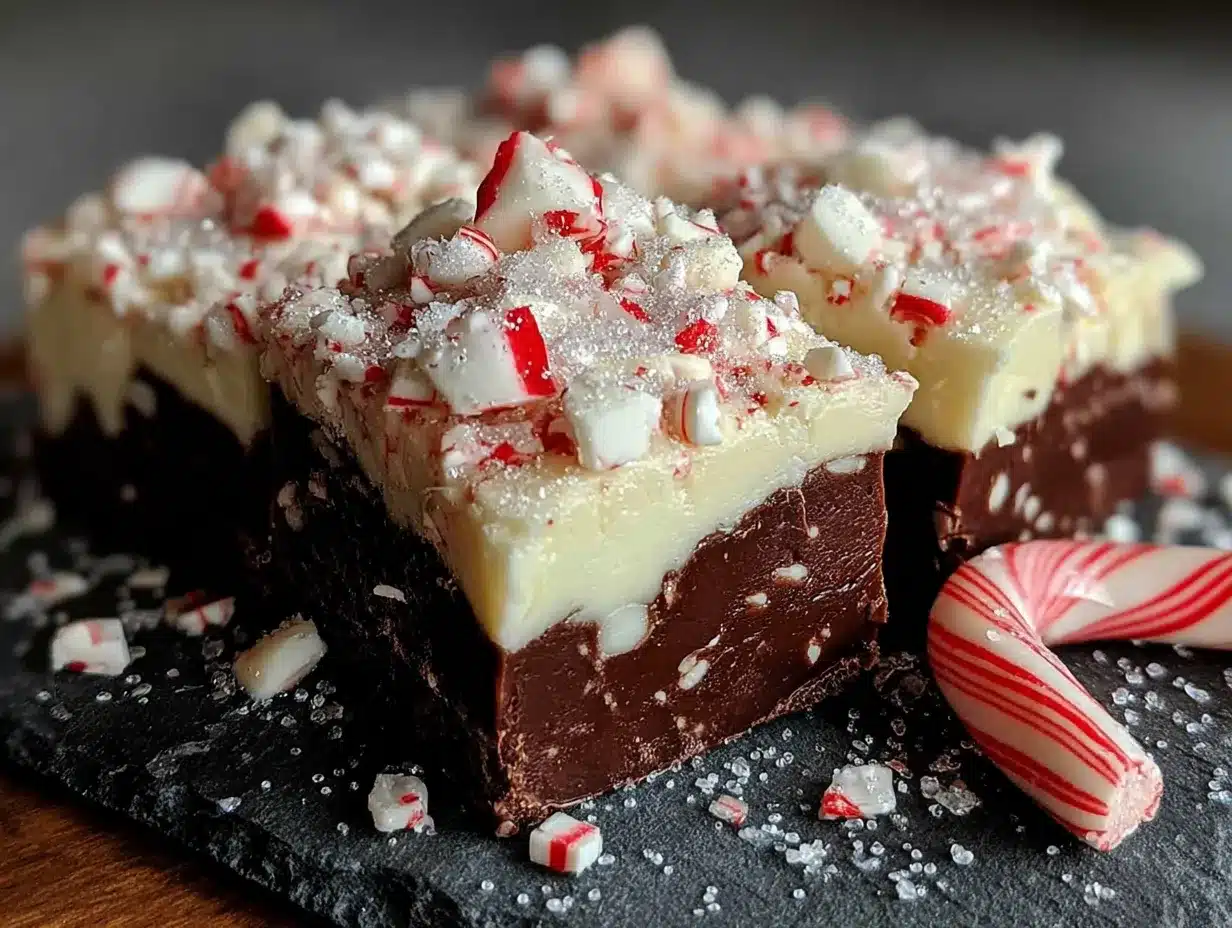
- Unbelievably Delicious: The texture is what gets me every time. Creamy, rich fudge with little crispy bits of candy cane throughout. It’s like eating a peppermint bark in one perfect bite.
What makes this recipe different from the usual bark? It’s the fudge factor. Instead of a thin layer of chocolate that can crack or bloom, you get a thick, creamy bite that stays soft and rich. The sweetened condensed milk gives it that melt-in-your-mouth texture that regular melted chocolate just can’t match. I’ve tried making bark the traditional way—tempering chocolate, layering white and dark, hoping it doesn’t seize—and honestly, this version is better. It’s more forgiving, more consistent, and way more satisfying.
This is the kind of recipe that makes you feel like a holiday hero without actually doing much. And honestly, isn’t that the best kind of recipe?
What Ingredients You Will Need
This recipe uses just four simple ingredients, and each one plays an important role. The beauty of these easy peppermint bark fudge bites is that you don’t need anything fancy—just good-quality basics that work together to create something special.
- Semi-sweet chocolate chips (12 oz or about 2 cups): I prefer Ghirardelli or Guittard for the smoothest melt, but any good-quality brand works. The semi-sweet gives you that classic chocolate flavor without being too bitter or too sweet. If you’re a milk chocolate fan, go ahead and swap—just know the fudge will be noticeably sweeter.
- Sweetened condensed milk (14 oz can): This is the secret to the fudge texture. Don’t substitute evaporated milk or regular milk—it won’t set properly. The condensed milk gives you that creamy, almost truffle-like consistency that makes these bites so addictive. I’ve tried making this with dairy-free condensed milk (like the coconut-based kind), and it works, though the texture is slightly softer.
- Peppermint extract (1/2 teaspoon): A little goes a long way. I use pure peppermint extract, not peppermint oil, because the extract is more forgiving. If you use oil, start with just 1/4 teaspoon—it’s much stronger. And please, don’t use mint extract. It tastes more like toothpaste than candy cane.
- Crushed candy canes (1/2 cup, plus more for topping): You can buy pre-crushed candy canes, but I actually prefer crushing my own. I put them in a ziplock bag and whack them with a rolling pin—it’s oddly satisfying and lets me control the texture. You want some fine crumbs and some little chunks for that perfect crunch. About 6-8 standard candy canes will give you enough.
Optional but recommended: A pinch of flaky sea salt on top. Trust me on this. The salt cuts through the sweetness and makes the peppermint pop. I use Maldon, but any flaky salt works.
Ingredient tip: If you’re making these for a holiday party and want them to look extra festive, look for candy canes with red stripes that are still bright. Some brands use a more muted red, and the color matters when you’re going for that classic peppermint bark look.
Equipment Needed
You don’t need much for this recipe, which is part of why I love it. Here’s what you’ll need:
- Microwave-safe bowl: A medium glass or ceramic bowl works best. I use a Pyrex measuring cup because the spout makes pouring easier, but any bowl will do.
- Silicone mini muffin mold (or mini muffin tin with paper liners): This is key for getting those perfect little bites. I have a silicone mold that holds 24 mini muffins, and it makes popping them out effortless. If you’re using a metal tin, definitely use paper liners—otherwise, you’ll be chiseling fudge out with a butter knife.
- Ziplock bag and rolling pin: For crushing the candy canes. You could also use a food processor, but I find the bag method gives you more control and less cleanup.
- Spatula: A small silicone spatula for stirring and scraping every last bit of fudge into the mold.
- Measuring spoons: For the peppermint extract.
Budget-friendly tip: If you don’t have a mini muffin mold, you can pour the fudge into a small loaf pan lined with parchment paper, chill it, and cut it into squares. Or use a regular muffin tin with liners—they’ll just be bigger bites. I’ve done both, and they work perfectly.
Preparation Method
This is the easiest part. I promise you can do this with your eyes half-closed. Here’s how to make these easy peppermint bark fudge bites:
- Crush the candy canes. Place 6-8 candy canes in a ziplock bag. Seal it, then go to town with a rolling pin or the bottom of a heavy pan. You want a mix of fine powder and small chunks—not dust, not boulders. Aim for pieces about the size of small peas. Set aside about 2 tablespoons for the topping.
- Melt the chocolate and condensed milk. Pour the chocolate chips and the entire can of sweetened condensed milk into your microwave-safe bowl. Microwave in 30-second bursts, stirring well after each one. It usually takes me about 2 minutes total, but microwaves vary. Stir until the mixture is completely smooth and glossy. Don’t overheat it—if it looks grainy, you’ve gone too far.
- Add the peppermint extract. Stir in the 1/2 teaspoon of peppermint extract. Give it a taste—you should get a clear peppermint kick, but it shouldn’t burn your throat. If it’s too subtle, add another 1/4 teaspoon. Remember, the flavor will mellow slightly as it sets.
- Fold in the crushed candy canes. Add the crushed candy canes (reserving the 2 tablespoons for topping) and fold them in gently. Don’t overmix—you want little pockets of crunch, not a completely blended texture.
- Fill the mold. If using a silicone mold, place it on a baking sheet for stability. Spoon the fudge mixture into each cavity, filling them almost to the top. You want them full but not overflowing. If you’re using a metal tin with liners, fill each liner about 3/4 full.
- Top with remaining candy canes. Sprinkle the reserved crushed candy canes over the tops. Press them in very gently with your fingertip so they stick. Don’t push them all the way in—you want them visible on top.
- Chill. Place the baking sheet with the mold in the refrigerator for at least 2 hours, or until the fudge is firm to the touch. I usually let them go overnight if I’m making them ahead. Don’t rush this—if they’re not fully set, they’ll be messy to remove.
- Pop them out. Once firm, gently push each fudge bite out of the silicone mold. If using a metal tin, lift them out by the paper liners. That’s it—you’re done.
Sensory cue: When you stir the melted chocolate and condensed milk, you should see it flow like thick lava—smooth, slow, and glossy. When you add the candy canes, you’ll hear that satisfying crunch as you fold. And when you bite into one, you should get a clean snap on the outside and a creamy, soft interior.
Cooking Tips & Techniques
I’ve made this recipe probably twenty times by now, and I’ve learned a few things the hard way. Here’s what I wish someone had told me:
Don’t overheat the chocolate. This is the number one mistake I made early on. Chocolate seizes when it gets too hot, and then you’re left with a grainy, clumpy mess that won’t smooth out. I’ve had to start over more times than I’d like to admit. The trick is to microwave in short bursts and stir, stir, stir. The residual heat will melt any remaining chips—you don’t need to keep nuking it until it’s liquid.
Room temperature ingredients matter. I know, I know, it’s a microwave recipe—who has time for that? But if your condensed milk is fridge-cold, it can seize the chocolate when you mix them. Take it out of the fridge 15 minutes before you start, or give it a quick warm-up in the microwave (10 seconds, uncovered) before adding it to the chocolate.
Crush your candy canes fresh. Pre-crushed candy canes from the store are often too fine—they turn into powder that just dissolves into the fudge instead of giving you that satisfying crunch. I always crush my own, and I do it right before I start melting. Stored crushed candy canes can absorb moisture and get clumpy.
Use a light touch with the extract. Peppermint extract is potent. I once added a full teaspoon thinking “more is better,” and the bites tasted like a candy cane exploded in my mouth. Start with 1/2 teaspoon, taste, and add more if needed. You can always add, but you can’t take away.
Chill them properly. I know you’re excited, but don’t skip the chill time. Two hours minimum. If you try to pop them out after an hour, they’ll be too soft and will lose their shape. I’ve made that mistake on Christmas Eve when I was rushing, and let’s just say I ended up with fudge blobs instead of neat little bites. Still delicious, but not as pretty.
Variations & Adaptations
This recipe is incredibly flexible. Here are some ways I’ve adapted it over the years:
- Dark chocolate version: Use dark chocolate chips (60-70% cacao) instead of semi-sweet. The bitterness balances the sweet condensed milk beautifully. This is my personal favorite—it feels a little more grown-up and less sugary.
- White chocolate peppermint: Swap the semi-sweet chips for white chocolate chips. The result is a creamy, vanilla-forward fudge with bright red candy cane flecks. It’s sweeter, so I recommend adding that pinch of flaky salt on top.
- Gluten-free and naturally: These are already gluten-free as written, but double-check your candy canes—some brands use wheat starch as a binder. Most are gluten-free, but it’s worth reading the label if you’re serving someone with celiac.
- Dairy-free adaptation: Use dairy-free chocolate chips (Enjoy Life is my go-to) and a can of coconut sweetened condensed milk. The texture will be slightly softer, so chill them a bit longer before serving.
- Add-in variations: Try stirring in 1/4 cup of mini chocolate chips along with the candy canes for extra texture. Or add 1/4 cup of chopped toasted almonds for a peppermint bark crunch situation. I made a batch with crushed freeze-dried raspberries once, and it was unexpectedly amazing—the tartness cuts through the sweet fudge.
- No mold, no problem: If you don’t have a mini muffin mold, pour the fudge into a parchment-lined 8×4 loaf pan, chill, and cut into squares. Or spread it on a baking sheet and break it into bark pieces. The texture is the same—just a different shape.
I once made a batch with crushed starlight mints instead of candy canes because that’s all I had. It worked fine, though the mint flavor was slightly different—more spearmint-y. Still good, but not quite the same classic peppermint bark experience.
Serving & Storage Suggestions
These easy peppermint bark fudge bites are best served cold or at cool room temperature. I like to take them out of the fridge about 10 minutes before serving—they soften just enough to be creamy without getting messy.
Presentation ideas: Arrange them on a white platter for that red-and-white holiday contrast. Or stack them in a small mason jar tied with a ribbon for a cute homemade gift. I’ve also pressed them into mini paper liners (the kind you use for truffles) and arranged them in a gift box—looks professional, takes zero effort.
Pairing suggestions: These go beautifully with a cup of hot cocoa or a peppermint mocha. For a dessert board, pair them with fresh strawberries, dark chocolate-covered almonds, and a few gingerbread cookies. The peppermint cuts through the richness of the other sweets.
Storage: Keep them in an airtight container in the refrigerator for up to 2 weeks. I’ve never had them last that long, but theoretically, they’ll hold. You can also freeze them for up to 3 months. Layer them between sheets of wax paper in a freezer-safe container, and thaw in the fridge overnight before serving.
Reheating note: Don’t. These are meant to be eaten cold or at room temperature. If they’ve been in the freezer, just let them thaw in the fridge. Microwaving will turn them into a puddle.
Flavor development: Honestly, these are best after about 24 hours in the fridge. The flavors meld together, the peppermint mellows slightly, and the texture becomes perfectly creamy. So if you can wait a day, do it.
Nutritional Information & Benefits
Let’s be real—these are a treat, not a health food. But I do appreciate that they’re made with real ingredients, not preservatives or artificial flavors. Here’s the approximate nutritional breakdown for one fudge bite (based on 24 bites per batch):
| Nutrient | Amount per bite |
|---|---|
| Calories | ~110 |
| Fat | 5g |
| Carbohydrates | 16g |
| Sugar | 14g |
| Protein | 2g |
Health highlight: Dark chocolate (if you use it) contains antioxidants called flavonoids, which are good for heart health. Peppermint has been shown to aid digestion and soothe headaches. So there’s that. But honestly, I eat these because they make me happy, and that counts for something.
Dietary considerations: These are gluten-free, nut-free (depending on your chocolate), and can be made dairy-free with simple substitutions. They are not low-sugar or low-calorie, so portion control is your friend. One or two bites is plenty—they’re rich.
I like to think of these as a little moment of joy in a busy season. They’re not about nutrition—they’re about savoring something simple and delicious.
Conclusion
These easy peppermint bark fudge bites have become my go-to holiday recipe for a reason. They’re fast, forgiving, and foolproof—exactly what you need when the holiday season gets hectic and you still want to make something special. Whether you’re gifting them, serving them at a party, or just keeping them in the fridge for those late-night cravings, they deliver every time.
What I love most about this recipe is how adaptable it is. You can dress it up with fancy toppings or keep it simple. You can make it with your kids on a snowy afternoon or whip it up at midnight when you realize you forgot to buy a hostess gift. It works for every scenario.
So grab your candy canes and your chocolate chips, and give these a try. I’d love to hear how they turn out—drop a comment below and let me know if you made any fun variations. And if you’re looking for more easy holiday treats, check out my graveyard dirt cup pudding cups for another fun, no-bake dessert idea, or these mummy cake pops that are perfect for themed gatherings. Happy holidays, and happy snacking!
Frequently Asked Questions
Can I use milk chocolate instead of semi-sweet?
Absolutely. Milk chocolate will make the fudge sweeter and creamier. Just keep in mind that the peppermint flavor might be a little more muted, so you may want to add an extra 1/4 teaspoon of extract. I’ve made it with milk chocolate chips before, and it’s delicious—just different.
Why is my fudge grainy?
This usually happens when the chocolate gets overheated. Chocolate seizes when it reaches too high a temperature, turning into a thick, grainy paste. To avoid this, microwave in short 30-second bursts and stir thoroughly between each one. If it does seize, you can try whisking in a tablespoon of warm milk or cream to smooth it out, but honestly, it’s often better to start over.
Can I freeze these fudge bites?
Yes! They freeze beautifully. Layer them between sheets of wax paper in an airtight container, and they’ll keep for up to 3 months. Thaw them in the refrigerator overnight before serving. I’ve made big batches in November and pulled them out for Christmas parties—nobody could tell they weren’t fresh.
How do I crush candy canes without making a mess?
Use the ziplock bag method—it’s the least messy option. Place the candy canes in a sturdy ziplock bag, seal it, and wrap it in a kitchen towel. Then go at it with a rolling pin or the bottom of a heavy pan. The towel catches any rogue shards and keeps the noise down. If you want finer crumbs, use a food processor, but pulse gently—you don’t want powder.
Can I make these without a mini muffin mold?
Definitely. Pour the fudge into a parchment-lined 8×4 loaf pan, chill, and cut into squares. Or spread it on a baking sheet and break it into bark pieces. You can also use a regular muffin tin with paper liners—they’ll just be bigger bites. The texture and taste are the same no matter what shape you use.
Pin This Recipe!

Easy Peppermint Bark Fudge Bites: Best 5-Minute Holiday Dessert

These easy peppermint bark fudge bites come together in just 5 minutes with only four ingredients. No baking, no fuss—just creamy, rich fudge with crunchy candy cane bits, perfect for holiday gifting or late-night snacking.
- Prep Time: 5 minutes
- Cook Time: 0 minutes
- Total Time: 2 hours 5 minutes (includes chilling)
- Yield: 24 servings 1x
- Category: Dessert
- Cuisine: American
Ingredients
- 12 oz (about 2 cups) semi-sweet chocolate chips
- 14 oz can sweetened condensed milk
- 1/2 teaspoon peppermint extract
- 1/2 cup crushed candy canes (plus more for topping)
- Optional: flaky sea salt for topping
Instructions
- Crush the candy canes: Place 6-8 candy canes in a ziplock bag and crush with a rolling pin until you have a mix of fine powder and small chunks. Set aside about 2 tablespoons for topping.
- Melt the chocolate and condensed milk: Pour the chocolate chips and entire can of sweetened condensed milk into a microwave-safe bowl. Microwave in 30-second bursts, stirring well after each, until smooth and glossy (about 2 minutes total).
- Add the peppermint extract: Stir in 1/2 teaspoon peppermint extract. Taste and add more if desired.
- Fold in the crushed candy canes: Add the crushed candy canes (reserving 2 tablespoons for topping) and fold gently until just combined.
- Fill the mold: Spoon the fudge mixture into a silicone mini muffin mold (or mini muffin tin with paper liners), filling each cavity almost to the top.
- Top with remaining candy canes: Sprinkle the reserved crushed candy canes over the tops and press in gently.
- Chill: Refrigerate for at least 2 hours, or until firm.
- Pop them out: Gently push each fudge bite out of the silicone mold. Serve cold or at cool room temperature.
Notes
Don’t overheat the chocolate—microwave in short bursts and stir. Use room temperature condensed milk to prevent seizing. Crush candy canes fresh for best texture. Chill for at least 2 hours before serving. For dairy-free, use dairy-free chocolate chips and coconut sweetened condensed milk.
Nutrition
- Serving Size: 1 fudge bite
- Calories: 110
- Sugar: 14
- Sodium: 20
- Fat: 5
- Saturated Fat: 3
- Carbohydrates: 16
- Fiber: 1
- Protein: 2
Keywords: peppermint bark, fudge bites, holiday dessert, no-bake, easy fudge, candy cane, chocolate fudge, 5-minute dessert


