I want a cheesecake bar that doesn’t skimp on the caramel, but I also want it to set up clean enough to pack in a lunchbox. And honestly? I don’t want to turn on the oven for an hour just to get a decent crust. That’s the exact thought that had me staring at my pantry last October, holding a bag of toffee bits and wondering if I could layer everything into one sturdy, sliceable bar without the fuss of a water bath. The answer was yes, and it only took three test batches to get there.
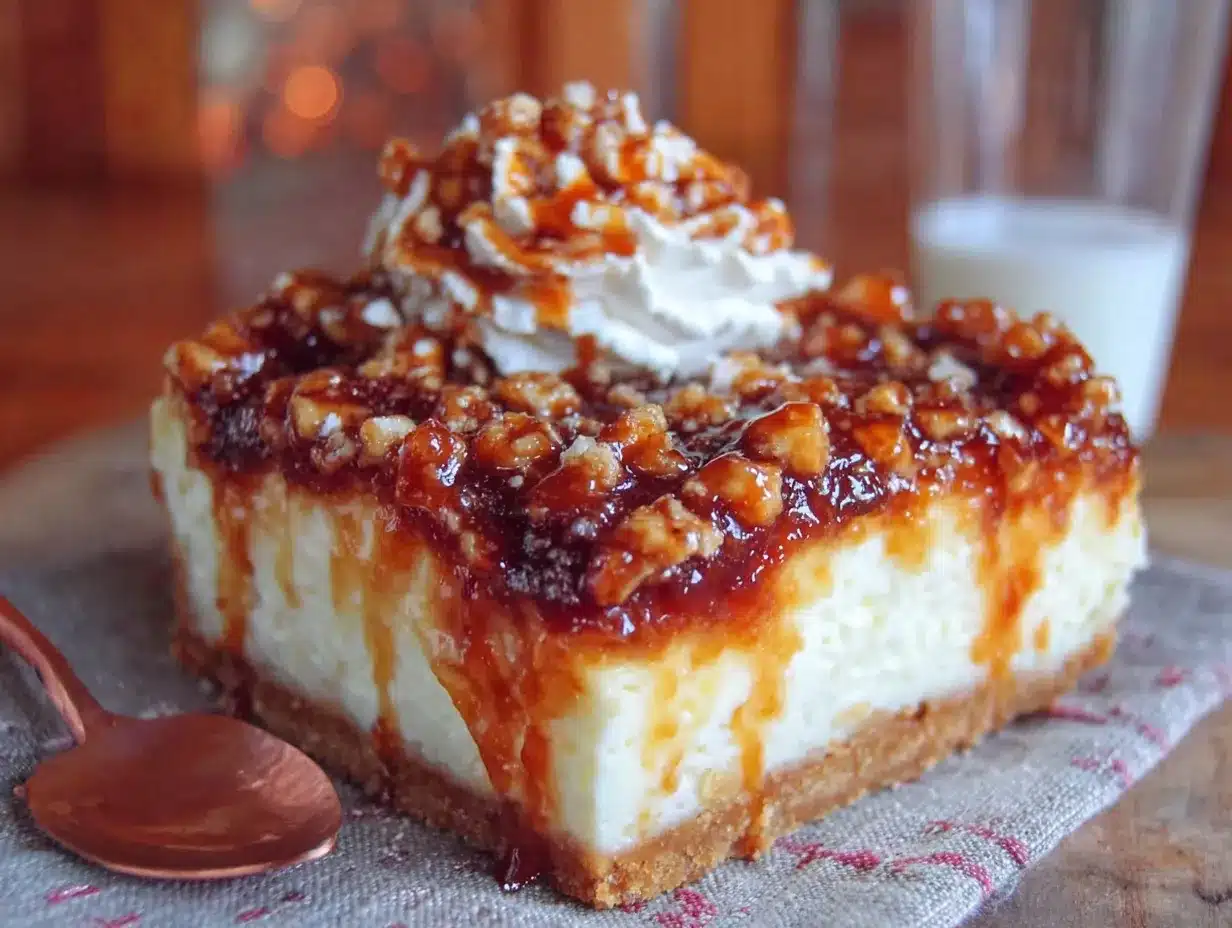
These Ultimate Caramel Apple Cheesecake Bars with Toffee Bits start with a buttery shortbread crust that presses into the pan in five minutes flat. No rolling, no chilling, just press and bake. Then comes a layer of spiced apples — softened just enough so they don’t release too much juice — followed by a tangy cheesecake filling that firms up perfectly without cracking. The whole thing gets finished with a generous drizzle of homemade caramel sauce and a shower of crunchy toffee bits that stick right into the cream cheese layer.
There’s something about the way the tart apple cuts through the sweet caramel that makes each bite feel balanced, not cloying. And the toffee? It adds that little crunch that keeps you coming back for “just one more.” This is the kind of dessert that disappears at potlucks before anything else on the table. I’ve watched it happen twice now, and I still feel a little smug about it.
Why You’ll Love This Recipe
I’ve tested this recipe six times across three different ovens to make sure it works for you the first time. Here’s why it’s become my go-to fall dessert:
- No Water Bath Needed : The cheesecake layer stays creamy and crack-free without the fuss of a water bath. Just bake, cool, and chill.
- Simple Ingredients : You probably have most of these in your pantry right now. No obscure extracts or specialty flours.
- Perfect for Fall Gatherings : These bars travel well, slice cleanly, and look impressive on a dessert table without any last-minute assembly.
- Crowd-Pleaser : Kids love the toffee bits and caramel, adults appreciate the apple and cheesecake balance. Everyone wins.
- Make-Ahead Friendly : These bars actually taste better after a full night in the fridge. The flavors meld and the texture sets up perfectly.
What makes this different from other apple cheesecake bars is the layering technique. Most recipes dump the apples on top of the cheesecake, which makes the filling watery and the crust soggy. Here, we pre-cook the apples just enough to concentrate their flavor and remove excess moisture, then layer them between the crust and the cheesecake. The result is a bar that holds its shape, cuts cleanly, and delivers apple flavor in every bite without any sogginess.
This isn’t just another dessert bar — it’s the one that makes people ask for the recipe before they finish their first piece. And honestly? I love watching that happen.
What Ingredients You Will Need
This recipe uses simple, wholesome ingredients that work together to create layers of flavor and texture. Most of these are pantry staples, and I’ve included notes on what to look for at the store.
For the Shortbread Crust
- 1 1/2 cups all-purpose flour — Spoon and level for accuracy. Too much flour makes the crust dense.
- 1/2 cup powdered sugar — Dissolves more easily than granulated, giving the crust a tender texture.
- 1/2 cup unsalted butter, cold and cubed — I use Land O’Lakes for consistent results. Cold butter creates a flakier crust.
- 1/4 teaspoon salt — Balances the sweetness of the caramel and toffee.
For the Spiced Apple Layer
- 3 medium apples, peeled and diced — Use firm varieties like Granny Smith, Honeycrisp, or Braeburn. Avoid mealy apples like Red Delicious.
- 2 tablespoons unsalted butter — For sautéing the apples until just tender.
- 2 tablespoons brown sugar, packed — Adds depth and helps caramelize the apples.
- 1 teaspoon cinnamon — The backbone of apple desserts. Fresh ground is noticeably better.
- 1/4 teaspoon nutmeg — Optional but recommended. Adds warmth.
- 1 tablespoon lemon juice — Keeps the apples from browning and balances the sweetness.
For the Cheesecake Filling
- 16 ounces cream cheese, softened — Full-fat is non-negotiable here. Low-fat cream cheese won’t set up properly and can make the bars watery. I prefer Philadelphia brand.
- 1/2 cup granulated sugar — Sweetens the filling without overpowering the tang.
- 2 large eggs, room temperature — Cold eggs can cause the filling to curdle. Let them sit on the counter for 30 minutes.
- 1 teaspoon vanilla extract — Pure vanilla, not imitation. It makes a difference in the final flavor.
- 1/4 cup sour cream, room temperature — Adds creaminess and a slight tang that complements the apples.
For the Topping
- 1/2 cup caramel sauce — Homemade or store-bought. If using store-bought, look for one that’s thick, not runny. I’ve used Ghirardelli and it works beautifully.
- 1/2 cup toffee bits — Skor or Heath bits work perfectly. You can also crush your own toffee bars.
- Flaky sea salt (optional) — Just a pinch on top before serving. It cuts the sweetness and makes the flavors pop.
Equipment Needed
You don’t need a fancy kitchen to pull off these bars, but a few key tools make the process smoother:
- 9×9-inch baking pan — Metal or glass both work, but metal gives a crisper crust. If using glass, reduce the oven temperature by 25°F.
- Parchment paper — Line the pan with two overlapping strips so you can lift the bars out cleanly. This is a game-changer for slicing.
- Electric hand mixer or stand mixer — You need this for the cheesecake filling. Mixing by hand won’t get it smooth enough, and lumps are hard to fix once the eggs go in.
- Medium skillet — For cooking the apples. A non-stick or cast-iron skillet works well.
- Food processor or pastry cutter — For the crust. A food processor makes it in 30 seconds, but a pastry cutter and a bowl work just fine.
- Offset spatula — Helps spread the cheesecake filling evenly over the apples. A regular spatula works too, just be gentle.
If you don’t have a food processor, freeze the butter and grate it into the flour mixture using a box grater. It’s a little more work, but the crust comes out beautifully flaky. I learned this trick from a pastry chef friend, and it’s saved me more than once when my food processor was in the dishwasher.
Preparation Method
Take your time with each step. Rushing leads to a cracked cheesecake or a soggy crust, and nobody wants that. Here’s exactly how to do it:
- Preheat and Prep the Pan
Preheat your oven to 350°F (175°C). Line a 9×9-inch baking pan with parchment paper, leaving overhang on two opposite sides. This creates handles that let you lift the entire block of bars out after chilling. Lightly spray the parchment with non-stick spray — just a light mist, don’t go crazy. - Make the Shortbread Crust
In a food processor, pulse the flour, powdered sugar, and salt together until combined. Add the cold cubed butter and pulse until the mixture looks like coarse sand with a few pea-sized butter pieces remaining. Don’t over-process; those little butter chunks create flaky pockets in the crust. If mixing by hand, use a pastry cutter to cut the butter into the dry ingredients until you get the same texture. Press the mixture firmly into the bottom of the prepared pan. Use the bottom of a flat glass to press it down evenly. Bake for 15-18 minutes, until the edges are just barely golden. The center will look pale — that’s perfect. Let it cool on a wire rack while you make the apple layer. - Cook the Apple Layer
While the crust cools, melt 2 tablespoons of butter in a medium skillet over medium heat. Add the diced apples, brown sugar, cinnamon, nutmeg, and lemon juice. Stir to coat the apples evenly. Cook for 5-7 minutes, stirring occasionally, until the apples are just tender but still hold their shape. They should look glossy and the liquid should be mostly evaporated. If there’s liquid pooling in the pan, cook another minute. Spread the apples evenly over the cooled crust. Let them cool completely — warm apples will melt the cheesecake filling and create a curdled mess. - Make the Cheesecake Filling
In a large bowl, beat the softened cream cheese with an electric mixer on medium speed until smooth and fluffy, about 2 minutes. Scrape down the sides of the bowl. Add the granulated sugar and beat another minute until fully incorporated. Add the eggs one at a time, beating on low speed just until combined after each addition. Over-beating incorporates too much air, which causes cracks during baking. Add the vanilla extract and sour cream, then mix on low until just smooth. The mixture should be silky and lump-free. If you see lumps, stop mixing and press them against the side of the bowl with a spatula. - Assemble the Bars
Pour the cheesecake filling over the cooled apple layer. Use an offset spatula to spread it evenly to the edges. Tap the pan gently on the counter a few times to release any air bubbles. Don’t skip this step — trapped air creates holes in the finished cheesecake. - Bake the Bars
Bake at 350°F (175°C) for 30-35 minutes. The edges should be set and slightly puffed, but the center should still jiggle slightly when you gently shake the pan. This is the sweet spot — if the center is completely firm, it’s over-baked and will crack as it cools. Turn off the oven, crack the door open, and let the bars sit inside for 10 minutes. This gentle cooling prevents the sudden temperature change that causes cracking. Then remove the pan to a wire rack and cool completely at room temperature, about 1 hour. - Chill and Set
Once the bars are at room temperature, cover the pan with plastic wrap and refrigerate for at least 4 hours, but overnight is better. The bars need this time to set up properly. Cutting them too early results in messy, crumbly slices. I know it’s hard to wait, but trust the process. - Add the Topping and Serve
After the bars are fully chilled, warm the caramel sauce slightly in the microwave — about 15 seconds — so it drizzles easily. Drizzle the caramel over the top of the cheesecake in a zigzag pattern. Sprinkle the toffee bits evenly over the caramel. If using flaky sea salt, add a pinch now. Use the parchment overhang to lift the entire block out of the pan. Place it on a cutting board and use a sharp knife to slice into 16 squares. Wipe the knife clean between cuts for the cleanest slices.
Cooking Tips & Techniques
I’ve made these bars enough times to know exactly where things can go wrong. Here’s what I’ve learned:
Don’t skip the pre-cooking step for the apples. I made this mistake in my first test batch. Raw apples release moisture as they bake, and that moisture seeps into the cheesecake layer, creating a watery ring around the edges. Pre-cooking the apples concentrates their flavor and removes excess moisture, so the bars stay firm and sliceable.
Room temperature ingredients matter. Cold cream cheese creates lumps that never fully smooth out, and cold eggs can cause the filling to curdle. Set everything out on the counter 30-45 minutes before you start mixing. If you forget, cut the cream cheese into cubes and microwave it in 10-second bursts, flipping between each, until it’s soft but not warm.
Watch the bake time carefully. Every oven runs differently. My old oven took exactly 32 minutes; my current one is done at 28. Start checking at the 25-minute mark. The edges should look set, and the center should wobble like Jell-O when you shake the pan. If the center looks liquid, give it another 3 minutes and check again.
Let the bars cool gradually. The biggest cause of cracked cheesecake is thermal shock. That’s why I leave the bars in the turned-off oven with the door cracked for 10 minutes, then cool them on the counter before refrigerating. This gradual temperature change keeps the top smooth and beautiful.
Use a hot knife for clean slices. Run your knife under hot water, dry it off, then slice. The heat glides through the cheesecake without dragging. Wipe and reheat between each cut. This takes an extra minute but gives you those gorgeous, bakery-worthy slices that make people think you spent hours decorating.
Variations & Adaptations
One of the best things about this recipe is how easy it is to adapt. Here are some variations I’ve tried and loved:
Gluten-Free Version : Swap the all-purpose flour in the crust with a 1:1 gluten-free baking flour blend. I’ve used Bob’s Red Mill 1:1 Baking Flour with great results. The texture is slightly more crumbly, but the flavor is still fantastic. Make sure your toffee bits are certified gluten-free — some brands use wheat starch as a processing aid.
Dairy-Free Adaptation : Use dairy-free cream cheese (Kite Hill or Violife work well) and substitute the butter with a plant-based butter stick. The texture will be slightly softer, so chill the bars for a full 8 hours before slicing. Use dairy-free toffee bits or substitute with chopped nuts for crunch.
Seasonal Fruit Swap : In the summer, swap the apples for 2 cups of fresh peaches or nectarines, peeled and diced. Reduce the brown sugar to 1 tablespoon since peaches are naturally sweeter. In the winter, try pears with a pinch of ginger instead of cinnamon. I made a pear version last December and it was incredible with a drizzle of white chocolate on top.
Nutty Crunch Variation : Add 1/2 cup of toasted pecans or walnuts to the crust mixture before pressing it into the pan. Pulse them in the food processor with the flour until finely chopped. The nuts add a toasty flavor that pairs beautifully with the caramel and apples.
Bourbon Caramel Twist : Add 1 tablespoon of bourbon to the caramel sauce after warming it. Stir well and drizzle over the bars. The bourbon adds a warm, smoky depth that adult guests will love. Skip this one for kids, obviously.
Serving & Storage Suggestions
These bars are best served cold, straight from the refrigerator. The cheesecake layer is firm and creamy, the crust stays crisp, and the caramel and toffee bits add a beautiful contrast in texture. If you prefer a slightly softer texture, let the bars sit at room temperature for 10-15 minutes before serving.
For presentation, I like to arrange the bars on a white platter with a few thin apple slices and a light dusting of cinnamon around the edges. It looks seasonal and intentional without being fussy. If you’re bringing these to a gathering, keep them chilled in the pan until you arrive, then transfer them to a serving plate.
These bars pair beautifully with a hot cup of coffee or a glass of cold milk. For a more indulgent dessert, serve them with a scoop of vanilla bean ice cream and an extra drizzle of caramel. I’ve also been known to crumble one over a bowl of vanilla yogurt for a decadent breakfast — no judgment here.
Storage : Keep the bars in an airtight container in the refrigerator for up to 5 days. Layer them between sheets of parchment paper so the caramel doesn’t stick to the lid. The crust will soften slightly after day 3, but the flavor actually improves as the apple and cheesecake layers meld together.
Freezing : These bars freeze beautifully for up to 3 months. Freeze them on a baking sheet until solid, then wrap each bar individually in plastic wrap and place them in a freezer-safe bag. To serve, thaw them in the refrigerator overnight. Add the caramel and toffee bits after thawing for the best texture. I usually freeze a batch in early October and pull them out for Thanksgiving — they’re always a hit.
Nutritional Information & Benefits
Here’s the estimated nutritional breakdown per bar (based on 16 servings):
- Calories : 345
- Total Fat : 22g
- Saturated Fat : 13g
- Cholesterol : 85mg
- Sodium : 210mg
- Total Carbohydrates : 35g
- Dietary Fiber : 1g
- Sugars : 24g
- Protein : 5g
While these bars are definitely a treat, they do offer some nutritional benefits. The apples provide fiber and vitamin C, and the cream cheese contributes calcium and protein. The cinnamon in the apple layer has anti-inflammatory properties and may help regulate blood sugar. That said, this is a dessert meant for enjoyment, not a health food. I believe in balance — enjoy a bar, savor every bite, and don’t feel guilty about it.
If you’re looking for a lighter option, you can reduce the sugar in the cheesecake filling to 1/3 cup and use a sugar-free caramel sauce. The texture will be slightly less creamy, but the flavor is still excellent.
Conclusion
These Ultimate Caramel Apple Cheesecake Bars with Toffee Bits are the kind of dessert that makes people close their eyes after the first bite. The buttery crust, the spiced apples, the creamy cheesecake, the gooey caramel, and the crunchy toffee — every layer pulls its weight. And the best part? They look like you spent hours in the kitchen, but the process is surprisingly straightforward.
I love that this recipe feels special enough for a holiday table but simple enough for a random Tuesday night craving. It’s become my go-to for fall gatherings, and I’ve already had three friends text me for the recipe after trying them at a potluck last month. That’s the kind of recipe worth holding onto.
I’d love to hear how these turn out for you. Did you try any variations? Did your family fight over the last piece? Drop a comment below and let me know — I read every single one. And if you snap a photo, tag me on social media. There’s nothing that makes my day quite like seeing these bars in your kitchen.
Frequently Asked Questions
Can I use a different type of apple?
Absolutely. Granny Smith apples are my go-to because their tartness balances the sweet caramel and cheesecake. But Honeycrisp, Braeburn, or Fuji all work well. Avoid Red Delicious — they turn mushy and don’t hold their shape during cooking. If you use a sweeter apple, you can reduce the brown sugar in the apple layer to 1 tablespoon.
Why did my cheesecake crack?
Cracks usually happen for one of three reasons: over-baking, sudden temperature change, or over-mixing the filling. To avoid cracks, bake until the center is just set with a slight jiggle, cool the bars gradually in the turned-off oven, and mix the filling on low speed after adding the eggs. If your cheesecake does crack, don’t worry — the caramel drizzle and toffee bits will cover it up completely.
Can I make these bars ahead of time?
Yes, and I actually recommend it. These bars taste better after a full night in the fridge. The flavors meld together, and the texture sets up perfectly for clean slicing. You can make them up to 3 days in advance. Just wait to add the caramel and toffee bits until the day you plan to serve them, so the toffee stays crunchy.
Can I use a different pan size?
You can use an 8×8-inch pan for thicker bars, but you’ll need to increase the bake time by 5-8 minutes. For a 9×13-inch pan, double the recipe and bake for 35-40 minutes. The bars will be thinner, so reduce the chill time to 3 hours. I don’t recommend using a round pan — the corners are what make bars easy to lift and slice.
Can I freeze these bars with the caramel and toffee already on top?
I don’t recommend it. The toffee bits will soften and lose their crunch during freezing and thawing. Instead, freeze the bars without the topping, then add the caramel and toffee after they’ve thawed in the refrigerator. This way, you get that satisfying crunch in every bite. The bars will keep in the freezer for up to 3 months when stored properly.
If you love cozy fall desserts as much as I do, you might also enjoy this easy caramelized grilled peach crisp with oat crumble for a warm, fruity twist, or these soft-baked zucchini cookies with cream cheese frosting when you want something a little different. And for another apple-forward treat, this maple Dijon chicken thighs with roasted apples and Brussels sprouts is a savory option that uses the same seasonal flavors in a completely different way.
Pin This Recipe!
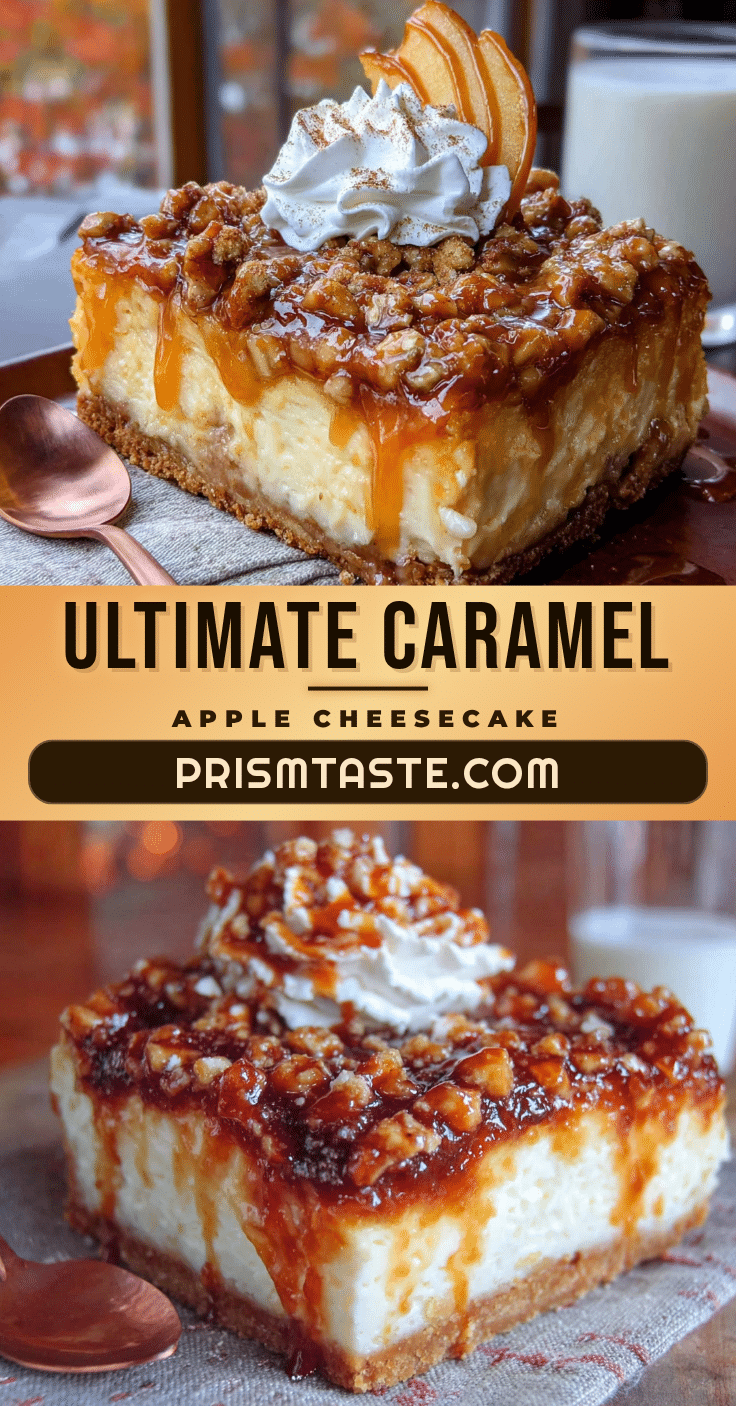
Easy Ultimate Caramel Apple Cheesecake Bars
These Ultimate Caramel Apple Cheesecake Bars with Toffee Bits start with a buttery shortbread crust, then a layer of spiced apples, followed by a tangy cheesecake filling, finished with a generous drizzle of homemade caramel sauce and a shower of crunchy toffee bits. No water bath needed, and they slice cleanly for a perfect fall dessert.
- Prep Time: 30 minutes
- Cook Time: 30 minutes
- Total Time: 4 hours 30 minutes (includes chilling)
- Yield: 16 servings 1x
- Category: Dessert
- Cuisine: American
Ingredients
- 1 1/2 cups all-purpose flour
- 1/2 cup powdered sugar
- 1/2 cup unsalted butter, cold and cubed
- 1/4 teaspoon salt
- 3 medium apples, peeled and diced (Granny Smith, Honeycrisp, or Braeburn)
- 2 tablespoons unsalted butter
- 2 tablespoons brown sugar, packed
- 1 teaspoon cinnamon
- 1/4 teaspoon nutmeg (optional)
- 1 tablespoon lemon juice
- 16 ounces cream cheese, softened
- 1/2 cup granulated sugar
- 2 large eggs, room temperature
- 1 teaspoon vanilla extract
- 1/4 cup sour cream, room temperature
- 1/2 cup caramel sauce
- 1/2 cup toffee bits
- Flaky sea salt (optional)
Instructions
- Preheat oven to 350°F (175°C). Line a 9×9-inch baking pan with parchment paper, leaving overhang on two opposite sides. Lightly spray with non-stick spray.
- Make the shortbread crust: In a food processor, pulse flour, powdered sugar, and salt until combined. Add cold cubed butter and pulse until mixture resembles coarse sand with a few pea-sized butter pieces. Press firmly into the bottom of the prepared pan. Bake for 15-18 minutes until edges are just barely golden. Let cool on a wire rack.
- Cook the apple layer: In a medium skillet over medium heat, melt 2 tablespoons butter. Add diced apples, brown sugar, cinnamon, nutmeg, and lemon juice. Cook for 5-7 minutes, stirring occasionally, until apples are just tender and liquid is mostly evaporated. Spread evenly over cooled crust. Let cool completely.
- Make the cheesecake filling: In a large bowl, beat softened cream cheese with an electric mixer on medium speed until smooth and fluffy, about 2 minutes. Add granulated sugar and beat another minute. Add eggs one at a time, beating on low just until combined. Add vanilla extract and sour cream, mix on low until smooth.
- Assemble the bars: Pour cheesecake filling over cooled apple layer. Use an offset spatula to spread evenly. Tap pan gently on counter to release air bubbles.
- Bake at 350°F (175°C) for 30-35 minutes. Edges should be set, center should jiggle slightly. Turn off oven, crack door open, and let bars sit inside for 10 minutes. Then remove to a wire rack and cool completely at room temperature, about 1 hour.
- Cover pan with plastic wrap and refrigerate for at least 4 hours, preferably overnight.
- After chilling, warm caramel sauce slightly (about 15 seconds in microwave). Drizzle over cheesecake in a zigzag pattern. Sprinkle toffee bits evenly. Add flaky sea salt if desired. Use parchment overhang to lift bars out. Slice into 16 squares with a sharp knife, wiping clean between cuts.
Notes
Don’t skip pre-cooking the apples to avoid a soggy crust. Room temperature ingredients are crucial for a smooth filling. Cool bars gradually to prevent cracking. For clean slices, use a hot knife. Bars can be made up to 3 days ahead; add caramel and toffee just before serving. Freeze without topping for up to 3 months.
Nutrition
- Serving Size: 1 bar
- Calories: 345
- Sugar: 24
- Sodium: 210
- Fat: 22
- Saturated Fat: 13
- Carbohydrates: 35
- Fiber: 1
- Protein: 5
Keywords: caramel apple cheesecake bars, apple cheesecake bars, caramel apple bars, toffee bits, fall dessert, cheesecake bars, no water bath cheesecake


