I figured a Halloween charcuterie board would be mostly about the props—plastic spiders, fake cobwebs, maybe some orange food coloring. It took about ten minutes of staring at a sad pile of store-bought crackers for that assumption to fall apart completely. The truth is, themed grazing boards can feel like an afterthought, a last-minute scramble of snack bags dumped onto a platter. But this Perfect Halloween Charcuterie Board with Candy Corn Cheese Balls? It changed my whole approach to holiday appetizers.
The idea actually came from a party I wasn’t even planning to host. My kids begged for a last-minute Halloween get-together, and I had maybe an hour to pull something together. I grabbed a block of cream cheese (because honestly, when is that not the answer?), some cheddar, and a bag of candy corn I’d hidden from myself. The first cheese ball was a mess—lopsided, crumbly, and nothing like the neat little candy corn shape I had in my head. But the second one? That one worked. And the third was even better. By the time the doorbell rang, I had a board that looked like it belonged on a magazine cover, and the guests devoured it before I could even grab a photo. That’s when I knew this recipe was something special.
It’s funny how the best ideas come from a little bit of panic and a lot of cream cheese. This board isn’t just cute—it’s genuinely delicious, with savory elements that balance the sweetness of the candy corn. The cheese balls are the star, but the whole spread comes together in a way that feels intentional and impressive without requiring a culinary degree. You can scale it up for a crowd or keep it small for a family movie night. Either way, it’s the kind of recipe that makes you look like you planned it all along.
Why You’ll Love This Recipe
Let’s be real—most Halloween snacks lean hard on sugar. Candy, cupcakes, more candy. This board offers a savory counterpoint that actually satisfies real hunger while still being undeniably festive. It’s the kind of spread that keeps both kids and adults coming back for more, and I’ve never seen leftovers when I bring it to a party.
- Show-Stopping Presentation: The candy corn shaped cheese balls are an instant conversation starter. They look like you spent hours, but the whole board comes together in under 30 minutes.
- Perfect for Parties: This board serves a crowd beautifully. It’s ideal for Halloween gatherings, potlucks, or even a spooky movie night at home. No utensils needed, just grab and go.
- Simple, Real Ingredients: No scary artificial flavors here. The cheese balls are made with cream cheese, sharp cheddar, and a few pantry spices. You probably have most of the ingredients already.
- Customizable & Crowd-Pleasing: You can swap out the meats, crackers, and veggies based on what your crowd loves. It’s endlessly adaptable, which makes it a total win for picky eaters and adventurous foodies alike.
- Make-Ahead Friendly: The cheese balls can be prepped a day in advance. Just assemble the board right before serving. This takes so much stress off party day.
What makes this board different from the hundreds of other Halloween snack boards out there? It’s the combination of savory cheese balls with the unexpected pop of candy corn. That sweet-salty contrast is what keeps people reaching for one more cracker. The cheese balls themselves are creamy, tangy, and perfectly seasoned—they don’t just look like candy corn, they hold their own as a seriously good appetizer.
This is the recipe that makes you close your eyes after the first bite. It’s Halloween fun without the sugar crash, and honestly, it might just become your new go-to for every fall gathering.
What Ingredients You Will Need
This recipe uses simple, wholesome ingredients that come together to create something truly special. Most of these are pantry staples or easy to find at any grocery store. The key is using good quality cheese and letting everything come to room temperature for the smoothest texture.
For the Candy Corn Cheese Balls (Makes 2 medium balls)
- 16 oz cream cheese, softened (I prefer Philadelphia for the creamiest texture—the block style, not the tub)
- 1 ½ cups sharp cheddar cheese, finely shredded (freshly shredded melts better than pre-shredded)
- ½ cup powdered sugar (this balances the tang and helps the balls hold their shape)
- ½ teaspoon garlic powder
- ½ teaspoon onion powder
- ¼ teaspoon smoked paprika (adds a subtle warmth and a beautiful orange tint)
- ¼ teaspoon salt
- ⅛ teaspoon cayenne pepper (optional, for a tiny kick—I love it, but skip it for kids)
- ⅓ cup crushed tortilla chips (plain or lightly salted, for the orange “candy corn” layer)
- ⅓ cup shredded coconut, toasted (for the white tip of the candy corn—trust me on this)
- Yellow or orange food coloring (gel works best for vibrant color without thinning the mixture)
For the Charcuterie Board Assembly
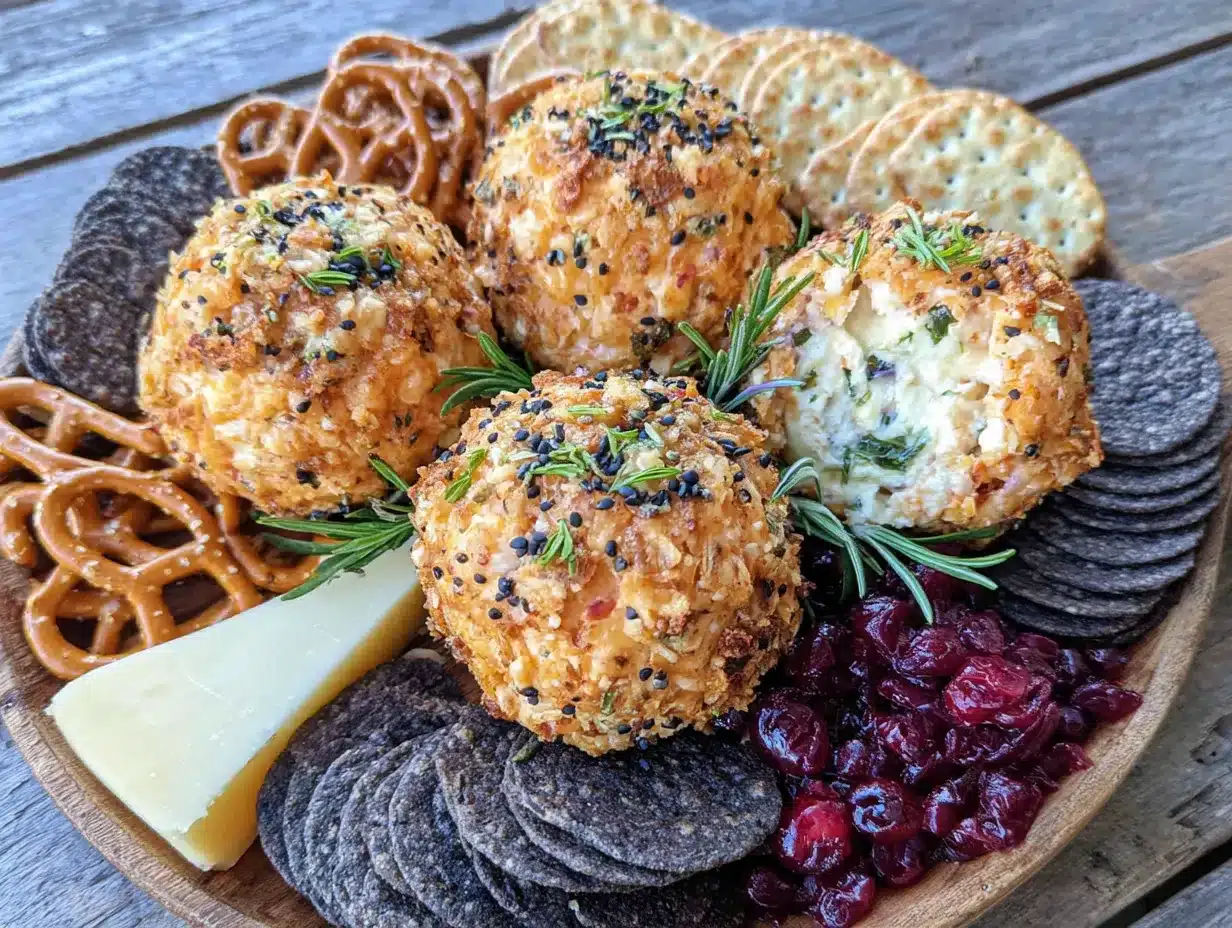
- Assorted crackers (I use a mix of buttery rounds, whole wheat squares, and pretzel crisps)
- Sliced salami or prosciutto (about 6-8 ounces)
- Fresh vegetables: carrot sticks, cucumber rounds, bell pepper strips (the colors pop against the board)
- Fruit: apple slices, red grapes, or dried apricots (the sweetness cuts through the rich cheese)
- Pitted black olives (for a briny contrast)
- Pickles or cornichons (adds acidity and crunch)
- Nuts: roasted almonds or pecans (optional, for extra texture)
- Candy corn (about ½ cup, for garnish and snacking)
- Fresh rosemary or sage sprigs (for a spooky, rustic garnish—looks like tiny witch’s broomsticks)
Ingredient Selection Tips: For the best flavor, use block cream cheese and let it sit on the counter for at least 30 minutes before mixing. Pre-shredded cheddar contains anti-caking agents that can make the cheese balls grainy. I learned this the hard way after my first batch turned out crumbly and sad. Also, look for candy corn that’s fresh—stale candy corn gets hard and loses that soft, chewy texture that makes it so addictive.
Substitution Guidance: If you’re not a fan of candy corn, you can skip it entirely and just make savory cheese balls shaped into pumpkins or ghosts. Use dairy-free cream cheese and vegan cheddar shreds for a dairy-free version. For a gluten-free board, simply use gluten-free crackers and pretzels.
Equipment Needed
You don’t need a lot of fancy tools for this board, which is part of its charm. Here’s what I use and what you can substitute if you’re in a pinch.
- Large mixing bowl (for combining the cheese ball ingredients)
- Hand mixer or stand mixer (a wooden spoon works, but a mixer makes it much smoother)
- Plastic wrap (for shaping and chilling the cheese balls—absolutely essential)
- Parchment paper (for rolling the cheese balls in toppings without making a mess)
- Large wooden board or serving platter (I use a 12×18 inch acacia wood board, but a large cutting board or even a baking sheet lined with parchment works perfectly)
- Small bowls or ramekins (for holding olives, pickles, or extra candy corn)
- Cheese knife or spreader (for serving)
Budget-Friendly Tip: If you don’t have a fancy charcuterie board, flip over a clean baking sheet or use a large ceramic platter. The food is the star here, not the board. I’ve used a cutting board with a crack in it more times than I care to admit, and nobody noticed once the food was on it.
Preparation Method
This recipe is surprisingly straightforward. The key is working with softened cream cheese and being patient while shaping. Here’s exactly how I do it.
- Soften the cream cheese: Take the cream cheese out of the fridge at least 30 minutes before starting. It should be soft enough that you can easily press your finger into it. If you’re in a hurry, you can microwave it in 10-second bursts, but be careful—melted cream cheese won’t hold its shape.
- Mix the cheese ball base: In a large mixing bowl, combine the softened cream cheese, shredded cheddar, powdered sugar, garlic powder, onion powder, smoked paprika, salt, and cayenne (if using). Beat with a hand mixer on medium speed until completely smooth and well combined. Scrape down the sides of the bowl at least once. The mixture should be thick, creamy, and slightly sticky.
- Divide and color: Divide the mixture into two equal portions. Leave one portion plain (this will be the white tip of the candy corn). To the other portion, add a few drops of yellow or orange food coloring and mix until the color is evenly distributed. You want a bright, vibrant orange—like a real candy corn. Add more coloring a drop at a time until you’re happy with the shade.
- Chill the mixture: Cover both bowls with plastic wrap and refrigerate for at least 20 minutes. This firms up the mixture, making it much easier to shape. Don’t skip this step—I’ve tried shaping warm cheese mixture, and it’s like trying to sculpt with pudding.
- Shape the candy corn: Lay a large piece of plastic wrap on your work surface. Scoop the plain (white) cheese mixture and shape it into a log about 4 inches long and 1.5 inches wide. Place it at one end of the plastic wrap. Then, scoop the orange cheese mixture and shape it into a slightly larger log, about 4 inches long and 2 inches wide. Place the orange log directly next to the white log, pressing them together gently. Using the plastic wrap, roll the two logs together into one larger log, shaping it so one end is narrower (the white tip) and the other end is wider (the orange base). It should resemble a giant candy corn. Twist the ends of the plastic wrap tightly to secure the shape. Repeat with the second batch of cheese mixture to make a second candy corn.
- Chill again: Place the wrapped cheese logs in the refrigerator for at least 1 hour, or up to 24 hours. This sets the shape completely. The longer they chill, the easier they are to handle.
- Prepare the coatings: While the cheese logs chill, prepare the coatings. Crush the tortilla chips into fine crumbs (I use a zip-top bag and a rolling pin—very satisfying). Toast the shredded coconut in a dry skillet over medium heat, stirring constantly, until it’s lightly golden and fragrant (about 2-3 minutes). Let the coconut cool completely.
- Roll the cheese balls: Once the cheese logs are firm, unwrap them. Gently roll the white (narrow) end in the toasted coconut, and the orange (wide) end in the crushed tortilla chips. The middle section can be left plain or lightly dusted with a little extra paprika for color. Use your hands to gently press the coatings into the cheese so they stick.
- Assemble the board: Place the two candy corn cheese balls on your serving board, positioning them so they look like they’re nestled among the other items. Arrange the crackers, sliced salami, fresh vegetables, fruit, olives, pickles, and nuts around them in small clusters. Sprinkle the candy corn around the board for pops of color and sweetness. Tuck fresh rosemary or sage sprigs here and there for a spooky, rustic look.
- Serve immediately or refrigerate: This board is best served at room temperature, so let it sit out for about 15 minutes before serving. If you’re making it ahead, cover the assembled board with plastic wrap and refrigerate for up to 4 hours. Add the fresh herbs and any delicate garnishes just before serving.
Cooking Tips & Techniques
I’ve made this board more times than I can count, and I’ve definitely made my share of mistakes. Here’s what I’ve learned so you don’t have to repeat my errors.
Don’t overmix the cheese. Once the ingredients are combined, stop mixing. Overworking the cream cheese can make it grainy and cause it to separate when chilled. I learned this the hard way when I got distracted and let the mixer run for an extra minute—the texture was never the same.
Use gel food coloring, not liquid. Liquid food coloring will thin out the cheese mixture and make it harder to shape. Gel colors are more concentrated and won’t affect the texture. I use Americolor brand, but any gel works fine. Start with a tiny amount—you can always add more, but you can’t take it away.
Keep your hands slightly damp. When shaping the cheese logs, wet your hands with a little cold water. This prevents the cheese from sticking to your palms and makes shaping much easier. It’s a trick I picked up from making truffles, and it works perfectly here.
Toast the coconut carefully. Coconut goes from golden to burnt in about 30 seconds. Keep it moving in the pan and watch it like a hawk. I’ve burned at least three batches of coconut while answering the phone. Set a timer if you have to.
Crush the chips finely. Big chunks of tortilla chips won’t stick well to the cheese ball. Aim for a consistency similar to breadcrumbs. A food processor works great, but a rolling pin and a zip-top bag is my go-to method.
Let the board come to room temperature. Chilled cheese loses a lot of its flavor. Take the assembled board out of the fridge about 15-20 minutes before serving. The cheese balls will be easier to spread, and the flavors will be much more pronounced.
Variations & Adaptations
This board is endlessly customizable. Here are some of my favorite variations that I’ve tried over the years.
Spicy Ghost Pepper Version: For a truly fiery board, add ½ teaspoon of ghost pepper powder or 1 finely minced habanero to the cheese mixture. The heat pairs beautifully with the sweetness of the candy corn. I made this for a Halloween party with my spice-loving friends, and it was gone in 20 minutes. If you love heat, you might also enjoy this homemade habanero peach hot sauce for an extra kick on the side.
Sweet & Savory Pumpkin Board: Swap the candy corn cheese balls for pumpkin-shaped cheese balls. Use the same base recipe, but roll the entire ball in crushed orange crackers or paprika. Add a small pretzel stick as a stem. This is perfect if you’re serving the board for Thanksgiving or a fall harvest party instead of Halloween.
Dairy-Free & Vegan Adaptation: Use vegan cream cheese and vegan cheddar shreds. I’ve tested this with Kite Hill brand cream cheese and Violife cheddar, and the texture is surprisingly close to the original. The flavor is slightly different, but still delicious. Just make sure to chill the mixture for longer—vegan cream cheese can be softer than the dairy version.
Kid-Friendly Mini Boards: For a kids’ Halloween party, assemble individual mini boards using small wooden cutting boards or even paper plates. Let each child build their own board with a mini candy corn cheese ball, a few crackers, some apple slices, and a handful of candy corn. It’s a fun activity and a snack all in one. This approach works great alongside easy DIY copycat Lunchable snack boxes for a truly kid-centered spread.
Herb & Garlic Twist: Add 2 tablespoons of finely chopped fresh chives and 1 tablespoon of fresh dill to the cheese mixture. The herbaceous notes cut through the richness and add a bright, fresh flavor. This version is especially good if you’re serving the board as an appetizer before a heavier meal.
Serving & Storage Suggestions
This board is designed to be a centerpiece, so presentation matters. Here’s how I like to serve and store it for the best results.
Serving Temperature: Serve the board at room temperature. The cheese balls will be spreadable and the flavors will be much more vibrant. If you’ve refrigerated the assembled board, let it sit out for 15-20 minutes before serving. The crackers and salami should also be at room temperature—cold salami is sad salami.
Presentation Tips: Arrange the food in small clusters rather than spreading everything evenly across the board. This creates visual interest and makes it easier for guests to grab what they want without disturbing the whole spread. Place the candy corn cheese balls at opposite ends of the board so they act as anchors. Fill in the gaps with smaller items like olives, nuts, and candy corn. I like to add a few sprigs of fresh rosemary or sage at the last minute—they look like tiny witch’s broomsticks and add a lovely fragrance.
Complementary Dishes: This board pairs beautifully with a spooky graveyard dirt cup pudding cups for dessert, creating a full Halloween menu. For drinks, a crisp apple cider or a dry sparkling wine cuts through the richness of the cheese. A fresh witch’s brew iced matcha latte is another fantastic non-alcoholic option that fits the theme perfectly.
Storage Instructions: Leftover cheese balls can be wrapped tightly in plastic wrap and stored in the refrigerator for up to 5 days. The coatings (coconut and crushed chips) may soften over time, so if you’re storing for more than a day, I recommend storing the cheese ball plain and adding the coatings just before serving. The other components (crackers, salami, vegetables) should be stored separately in airtight containers. The assembled board should not be stored—it’s best enjoyed fresh.
Reheating: You don’t need to reheat anything! Just let the cheese balls come to room temperature before serving. If the cheese balls have been refrigerated, let them sit out for 20-30 minutes before unwrapping and serving.
Flavor Development: The cheese balls actually taste better the next day. The flavors meld together and the garlic and onion powder become more pronounced. I’ve been known to make the cheese balls a day ahead of time just for this reason. The coatings, however, are best added fresh.
Nutritional Information & Benefits
While this board is definitely a treat, it does offer some surprising nutritional benefits when you balance it with the fresh components. Here’s a rough estimate per serving (based on 8 servings, including all components of the board).
- Calories: Approximately 380-420 per serving
- Protein: 14-16g (thanks to the cheese and salami)
- Fat: 28-32g (mostly from cheese and nuts, which are satisfying fats)
- Carbohydrates: 22-26g (varies based on crackers and candy corn)
- Fiber: 3-4g (from vegetables and nuts)
- Sugar: 12-15g (mostly from candy corn and fruit)
Health Benefits of Key Ingredients: Cream cheese provides calcium and protein, while the sharp cheddar adds more calcium and vitamin A. The fresh vegetables and fruit contribute fiber, vitamins, and antioxidants. Nuts offer healthy fats and additional protein. Even the candy corn, in moderation, provides a quick energy boost—though let’s be honest, we’re eating it because it’s fun.
Dietary Considerations: This recipe contains dairy and gluten (from crackers). For a gluten-free version, use gluten-free crackers and pretzels. For a dairy-free version, use vegan cream cheese and cheddar. The board can be made nut-free by omitting the nuts and using a different coating for the cheese balls (like crushed pretzels instead of coconut).
Potential Allergens: Dairy, gluten, tree nuts (coconut), and potentially soy (in some crackers and salami). Always check labels if serving guests with allergies.
Personal Wellness Perspective: I love that this board lets you indulge while still getting in some real food. The vegetables and fruit balance out the richer elements, and because it’s a grazing board, you naturally eat slower and pay more attention to what you’re consuming. It’s not a health food, but it’s a balanced treat that feels satisfying without being overly heavy.
Conclusion
This Perfect Halloween Charcuterie Board with Candy Corn Cheese Balls is the kind of recipe that makes you excited to host. It’s fun, festive, and genuinely delicious—a rare combination in the world of themed party food. The cheese balls are creamy and flavorful, the board is endlessly customizable, and the whole thing comes together with minimal stress. That’s a win in my book.
I love that this board lets me be creative without spending hours in the kitchen. It’s the perfect centerpiece for a Halloween party, a spooky movie night, or even just a Tuesday when you want to make dinner feel special. The candy corn cheese balls always get a laugh and a double-take, and they taste even better than they look.
So go ahead and make this board your own. Swap in your favorite meats and cheeses, add your kid’s preferred snacks, or go all out with the spooky garnishes. The beauty of a charcuterie board is that there’s no wrong way to do it. I’d love to hear how yours turns out—drop a comment below and let me know what variations you tried. And if you’re looking for more Halloween inspiration, don’t miss the perfect mummy cake pops for a sweet finish to your spooky spread. Happy haunting, and happy snacking!
Frequently Asked Questions
Can I make the candy corn cheese balls ahead of time?
Absolutely! The cheese balls can be made up to 2 days in advance. Wrap them tightly in plastic wrap and store them in the refrigerator. Add the coatings (crushed chips and toasted coconut) just before serving for the best texture and crunch.
Can I use pre-shredded cheddar cheese?
You can, but I don’t recommend it. Pre-shredded cheese is coated with anti-caking agents that can make your cheese balls grainy and less creamy. Freshly shredded cheddar melts better and gives a much smoother texture. It takes an extra 2 minutes to shred it yourself, and the difference is worth it.
What if I can’t find candy corn?
No problem! You can use any orange and yellow candies, like candy pumpkins, orange jelly beans, or even chopped orange gummy candies. You can also skip the candy corn entirely and just make the cheese balls as the centerpiece—they’re delicious on their own.
How do I keep the cheese balls from falling apart?
The key is chilling the mixture before shaping. The 20-minute chill in step 4 is non-negotiable. Also, make sure your cream cheese is properly softened before mixing—if it’s too cold, it won’t combine smoothly, and if it’s too warm, it won’t hold its shape. If the mixture still seems too soft, pop it back in the fridge for another 10 minutes.
Can I make this board dairy-free?
Yes! Use vegan cream cheese and vegan cheddar shreds. I’ve tested this with Kite Hill cream cheese and Violife cheddar, and it works beautifully. Just be aware that vegan cream cheese can be softer, so you may need to chill it for longer before shaping. The flavor will be slightly different, but it’s still delicious and festive.
Pin This Recipe!
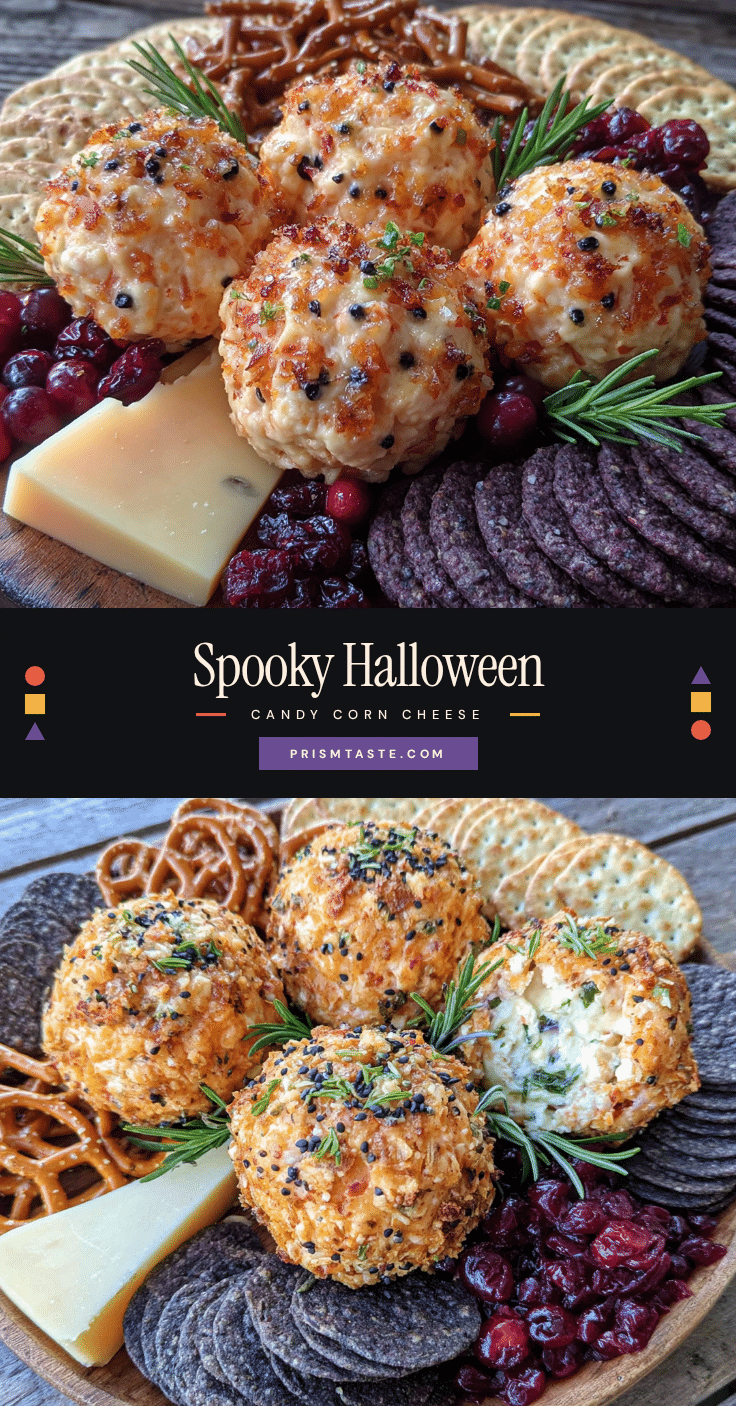
Perfect Halloween Charcuterie Board with Easy Candy Corn Cheese
A festive Halloween charcuterie board featuring creamy candy corn-shaped cheese balls, savory meats, fresh vegetables, and sweet candy corn. Perfect for parties and movie nights, this board comes together in under 30 minutes and is endlessly customizable.
- Prep Time: 20 minutes
- Cook Time: 5 minutes
- Total Time: 25 minutes
- Yield: 8 servings 1x
- Category: Appetizer
- Cuisine: American
Ingredients
- 16 oz cream cheese, softened
- 1 ½ cups sharp cheddar cheese, finely shredded
- ½ cup powdered sugar
- ½ teaspoon garlic powder
- ½ teaspoon onion powder
- ¼ teaspoon smoked paprika
- ¼ teaspoon salt
- ⅛ teaspoon cayenne pepper (optional)
- ⅓ cup crushed tortilla chips
- ⅓ cup shredded coconut, toasted
- Yellow or orange food coloring (gel preferred)
- Assorted crackers (buttery rounds, whole wheat squares, pretzel crisps)
- 6–8 oz sliced salami or prosciutto
- Fresh vegetables: carrot sticks, cucumber rounds, bell pepper strips
- Fruit: apple slices, red grapes, or dried apricots
- Pitted black olives
- Pickles or cornichons
- Roasted almonds or pecans (optional)
- ½ cup candy corn
- Fresh rosemary or sage sprigs
Instructions
- Soften the cream cheese: Take the cream cheese out of the fridge at least 30 minutes before starting. It should be soft enough that you can easily press your finger into it. If in a hurry, microwave in 10-second bursts, but be careful not to melt it.
- Mix the cheese ball base: In a large mixing bowl, combine the softened cream cheese, shredded cheddar, powdered sugar, garlic powder, onion powder, smoked paprika, salt, and cayenne (if using). Beat with a hand mixer on medium speed until completely smooth and well combined. Scrape down the sides of the bowl at least once.
- Divide and color: Divide the mixture into two equal portions. Leave one portion plain (this will be the white tip of the candy corn). To the other portion, add a few drops of yellow or orange food coloring and mix until the color is evenly distributed. You want a bright, vibrant orange—like a real candy corn.
- Chill the mixture: Cover both bowls with plastic wrap and refrigerate for at least 20 minutes. This firms up the mixture, making it much easier to shape.
- Shape the candy corn: Lay a large piece of plastic wrap on your work surface. Scoop the plain (white) cheese mixture and shape it into a log about 4 inches long and 1.5 inches wide. Place it at one end of the plastic wrap. Then, scoop the orange cheese mixture and shape it into a slightly larger log, about 4 inches long and 2 inches wide. Place the orange log directly next to the white log, pressing them together gently. Using the plastic wrap, roll the two logs together into one larger log, sha…
- Chill again: Place the wrapped cheese logs in the refrigerator for at least 1 hour, or up to 24 hours. This sets the shape completely.
- Prepare the coatings: While the cheese logs chill, prepare the coatings. Crush the tortilla chips into fine crumbs (use a zip-top bag and a rolling pin). Toast the shredded coconut in a dry skillet over medium heat, stirring constantly, until it’s lightly golden and fragrant (about 2-3 minutes). Let the coconut cool completely.
- Roll the cheese balls: Once the cheese logs are firm, unwrap them. Gently roll the white (narrow) end in the toasted coconut, and the orange (wide) end in the crushed tortilla chips. The middle section can be left plain or lightly dusted with a little extra paprika for color. Use your hands to gently press the coatings into the cheese so they stick.
- Assemble the board: Place the two candy corn cheese balls on your serving board, positioning them so they look like they’re nestled among the other items. Arrange the crackers, sliced salami, fresh vegetables, fruit, olives, pickles, and nuts around them in small clusters. Sprinkle the candy corn around the board for pops of color and sweetness. Tuck fresh rosemary or sage sprigs here and there for a spooky, rustic look.
- Serve immediately or refrigerate: This board is best served at room temperature, so let it sit out for about 15 minutes before serving. If making ahead, cover the assembled board with plastic wrap and refrigerate for up to 4 hours. Add fresh herbs and delicate garnishes just before serving.
Notes
The cheese balls can be made up to 2 days in advance. Add coatings just before serving for best texture. Use gel food coloring instead of liquid to avoid thinning the cheese mixture. Keep hands slightly damp when shaping to prevent sticking. Let the board come to room temperature for 15-20 minutes before serving for best flavor.
Nutrition
- Serving Size: 1 serving (approxima
- Calories: 400
- Sugar: 13
- Sodium: 600
- Fat: 30
- Saturated Fat: 15
- Carbohydrates: 24
- Fiber: 3
- Protein: 15
Keywords: Halloween charcuterie board, candy corn cheese balls, Halloween appetizer, themed grazing board, spooky snack board, holiday party food


