I roasted honeynut squash wrong for three years before I figured out why it never got crispy. Not slightly wrong — consistently, frustratingly wrong. I’d slice them, toss them in oil, spread them on a sheet pan, and wait for that golden-brown magic that everyone raved about. Instead, I got steamed, sad, floppy squash that tasted fine but looked nothing like the photos. It drove me crazy because I knew this squash had potential. The flavor was always there — that concentrated sweetness, almost like butternut squash’s more sophisticated cousin — but the texture? A total letdown.
The problem, I finally realized, was everything I thought I knew about roasting. I was overcrowding the pan (guilty), using too much oil (also guilty), and not giving the squash enough space to actually crisp up. Once I stopped treating honeynut squash like a miniature butternut and started treating it like its own thing, everything changed. The skin crisped up like bacon. The edges caramelized into something almost candy-like. And the brown butter? Well, that was the real game-changer.
This crispy honeynut squash with brown butter is the recipe I make every single week now — sometimes twice. It’s become my secret weapon for impressing dinner guests without actually trying that hard. And honestly? It’s the kind of dish that makes you feel like you know what you’re doing in the kitchen, even on days when you definitely don’t.
Why You’ll Love This Recipe
Let me tell you why this one’s different from every other roasted squash recipe you’ve tried. I’ve tested this method at least a dozen times (honestly, probably more) and the results are consistently perfect. Here’s what makes it special:
- Perfectly Crispy Every Time — No more soggy squash. The high-heat method with proper spacing gives you edges that crunch like potato chips while the inside stays tender and creamy.
- Just 6 Ingredients — You probably have most of these in your kitchen right now. No fancy trips to specialty stores required.
- Ready in 30 Minutes — From cutting board to table in half an hour. That’s faster than takeout in some neighborhoods.
- Looks Fancy, Tastes Fancier — The brown butter takes this from “side dish” to “centerpiece conversation starter” without any extra effort.
- Naturally Gluten-Free & Vegetarian — Works for almost every dietary preference at your table.
This isn’t just another roasted vegetable recipe. The combination of crispy edges, sweet caramelized flesh, and nutty brown butter creates something that tastes way more complex than it actually is. It’s the kind of dish that makes people close their eyes after the first bite — and I’ve watched it happen more times than I can count.
What Ingredients You Will Need
This recipe uses simple, honest ingredients that work together to create something truly special. No weird stuff, no hard-to-find items — just good food made right.
- Honeynut Squash (4-6 squash) — Look for ones that feel heavy for their size with firm, unblemished skin. They’re smaller than butternut squash and have that distinctive ribbed shape. The flavor is concentrated and sweeter than butternut, almost like someone added honey to the soil (they didn’t, but it tastes that way).
- Unsalted Butter (4 tablespoons) — I use Kerrygold for its higher butterfat content, which means better browning and richer flavor. But any good unsalted butter works. The browning process is where the magic happens.
- Olive Oil (2 tablespoons) — Regular olive oil is fine here. Save your fancy extra-virgin for salads. We need a neutral oil with a decent smoke point for the high heat roasting.
- Kosher Salt (1 teaspoon) — Diamond Crystal is my go-to because the flakes are consistent and easy to control. If you’re using table salt, use about half that amount.
- Fresh Thyme (6-8 sprigs) — The woody, slightly floral notes cut through the richness of the brown butter perfectly. Dried thyme works in a pinch, but fresh really shines here.
- Black Pepper (freshly ground, about 1/2 teaspoon) — Don’t skip this. The slight heat balances the sweetness of the squash and the richness of the butter.
- Flaky Sea Salt (for finishing) — Maldon or any other flaky salt. This is non-negotiable for that final pop of texture and saltiness.
- Optional: Maple Syrup (1 tablespoon) — If your squash isn’t as sweet as you’d like, a tiny drizzle before roasting amplifies the caramelization. But honestly, good honeynut squash doesn’t need it.
Equipment Needed
You don’t need a professional kitchen for this recipe, but a few key tools make the difference between good squash and unforgettable squash.
- Large Sheet Pan (half-sheet size, 18×13 inches) — This is crucial. A smaller pan means overcrowding, which means steamed squash instead of crispy squash. I use Nordic Ware because they don’t warp at high heat.
- Chef’s Knife — A sharp 8-inch knife makes cutting through squash much safer and easier. Dull knives are dangerous — they slip.
- Cutting Board — Something with grip underneath. Squash can be slippery, and stability matters.
- Small Saucepan (for browning butter) — Light-colored stainless steel is ideal so you can see the color change. Dark pans hide the browning process.
- Rubber Spatula — For scraping every last drop of that brown butter onto the squash. Waste not, want not.
- Parchment Paper — Makes cleanup easier and helps prevent sticking. You can use foil, but parchment gives better browning.
- Vegetable Peeler (optional) — I don’t peel honeynut squash, but some people prefer to. If you do, a good Y-peeler makes quick work of it.
Preparation Method
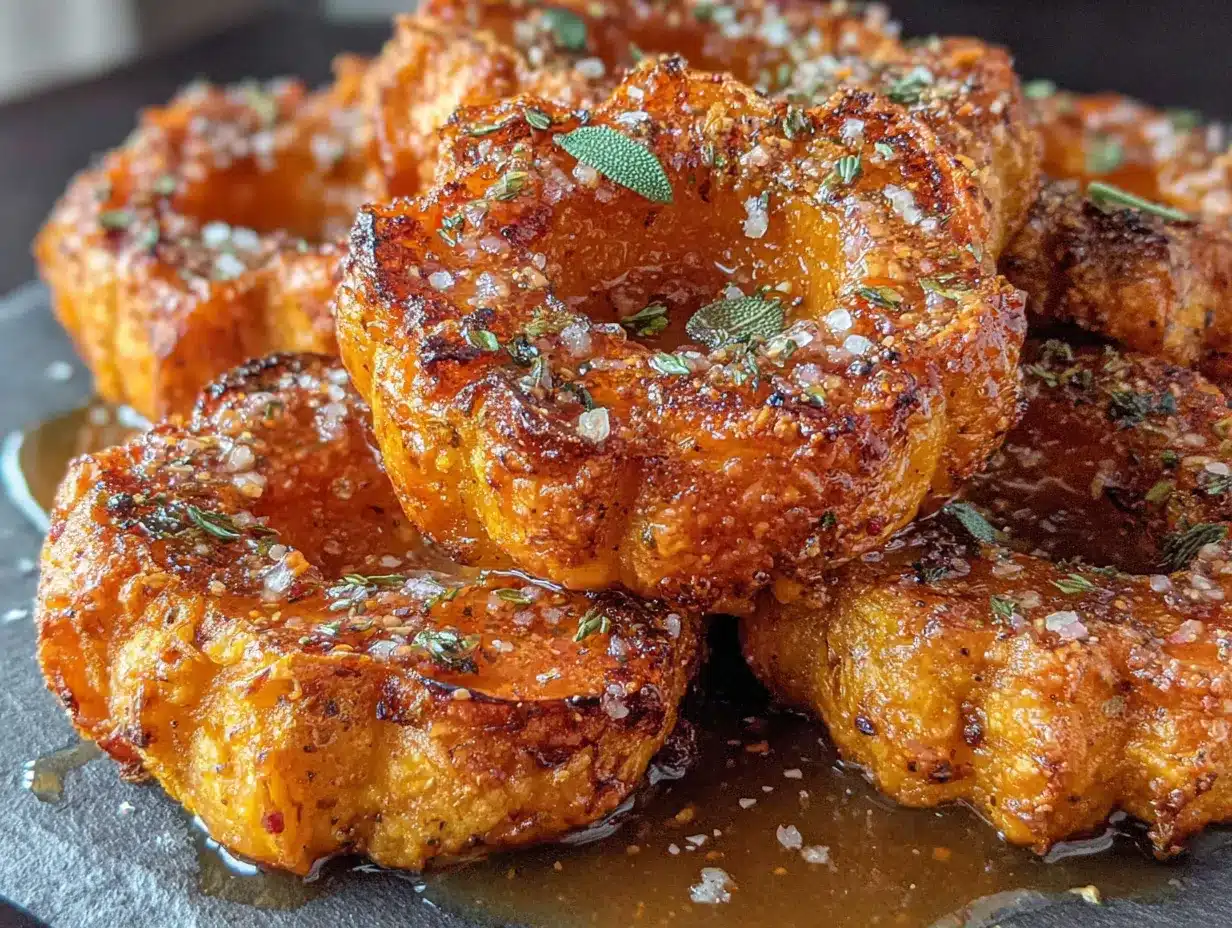
Here’s where everything comes together. Follow these steps exactly, and you’ll have the crispiest, most flavorful squash of your life.
- Preheat your oven to 425°F (220°C) — This high heat is non-negotiable. We need the oven screaming hot to get that caramelization happening fast. Place the rack in the middle position.
- Prepare the squash — Wash the honeynut squash well and pat them dry. Using a sharp chef’s knife, trim off the very top and bottom (just the stem end and a thin slice from the bottom). Cut each squash in half lengthwise. Use a spoon to scoop out the seeds and stringy bits. Don’t rinse them — you want the cut surfaces dry for better browning.
- Slice the squash — Cut each half into 1/2-inch thick half-moons. Try to keep them uniform in thickness so they cook evenly. If some pieces are thinner, they’ll burn before the thicker ones are done. I’ve learned this the hard way more than once.
- Season the squash — Place the squash slices on your sheet pan. Drizzle with olive oil and sprinkle with kosher salt and black pepper. Toss everything with your hands (yes, get in there) until every piece is evenly coated. Now here’s the important part: spread them out in a single layer with space between each piece. If they’re touching, they’ll steam instead of crisp. Use two pans if you need to.
- Roast the squash — Place the pan in the preheated oven and roast for 15 minutes. After 15 minutes, flip each piece using tongs. The undersides should be golden brown and starting to caramelize. Roast for another 10-15 minutes, until the edges are deeply browned and crispy, and the flesh is tender when pierced with a fork.
- Make the brown butter — While the squash roasts, make the brown butter. Place the butter in a small saucepan over medium heat. Stir constantly with a rubber spatula. The butter will melt, then foam, then start to bubble. Keep stirring. After about 4-5 minutes, you’ll see brown specks forming at the bottom of the pan. The butter will smell nutty and toasty. As soon as it turns a golden-amber color and smells like toasted hazelnuts, remove it from heat immediately. Pour it into a heat-safe bowl to stop the cooking process. Don’t walk away from browning butter — it goes from perfect to burnt in about 15 seconds.
- Finish the dish — Remove the squash from the oven. While it’s still hot, drizzle the brown butter over the top. Add the fresh thyme leaves (strip them from the stems). Toss gently to coat. Sprinkle with flaky sea salt. Serve immediately while everything is hot and the edges are still crispy.
Cooking Tips & Techniques
After making this recipe more times than I can count, here are the things I wish someone had told me from the start.
The biggest mistake people make is overcrowding the pan. I did it for years because I was trying to feed a crowd and didn’t want to use two pans. But here’s the truth: crowded pans create steam, and steam is the enemy of crispiness. If you need to make a double batch, use two pans and rotate them halfway through. Your squash will thank you.
Don’t skip the flipping step. I know it’s tempting to just let them roast without touching them, but flipping ensures both sides get that beautiful caramelization. Set a timer if you need to — I always do.
Brown butter patience is real. The first few times I made brown butter, I pulled it off the heat too early because I was scared of burning it. The result was just melted butter with a slight tan — not the deep, nutty flavor we’re after. Trust the process. Wait until you see those brown specks and smell that unmistakable nutty aroma. Then pull it off immediately.
Room temperature matters. If your squash has been sitting in the fridge, let it come to room temperature for about 15 minutes before roasting. Cold squash will lower the oven temperature and take longer to crisp up.
Use the right oil. Olive oil has a lower smoke point than avocado or grapeseed oil, but it adds flavor. If you’re worried about smoking, mix olive oil with a neutral high-heat oil like avocado. I’ve never had issues at 425°F, but every oven is different.
One thing I learned from making slow-roasted cherry tomato pasta sauce is that patience with caramelization always pays off. Same principle applies here — don’t rush the browning process.
Variations & Adaptations
This recipe is wonderfully flexible. Here are some ways I’ve adapted it depending on what I have on hand or who I’m feeding.
- Maple-Bourbon Version — Add 1 tablespoon of maple syrup and 1 tablespoon of bourbon to the brown butter after removing it from heat. Stir to combine, then drizzle over the roasted squash. The bourbon adds a warmth that complements the sweetness beautifully. I made this for Thanksgiving last year and it disappeared in minutes.
- Spicy Honey Version — Add 1/2 teaspoon of red pepper flakes to the brown butter as it’s cooking. Finish with a drizzle of honey instead of maple syrup. The heat cuts through the richness and keeps you coming back for more.
- Herb-Forward Version — Add fresh rosemary and sage along with the thyme. The woodsy herbs stand up well to the brown butter and add complexity. I sometimes add crushed fennel seeds too for a subtle licorice note.
- Parmesan-Crusted Version — After flipping the squash, sprinkle finely grated Parmesan cheese over the slices. The cheese melts and crisps up into the most addictive crust. Just be careful not to over-salt since Parmesan is already salty.
- Balsamic Glaze Finish — Instead of brown butter, drizzle aged balsamic glaze over the roasted squash. The acidity balances the sweetness and adds a gorgeous dark color. This version is especially good with the small-batch fig jam with vanilla bean spread on the side.
Serving & Storage Suggestions
This crispy honeynut squash is best served immediately while the edges are still crunchy and the brown butter is warm and glossy. But here’s how to handle leftovers and make the most of this dish.
Serving: Transfer the squash to a warm platter immediately after tossing with brown butter. The residual heat from the platter helps maintain the temperature. I like to scatter extra fresh thyme leaves and a final pinch of flaky salt right before serving. This dish pairs beautifully with roasted chicken, pan-seared fish, or even a simple grain bowl with farro and arugula.
Storage: Leftover squash keeps in an airtight container in the refrigerator for up to 4 days. The crispy edges will soften as it sits, but the flavor remains excellent. I actually love cold leftovers straight from the fridge — the flavors meld together in a really satisfying way.
Reheating: To restore some of the crispiness, reheat the squash in a single layer on a sheet pan at 400°F for 5-7 minutes. Don’t use the microwave — it will turn the squash into mush. If you’re in a hurry, a hot skillet with a tiny bit of butter works well too.
Make-Ahead Tips: You can prep the squash up to a day ahead by cutting, seeding, and storing in an airtight container in the fridge. The brown butter can be made 3-4 days ahead and stored in the fridge. Reheat it gently before using. This makes weeknight dinners so much easier.
If you’re planning a cozy dinner, this squash pairs wonderfully with crockpot beef stew with red wine and root vegetables for a complete, comforting meal.
Nutritional Information & Benefits
Honeynut squash isn’t just delicious — it’s actually good for you. Here’s what you’re getting in each serving (based on 4 servings):
- Calories: Approximately 220 per serving
- Fat: 16g (mostly from the healthy butter and olive oil)
- Carbohydrates: 18g (with 3g fiber and 6g natural sugar)
- Protein: 3g
- Vitamin A: Over 200% of your daily value — this squash is packed with beta-carotene
- Vitamin C: About 20% of your daily value for immune support
- Potassium: More than a banana, which helps with muscle function and blood pressure
This recipe is naturally gluten-free, vegetarian, and can be made vegan by substituting the butter with a high-quality vegan butter (though the brown butter flavor won’t be quite the same). It’s also low in added sugars — the sweetness comes entirely from the squash itself. If you’re watching your sodium, reduce the finishing salt or skip it entirely.
Conclusion
This crispy honeynut squash with brown butter has become my go-to dish for so many occasions. It’s fancy enough for holiday dinners but simple enough for a Tuesday night when you want something that feels special. The contrast between the crispy edges and the tender interior, all coated in that nutty brown butter — it’s the kind of flavor combination that makes you wonder why you haven’t been making it your whole life.
I’d love to hear how this turns out for you. Did you try any of the variations? Did you discover a new favorite way to serve it? Drop a comment below and let me know. And if you make this for a gathering, tag me in your photos — I genuinely get excited seeing other people fall in love with this recipe the way I did.
Go ahead, give it a try. Your taste buds will thank you, and honestly? You deserve something this good on your table.
Frequently Asked Questions
Can I use butternut squash instead of honeynut squash?
Yes, but you’ll need to adjust the cooking time. Butternut squash is larger and denser, so it takes about 10-15 minutes longer to roast. Cut it into similar 1/2-inch thick pieces and check for doneness with a fork. The flavor won’t be as concentrated as honeynut, so you might want to add a drizzle of maple syrup.
Why isn’t my squash getting crispy?
Most likely, your pan is overcrowded or your oven isn’t hot enough. Make sure the squash pieces aren’t touching each other on the pan. Also, check your oven temperature with an oven thermometer — many ovens run cooler than the dial shows. Finally, pat the squash dry before seasoning to remove excess moisture.
Can I make this recipe ahead of time for a dinner party?
You can prep everything ahead, but I recommend roasting right before serving for the best texture. Cut the squash and make the brown butter up to 2 days ahead. When guests arrive, pop the squash in the oven for 25 minutes, then finish with the brown butter. It’s that easy.
Is the skin of honeynut squash edible?
Absolutely! Unlike butternut squash, honeynut squash has thin, tender skin that becomes deliciously crispy when roasted. No need to peel it. Just wash it well and slice. The skin adds texture and fiber, and it’s one of the things that makes this recipe so easy.
How do I store leftover brown butter?
Pour any leftover brown butter into a small jar or container and refrigerate for up to 2 weeks. It will solidify, so let it come to room temperature or gently warm it before using. Brown butter is amazing on roasted vegetables, pasta, popcorn, or even stirred into oatmeal. Waste not, want not.
If you enjoyed this recipe, you might also love my brown butter banana bread with walnuts — it uses the same brown butter technique for a completely different (and equally delicious) result.
Pin This Recipe!
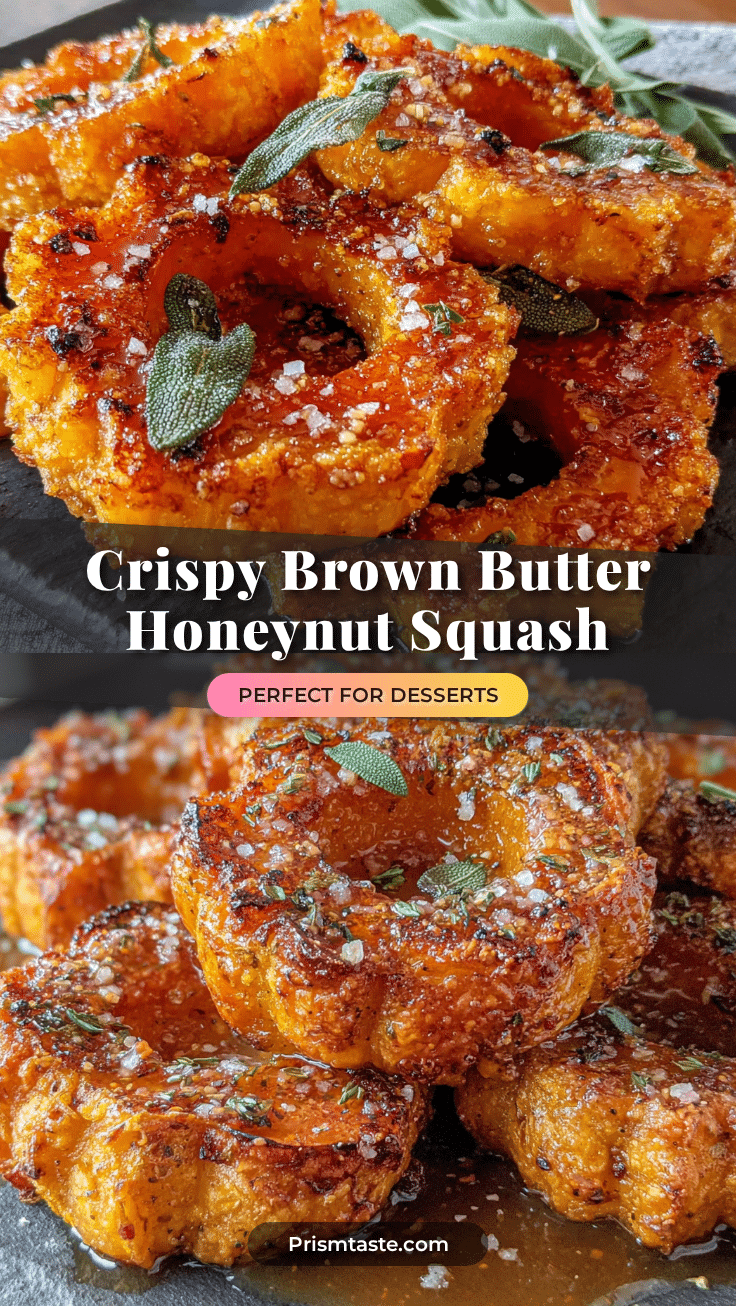
The Best Crispy Honeynut Squash with Brown Butter (Easy)

Perfectly crispy roasted honeynut squash with nutty brown butter and fresh thyme. This easy 30-minute recipe delivers caramelized edges and tender interiors every time.
- Prep Time: 10 minutes
- Cook Time: 25 minutes
- Total Time: 35 minutes
- Yield: 4 servings 1x
- Category: Side Dish
- Cuisine: American
Ingredients
- 4–6 honeynut squash
- 4 tablespoons unsalted butter (preferably Kerrygold)
- 2 tablespoons olive oil
- 1 teaspoon kosher salt (Diamond Crystal; use 1/2 teaspoon if using table salt)
- 6–8 sprigs fresh thyme
- 1/2 teaspoon freshly ground black pepper
- Flaky sea salt (e.g., Maldon) for finishing
- 1 tablespoon maple syrup (optional)
Instructions
- Preheat your oven to 425°F (220°C). Place the rack in the middle position.
- Wash the honeynut squash well and pat them dry. Trim off the very top and bottom, then cut each squash in half lengthwise. Scoop out the seeds and stringy bits with a spoon. Do not rinse.
- Cut each half into 1/2-inch thick half-moons, keeping them uniform in thickness.
- Place the squash slices on a large sheet pan. Drizzle with olive oil and sprinkle with kosher salt and black pepper. Toss with your hands until evenly coated. Spread them out in a single layer with space between each piece (use two pans if needed).
- Roast for 15 minutes. Flip each piece using tongs, then roast for another 10-15 minutes until the edges are deeply browned and crispy, and the flesh is tender when pierced with a fork.
- While the squash roasts, make the brown butter: Place the butter in a small saucepan over medium heat. Stir constantly with a rubber spatula. The butter will melt, foam, then bubble. After about 4-5 minutes, brown specks will form at the bottom and the butter will smell nutty. As soon as it turns golden-amber, remove from heat immediately and pour into a heat-safe bowl.
- Remove the squash from the oven. While hot, drizzle the brown butter over the top. Add fresh thyme leaves (stripped from stems). Toss gently to coat. Sprinkle with flaky sea salt. Serve immediately.
Notes
Do not overcrowd the pan; use two pans if needed. Pat squash dry before seasoning. Brown butter can burn quickly—watch carefully. For best texture, serve immediately. Leftovers can be reheated at 400°F for 5-7 minutes.
Nutrition
- Serving Size: 1 serving (about 1/4
- Calories: 220
- Sugar: 6
- Sodium: 480
- Fat: 16
- Saturated Fat: 8
- Carbohydrates: 18
- Fiber: 3
- Protein: 3
Keywords: crispy honeynut squash, brown butter squash, roasted honeynut squash, easy side dish, gluten-free, vegetarian, fall recipe


