My husband did not trust “healthy snacks” that looked like dessert. He would eye my little plastic container of homemade protein balls with the same suspicion he reserves for diet soda and unsolicited advice. “It’s just peanut butter and oats,” I told him one Tuesday afternoon, shoving a bowl across the counter. He took one bite—a tiny, reluctant nibble—and then he just stood there, chewing, looking at the bowl like it had personally offended him by being delicious. That was the moment I knew these easy no-bake peanut butter protein energy balls were more than just a snack. They were a convert-maker. And honestly? I get it. I used to think anything calling itself a “protein ball” would taste like sawdust and regret. But these little guys? They taste like a cheat code.
So here’s the thing about these easy no-bake peanut butter protein energy balls—they actually work. Not just as a pre-workout bite or a 3 PM slump saver, but as a legitimate, honest-to-goodness treat that doesn’t need a nutrition label apology. They come together in five minutes flat (I timed it), use ingredients I always have in my pantry, and somehow manage to taste like a peanut butter cookie that decided to be good for you. I’ve made them for road trips, for my kid’s lunchbox, for late-night cravings when I want something sweet but don’t want to turn on the oven. They’ve never let me down.
Why You’ll Love This Recipe
Let me tell you why these easy no-bake peanut butter protein energy balls have earned a permanent spot in my fridge. I’ve tested countless versions—some too dry, some too sticky, some that fell apart the second you looked at them. This one is the Goldilocks of energy balls. And I say that with the confidence of someone who has eaten approximately four dozen of them in the past month alone.
- Ready in 5 Minutes – No oven, no stovetop, no complicated steps. Just mix, roll, and eat. Perfect for those days when you need a snack now.
- Simple Ingredients – You probably have everything in your kitchen right this second. Oats, peanut butter, honey, chocolate chips, and a scoop of protein powder. That’s it.
- Perfect for Meal Prep – Make a batch on Sunday and you’ve got snacks for the whole week. They keep beautifully in the fridge or freezer.
- Crowd-Pleaser – I’ve brought these to potlucks, hiking trips, and kid’s soccer games. They disappear fast. Even the skeptics (see: my husband) go back for seconds.
- Actually Satisfying – The combination of protein, healthy fats, and fiber keeps you full for hours. No more staring into the pantry twenty minutes after a snack.
What makes these easy no-bake peanut butter protein energy balls different from every other recipe out there? It’s the texture. I spent weeks tweaking the ratio of wet to dry ingredients to get that perfect balance—firm enough to hold their shape, soft enough to be pleasant to chew, and just sticky enough to feel indulgent without being a mess. Plus, the addition of a tiny pinch of sea salt makes the peanut butter flavor absolutely sing. This isn’t just another energy ball recipe. It’s the one you’ll actually want to make again and again.
What Ingredients You Will Need
This recipe uses simple, wholesome ingredients to deliver bold peanut butter flavor and satisfying texture without any fuss. Most of these are pantry staples, which means you can whip up a batch whenever the craving hits.
- 1 cup old-fashioned rolled oats – Not quick oats! The texture is much better with rolled oats. If you need a gluten-free option, make sure to use certified gluten-free oats. I prefer Bob’s Red Mill for consistent texture.
- 1/2 cup creamy peanut butter – Natural peanut butter works great, but make sure it’s well-stirred. If you use the kind with oil separation, give it a good mix before measuring. I’ve also used crunchy peanut butter for extra texture—highly recommend.
- 1/3 cup honey or maple syrup – Honey gives a slightly floral sweetness; maple syrup adds a warm, caramel-like note. Both work perfectly. For a vegan option, stick with maple syrup.
- 1/4 cup vanilla protein powder – I use a pea protein blend for this, but whey protein works too. Just make sure it’s a flavor you enjoy, because it really comes through. My go-to is Orgain Simple vanilla.
- 1/4 cup mini chocolate chips – Regular chocolate chips work too, but mini ones distribute more evenly. I’m partial to Enjoy Life dark chocolate chips for a slightly healthier option.
- 1 tablespoon chia seeds or flaxseed meal – This is optional but adds extra fiber and omega-3s. Plus, it helps bind everything together. I usually use chia seeds because I like the little crunch.
- 1/4 teaspoon sea salt – Don’t skip this. It makes the peanut butter taste richer and balances the sweetness. I use flaky Maldon salt on top for presentation sometimes.
- 1-2 tablespoons water (if needed) – Depending on your peanut butter and protein powder, you might need a splash of water to help everything come together. Add it one tablespoon at a time.
If you’re looking for a peanut-free option, sunflower seed butter works beautifully here. Just know that the color will turn a slightly greenish-brown (that’s a natural reaction with sunflower seeds and baking soda—totally normal!). I’ve made these easy no-bake peanut butter protein energy balls with almond butter too, and they turned out great, though the flavor is milder.
Equipment Needed
You don’t need fancy equipment for these easy no-bake peanut butter protein energy balls. That’s part of the beauty. Here’s what you’ll need:
- Large mixing bowl – Any bowl will do, but a wider one makes mixing easier. I use my trusty ceramic mixing bowl that I’ve had for years.
- Measuring cups and spoons – For accuracy. I learned the hard way that eyeballing peanut butter leads to either dry, crumbly balls or sticky, impossible-to-roll messes.
- Rubber spatula or wooden spoon – Something sturdy enough to mix thick dough. A rubber spatula is my preference because it scrapes the sides clean.
- Parchment paper or wax paper – For lining a baking sheet or plate while the balls chill. Makes cleanup a breeze.
- Baking sheet or large plate – To hold the balls while they set in the fridge.
- Cookie scoop (optional but helpful) – A small cookie scoop (about 1 tablespoon size) gives you evenly sized balls. I found mine at a kitchen supply store for five bucks, and it’s one of my most-used tools.
- Small bowl for water – Keep this nearby. Wetting your hands slightly makes rolling the balls much less sticky.
If you don’t have a cookie scoop, just use a regular tablespoon. The balls don’t need to be perfectly uniform—they’re handmade, after all. A little character is part of the charm.
Preparation Method
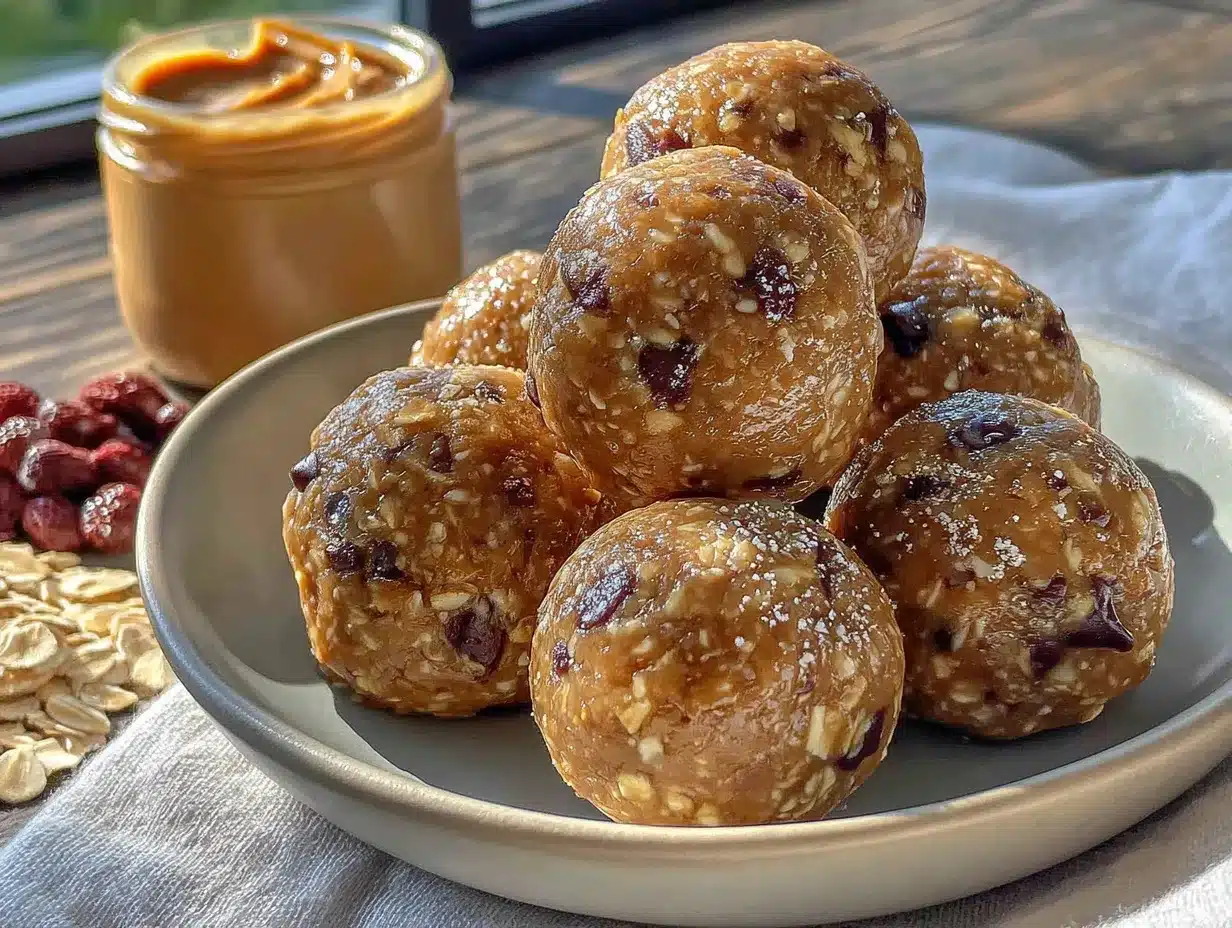
- Combine the dry ingredients. In a large mixing bowl, add the rolled oats, protein powder, chia seeds (if using), and sea salt. Give everything a quick stir with your spatula to distribute evenly. This step takes about 30 seconds but makes a difference—you don’t want a pocket of pure protein powder in one bite.
- Add the wet ingredients. Spoon in the peanut butter and drizzle the honey (or maple syrup) over the top. Don’t worry if it looks messy at this point—it’s supposed to.
- Mix until combined. Using your rubber spatula or a sturdy spoon, stir everything together. Start with a folding motion, then switch to pressing and stirring. The mixture will look crumbly at first, then suddenly come together into a thick, cohesive dough. This usually takes about 1-2 minutes of vigorous mixing. If the mixture seems too dry and isn’t holding together, add water one tablespoon at a time. If it’s too sticky, add a tablespoon more oats.
- Fold in the chocolate chips. Once the dough is well combined, add the mini chocolate chips and fold them in gently. Make sure they’re evenly distributed throughout the dough. I always save a few to press onto the tops of the finished balls—makes them look prettier.
- Chill the dough (optional but recommended). Pop the bowl in the refrigerator for 15-20 minutes. This step isn’t strictly necessary, but it makes the dough much easier to handle. The peanut butter firms up, and the oats absorb some moisture, resulting in less sticky hands during rolling. If you’re in a hurry, you can skip this.
- Roll into balls. Line a baking sheet or large plate with parchment paper. Lightly wet your hands with water (this is the secret to non-sticky rolling!). Scoop out about 1 tablespoon of dough and roll it between your palms into a smooth ball. Place it on the prepared baking sheet. Repeat with the remaining dough. You should get about 16-18 balls, depending on size.
- Press extra chocolate chips on top (optional). If you want them to look extra inviting, press a few chocolate chips onto the top of each ball. This is purely cosmetic, but I think it makes them look like little works of art.
- Chill to set. Place the baking sheet in the refrigerator for at least 30 minutes. This allows the balls to firm up completely. The texture is much better when they’re cold—they hold their shape and have a satisfying, fudge-like bite.
- Transfer to a storage container. Once set, move the energy balls to an airtight container. Layer them between sheets of parchment paper if you’re stacking them. Store in the refrigerator for up to 2 weeks, or in the freezer for up to 3 months.
One thing I’ve learned from making these easy no-bake peanut butter protein energy balls dozens of times: trust the process when the dough seems too dry. It always comes together in the end. If you’re worried about it, just add that splash of water and keep mixing. The texture should be like a stiff cookie dough—not wet, not crumbly, but moldable and slightly tacky.
Cooking Tips & Techniques
I’ve made plenty of mistakes with energy balls over the years, so you don’t have to. Here are the things I wish someone had told me from the start.
Wet your hands. This is the single most important tip. If you try to roll the dough with dry hands, you’ll end up with peanut butter paste stuck to your palms and frustration levels rising. Keep a small bowl of water nearby and dip your fingers before rolling each ball. It makes the process smooth and actually kind of meditative.
Don’t overmix. Once everything is combined, stop. Overmixing can make the protein powder clump up and create an uneven texture. You want a homogeneous dough, but you don’t need to beat it into submission.
Room temperature ingredients matter. If your peanut butter is straight from the fridge, it will be too stiff to mix properly. Let it sit on the counter for 15 minutes before starting. Same goes for honey—if it’s crystallized, warm it gently in a bowl of hot water for a few minutes.
Adjust for your protein powder. Different protein powders absorb liquid differently. Whey protein tends to be less absorbent, while plant-based proteins (especially pea protein) can be quite thirsty. If your dough feels dry after mixing, add water a teaspoon at a time. If it’s too wet, add a tablespoon more oats. This is normal—don’t panic.
Chill before rolling. I know I said this already, but it’s worth repeating. That 15-minute chill in the fridge transforms the dough from sticky and stubborn to cooperative and easy. It also helps the flavors meld together. Patience pays off here.
Use a scale for consistency. If you’re making these regularly, weigh your ingredients once to get a baseline. I found that 1 cup of oats from my pantry weighs about 90 grams. Knowing this helps me replicate the perfect texture every time, even if I’m using a different brand of peanut butter or protein powder.
Variations & Adaptations
One of the best things about these easy no-bake peanut butter protein energy balls is how customizable they are. I’ve experimented with countless variations, and here are my favorites.
Chocolate Peanut Butter Bliss. Replace 2 tablespoons of the oats with unsweetened cocoa powder. The result is a double-chocolate-peanut butter experience that tastes dangerously close to a brownie. I make this version when I’m craving something truly decadent but don’t want to bake an entire tray of brownies.
Vegan & Gluten-Free. Use maple syrup instead of honey, and make sure your protein powder is plant-based. Use certified gluten-free oats if needed. I’ve made this version for friends with dietary restrictions, and no one could tell the difference. The maple syrup adds a lovely warmth that pairs perfectly with peanut butter.
Trail Mix Crunch. Swap the chocolate chips for a mix of dried cranberries, chopped almonds, and unsweetened coconut flakes. This version is less sweet and has a wonderful texture. I make these for hiking trips—they hold up well in a backpack and provide sustained energy.
Low-Carb Option. Replace the oats with unsweetened shredded coconut and almond flour (about 1/2 cup each). Use a low-carb protein powder and sugar-free chocolate chips. The texture is different—denser and more coconut-forward—but still delicious. My keto friends love this version.
Spiced Chai. Add 1 teaspoon of chai spice blend (cinnamon, cardamom, ginger, cloves) to the dry ingredients. The warm spices complement the peanut butter beautifully and make these feel like a cozy fall treat. I made this version for a book club meeting and got asked for the recipe three times.
Serving & Storage Suggestions
These easy no-bake peanut butter protein energy balls are best served cold, straight from the fridge. The texture is firm but not hard, with a satisfying chew that makes you feel like you’re eating a real treat. I like to pull them out about 5 minutes before eating to take the chill off slightly.
For serving, arrange them on a small plate or in a pretty bowl. They make a fantastic addition to a brunch spread alongside fresh fruit and coffee. I’ve also served them as a post-dinner “dessert” when I wanted something sweet but light. Pair them with a tall glass of cold almond milk or a warm cup of chai tea for maximum comfort.
Storage: Keep the energy balls in an airtight container in the refrigerator. They’ll stay fresh for up to 2 weeks—though in my house, they rarely last that long. For longer storage, place them in a freezer-safe bag or container and freeze for up to 3 months. They thaw quickly at room temperature (about 10-15 minutes), so you can grab one straight from the freezer and eat it while you’re running out the door.
Reheating: You don’t need to reheat these, but if you prefer a softer texture, let them sit at room temperature for 10 minutes before eating. I actually love eating them frozen during summer—they have a fudge-like quality that’s incredibly satisfying.
One thing I’ve noticed: the flavors develop and deepen after a day in the fridge. The peanut butter becomes more pronounced, and the oats soften slightly, creating a more cohesive texture. So if you can wait, these are actually better on day two. They’re also perfect for packing in lunchboxes—just toss a couple in a small container and they’ll be perfectly thawed by lunchtime. I’ve been known to pack them for road trips, picnics, and even quick breakfasts when I’m running late. If you’re looking for more grab-and-go snack ideas, these easy 5-ingredient overnight oat lunchbox cups are another fantastic option for busy mornings.
Nutritional Information & Benefits
Here’s the approximate nutritional breakdown for one energy ball (based on 16 servings):
| Nutrient | Amount per Ball |
|---|---|
| Calories | 145 |
| Protein | 7g |
| Carbohydrates | 16g |
| Fiber | 3g |
| Sugar | 8g |
| Fat | 7g |
These easy no-bake peanut butter protein energy balls pack a surprising nutritional punch. The oats provide slow-release carbohydrates and soluble fiber, which helps keep you full and supports heart health. Peanut butter offers healthy monounsaturated fats and plant-based protein. The chia seeds (if you add them) are loaded with omega-3 fatty acids, fiber, and antioxidants. And the protein powder gives these balls staying power that a regular snack just can’t match.
They’re naturally gluten-free (if you use certified oats) and can easily be made vegan. The main allergens to watch for are peanuts and gluten (from oats). If you’re serving these to someone with allergies, always check your labels—especially the protein powder, which can sometimes contain hidden additives.
From my personal perspective, these energy balls have been a game-changer for my afternoon slump. Instead of reaching for a granola bar that’s basically candy in disguise, I grab one of these. They give me steady energy without the crash, and they actually taste good enough that I don’t feel deprived. That’s a win in my book.
Conclusion
These easy no-bake peanut butter protein energy balls are the kind of recipe that makes you wonder why you ever bought pre-packaged snacks. They’re faster, cheaper, and infinitely more customizable than anything you’ll find at the store. Plus, they actually taste like something you’d want to eat—not like a compromise you’re making for your health.
I love that I can make a batch in the time it takes to brew a pot of coffee. I love that my kids eat them without complaint. And I love that they’ve converted even the biggest skeptics in my life (yes, I’m looking at you, husband). This recipe has become my go-to for busy weeks, road trips, and any time I need a little something that feels indulgent but isn’t.
I’d love to hear how these turn out for you. Did you try any of the variations? Add your own twist? Drop a comment below and let me know—I read every single one. And if you’re looking for more easy, healthy snacks, you might enjoy these easy high-protein turkey pinwheel wraps or these easy make-ahead freezer breakfast burritos. Happy snacking!
Frequently Asked Questions
Can I use quick oats instead of rolled oats?
You can, but the texture will be different. Quick oats are more finely processed, so they absorb moisture faster and create a softer, almost paste-like texture. Rolled oats give these energy balls a pleasant chewiness that I personally prefer. If you only have quick oats on hand, reduce the liquid slightly and expect a denser result.
My dough is too dry. What did I do wrong?
This usually happens if your peanut butter is on the thicker side or your protein powder is particularly absorbent. Don’t worry—it’s an easy fix. Add water one tablespoon at a time, mixing well after each addition, until the dough comes together. You can also add an extra tablespoon of honey or maple syrup if you don’t mind the extra sweetness.
How long do these energy balls last at room temperature?
They’re best kept in the fridge, but they’ll hold up at room temperature for about 4-6 hours. If you’re taking them on a picnic or to work, pack them in a cooler bag or eat them within a few hours. In warm weather, the chocolate chips might soften and the balls can become a bit sticky.
Can I make these without protein powder?
Absolutely. Just replace the protein powder with an equal amount of oat flour (pulse rolled oats in a blender until powdery) or additional rolled oats. Keep in mind that the protein content will be lower, and the texture will be slightly different—more oat-forward and less dense. They’ll still taste great!
My energy balls are too sticky to roll. Help!
This usually means the dough has too much moisture. Pop the bowl in the fridge for 20-30 minutes to firm up the peanut butter. If they’re still sticky after chilling, add a tablespoon more oats and mix well. And remember to wet your hands before rolling—that single trick solves most sticky dough problems.
Pin This Recipe!
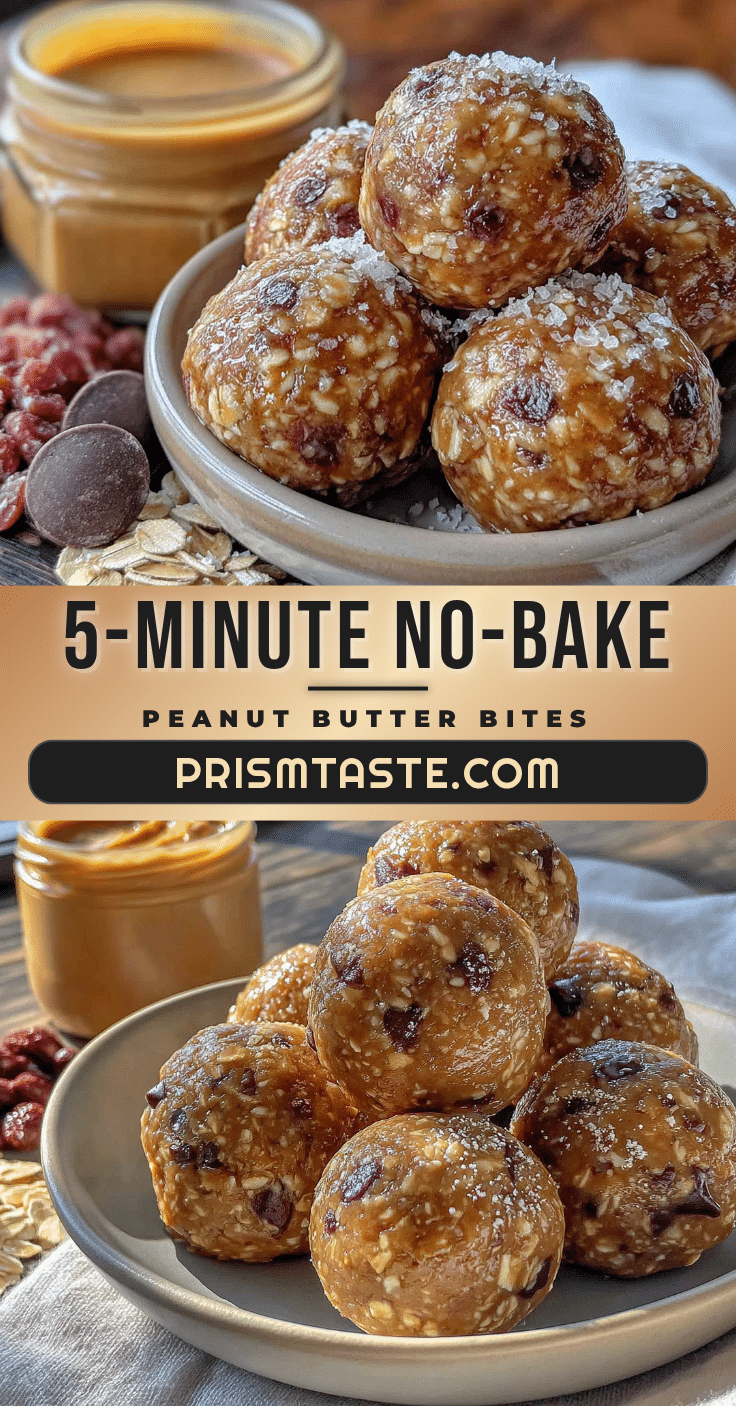
Easy No-Bake Peanut Butter Energy Balls: Best 5-Minute Recipe
These easy no-bake peanut butter protein energy balls come together in five minutes flat, use simple pantry ingredients, and taste like a peanut butter cookie that decided to be good for you. Perfect for a pre-workout bite, lunchbox treat, or late-night craving.
- Prep Time: 5 minutes
- Cook Time: 0 minutes
- Total Time: 5 minutes (plus 30 minutes chilling)
- Yield: 16-18 servings 1x
- Category: Snack
- Cuisine: American
Ingredients
- 1 cup old-fashioned rolled oats
- 1/2 cup creamy peanut butter
- 1/3 cup honey or maple syrup
- 1/4 cup vanilla protein powder
- 1/4 cup mini chocolate chips
- 1 tablespoon chia seeds or flaxseed meal (optional)
- 1/4 teaspoon sea salt
- 1–2 tablespoons water (if needed)
Instructions
- Combine the dry ingredients: In a large mixing bowl, add the rolled oats, protein powder, chia seeds (if using), and sea salt. Stir to distribute evenly.
- Add the wet ingredients: Spoon in the peanut butter and drizzle the honey (or maple syrup) over the top.
- Mix until combined: Stir with a rubber spatula or sturdy spoon until a thick, cohesive dough forms. If too dry, add water one tablespoon at a time. If too sticky, add a tablespoon more oats.
- Fold in the chocolate chips: Add the mini chocolate chips and fold gently until evenly distributed.
- Chill the dough (optional but recommended): Refrigerate for 15-20 minutes to make rolling easier.
- Roll into balls: Line a baking sheet with parchment paper. Lightly wet your hands, scoop about 1 tablespoon of dough, and roll into smooth balls. Place on prepared sheet. Repeat with remaining dough (makes about 16-18 balls).
- Press extra chocolate chips on top (optional): For presentation, press a few chocolate chips onto each ball.
- Chill to set: Refrigerate for at least 30 minutes until firm.
- Transfer to a storage container: Once set, move to an airtight container. Store in the refrigerator for up to 2 weeks or freeze for up to 3 months.
Notes
Wet your hands before rolling to prevent sticking. Chill the dough for 15-20 minutes for easier handling. Adjust water or oats based on protein powder absorbency. For best texture, serve cold from the fridge. Flavors deepen after a day in the fridge.
Nutrition
- Serving Size: 1 energy ball
- Calories: 145
- Sugar: 8
- Sodium: 85
- Fat: 7
- Saturated Fat: 2
- Carbohydrates: 16
- Fiber: 3
- Protein: 7
Keywords: no-bake energy balls, peanut butter protein balls, healthy snack, 5-minute recipe, gluten-free snack, vegan option, meal prep snack


