The whistle blew, the fridge door swung open, and I had twelve people showing up in ninety minutes. My carefully planned game day spread? A total bust. I had chips. I had a block of cheddar. And honestly? A mild panic attack brewing. The store was twenty minutes away, traffic was a nightmare, and I needed something that looked like I had my life together—fast.
That’s when I spotted the leftover pepperoni from last week’s pizza night, a half-eaten log of salami, and some random cheese ends. Not exactly a grocery ad, right? But I started arranging things on a big wooden board. Meats here, cheeses there, a little pile of crackers filling the gaps. By the time the doorbell rang, I had this massive, messy, beautiful platter that everyone went nuts over. They thought I’d planned it for days.
That chaotic afternoon taught me something important: you don’t need a perfect plan to create a showstopper. You just need a little creativity and a willingness to work with what you’ve got. This Ultimate Loaded Football Charcuterie Board for Game Day was born from that exact moment—a last-minute scramble that turned into a touchdown of a snack spread. It’s forgiving, flexible, and honestly, it makes you look like a hero without breaking a sweat. Every time I make it now, I think of that frantic afternoon and smile. It’s proof that sometimes the best things happen when you stop stressing and start building.
Why You’ll Love This Recipe
Let me tell you why this board has become my secret weapon for every game day gathering. I’ve tested this setup through three Super Bowls, two playoff games, and countless regular-season Sundays. It never fails. Here’s what makes it special:
- Completely Customizable : Use whatever meats, cheeses, and snacks you have on hand. No rigid rules here—this board adapts to your fridge and your crowd.
- Minimal Prep Time : Everything is ready in under 20 minutes. No cooking, no complicated steps, just arranging and snacking.
- Perfect for Crowds : This board feeds 8-12 people easily. It’s designed for grazing, so everyone finds something they love.
- Visually Stunning : The layered arrangement looks professionally done, even when you’re winging it. Your guests will think you spent hours.
- Dietary Friendly : Naturally gluten-free options, low-carb choices, and vegetarian-friendly sections make it easy for everyone to enjoy.
What sets this board apart from other charcuterie ideas is the balance. I’ve perfected the ratio of meats to cheeses to crunch, so every bite feels intentional. The sweet and salty contrast from grapes and prosciutto, the creamy tang of brie against sharp cheddar, the crunch of crackers with smooth hummus—it’s a flavor experience, not just a pile of snacks. Plus, I’ve included a few sneaky tricks (like folding salami into little triangles) that make it look fancy without any extra effort.
Honestly, this board has saved me more times than I can count. It’s the kind of recipe that makes you feel like a kitchen genius, even when you’re just arranging store-bought ingredients on a platter. And isn’t that what game day is all about? Looking good while having fun?
What Ingredients You Will Need
This recipe uses simple, crowd-pleasing ingredients that you can mix and match based on what’s available. The key is variety—different textures, flavors, and colors keep people coming back for more. Here’s what I typically use for my Ultimate Loaded Football Charcuterie Board for Game Day:
For the Meats
- Prosciutto (4-6 ounces): Thinly sliced, salty, and melt-in-your-mouth good. I prefer the imported Italian kind for that buttery texture.
- Salami (4-6 ounces): Hard salami or Genoa salami works great. Look for pepper-crusted varieties for extra kick.
- Pepperoni (3-4 ounces): Classic game day choice. The crispy edges and spicy flavor are always a hit.
- Capicola or Soppressata (3-4 ounces): Adds a spicy, bold option for adventurous eaters. (Optional but recommended)
For the Cheeses
- Aged Cheddar (4-6 ounces): Sharp and crumbly. I love Cabot or Beecher’s for consistent quality.
- Brie (4-6 ounces): Soft, creamy, and luxurious. Let it come to room temperature for the best spreadability.
- Gouda (4-6 ounces): Smoked gouda adds a rich, smoky flavor that pairs beautifully with apples.
- Goat Cheese Log (4 ounces): Tangy and soft. Roll it in herbs or cracked pepper for extra flair.
For the Crunch
- Crackers (1 box): Choose a mix of buttery rounds, whole wheat squares, and seeded crisps. I like Raincoast Crisps or Rustic Bakery.
- Breadsticks or Crostini (1 bag): Adds height and texture. Look for garlic-flavored or rosemary-infused options.
- Pretzels (1 cup): Mini pretzels or pretzel sticks add salt and crunch. Gluten-free versions work perfectly.
For the Fruits & Vegetables
- Grapes (1 cup): Red and green grapes add sweetness and color. Wash and dry thoroughly to prevent sogginess.
- Apple Slices (1 apple): Thinly sliced honeycrisp or granny smith. Toss in lemon juice to prevent browning.
- Dried Figs or Apricots (½ cup): Chewy and sweet. They pair wonderfully with aged cheeses.
- Cherry Tomatoes (1 cup): Halved or left whole. Adds acidity and freshness.
- Cucumber Rounds (1 cucumber): Cool and crisp. A refreshing contrast to salty meats.
For the Spreads & Accents
- Honey (¼ cup): Drizzle over brie or goat cheese. Local honey adds a lovely floral note.
- Whole Grain Mustard (¼ cup): Tangy and textured. Perfect with salami and cheddar.
- Olives (½ cup): Castelvetrano or kalamata. Briny and buttery.
- Pickles (½ cup): Cornichons or dill pickle spears. I love using our easy refrigerator dill pickles for that extra crunch.
- Nuts (½ cup): Marcona almonds or candied pecans. Adds protein and crunch.
For Garnish (Optional but Beautiful)
- Fresh Herbs: Rosemary sprigs, thyme, or edible flowers. Adds aroma and visual appeal.
- Edible Flowers: Nasturtiums or pansies. Totally optional, but they make the board look like a magazine cover.
For substitutions, feel free to swap any meat with turkey pepperoni or plant-based options. Use dairy-free cheese for a vegan-friendly section. The beauty of this board is its flexibility—don’t stress if you’re missing something. Just replace it with what you have. I’ve made this board with leftover holiday ham and random cheese ends, and it still disappeared in minutes.
Equipment Needed
You don’t need fancy tools to build a stunning charcuterie board. Here’s what I use:
- Large Wooden Board or Platter (16×20 inches or larger): A wooden cutting board, marble slab, or even a baking sheet works. The bigger, the better for spreading everything out.
- Small Bowls or Ramekins (3-4): For honey, mustard, olives, and pickles. Keeps wet ingredients from making everything soggy.
- Cheese Knives (2-3): A soft cheese knife for brie, a hard cheese knife for cheddar, and a spreader. If you don’t have them, butter knives work fine.
- Tongs or Small Forks (2-3): For serving meats and pickles. Keeps things hygienic and tidy.
- Parchment Paper or Cheese Paper: Optional, but helps with cleanup. Place under cheeses or sticky items.
- Measuring Cups and Spoons: For portioning spreads and nuts. Honestly, I eyeball it most of the time.
I’ve used everything from a marble pastry board to a clean cookie sheet. The key is having enough surface area to create visual layers. If you’re on a budget, a large white cutting board from IKEA costs under $15 and works beautifully. Pro tip: line it with parchment paper for easy cleanup, especially if you’re serving sticky honey or juicy fruits.
Preparation Method
Building this board is more about arranging than actual cooking. Follow these steps for a stunning result every time:
- Choose Your Board and Bowls (2 minutes): Select a large board or platter. Place 3-4 small bowls or ramekins in different corners of the board. Fill them with honey, mustard, olives, and pickles. This anchors your layout and creates natural separation points.
- Place the Cheeses (3 minutes): Unwrap your cheeses and place them at different spots around the board. Cut the cheddar into cubes or thin slices. Leave the brie whole (with the rind on) and place it near the honey bowl. Slice the gouda into thin wedges. Space them out so guests don’t have to reach across the board. Pro tip: place softer cheeses away from the edges so they don’t get squished.
- Add the Meats (4 minutes): Fold or roll your meats into attractive shapes. For prosciutto, fold each slice into a loose ribbon. For salami, fold slices in half, then in half again to create little triangles. Arrange them in small clusters near the cheeses. Don’t spread them evenly—clusters look more organic and inviting. Leave some space between meat groups for visual breathing room.
- Fill in with Fruits and Vegetables (3 minutes): Place grapes in small bunches (don’t separate every grape). Arrange apple slices in a fan pattern near the cheddar. Scatter cherry tomatoes and cucumber rounds in gaps. Add dried figs or apricots in small piles. The goal is to fill empty spaces with color and texture.
- Add the Crunch (3 minutes): Pour crackers into a few small piles around the board. Place breadsticks in a tall cluster for height. Scatter pretzels in the remaining gaps. Don’t overfill—leave some board surface visible for a clean, professional look.
- Add Spreads and Accents (2 minutes): Drizzle honey over the brie or goat cheese. Spoon mustard into its bowl. Add nuts in small clusters near the cheeses. Place pickles and olives in their designated bowls. Use fresh herbs as garnishes—tuck rosemary sprigs between cheese wedges or lay thyme sprigs along the board’s edge.
- Final Touches and Adjustments (2 minutes): Step back and look at your board. Fill any obvious gaps with extra crackers or fruit. Adjust clusters that look too crowded. Wipe any spills or smudges on the board. Add edible flowers for a pop of color if you have them. Your board should look abundant but not chaotic—think curated, not dumped.
Sensory cues: you should see a rainbow of colors—deep reds from salami, creamy whites from brie, bright greens from grapes, golden yellows from cheddar. The smells should be savory and inviting—salty meats, tangy cheese, sweet honey. When guests walk in, they should feel drawn to grab a plate and start exploring. That’s the magic of a well-built board.
Cooking Tips & Techniques
Over the years, I’ve learned a few things the hard way. Here are my best tips for building a board that wows:
- Let Cheeses Come to Room Temperature : Take cheeses out of the fridge 30-45 minutes before serving. Cold cheese hides its flavor. Room temperature brie is creamy and rich; cold brie is rubbery and bland. Trust me on this one.
- Fold Meats for Visual Interest : Don’t just lay slices flat. Fold prosciutto into loose ribbons, roll salami into little cones, or create pepperoni roses. It takes two extra minutes and makes the board look professionally styled.
- Use Negative Space : Don’t overcrowd the board. Leave some empty space around clusters so each ingredient stands out. A cluttered board feels overwhelming; a balanced board feels inviting.
- Balance Flavors and Textures : Pair salty meats with sweet fruits. Pair creamy cheeses with crunchy crackers. Pair tangy pickles with rich nuts. Every bite should have contrast—that’s what keeps people coming back.
- Prep Everything Before Arranging : Wash grapes, slice apples, cut cheeses, fold meats. Have everything ready before you start placing items on the board. Once you start arranging, you want to flow without stopping to wash or cut.
- Don’t Forget the Little Touches : A drizzle of honey over brie, a sprinkle of flaky salt on goat cheese, a few fresh herb sprigs. These small details elevate the board from “I threw this together” to “wow, you really outdid yourself.”
One mistake I made early on? Using too many strong flavors. I once paired blue cheese with spicy salami and pickled jalapeños—it was overwhelming. Now I balance strong cheeses (like aged cheddar or gouda) with milder options (like brie or goat cheese). Think of your board as a symphony—each ingredient should play its part without overpowering the others.
Another tip: if you’re serving this board during a game, place it in the center of the action. People will graze throughout the game, so keep it accessible. I’ve learned to refill crackers and fruits halfway through—nothing kills the vibe like an empty board during the fourth quarter.
Variations & Adaptations
This board is endlessly adaptable. Here are some of my favorite variations:
- Low-Carb/Keto Version : Skip the crackers, breadsticks, and pretzels. Replace them with cucumber rounds, bell pepper strips, and celery sticks. Add extra nuts and cheese cubes. The meats and cheeses are naturally low-carb, so this version is super easy.
- Vegetarian Version : Omit all meats. Double up on cheeses, add marinated artichoke hearts, roasted red peppers, and grilled vegetables. Include hummus or baba ganoush as a spread. This version is hearty and satisfying without any meat.
- Spicy Game Day Version : Add spicy salami, pepper jack cheese, jalapeño-stuffed olives, and a chipotle honey drizzle. Include pickled jalapeños and spicy mustard. This version is perfect for crowds who love heat.
- Sweet and Savory Version : Include dark chocolate squares, candied pecans, dried cherries, and fig jam. Pair with aged gouda and prosciutto. The sweet-savory combo is irresistible.
- Breakfast Charcuterie Board : Swap meats for bacon and breakfast sausage. Add mini pancakes, fresh berries, yogurt dip, and maple syrup. Perfect for brunch game days.
I once made a Mediterranean-inspired version with feta, olives, hummus, pita chips, and grilled lamb meatballs. It was a huge hit, especially with guests who were tired of traditional game day snacks. Don’t be afraid to experiment—the best boards come from playing with flavors you love.
Serving & Storage Suggestions
Serve this board at room temperature for the best flavor. Arrange it on a large table where guests can gather around. Provide small plates, napkins, and individual cheese knives for each cheese type. I like to set out small bowls for discarded olive pits and pickle ends.
For beverages, pair with:
- Beer : IPA or pale ale cuts through rich cheeses. Light lager works with salty meats.
- Wine : Crisp Sauvignon Blanc or fruity Pinot Noir. Rosé is always a crowd-pleaser.
- Cocktails : A classic margarita or whiskey sour complements the savory elements beautifully.
- Non-Alcoholic : Sparkling water with lemon or a brown sugar cinnamon apple cider spritzer adds a festive touch.
Storage instructions: Cover the board tightly with plastic wrap and refrigerate for up to 24 hours. However, some items don’t store well once arranged. Grapes can make crackers soggy, and cut apples will brown. I recommend storing components separately if you’re prepping ahead. Meats and cheeses can be wrapped and refrigerated for 3-4 days. Crackers and nuts stay fresh in airtight containers for weeks.
Reheating isn’t necessary for most items, but if you’re serving brie, you can warm it in the oven at 350°F for 5-7 minutes until soft. Drizzle with honey and top with fresh thyme for an extra-special touch.
Flavors actually improve over time as cheeses and meats meld together. If you’re making this board for a party, assemble it 1-2 hours before serving and let it sit at room temperature. The cheeses soften, the meats relax, and everything becomes more cohesive.
Nutritional Information & Benefits
This board is designed for sharing, so portion sizes vary. Here’s an estimated breakdown per serving (assuming 10 servings):
- Calories : 350-450 per serving
- Protein : 15-20g
- Fat : 25-30g
- Carbohydrates : 15-20g
- Fiber : 3-5g
- Sugar : 8-12g (from fruits and honey)
Health benefits: This board offers a balance of protein from meats and cheeses, healthy fats from nuts and olives, and antioxidants from fruits and vegetables. Grapes contain resveratrol, which supports heart health. Nuts provide omega-3 fatty acids and vitamin E. Cheese offers calcium and protein. The variety encourages mindful eating—you naturally eat less when you’re grazing on diverse flavors.
Dietary considerations: This recipe is naturally gluten-free if you skip crackers and pretzels. It’s low-carb friendly with the right modifications. For dairy-free options, use plant-based cheeses and skip the honey (use agave instead). Potential allergens include dairy, nuts, and gluten (from crackers). Always label ingredients clearly for guests with allergies.
My personal take? This board is about balance. It’s indulgent enough for game day celebrations but flexible enough to include healthier options like fresh vegetables and lean meats. I love that guests can choose their own adventure—loading up on veggies one round and indulging in brie the next.
Conclusion
This Ultimate Loaded Football Charcuterie Board for Game Day has become my go-to for every big game, and I hope it becomes yours too. It’s forgiving, flexible, and always impressive—whether you’re hosting a Super Bowl party or a casual Sunday gathering. The best part? You can customize it to fit your crowd, your fridge, and your mood. No stress, no complicated recipes, just delicious food that brings people together.
I love how this board turns a simple snack into an event. It encourages conversation, grazing, and sharing—exactly what game day is all about. Plus, it’s a great way to use up odds and ends from your fridge. Honestly, some of my best boards have come from random leftovers.
So go ahead and build your own masterpiece. Start with the basics, experiment with flavors, and make it your own. And when your guests rave about it (they will), just smile and say you threw it together. That’s the beauty of this recipe—it makes you look like a pro, even when you’re winging it.
I’d love to see your boards! Share your creations in the comments below, or tag me on social media. What’s your favorite game day snack? Let me know—I’m always looking for new ideas. Until next time, happy snacking!
Frequently Asked Questions
How far in advance can I assemble the charcuterie board?
You can assemble the board 1-2 hours before serving. Keep it covered with plastic wrap in the refrigerator until 30 minutes before guests arrive. Let it sit at room temperature before serving for the best flavor. If you’re prepping components separately, meats and cheeses can be sliced and stored for 2-3 days ahead.
Can I make this board vegetarian or vegan?
Absolutely! For a vegetarian version, skip the meats and double up on cheeses, fruits, nuts, and vegetables. Add marinated artichokes, roasted red peppers, and hummus. For a vegan version, use plant-based cheeses, skip honey (use agave), and load up on fresh vegetables, nuts, and crackers. The board will still be beautiful and satisfying.
What if I don’t have a large board?
No problem! Use a large baking sheet, a clean cutting board, or even a pizza pan. You can also use multiple smaller boards or plates arranged together. The key is having enough surface area to spread everything out. If you’re using a smaller board, just reduce the quantities proportionally.
How do I keep the board from getting messy?
Use small bowls for sticky or wet items like honey, olives, and pickles. Place them in different corners of the board to create natural separation. Keep fruits like grapes and cherry tomatoes away from crackers to prevent sogginess. Wipe the board clean before adding new items. A little organization goes a long way.
What are the best cheeses for a charcuterie board?
I recommend a mix of textures and flavors: one soft cheese (brie or goat cheese), one hard cheese (aged cheddar or gouda), one blue cheese (optional, for adventurous eaters), and one mild cheese (havarti or mozzarella). This variety ensures there’s something for everyone. Let cheeses come to room temperature for the best taste.
Pin This Recipe!
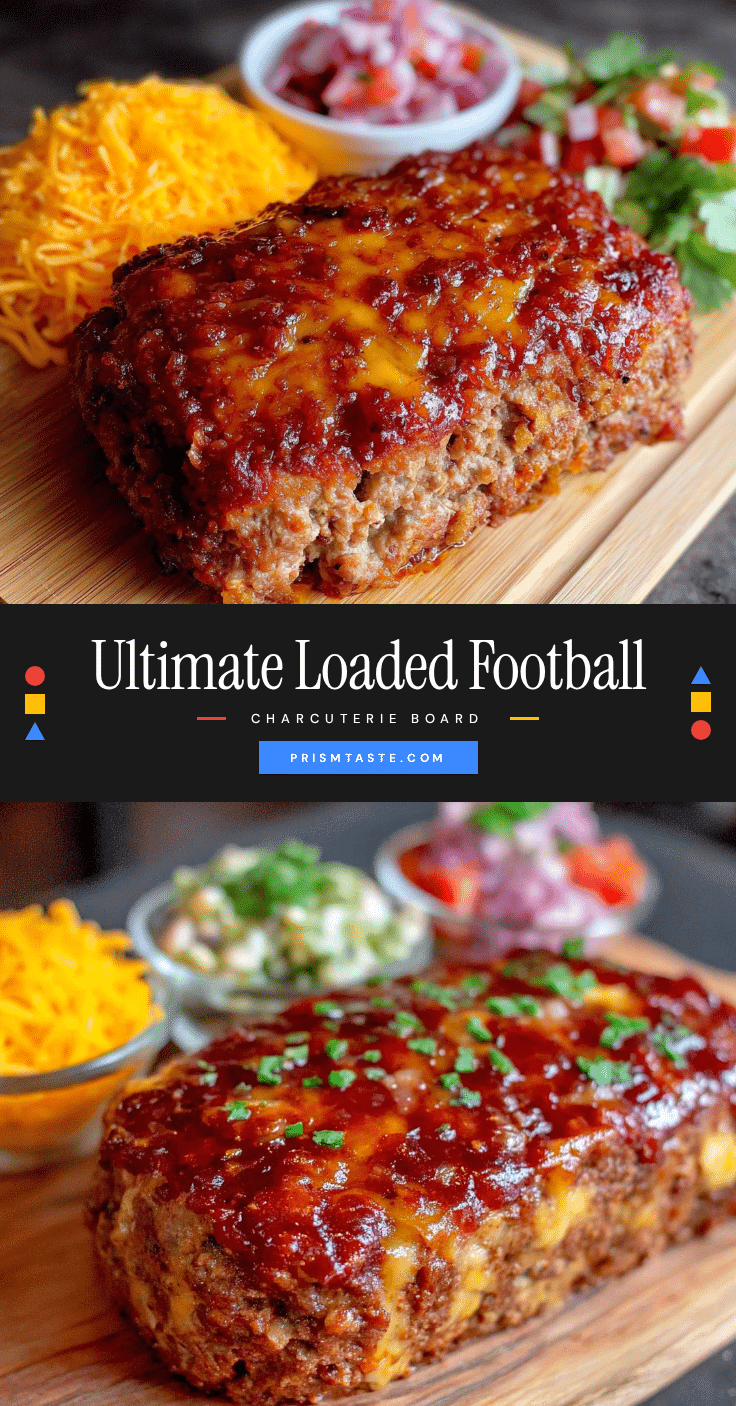
Ultimate Loaded Football Charcuterie Board for Easy Game Day
A forgiving, flexible, and visually stunning charcuterie board perfect for game day gatherings. It’s ready in under 20 minutes and feeds 8-12 people, with a perfect balance of meats, cheeses, fruits, and crunch.
- Prep Time: 20 minutes
- Cook Time: 0 minutes
- Total Time: 20 minutes
- Yield: 8-12 servings 1x
- Category: Appetizer
- Cuisine: American
Ingredients
- 4–6 ounces prosciutto
- 4–6 ounces salami
- 3–4 ounces pepperoni
- 3–4 ounces capicola or soppressata (optional)
- 4–6 ounces aged cheddar
- 4–6 ounces brie
- 4–6 ounces gouda
- 4 ounces goat cheese log
- 1 box crackers (mix of buttery rounds, whole wheat squares, seeded crisps)
- 1 bag breadsticks or crostini
- 1 cup mini pretzels or pretzel sticks
- 1 cup red and green grapes
- 1 apple (honeycrisp or granny smith), thinly sliced
- 1/2 cup dried figs or apricots
- 1 cup cherry tomatoes
- 1 cucumber, sliced into rounds
- 1/4 cup honey
- 1/4 cup whole grain mustard
- 1/2 cup olives (Castelvetrano or kalamata)
- 1/2 cup pickles (cornichons or dill pickle spears)
- 1/2 cup nuts (Marcona almonds or candied pecans)
- Fresh herbs (rosemary sprigs, thyme) for garnish
- Edible flowers (nasturtiums or pansies) for garnish (optional)
Instructions
- Choose a large board or platter. Place 3-4 small bowls or ramekins in different corners and fill with honey, mustard, olives, and pickles.
- Unwrap cheeses and place them at different spots around the board. Cut cheddar into cubes or thin slices. Leave brie whole with rind on near the honey bowl. Slice gouda into thin wedges. Space cheeses out.
- Fold or roll meats into attractive shapes: fold prosciutto into loose ribbons, fold salami slices in half twice to create triangles. Arrange in small clusters near cheeses.
- Place grapes in small bunches. Arrange apple slices in a fan pattern near cheddar. Scatter cherry tomatoes and cucumber rounds in gaps. Add dried figs or apricots in small piles.
- Pour crackers into small piles around the board. Place breadsticks in a tall cluster. Scatter pretzels in remaining gaps. Leave some board surface visible.
- Drizzle honey over brie or goat cheese. Spoon mustard into its bowl. Add nuts in small clusters near cheeses. Place pickles and olives in their bowls. Garnish with fresh herbs.
- Step back and adjust: fill gaps with extra crackers or fruit, adjust crowded clusters, wipe spills. Add edible flowers if desired.
Notes
Let cheeses come to room temperature 30-45 minutes before serving for best flavor. Fold meats for visual interest. Use negative space to avoid overcrowding. Balance flavors and textures. Prep everything before arranging. Don’t forget little touches like honey drizzle or fresh herbs. For a low-carb version, replace crackers with cucumber rounds and bell pepper strips. For a vegetarian version, omit meats and double up on cheeses and vegetables.
Nutrition
- Serving Size: 1 serving (based on
- Calories: 350450
- Sugar: 812
- Sodium: 600800
- Fat: 2530
- Saturated Fat: 1015
- Carbohydrates: 1520
- Fiber: 35
- Protein: 1520
Keywords: charcuterie board, game day snack, football party, easy appetizer, no-cook recipe, crowd-pleaser


