“You have to try this peppermint bark fudge I made—it’s dangerous,” my sister-in-law texted me last December, along with a blurry photo of something swirled and glossy on a parchment-lined plate. I didn’t respond right away because, honestly, I was skeptical. I’d made peppermint bark before—the kind where you layer melted chocolate and crushed candy canes, and it looks pretty but tastes like a sugar headache waiting to happen. But she kept sending updates. “It took me five minutes.” “I’m eating it straight from the fridge at 11 p.m.” “I’m not even sorry.” So I caved and asked for the recipe, and what she sent back was less of a formal recipe and more of a breathless voice note about melted chocolate chips, a swirl of fudge, and crushed candy canes. That was it. No double boiler. No tempering chocolate. No fuss.
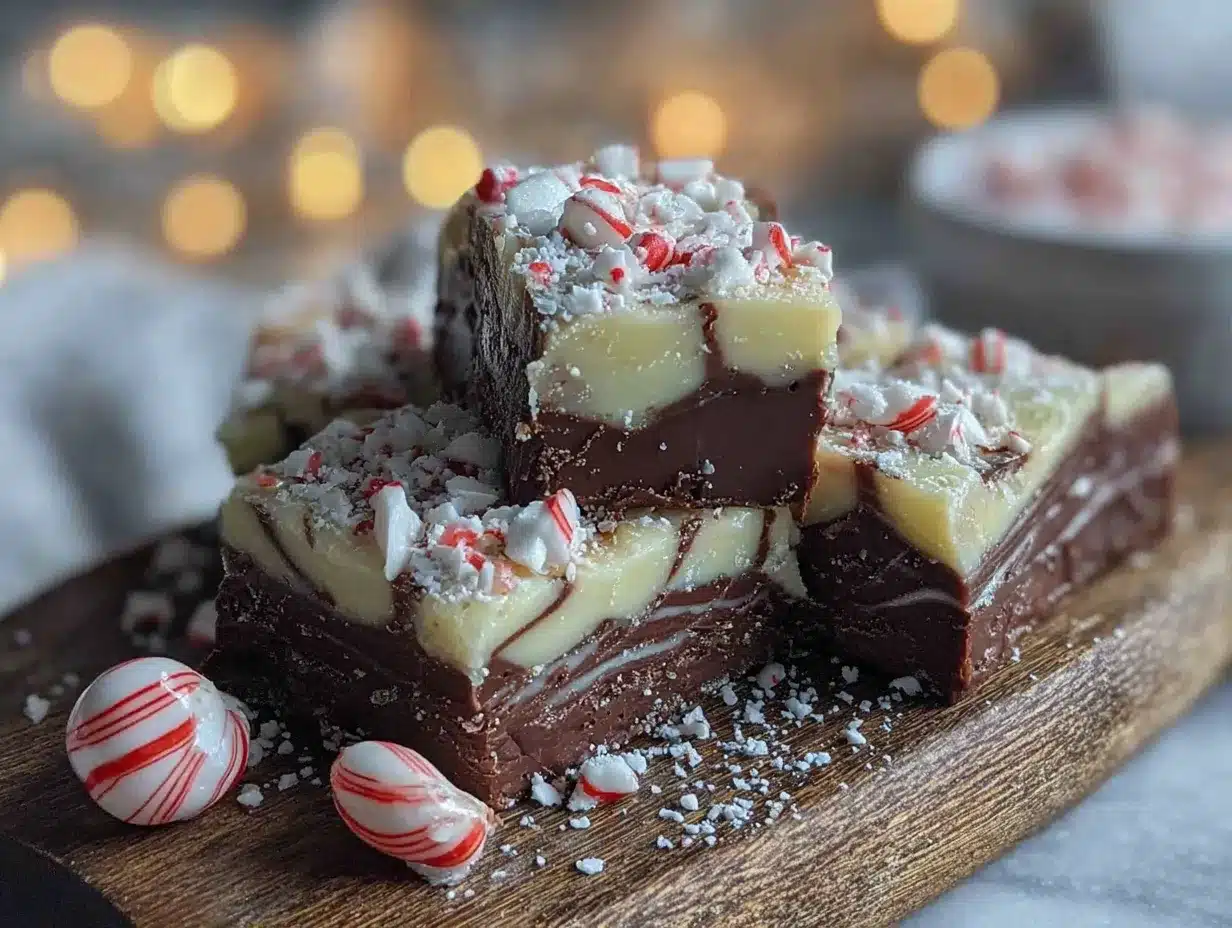
I made my first batch that weekend, and I haven’t stopped since. The thing about this Easy Peppermint Bark Fudge Swirl is that it doesn’t try to be fancy. It’s just good—rich, creamy, with that cool peppermint bite and a fudge swirl that cuts through the sweetness just enough. It’s the kind of holiday treat that makes people hover around the kitchen counter, grabbing “just one more piece” until the whole tray is gone. And honestly? That’s exactly what I want from a holiday dessert. No complicated steps, no special equipment, just something that tastes like you spent hours on it when you really didn’t.
There’s something quietly satisfying about a recipe that delivers on its promise. This one does. It’s the kind of thing you’ll find yourself making for cookie swaps, for hostess gifts, for those nights when you need a little holiday magic without the holiday stress. And once you taste that first creamy, crunchy, minty bite, you’ll understand why I keep coming back to it year after year.
Why You’ll Love This Recipe
Let me tell you why this Easy Peppermint Bark Fudge Swirl has become my go-to holiday dessert—and why it’ll probably become yours too. I’ve tested this recipe more times than I can count, tweaking the ratios, trying different chocolates, and even accidentally freezing a batch (which actually turned out great, but we’ll get to that).
- Ready in 5 Minutes : No, seriously. From start to finish, you’re looking at about five minutes of active work. The hardest part is unwrapping the candy canes.
- Simple Ingredients : You probably have most of these in your pantry right now. Chocolate chips, sweetened condensed milk, peppermint extract, and candy canes. That’s it.
- Perfect for Holiday Gifting : This stuff looks beautiful wrapped up in a little cellophane bag with a ribbon. People think you went to a fancy chocolatier.
- Crowd-Pleaser : I’ve brought this to three different holiday parties this year, and every single time, someone asked for the recipe before they even finished their first piece.
- No-Bake, No-Fuss : No oven required, no candy thermometer, no tempering chocolate. If you can stir, you can make this.
What makes this recipe different from all the other peppermint bark recipes out there? It’s the fudge swirl. Most recipes just layer white and dark chocolate with peppermint on top, which is fine—but this one has a ribbon of creamy fudge running through it that adds this incredible richness and texture. It’s not just bark anymore; it’s fudge and bark in one perfect bite. And that fudge swirl? It keeps the whole thing from being too sweet, balancing out the candy cane crunch with something deeply chocolatey and smooth.
This is the kind of recipe that makes you close your eyes after the first bite. It’s comfort food reimagined for the holidays—faster, simpler, but with the same soul-soothing satisfaction. Perfect for impressing guests without stress, or turning a simple evening into something memorable.
What Ingredients You Will Need
This recipe uses simple, straightforward ingredients to deliver that perfect balance of creamy chocolate, cool peppermint, and crunchy candy cane. Most of these are pantry staples during the holiday season, and none of them require a special trip to a gourmet store.
For the Chocolate Base
- 2 cups (340g) semi-sweet chocolate chips – I prefer Ghirardelli or Guittard for the smoothest melt, but any good-quality brand works. The semi-sweet gives you that rich chocolate flavor without being too bitter or too sweet.
- 1 can (14 oz / 397g) sweetened condensed milk – This is non-negotiable. Don’t substitute evaporated milk or regular milk—the condensed milk is what gives the fudge its creamy, melt-in-your-mouth texture. I’ve tried making this with homemade condensed milk before, and honestly, just buy the can.
- 1 teaspoon vanilla extract – Pure vanilla extract adds warmth and depth. Imitation vanilla works in a pinch, but pure is better here.
- ¼ teaspoon salt – A little salt balances the sweetness and makes the chocolate flavor pop. Don’t skip it.
For the White Chocolate Layer
- 2 cups (340g) white chocolate chips – Look for white chocolate that contains cocoa butter (real white chocolate), not white confectionery coating. Ghirardelli and Lindt are my go-to brands. The white chocolate layer is what carries the peppermint flavor, so quality matters here.
- 1 tablespoon coconut oil or vegetable shortening – This helps the white chocolate melt smoothly and gives it that nice snap when you break the bark. Coconut oil adds a subtle flavor that works beautifully with the peppermint, but vegetable shortening is totally fine if that’s what you have.
- 1 teaspoon peppermint extract – Start with 1 teaspoon, taste, and add more if you want a stronger mint kick. I usually go with 1½ teaspoons because I love that cool, tingly feeling. Make sure you’re using peppermint extract, not spearmint—they’re different, and spearmint will give you more of a toothpaste vibe than a holiday treat.
For the Fudge Swirl
- ½ cup (85g) semi-sweet chocolate chips – You’ll melt these separately to create the fudge ribbon that gets swirled through the white chocolate layer.
- 1 tablespoon heavy cream – This thins out the melted chocolate just enough to make it swirlable. If you don’t have heavy cream, you can use whole milk or even a splash of coconut milk.
For the Topping
- ½ cup (about 4-5 candy canes) crushed candy canes or peppermint candies – I like to crush mine in a zip-top bag with a rolling pin. It’s cathartic, and the kids love helping. You want a mix of fine dust and small chunks for the best texture. Avoid crushing them into a powder—you want some crunch.
- Optional: ¼ cup white chocolate chips for drizzling – This is purely decorative, but it makes the bark look extra fancy with almost no effort.
Equipment Needed
You don’t need a lot of fancy equipment for this Easy Peppermint Bark Fudge Swirl, which is part of what makes it so great. Here’s what you’ll need:
- 8×8-inch baking pan – A square pan gives you the perfect thickness for bark. If you only have a 9×13, you’ll get thinner pieces, which are still delicious but might be more delicate.
- Parchment paper – This is your best friend for easy removal. Don’t use wax paper—it can melt or stick. Parchment paper creates a sling that lets you lift the whole block of bark out cleanly.
- Medium microwave-safe bowls – You’ll need one for the fudge base and one for the white chocolate layer. Glass or ceramic works best.
- Rubber spatula – For stirring and spreading. A silicone spatula is ideal because it won’t scratch your bowls and it gets every last bit of chocolate.
- Small knife or skewer – For creating the fudge swirl pattern. A toothpick works too, but a small knife gives you wider, more dramatic swirls.
- Rolling pin or meat mallet – For crushing the candy canes. You can also use a food processor, but I find the manual method gives you more control over the texture.
- Zip-top bag – For containing the candy cane pieces while you crush them. Double-bag if you’re worried about punctures—those candy cane shards can be sharp!
If you don’t have an 8×8 pan, you can use a loaf pan for thicker pieces or a small sheet pan for thinner, more delicate bark. Just adjust the chilling time slightly. And if you’re using a metal pan, that’s fine—just make sure the parchment paper overhangs on two sides so you can lift the bark out easily. I learned that lesson the hard way after spending ten minutes trying to pry a stuck block of fudge out of a pan. Not my finest moment.
Preparation Method
Alright, let’s make this Easy Peppermint Bark Fudge Swirl. I’ll walk you through every step, including what to look for and what to avoid. Trust me on this one—it’s simpler than you think.
Step 1: Prepare Your Pan
Line your 8×8-inch baking pan with parchment paper, leaving about 2 inches of overhang on two opposite sides. This creates a sling that will let you lift the finished bark out cleanly. Lightly spray the parchment with non-stick cooking spray if you’re worried about sticking, though I’ve found it’s usually not necessary with the fudge base.
Step 2: Make the Fudge Base
In a medium microwave-safe bowl, combine 2 cups of semi-sweet chocolate chips and the entire can of sweetened condensed milk. Microwave in 30-second intervals, stirring well after each, until the chocolate is completely melted and the mixture is smooth and glossy. This usually takes about 1½ to 2 minutes total. Don’t overheat it—chocolate can seize up if it gets too hot, and nobody wants grainy fudge. Stir in the vanilla extract and salt until everything is well combined.
The mixture should be thick but pourable, like a very rich hot fudge sauce. If it looks too thick, you can microwave it for another 10 seconds, but honestly, it should be just right. Pour this into your prepared pan and spread it evenly with a rubber spatula. Pop it in the fridge while you work on the next layer—about 10 minutes should do it. You want the fudge to be set but not rock hard.
Step 3: Make the White Chocolate Layer
In another medium microwave-safe bowl, combine the white chocolate chips and coconut oil (or vegetable shortening). Microwave in 30-second intervals, stirring after each, until smooth and fully melted. White chocolate is more delicate than dark chocolate, so be extra careful not to overheat it. If it looks lumpy or grainy, you’ve gone too far—start over with fresh chips.
Once the white chocolate is smooth, stir in the peppermint extract. Give it a taste—you want a distinct peppermint flavor that’s pleasant but not overpowering. If it’s not minty enough, add another ¼ teaspoon. Set this aside while you prepare the fudge swirl mixture.
Step 4: Make the Fudge Swirl
In a small microwave-safe bowl, combine the ½ cup of semi-sweet chocolate chips with the heavy cream. Microwave in 15-second intervals, stirring after each, until smooth and slightly runny. You want this to be thin enough to drizzle and swirl, but not so thin that it just sinks into the white chocolate layer. If it’s too thick, add another teaspoon of cream.
Step 5: Assemble and Swirl
Remove the pan from the fridge. The fudge base should be firm but not completely hard—it should feel set to the touch but still have a little give. Pour the white chocolate mixture over the fudge base and spread it evenly with your spatula.
Now for the fun part. Dollop the fudge swirl mixture in small spoonfuls across the surface of the white chocolate layer. You want about 8-10 dollops spaced evenly apart. Using a small knife or skewer, drag the tip through the dollops in a figure-eight or zigzag pattern to create swirls. Don’t over-swirl—you want distinct ribbons of fudge running through the white chocolate, not one muddy brown mess. Three or four passes is plenty.
Sprinkle the crushed candy canes evenly over the top before the white chocolate sets. Press them in gently with your fingers so they stick. If you’re adding the optional white chocolate drizzle, wait until after the bark has chilled.
Step 6: Chill and Set
Place the pan in the refrigerator for at least 2 hours, or until the bark is completely firm to the touch. I usually let it go for 3 hours to be safe. If you’re in a hurry, you can pop it in the freezer for 45 minutes to an hour, but watch it carefully—you don’t want it to freeze.
Once set, use the parchment sling to lift the bark out of the pan. Place it on a cutting board and let it sit at room temperature for about 5 minutes before cutting—this prevents the chocolate from cracking or shattering. Use a sharp knife to cut it into pieces. I like irregular, rustic shapes for a more homemade look, but you can cut clean squares if you’re feeling precise. A large chef’s knife works best; a serrated knife can leave jagged edges.
Cooking Tips & Techniques
I’ve made this Easy Peppermint Bark Fudge Swirl more times than I can count, and I’ve definitely learned a few things along the way. Here are my best tips for getting it right every time.
Don’t Overheat the Chocolate
This is the number one mistake I see people make. Chocolate is temperamental—it can go from perfectly melted to grainy and seized in seconds. Always microwave in short bursts and stir thoroughly between each one. If your chocolate does seize (turns thick and lumpy), you can try adding a teaspoon of coconut oil or vegetable shortening and stirring vigorously. Sometimes it’ll come back, but honestly, it’s usually better to start over.
Room Temperature Ingredients Matter
I know, I know—it’s annoying to wait for ingredients to come to room temperature. But here’s the thing: cold ingredients can cause your melted chocolate to seize or become grainy. Take the sweetened condensed milk out of the fridge about 30 minutes before you start. The heavy cream for the swirl should also be at room temperature.
Get the Swirl Right
The fudge swirl is what makes this recipe special, but it’s easy to overdo it. Less is more here. You want distinct ribbons of dark chocolate running through the white layer, not a muddy mess. I use a small knife and make just three or four passes through the dollops. If you swirl too much, the two colors blend together and you lose that beautiful contrast.
Crush Candy Canes the Right Way
Put the candy canes in a zip-top bag, squeeze out all the air, and seal it. Then wrap the bag in a kitchen towel and use a rolling pin or meat mallet to crush them. This contains the mess and prevents the candy from flying everywhere. You want a mix of fine dust and small chunks—the dust provides color and flavor throughout, while the chunks give you that satisfying crunch. If you crush them too fine, you lose the texture.
Cut at the Right Temperature
This is crucial. If you cut the bark straight out of the fridge, it’ll shatter and crack. Let it sit at room temperature for 5-10 minutes before cutting. The bark should feel firm but not brittle. Use a sharp chef’s knife and wipe it clean between cuts for the cleanest edges.
Variations & Adaptations
One of the best things about this Easy Peppermint Bark Fudge Swirl is how customizable it is. Here are some of my favorite variations.
Dark Chocolate Lovers’ Version
Swap the semi-sweet chocolate chips in the fudge base for dark chocolate (60-70% cacao). This gives the fudge a deeper, more intense chocolate flavor that pairs beautifully with the cool peppermint. You might need to add an extra tablespoon of sweetened condensed milk to keep the texture creamy, since dark chocolate has less cocoa butter.
Milk Chocolate Version
If you prefer a sweeter, creamier fudge, use milk chocolate chips instead of semi-sweet. The result is a more kid-friendly version that’s almost like a chocolate bar. Just be aware that milk chocolate can be softer, so the bark might not have quite as clean a snap when you break it.
Peppermint-Free Option
I know, it sounds weird, but hear me out. If you’re making this for someone who doesn’t like peppermint (they exist, apparently), you can leave out the peppermint extract and use vanilla extract in the white chocolate layer instead. Top it with crushed toffee bits or chopped nuts for a different kind of crunch. It’s essentially a chocolate fudge swirl bark, and it’s still absolutely delicious.
Vegan Adaptation
Use dairy-free chocolate chips (Enjoy Life makes great ones), full-fat coconut milk instead of sweetened condensed milk (you can buy vegan sweetened condensed milk or make your own), and coconut oil instead of heavy cream. The texture will be slightly different—a bit softer and more melt-in-your-mouth—but it’s still incredibly good. I’ve made this for a vegan friend’s holiday party and it disappeared faster than the regular version.
Extra Peppermint Kick
For those of us who can’t get enough of that cool, tingly peppermint flavor, add an extra ½ teaspoon of peppermint extract to the white chocolate layer and sprinkle a little more crushed candy cane on top. You can also add a drop of peppermint oil (not extract) for an even more intense flavor, but be careful—peppermint oil is much stronger and a little goes a long way.
Serving & Storage Suggestions
This Easy Peppermint Bark Fudge Swirl is best served cold or at cool room temperature. I personally prefer it straight from the fridge—the fudge is firmer, the white chocolate has a satisfying snap, and the peppermint flavor is more pronounced. If you let it sit out too long, the bark can become soft and sticky, especially in a warm room.
For serving, arrange the pieces on a festive platter or in a decorative tin. It makes a gorgeous addition to a holiday dessert table, cookie tray, or gift basket. I like to pair it with a cup of hot cocoa or a peppermint mocha—the combination is pure holiday magic. If you’re serving it alongside other desserts, try it with a batch of brown butter pumpkin chocolate chip cookies for a truly over-the-top holiday spread.
Storage: Store the bark in an airtight container in the refrigerator for up to 2 weeks. Layer the pieces between sheets of parchment or wax paper to prevent them from sticking together. If you live in a humid climate, definitely keep it in the fridge—the candy canes can get sticky otherwise.
Freezing: This bark freezes beautifully. Place the pieces in a single layer on a baking sheet and freeze for 1 hour, then transfer to a freezer-safe container or zip-top bag. It’ll keep for up to 3 months. Thaw in the refrigerator overnight before serving. I actually kind of love eating it straight from the freezer—it’s like a frozen peppermint chocolate bar, and the texture is incredible.
Reheating: You don’t need to reheat this—it’s meant to be served cold. But if you want to add a warm element, try serving it alongside a warm beverage or drizzling a little warm caramel sauce over the top before serving. The contrast between the cold bark and warm sauce is amazing.
One thing I’ve noticed: the flavors actually develop and deepen after a day or two in the fridge. The peppermint mellows out and melds with the chocolate in a really lovely way. So if you can resist eating it all on day one, you’ll be rewarded on day two.
Nutritional Information & Benefits
Let’s be real—this is a holiday treat, not a health food. But I believe in enjoying things in moderation, and this Easy Peppermint Bark Fudge Swirl is absolutely worth every bite. Here’s the estimated nutritional breakdown per piece (assuming 16 pieces per batch):
| Nutrient | Amount per Piece |
|---|---|
| Calories | 210 |
| Total Fat | 11g |
| Saturated Fat | 7g |
| Cholesterol | 10mg |
| Sodium | 45mg |
| Total Carbohydrates | 28g |
| Dietary Fiber | 1g |
| Sugars | 24g |
| Protein | 2g |
Now, let’s talk about the silver lining. Dark chocolate (the semi-sweet chips we use in the fudge base) contains antioxidants called flavonoids, which can support heart health and reduce inflammation. Peppermint has been shown to aid digestion and can help soothe an upset stomach—which, let’s be honest, comes in handy during the holiday season when we’re all eating a little more than usual. And the candy canes? Well, they make you happy. That counts for something, right?
This recipe is naturally vegetarian and can be made gluten-free by using certified gluten-free candy canes (most are, but it’s worth checking the label). It’s also nut-free if you use the basic recipe without any nut-based add-ins. If you’re looking for a dairy-free option, check out the vegan adaptation in the variations section above.
My personal philosophy? Life is short. Eat the fudge. Just maybe don’t eat the whole pan in one sitting—though I won’t judge you if you do.
Conclusion
There’s a reason this Easy Peppermint Bark Fudge Swirl has become my most-requested holiday recipe. It’s simple enough to make on a busy weeknight, impressive enough to bring to any party, and delicious enough to disappear in minutes. The combination of creamy fudge, cool peppermint, and crunchy candy cane is just… perfect. It’s the kind of treat that makes you feel like you’ve done something special, even when all you really did was melt some chocolate and stir.
I love that this recipe invites you to make it your own. Want more peppermint? Add it. Prefer dark chocolate? Swap it. Need a vegan version? Done. This isn’t a rigid, fussy recipe—it’s a starting point for your own holiday tradition. And honestly, that’s what cooking should be about. Not perfection, but joy.
So go ahead, give this a try. Make a batch for your next holiday gathering, or just for yourself on a cozy December evening. And when you do, I’d love to hear about it—leave a comment below and tell me how it turned out. Did you add your own twist? Did it disappear faster than expected? Did you have to hide some in the freezer so your family wouldn’t eat it all? I want to know.
Happy holidays, friends. Here’s to sweet moments, simple recipes, and the people we share them with. Now go make some fudge.
Frequently Asked Questions
Can I use white chocolate melting wafers instead of white chocolate chips?
Yes, you can! Melting wafers (like Wilton’s Candy Melts) actually melt more smoothly than white chocolate chips because they contain stabilizers. The flavor isn’t quite as rich as real white chocolate, but the texture is great and they’re very forgiving. Just skip the coconut oil if you’re using melting wafers—they’re already formulated to melt smoothly on their own.
My fudge turned out grainy. What went wrong?
Grainy fudge is usually caused by overheating the chocolate or getting water into the melted chocolate. Make sure your bowls and utensils are completely dry before you start, and always microwave in short bursts. If you’re using a double boiler, make sure the water isn’t boiling and that no steam gets into the chocolate. If all else fails, a tablespoon of coconut oil stirred into the grainy mixture can sometimes smooth it out.
How do I crush candy canes without making a huge mess?
The zip-top bag and rolling pin method is my go-to. Put the candy canes in a sturdy zip-top bag, squeeze out all the air, seal it, and wrap it in a kitchen towel. Then go to town with a rolling pin or meat mallet. The towel catches any punctures and muffles the noise. If you want a more uniform crush, you can pulse them in a food processor, but be careful not to overdo it—you want chunks, not powder.
Can I make this ahead of time for a holiday party?
Absolutely! This is one of those recipes that actually gets better after a day or two in the fridge. The flavors meld together and the texture firms up beautifully. I usually make mine 2-3 days ahead of time and keep it in an airtight container in the refrigerator. Just let it sit at room temperature for 5-10 minutes before cutting and serving.
Why did my white chocolate seize up and turn lumpy?
White chocolate is more delicate than dark or milk chocolate because it contains milk solids and sugar that can easily scorch or seize. The most common causes are overheating (microwaving too long or at too high a power) or getting even a drop of water into the chocolate. Always microwave at 50% power in short bursts, and make sure your bowl and spatula are completely dry. If it does seize, you can try adding a teaspoon of coconut oil or vegetable shortening and stirring vigorously—sometimes it’ll come back to a smooth state.
If you’re looking for another easy, crowd-pleasing dessert to add to your holiday rotation, you might also enjoy this no-churn strawberry cheesecake ice cream—it’s another no-fuss treat that looks and tastes like you spent hours on it. And if you’re in the mood for something savory to balance out all the sweets, this creamy slow cooker Tuscan white bean soup is the perfect cozy companion on a cold winter night.
Pin This Recipe!

Easy Peppermint Bark Fudge Swirl: Best 5-Minute Holiday Treat

This Easy Peppermint Bark Fudge Swirl is a quick, no-bake holiday treat that combines creamy fudge, cool peppermint, and crunchy candy canes. Ready in just 5 minutes of active time, it’s perfect for gifting or holiday parties.
- Prep Time: 5 minutes
- Cook Time: 0 minutes
- Total Time: 2 hours 5 minutes (includes chilling)
- Yield: 16 servings 1x
- Category: Dessert
- Cuisine: American
Ingredients
- 2 cups (340g) semi-sweet chocolate chips
- 1 can (14 oz / 397g) sweetened condensed milk
- 1 teaspoon vanilla extract
- ¼ teaspoon salt
- 2 cups (340g) white chocolate chips
- 1 tablespoon coconut oil or vegetable shortening
- 1 teaspoon peppermint extract
- ½ cup (85g) semi-sweet chocolate chips (for fudge swirl)
- 1 tablespoon heavy cream
- ½ cup (about 4–5 candy canes) crushed candy canes or peppermint candies
- Optional: ¼ cup white chocolate chips for drizzling
Instructions
- Line an 8×8-inch baking pan with parchment paper, leaving about 2 inches of overhang on two opposite sides. Lightly spray with non-stick cooking spray if desired.
- In a medium microwave-safe bowl, combine 2 cups semi-sweet chocolate chips and the entire can of sweetened condensed milk. Microwave in 30-second intervals, stirring well after each, until smooth and glossy (about 1½ to 2 minutes). Stir in vanilla extract and salt.
- Pour the fudge base into the prepared pan and spread evenly. Refrigerate for about 10 minutes until set but not rock hard.
- In another medium microwave-safe bowl, combine white chocolate chips and coconut oil. Microwave in 30-second intervals, stirring after each, until smooth. Stir in peppermint extract. Set aside.
- In a small microwave-safe bowl, combine ½ cup semi-sweet chocolate chips with heavy cream. Microwave in 15-second intervals, stirring after each, until smooth and slightly runny.
- Remove the pan from the fridge. Pour the white chocolate mixture over the fudge base and spread evenly.
- Dollop the fudge swirl mixture in small spoonfuls across the white chocolate layer (about 8-10 dollops). Use a small knife or skewer to create swirls with a figure-eight or zigzag pattern. Do not over-swirl.
- Sprinkle crushed candy canes evenly over the top and press gently to adhere. If using optional white chocolate drizzle, wait until after chilling.
- Refrigerate for at least 2 hours (or freeze for 45 minutes to 1 hour) until completely firm.
- Use the parchment sling to lift the bark out of the pan. Let sit at room temperature for 5 minutes before cutting into pieces with a sharp knife.
Notes
Store in an airtight container in the refrigerator for up to 2 weeks. Freeze for up to 3 months. Let bark sit at room temperature for 5-10 minutes before cutting to prevent cracking. For best results, use room temperature ingredients and do not overheat chocolate.
Nutrition
- Serving Size: 1 piece
- Calories: 210
- Sugar: 24
- Sodium: 45
- Fat: 11
- Saturated Fat: 7
- Carbohydrates: 28
- Fiber: 1
- Protein: 2
Keywords: peppermint bark, fudge swirl, holiday treat, no-bake dessert, 5-minute recipe, Christmas candy, easy fudge


