I had been looking for a weeknight chicken recipe that actually delivered on both promises—crispy skin and deeply flavorful meat—without a deep fryer or a complicated breading station. For a while, I just accepted that juicy thighs meant sacrificing that shatteringly crisp exterior, and crispy skin usually meant dry meat. It felt like a trade-off I had to make. Then, on a random Tuesday, with a pack of bone-in thighs thawed on the counter and a half-used stick of butter staring at me from the fridge, I decided to stop compromising.
This wasn’t some grand culinary epiphany. It was more like a quiet stubbornness. I wanted that golden, paper-thin, crackling skin that gives way to tender, almost buttery meat underneath. I wanted the whole thing to taste like garlic and butter had fused into the very bones. And honestly? I was tired of recipes that told me to pat the chicken dry and then drown it in a wet marinade. So I did the opposite. I dry-brined the skin, seared it low and slow on the stovetop, and finished it in a bath of foaming garlic butter. The result was so simple, so good, that I made it twice that week. This is that recipe. It’s not fancy, but it’s the one I keep coming back to.
Why You’ll Love This Recipe
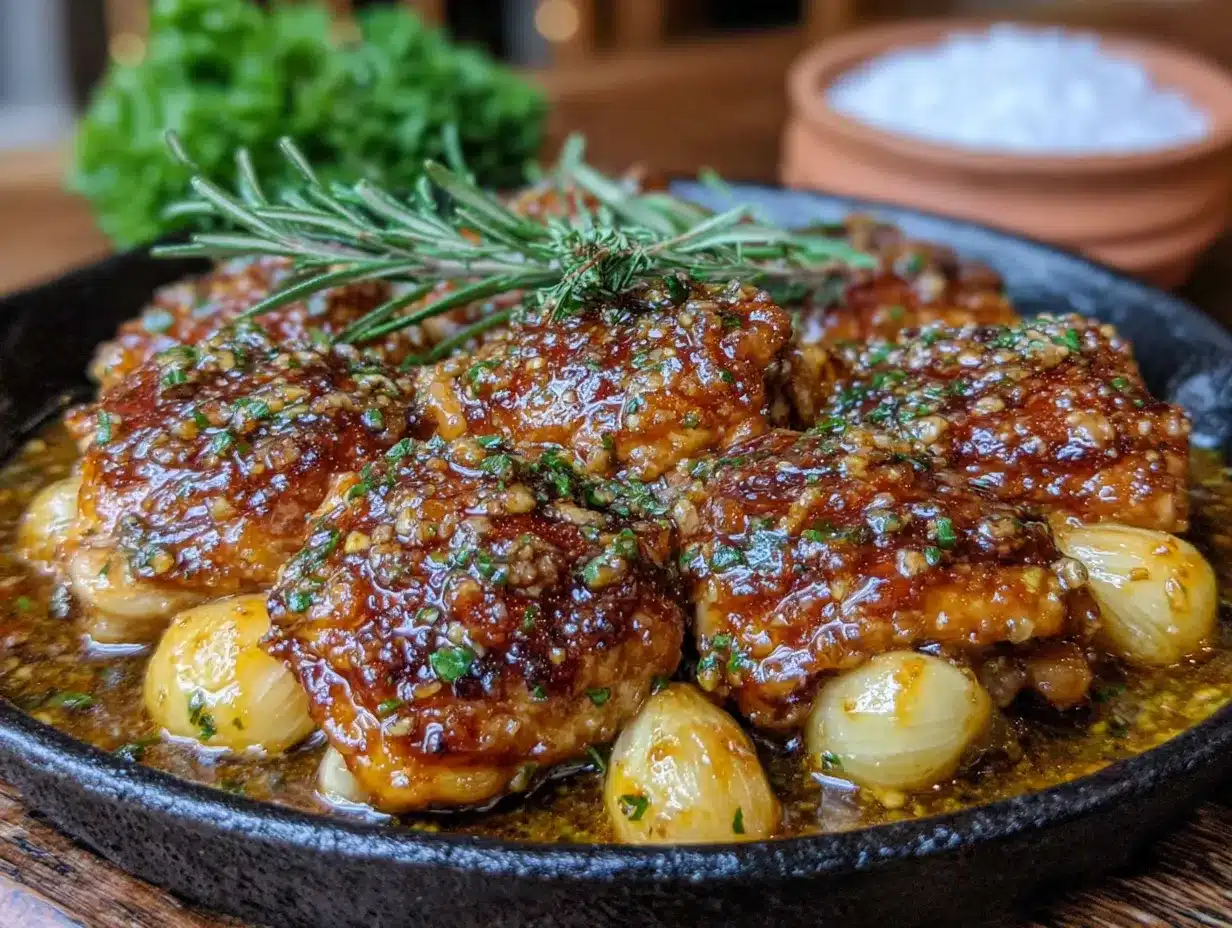
These Crispy Garlic Butter Chicken Thighs are the kind of dish that makes you look like a pro with almost no effort. The skin gets unbelievably crispy without a coating, and the garlic butter sauce does double duty—it adds flavor and keeps the meat perfectly moist.
- Simple Ingredients: You probably have garlic, butter, and chicken in your kitchen right now. No fancy trips to the store.
- One Pan Meal: Everything happens in a single skillet, which means less cleanup and more time to relax.
- Perfect for Busy Weeknights: It comes together in about 40 minutes, most of which is hands-off oven time.
- Crowd-Pleaser: I’ve served these to picky kids and serious foodies, and the plate always comes back clean.
- Unbelievably Delicious: The contrast between the crispy skin and the tender, garlic-infused meat is next-level comfort food.
What makes this recipe different is the technique. Instead of slathering the chicken in sauce, we sear it first to build that crust, then let it finish cooking in a foaming garlic butter bath. The butter bastes the skin as it renders, creating a crispness that stays crunchy even after you add the sauce. It’s not just another chicken dinner—it’s the one you’ll remember.
What Ingredients You Will Need
This recipe uses simple, wholesome ingredients to deliver bold flavor and satisfying texture without the fuss. Most are pantry staples you likely already have on hand.
- Bone-in, skin-on chicken thighs (4-6 thighs, about 2 lbs / 900g): This is non-negotiable for the crispiest skin. The bone keeps the meat juicy, and the skin is what we’re after. I prefer organic or air-chilled thighs for better texture.
- Unsalted butter (4 tablespoons / 56g): We control the salt level ourselves. Using unsalted lets the garlic and chicken shine without getting overly salty. If you only have salted, reduce the added salt by half.
- Garlic (6-8 cloves, minced): Fresh garlic is essential here. Pre-minced jarred garlic will burn and turn bitter. Take the extra minute to do it fresh—it makes a huge difference.
- Kosher salt (1 teaspoon / 5g): I use Diamond Crystal. If you use Morton’s, use about ¾ teaspoon. Salt is crucial for drawing moisture out of the skin to help it crisp.
- Black pepper (½ teaspoon / 2g): Freshly ground is best. It adds a subtle warmth that pairs beautifully with the butter.
- Garlic powder (½ teaspoon / 2g): This is my secret for extra garlic flavor without risking burnt bits. It clings to the skin and boosts the savory notes.
- Paprika (½ teaspoon / 2g): Sweet or smoked, depending on your mood. It adds color and a gentle earthiness. Smoked paprika gives a subtle bacon-like depth.
- Fresh parsley (2 tablespoons, chopped): For garnish and a pop of freshness. It cuts through the richness of the butter.
- Optional: Lemon wedges: A squeeze of lemon right before serving brightens everything up. I never skip it.
Ingredient Selection Tip: Look for chicken thighs that have the skin still attached and intact. If the skin is torn, it will shrink and expose the meat, leading to dryness. I also recommend letting the chicken sit uncovered in the fridge for an hour after salting—this dries the skin further for maximum crunch.
Equipment Needed
- Large oven-safe skillet (10-12 inches / 25-30cm): Cast iron is ideal for heat retention and even browning. A stainless steel skillet works too, but avoid non-stick if you want a good sear.
- Tongs: For flipping the chicken without piercing the skin. Silicone-tipped tongs won’t scratch your pan.
- Meat thermometer: An instant-read thermometer takes the guesswork out. Chicken is done at 165°F (74°C), but thighs are even better at 175-185°F (79-85°C) where the collagen breaks down.
- Cutting board and chef’s knife: For mincing garlic and chopping parsley.
- Small bowl: For mixing the dry seasoning.
- Paper towels: Essential for patting the chicken dry—don’t skip this step.
Budget-Friendly Tip: If you don’t have an oven-safe skillet, sear the chicken in a regular pan, then transfer it to a baking dish to finish in the oven. Just pour the butter and garlic over the top before baking.
Preparation Method
- Prep the chicken (15 minutes before cooking): Pat the chicken thighs completely dry with paper towels. This is the most important step for crispy skin. Place them on a plate, skin-side up, and let them sit uncovered in the fridge for 15-30 minutes. This dries out the surface even more.
- Season the chicken: In a small bowl, mix 1 teaspoon kosher salt, ½ teaspoon black pepper, ½ teaspoon garlic powder, and ½ teaspoon paprika. Sprinkle this mixture evenly over both sides of the chicken, pressing it gently into the skin. Let it sit at room temperature for 10 minutes while the oven preheats.
- Preheat the oven to 400°F (200°C). Place the oven rack in the middle position.
- Sear the chicken (stovetop): Place your oven-safe skillet over medium heat and add 1 tablespoon of the unsalted butter. Once it melts and foams, place the chicken thighs skin-side down in a single layer. Don’t crowd the pan—if needed, work in batches. Let them cook undisturbed for 6-8 minutes. The skin should turn deep golden brown and release easily from the pan. If it sticks, it’s not ready. Sensory cue: You should hear a steady sizzle, not a frantic crackle. If it’s smoking, the heat is too high.
- Flip and add garlic: Using tongs, carefully flip the chicken skin-side up. Add the remaining 3 tablespoons of butter and the minced garlic to the pan around the chicken. Let the butter melt and the garlic sizzle for about 30 seconds—don’t let it burn.
- Finish in the oven: Spoon some of the garlic butter over the chicken skin. Transfer the skillet to the preheated oven. Roast for 15-20 minutes, or until the internal temperature of the thickest thigh reaches 175°F (79°C) for tender meat. My tip: If you like the skin extra crispy, switch the oven to broil for the last 2 minutes. Watch it closely so it doesn’t burn.
- Rest and serve: Remove the skillet from the oven. Let the chicken rest in the pan for 5 minutes. The residual heat will finish cooking the garlic and allow the juices to redistribute. Sprinkle with fresh parsley and serve with the pan juices spooned over the top.
Troubleshooting: If your skin isn’t crispy after roasting, it’s usually because the chicken wasn’t dry enough before searing, or the pan was too crowded. Next time, pat it dry with a fresh paper towel right before it hits the pan, and leave a little space between each thigh.
Cooking Tips & Techniques
Getting that perfect crispy skin is more about technique than magic. Here are the things I learned the hard way so you don’t have to.
- Dry is the goal: Moisture is the enemy of crispiness. After patting the chicken dry, I sometimes let it sit uncovered in the fridge overnight. It sounds extra, but the skin gets so thin and crackly it almost shatters. Even an hour helps.
- Start skin-side down in a cold-ish pan: I used to throw chicken into a screaming hot pan, but the skin would shrink and curl up. Starting in a medium-hot pan lets the fat render slowly, giving you a flat, even crust. Patience is key—don’t move it for a full 6 minutes.
- Don’t skip the garlic powder: Fresh garlic is for the sauce, but garlic powder in the dry rub sticks to the skin and adds flavor without burning. It’s a simple trick that makes a big difference.
- Use a meat thermometer: I’ve overcooked more chicken than I’d like to admit. Thighs are forgiving, but pulling them at 175°F (79°C) guarantees they’re juicy without being rubbery. The carryover cooking will bring it up a few more degrees.
- Baste, baste, baste: When you add the garlic butter, spoon it over the skin before the pan goes in the oven. During roasting, the butter bastes the skin, keeping it from drying out while the oven crisps it further. It’s a beautiful cycle.
Variations & Adaptations
This recipe is a great base, and I’ve played around with it more times than I can count. Here are a few twists that worked well.
- Spicy Garlic Butter: Add ½ teaspoon of red pepper flakes along with the garlic. The heat cuts through the richness beautifully. I also like to drizzle a little honey over the chicken before serving for a sweet-spicy combo.
- Herb Butter: Stir in 1 teaspoon of fresh thyme or rosemary leaves with the garlic. The herbs infuse the butter and give the chicken a more savory, almost Thanksgiving-like flavor. Sage works well too.
- Lemon Garlic: Add the zest of one lemon to the garlic butter, and squeeze the juice over the chicken just before serving. It brightens everything up and makes it feel lighter—perfect for spring or summer.
- Parmesan Crust: After flipping the chicken, sprinkle 2 tablespoons of grated Parmesan over the skin before roasting. It forms a cheesy, crispy crust that’s absolutely addictive. Just watch it under the broiler so it doesn’t burn.
- Dairy-Free Option: Substitute the butter with a high-quality vegan butter or ghee (if you tolerate dairy). I’ve used Miyoko’s European-style cultured butter with great results—it browns and foams just like the real thing.
Serving & Storage Suggestions
These Crispy Garlic Butter Chicken Thighs are best served hot, right out of the skillet. The skin is at its peak crispiness within the first 10 minutes, so don’t let them sit too long.
- Serving temperature: Serve immediately after the 5-minute rest. The pan juices should still be bubbling and fragrant.
- What to serve with them: I love these with a simple side of steamed green beans or a crisp Watermelon Feta Mint Salad for a refreshing contrast. Mashed potatoes or crusty bread are perfect for soaking up the garlic butter sauce. If you’re looking for a vegetable side, try my Crispy Air Fryer Corn on the Cob—the smoky, charred corn pairs beautifully with the rich chicken.
- Storage: Store leftover chicken in an airtight container in the refrigerator for up to 4 days. The skin will soften, but the flavor will be even better as the garlic infuses the meat.
- Reheating: To bring back some of the crispiness, reheat the chicken in a 375°F (190°C) oven for 10-12 minutes, or in an air fryer at 350°F (175°C) for 5-6 minutes. Avoid the microwave—it will make the skin rubbery.
- Freezing: You can freeze the cooked chicken (without the sauce) for up to 3 months. Wrap each thigh tightly in plastic wrap and place in a freezer bag. Thaw overnight in the fridge and reheat as above. The sauce can be frozen separately in a small container.
Nutritional Information & Benefits
Here’s the estimated nutritional breakdown per serving (based on 4 servings, using 4 tablespoons of butter):
- Calories: ~450-500 kcal
- Protein: ~35g
- Fat: ~35g
- Carbohydrates: ~2g
- Fiber: 0g
- Sugar: 0g
Chicken thighs are a great source of high-quality protein, iron, and B vitamins, especially B12 and niacin, which support energy metabolism. The skin contains healthy fats that help with nutrient absorption. Garlic is known for its anti-inflammatory properties and may support immune health. This recipe is naturally low-carb, keto-friendly, and gluten-free. If you’re watching your sodium, reduce the added salt and use unsalted butter. The main allergens are dairy (butter) and, of course, chicken. For a dairy-free option, use the substitution mentioned above.
I love that this dish feels indulgent but is actually quite balanced. It’s comfort food that doesn’t leave you feeling heavy—just satisfied.
Conclusion
This Crispy Garlic Butter Chicken Thighs recipe is proof that you don’t need complicated techniques or exotic ingredients to make something truly memorable. It’s the kind of dinner that turns a regular weeknight into something a little special, without adding stress to your evening. The crispy skin, the tender meat, the rich garlic butter—it all comes together in one pan, in under an hour.
I encourage you to make this your own. Play with the herbs, adjust the spice level, or try it with a different side dish. The first time I made this, I served it with a simple Healthy Italian Antipasto Pasta Salad, and it was a hit. Cooking should be flexible and fun, and this recipe is a great starting point.
I’d love to hear how it turns out for you. Drop a comment below and let me know if you tried any variations—I’m always looking for new ideas. And if you loved it, share it with a friend who needs a good chicken recipe in their life. Happy cooking!
Frequently Asked Questions
Can I use boneless, skinless chicken thighs instead?
You can, but you’ll lose the crispy skin and the bone-in juiciness. If you use boneless thighs, reduce the oven time to 12-15 minutes and check for doneness at 165°F (74°C). The butter sauce will still be delicious, but the texture will be different.
How do I keep the garlic from burning?
Add the garlic after you flip the chicken, not before. The residual heat from the pan and the butter will cook it gently. If you add it too early, it can burn and turn bitter. Also, keep the heat at medium—not high—when adding the garlic.
Can I make this recipe ahead of time?
You can prep the dry seasoning and mince the garlic up to a day ahead. You can also season the chicken and leave it uncovered in the fridge overnight for extra crispy skin. The cooked chicken is best fresh, but leftovers reheat well in the oven or air fryer.
What if I don’t have an oven-safe skillet?
No problem. Sear the chicken in a regular skillet, then transfer it to a baking dish. Pour the melted butter and garlic over the top, and bake as directed. Just make sure the baking dish is large enough to hold the chicken in a single layer.
Can I use chicken breasts instead of thighs?
Yes, but adjust the cooking time. Boneless, skinless chicken breasts will cook faster—about 12-15 minutes in the oven. For bone-in breasts, add 5-10 minutes. The skin on breasts is thinner and may not get as crispy, so watch it closely to avoid overcooking the meat.
Pin This Recipe!

Easy Crispy Garlic Butter Chicken Thighs Recipe

These Crispy Garlic Butter Chicken Thighs deliver shatteringly crisp skin and tender, juicy meat in a rich garlic butter sauce. Made in one pan in under an hour, this simple weeknight dinner is packed with flavor and guaranteed to impress.
- Prep Time: 15 minutes
- Cook Time: 30 minutes
- Total Time: 45 minutes
- Yield: 4 servings 1x
- Category: Main Course
- Cuisine: American
Ingredients
- 4–6 bone-in, skin-on chicken thighs (about 2 lbs / 900g)
- 4 tablespoons unsalted butter (56g), divided
- 6–8 cloves garlic, minced
- 1 teaspoon kosher salt (5g)
- ½ teaspoon black pepper (2g), freshly ground
- ½ teaspoon garlic powder (2g)
- ½ teaspoon paprika (2g), sweet or smoked
- 2 tablespoons fresh parsley, chopped
- Lemon wedges (optional, for serving)
Instructions
- Prep the chicken: Pat chicken thighs completely dry with paper towels. Place skin-side up on a plate and refrigerate uncovered for 15-30 minutes to further dry the skin.
- Season the chicken: In a small bowl, mix salt, pepper, garlic powder, and paprika. Sprinkle evenly over both sides of the chicken, pressing gently into the skin. Let sit at room temperature for 10 minutes while oven preheats.
- Preheat oven to 400°F (200°C) with rack in middle position.
- Sear the chicken: Heat an oven-safe skillet over medium heat. Add 1 tablespoon butter. Once melted and foaming, place chicken skin-side down in a single layer (work in batches if needed). Cook undisturbed for 6-8 minutes until skin is deep golden brown and releases easily.
- Flip and add garlic: Flip chicken skin-side up. Add remaining 3 tablespoons butter and minced garlic to the pan around the chicken. Let butter melt and garlic sizzle for about 30 seconds, being careful not to burn.
- Finish in the oven: Spoon some garlic butter over the chicken skin. Transfer skillet to preheated oven and roast for 15-20 minutes, until internal temperature reaches 175°F (79°C) for tender meat. For extra crispy skin, broil for the last 2 minutes, watching closely.
- Rest and serve: Remove skillet from oven. Let chicken rest in pan for 5 minutes. Sprinkle with fresh parsley and serve with pan juices spooned over the top. Squeeze lemon wedges over if desired.
Notes
For maximum crispiness, pat the chicken dry thoroughly and let it sit uncovered in the fridge for up to 24 hours after salting. Start searing in a medium-hot pan to render fat slowly. Add garlic after flipping to prevent burning. Use a meat thermometer for perfect doneness: 175°F (79°C) for thighs. If skin isn’t crispy, the chicken wasn’t dry enough or the pan was too crowded.
Nutrition
- Serving Size: 1 thigh with pan jui
- Calories: 475
- Sodium: 650
- Fat: 35
- Saturated Fat: 12
- Carbohydrates: 2
- Protein: 35
Keywords: crispy chicken thighs, garlic butter chicken, one pan chicken, easy chicken dinner, weeknight chicken, bone-in chicken thighs


