My six-year-old took one bite of his store-bought lunchable, looked at me with those big serious eyes, and said, “Mom, this is good but yours would be way better.” And I just stood there in the kitchen, cheese wrapper in hand, thinking about how much money we spend on those little plastic trays. He didn’t ask for anything fancy—just crackers, cheese, and meat in a box. That was it. That tiny vote of confidence from a kid who normally picks at his lunch was all I needed to start making my own.
Honestly, I’d been buying those lunchables for years out of convenience. You know how it is—you’re at the store, the kids are tired, and those boxes just make sense. But after that conversation, I started paying attention to what was actually inside. The sodium numbers made me wince. The portion sizes left my boys hungry an hour later. And the price? Let’s just say I could hear my wallet crying.
So I started experimenting in my kitchen, trying to recreate that same fun, lunchable experience but with real food. Better cheese. Better meat. Crackers that don’t taste like cardboard. And you know what? My kids didn’t just eat them—they asked for them. The first time I packed one for school, my son came home and said his friends were jealous. That’s when I knew I’d stumbled onto something good.
These easy DIY copycat lunchable snack boxes for kids aren’t complicated. They’re not fancy. But they are the kind of thing that makes you feel like you’ve got this whole parenting thing figured out, at least for one meal. And honestly, that’s enough some days.
Why You’ll Love This Recipe
Let me tell you why these snack boxes have become a staple in our house. I’ve tested dozens of combinations over the past few months, and I keep coming back to this basic formula because it just works. No stress, no fuss, just happy kids and a happy wallet.
- Quick & Easy: These come together in under 10 minutes. Seriously, I timed myself. While you’re packing lunches anyway, you can throw these together without breaking your morning rhythm.
- Simple Ingredients: No fancy grocery trips needed. You likely already have most of what you need in your fridge and pantry right now. Crackers, cheese, meat, fruit—that’s the basic formula.
- Perfect for School Lunches: These are ideal for lunchboxes, after-school snacks, or even road trips. My kids eat them in the car on the way to soccer practice all the time.
- Crowd-Pleaser: I’ve yet to meet a kid who turns these down. Even my picky eater, who survives on air and goldfish crackers, clears his box every single time.
- Unbelievably Budget-Friendly: When I broke down the cost, I was shocked. These cost about a third of what store-bought lunchables go for. That adds up fast when you’re packing multiple lunches a week.
What makes these different from the store-bought version? For starters, you control the quality. I use sharp cheddar instead of that plasticky orange stuff. I pick ham or turkey from the deli counter instead of processed meat squares. And I add fresh fruit and veggies on the side, which the store version never includes. It’s the same fun concept but with food that actually tastes good and makes you feel good about feeding it to your kids.
There’s something about opening a lunchbox and seeing those little compartments filled with colorful food. My kids get excited about it. And honestly? So do I. It’s comfort food reimagined—healthier, faster, and with the same soul-soothing satisfaction as the original.
What Ingredients You Will Need
This recipe uses simple, wholesome ingredients to deliver that classic lunchable experience without the processed stuff. The beauty of these snack boxes is how flexible they are. Here’s what I typically use, along with some notes from my own trial and error.
For the Main Components
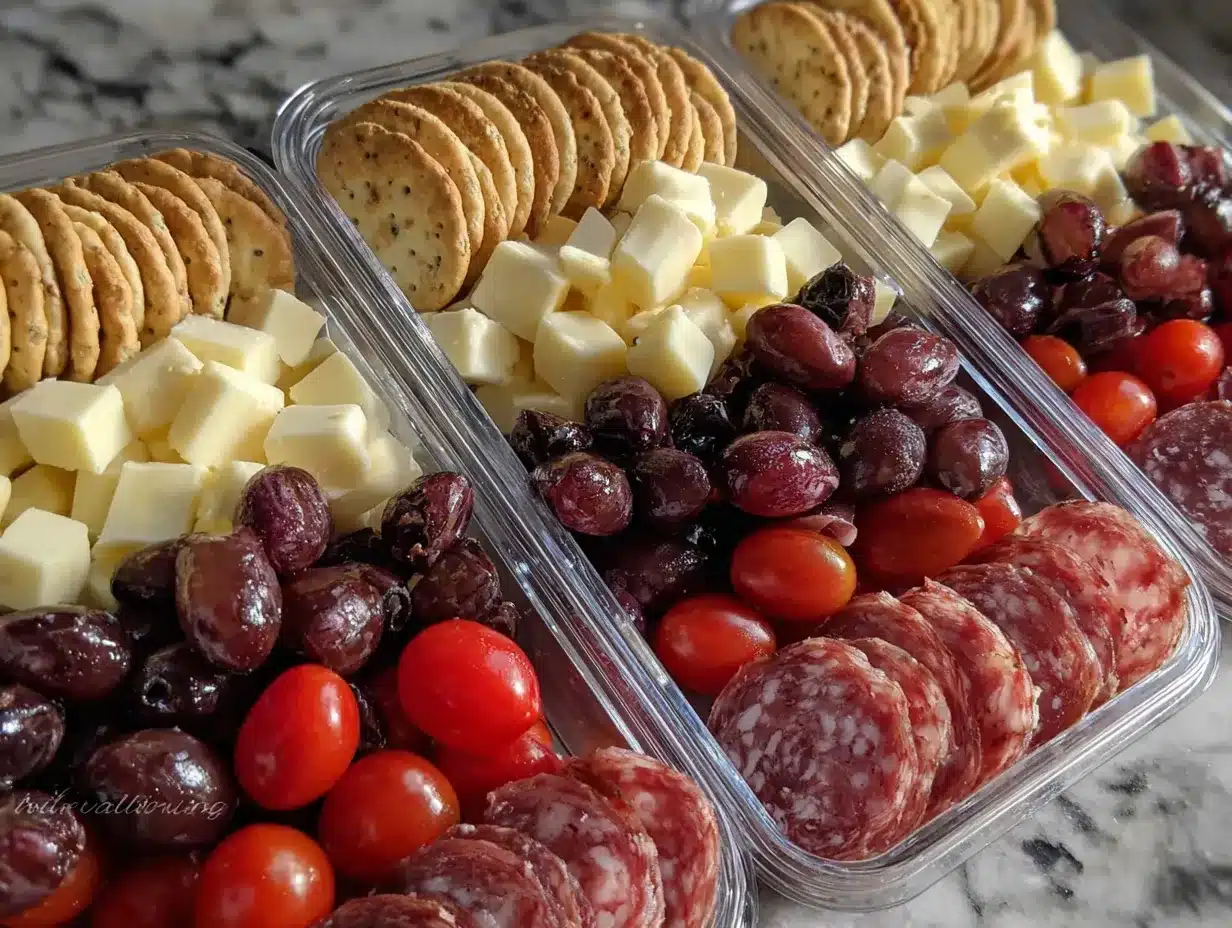
- Crackers: Mini saltines, whole wheat rounds, or butter crackers work best. I prefer Annie’s bunny crackers or simple organic saltines. (Pro tip: avoid super thin crackers that break easily in lunchboxes.)
- Cheese: Sharp cheddar, Colby Jack, or mozzarella cut into small cubes or slices. I’ve found that block cheese holds up better than pre-sliced. (Adds richness and protein.)
- Meat: Oven-roasted turkey breast, ham, or salami from the deli counter. Look for low-sodium options if you can. I like Boar’s Head or Applegate Farms for clean ingredients.
- Fruit: Apple slices (tossed in lemon juice to prevent browning), grapes, berries, or mandarin orange segments. Whatever’s in season works great.
- Veggies: Baby carrots, cucumber rounds, cherry tomatoes, or bell pepper strips. My kids love the crunch factor.
For the Extras (Optional but Fun)
- Dipping Sauce: Ranch dressing, hummus, or yogurt-based dip. I make a quick ranch using Greek yogurt and seasoning mix. (Use dairy-free yogurt if needed.)
- Sweet Treat: A small dark chocolate square, a few chocolate chips, or a mini cookie. Keeps it fun without going overboard.
- Crunchy Element: Pretzel sticks, popcorn, or roasted chickpeas. Adds texture and keeps things interesting.
Ingredient Selection Tips
I’ve learned a few things the hard way. For cheese, look for blocks that are firm and not too soft—they hold their shape better in the lunchbox. I recommend Tillamook or Cabot for best texture and flavor. For meat, ask the deli counter to slice it a little thicker than usual so it doesn’t fall apart. And for fruit, stick with options that don’t brown quickly or get mushy. Apples with a squeeze of lemon juice, grapes, and berries are my go-tos.
If you’re shopping seasonally, swap in fresh berries in summer, apple slices in fall, and clementines in winter. The flexibility is part of what makes these so great. You can literally use whatever you have on hand.
Equipment Needed
You don’t need much to make these snack boxes, which is part of their charm. Here’s what I use:
- Bento-style lunchbox or compartment container: I love the ones with removable dividers. PlanetBox and Bentgo make great options, but honestly, any container with sections works.
- Small cookie cutters: For cutting cheese and fruit into fun shapes. Stars, hearts, and dinosaurs are huge hits with my kids.
- Sharp knife and cutting board: For prepping cheese, meat, and fruit. A good chef’s knife makes quick work of everything.
- Small dipping cups: If you’re including sauce, these little containers are lifesavers. I got a pack of silicone ones on Amazon for cheap.
- Ice pack: Keeps everything cold until lunchtime. I use reusable gel packs that fit perfectly in lunchboxes.
If you don’t have a bento box, no worries. A regular container with silicone muffin cups works just as well to keep things separated. I’ve used everything from old takeout containers to mason jars with compartments. The key is keeping the food separated so crackers don’t get soggy.
For maintenance, I hand-wash my bento boxes to keep the dividers intact. The silicone cups go in the dishwasher. And I always dry everything thoroughly before storing to prevent any funky smells.
Preparation Method
Here’s how I put these together. It’s simple, but I’ve learned a few tricks along the way that make a difference.
- Start with the cheese. Cut your block cheese into small cubes, about ½ inch each. (If you’re using cookie cutters, slice the cheese into ¼-inch thick slabs first, then press the cutter through.) Aim for about 4-6 cubes per box. This takes about 2 minutes.
- Prep the meat. If you’re using deli meat, stack 2-3 slices and roll them up tightly. Then slice the roll into pinwheels about ½ inch thick. This makes them easy for little fingers to grab. Alternatively, you can fold the slices into quarters. About 3-4 pinwheels per box works well.
- Wash and cut fruit. For apples, core them and slice into thin wedges. Toss with a squeeze of lemon juice to prevent browning. For grapes, leave them whole or halve them lengthwise for younger kids. Berries can go in as-is. Aim for about ½ cup of fruit per box.
- Prep veggies. Baby carrots can go in whole. Cucumbers should be sliced into rounds or half-moons. Cherry tomatoes can stay whole. About ¼ cup of veggies per box is plenty.
- Portion crackers. Count out about 10-12 mini crackers per box. I put them in their own compartment so they stay crunchy. (Trust me on this—soggy crackers are a lunchbox tragedy.)
- Add any extras. If you’re including a dipping sauce, fill a small cup with about 2 tablespoons of ranch or hummus. Add a small treat if you want—a few chocolate chips or a mini cookie goes a long way.
- Assemble the box. Arrange everything in the compartments. I like to put crackers in one section, cheese and meat together in another, fruit in a third, and veggies in the fourth. The dipping cup goes in the middle or on the side.
- Pack it up. Close the lid, add an ice pack if your box has room, and pop it in the fridge until lunchtime. These keep well for up to 24 hours in the fridge.
A few things I’ve learned: If your crackers are getting soft, try adding a small silica gel packet (the kind that comes in beef jerky) to the container. Sounds weird, but it works. Also, if you’re prepping these the night before, keep the crackers separate and add them in the morning. That extra step makes a huge difference in texture.
The visual cue you’re looking for is a box that looks colorful and full, not crowded. Everything should fit without being squished. If you’re struggling to close the lid, you’ve got too much in there. Kids eat with their eyes first, so a pretty box is more likely to get eaten.
Cooking Tips & Techniques
After making hundreds of these snack boxes (not exaggerating), I’ve picked up a few tricks that make the process smoother and the results better.
Keep ingredients separate until serving. This is the number one rule. Moisture is the enemy of crunchy crackers. If you’re prepping the night before, store crackers in a separate baggie and add them in the morning. Same goes for anything wet like fruit or sauce.
Use an assembly line. When I’m making multiple boxes at once, I set up stations: cheese station, meat station, fruit station, cracker station. I move down the line filling each compartment. It saves so much time. I can do five boxes in under 10 minutes this way.
Don’t overcomplicate it. I learned this the hard way. My first few boxes had like eight different components, and my kids barely touched half of them. Keep it simple. Three or four main items plus one fun extra is plenty. Kids get overwhelmed by too many choices just like adults do.
Rotate the flavors. If you make the exact same box every day, kids will get bored. I keep a rotation going: Monday is turkey and cheddar, Tuesday is ham and Swiss, Wednesday is salami and mozzarella. Same concept, different flavors. It keeps things fresh without extra work.
Let kids help. My boys love assembling their own boxes. I prep all the ingredients, and they fill the compartments themselves. They’re way more likely to eat something they helped make. Plus, it keeps them busy while I pack the rest of their lunch.
Watch the portion sizes. A lunchable is supposed to be a snack or a light lunch, not a full meal. I aim for about 300-400 calories per box for my school-age kids. That’s enough to keep them full until after-school snack without overdoing it.
Variations & Adaptations
One of the best things about these snack boxes is how customizable they are. Here are some variations I’ve tried and loved.
Pizza Lunchable: This is a huge hit in our house. Instead of regular crackers, use mini pitas or naan bread. Add pizza sauce in a small cup, shredded mozzarella, and mini pepperonis. My kids go crazy for this version. It’s like the deconstructed pizza lunchbox recipe we make sometimes, but even simpler.
Protein-Packed Box: For active kids or after-sports snacks, I load up on protein. Hard-boiled egg slices, turkey roll-ups, cheese cubes, and edamame. Add some whole wheat crackers on the side. This version keeps them full for hours.
Veggie-Focused Box: For days when my kids haven’t touched a vegetable in 24 hours (it happens), I make a veggie-heavy box. Hummus for dipping, cucumber rounds, bell pepper strips, cherry tomatoes, and cheese cubes. The hummus makes the veggies way more appealing.
Sweet Tooth Box: This one’s more of a treat than a meal. Mini pancakes or waffles (leftover from breakfast), fresh berries, yogurt dip, and a small drizzle of maple syrup in a cup. My youngest asks for this on weekends.
Gluten-Free Option: Use gluten-free crackers or rice cakes instead of regular crackers. Most cheese and meat are naturally gluten-free, so this is an easy swap. Just double-check your deli meat labels.
Dairy-Free Option: Swap cheese for dairy-free cheese alternatives or skip it entirely and add extra protein like turkey or hard-boiled eggs. Hummus makes a great dairy-free dip.
I’ve also tried making these for adults by adding fancier ingredients like prosciutto, aged gouda, and fig jam. They make great work lunches or picnic snacks. The concept works for any age, really.
Serving & Storage Suggestions
These snack boxes are best served cold or at room temperature. If you’re packing them for school, keep them refrigerated until morning and add an ice pack to the lunchbox. The ice pack keeps everything fresh and safe until lunchtime.
For presentation, I like to arrange things by color. Red grapes next to orange cheese next to green cucumber slices. It looks more appealing and somehow tastes better when it looks pretty. My kids definitely notice the difference.
These pair beautifully with a cold juice box, a thermos of milk, or even a small bottle of water. If I’m packing these for a road trip, I add a few of our no-bake peanut butter oat energy balls on the side for extra staying power. For a more complete lunch, I’ll throw in a yogurt tube or a small bag of trail mix.
Storage: Assembled boxes will keep in the refrigerator for up to 24 hours. After that, the crackers start to get soft and the fruit loses its freshness. I don’t recommend freezing these—the texture of the cheese and meat gets weird when thawed.
Reheating: These are meant to be eaten cold or at room temperature, so no reheating needed. If you’re using the pizza variation, you can warm the sauce slightly before adding it to the box, but let it cool completely before closing the lid.
One thing I love about these boxes is how the flavors develop over time. The cheese and meat sort of meld together in a good way after a few hours in the fridge. It’s not a strong flavor change, just a subtle improvement. Kind of like how a sandwich tastes better when it’s had time to sit.
Nutritional Information & Benefits
Here’s the nutritional breakdown for a standard box with turkey, cheddar, whole wheat crackers, grapes, and baby carrots. These are estimates and will vary based on your specific ingredients.
| Nutrient | Amount per Box |
|---|---|
| Calories | 320-380 |
| Protein | 18-22g |
| Carbohydrates | 30-35g |
| Fiber | 4-6g |
| Sugar | 12-15g (from fruit) |
| Fat | 14-18g |
| Sodium | 400-500mg |
| Calcium | 200-250mg |
The health benefits here come from the whole food ingredients. Cheese provides calcium and protein for growing bones and muscles. Turkey offers lean protein without too much saturated fat. Whole grain crackers add fiber for digestive health. And the fruit provides natural sweetness along with vitamins and antioxidants.
This recipe is naturally nut-free if you skip any nut-based dips or treats, making it school-safe. It’s also easy to make gluten-free or dairy-free with simple swaps. The main allergens to watch for are dairy (cheese), gluten (crackers), and potential cross-contamination in deli meats.
From a wellness perspective, I love that these boxes give my kids control over what they eat. They can choose the order of bites, dip or not dip, save their favorite part for last. That sense of autonomy makes them more likely to actually eat their lunch instead of trading it away.
Conclusion
These easy DIY copycat lunchable snack boxes for kids have honestly changed our lunch routine. No more fighting over which box to buy at the store. No more worrying about what’s actually in that processed cheese. Just good, simple food that my kids actually eat and enjoy.
I love that this recipe is more of a framework than a strict set of rules. You can adapt it to whatever your kids like, whatever you have in the fridge, whatever fits your budget. That flexibility is what makes it work for real life, not just for Pinterest-perfect lunch photos.
If you try these, I’d love to hear how they turn out. What combinations did your kids love? What did you add or change? Drop a comment below and share your favorite lunchbox creations. And if you’re looking for more easy lunch ideas, check out our healthy bento box lunch for picky eaters or these easy 5-ingredient overnight oat lunchbox cups for more inspiration.
Go ahead and give these a try. Your kids will thank you, your wallet will thank you, and you’ll feel pretty good about yourself too. Happy lunch packing!
Frequently Asked Questions
How long do these snack boxes stay fresh in a lunchbox?
With an ice pack, these stay fresh for about 4-5 hours. Without an ice pack, aim for 2-3 hours max. The crackers might get a little soft after a few hours, but everything is still safe to eat as long as it stays cool.
Can I make these the night before?
Absolutely! I prep them the night before all the time. Just keep the crackers separate and add them in the morning. Everything else holds up fine overnight in the fridge.
What’s the best container to use?
I love bento-style boxes with compartments. PlanetBox and Bentgo are my favorites, but any container with sections works. If you don’t have one, use silicone muffin cups inside a regular container to keep things separated.
How can I keep apple slices from browning?
Toss them in a little lemon juice or lime juice right after cutting. You can also use a commercial product like Fruit-Fresh, but lemon juice works just as well and tastes better. Another trick is to pack the apple slices with a rubber band around them—sounds weird but it works.
Are these cheaper than store-bought lunchables?
Way cheaper. A store-bought lunchable costs about $3-4 per box. My homemade version costs about $1-1.50 per box, depending on what ingredients I use. When you’re packing multiple lunches a week, that adds up fast.
Pin This Recipe!
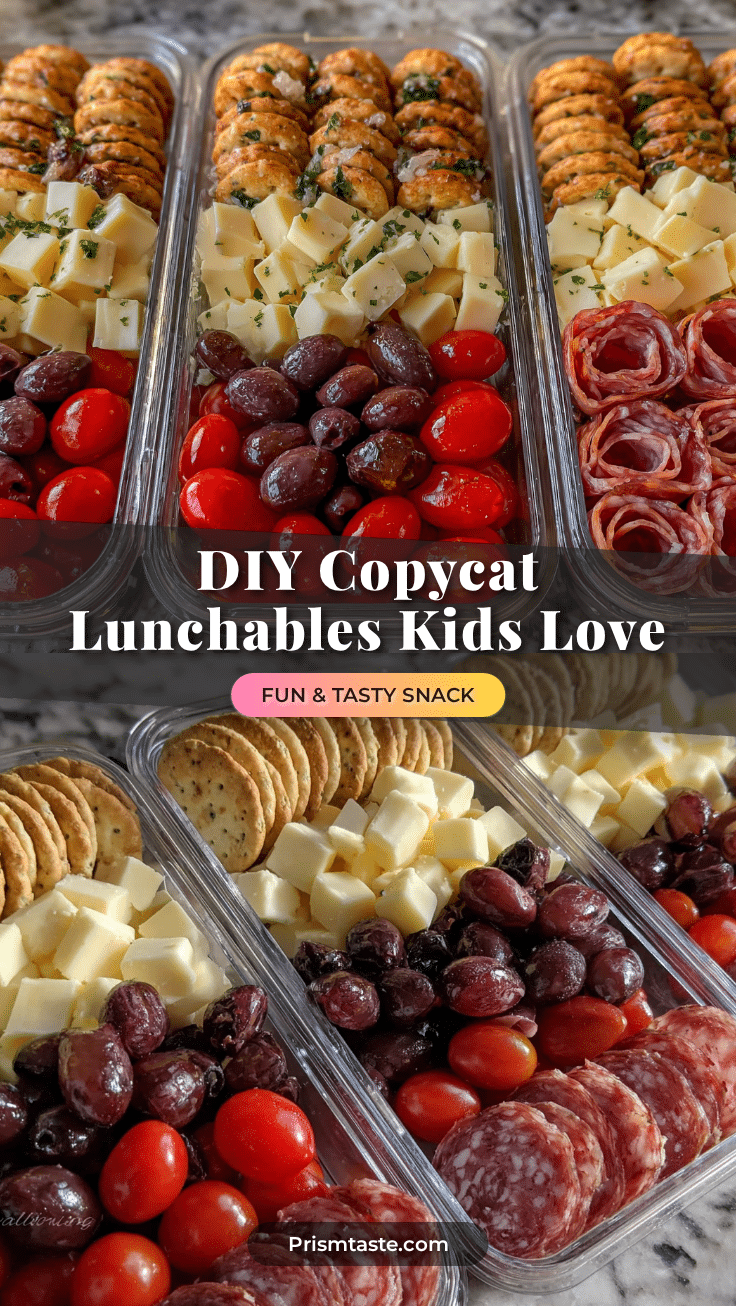
Easy DIY Copycat Lunchable Snack Boxes for Kids
These easy DIY copycat lunchable snack boxes for kids are quick, budget-friendly, and made with wholesome ingredients. Perfect for school lunches, after-school snacks, or road trips, they offer a healthier alternative to store-bought lunchables.
- Prep Time: 10 minutes
- Cook Time: 0 minutes
- Total Time: 10 minutes
- Yield: 1 serving
- Category: Snack
- Cuisine: American
Ingredients
- Crackers (mini saltines, whole wheat rounds, or butter crackers)
- Cheese (sharp cheddar, Colby Jack, or mozzarella, cut into cubes or slices)
- Meat (oven-roasted turkey breast, ham, or salami from the deli counter)
- Fruit (apple slices, grapes, berries, or mandarin orange segments)
- Veggies (baby carrots, cucumber rounds, cherry tomatoes, or bell pepper strips)
- Dipping sauce (ranch dressing, hummus, or yogurt-based dip) (optional)
- Sweet treat (dark chocolate square, chocolate chips, or mini cookie) (optional)
- Crunchy element (pretzel sticks, popcorn, or roasted chickpeas) (optional)
Instructions
- Start with the cheese. Cut your block cheese into small cubes, about ½ inch each. (If using cookie cutters, slice cheese into ¼-inch thick slabs first, then press the cutter through.) Aim for about 4-6 cubes per box.
- Prep the meat. Stack 2-3 slices of deli meat and roll them up tightly. Slice the roll into pinwheels about ½ inch thick. Alternatively, fold slices into quarters. About 3-4 pinwheels per box.
- Wash and cut fruit. For apples, core and slice into thin wedges. Toss with a squeeze of lemon juice to prevent browning. For grapes, leave whole or halve lengthwise for younger kids. Berries can go in as-is. Aim for about ½ cup of fruit per box.
- Prep veggies. Baby carrots can go in whole. Cucumbers should be sliced into rounds or half-moons. Cherry tomatoes can stay whole. About ¼ cup of veggies per box.
- Portion crackers. Count out about 10-12 mini crackers per box. Put them in their own compartment to stay crunchy.
- Add any extras. If including a dipping sauce, fill a small cup with about 2 tablespoons of ranch or hummus. Add a small treat if desired.
- Assemble the box. Arrange everything in compartments: crackers in one, cheese and meat together in another, fruit in a third, and veggies in the fourth. Place the dipping cup in the middle or on the side.
- Pack it up. Close the lid, add an ice pack if possible, and refrigerate until lunchtime. These keep well for up to 24 hours in the fridge.
Notes
Keep ingredients separate until serving to maintain crunch. Use an assembly line when making multiple boxes. Rotate flavors to prevent boredom. Let kids help assemble for better eating. Watch portion sizes—aim for 300-400 calories per box for school-age kids.
Nutrition
- Serving Size: 1 box
- Calories: 320380
- Sugar: 1215
- Sodium: 400500
- Fat: 1418
- Carbohydrates: 3035
- Fiber: 46
- Protein: 1822
Keywords: lunchable, snack boxes, kids lunch, school lunch, DIY lunchable, copycat lunchable, healthy snack, bento box


