It was right after school started, and my kitchen was a mess of half-packed lunches and scattered papers. My daughter’s backpack had just been zipped shut when her best friend showed up unexpectedly—no warning, no heads-up. I glanced around the fridge to find nothing but a lonely box of Rice Krispies and a few marshmallows left on the counter. Honestly, I was scrambling. No fancy snack stash, no time to run to the store. But then, in that chaos, the idea hit me: why not turn those humble Rice Krispies into pencil-shaped treats as a fun nod to school days? Not only would it be quick, but it would also make the surprise guest smile—and hey, pencils and snacks? That’s a back to school combo worth trying.
The marshmallows melted into gooey sweetness, the crispy cereal gave just the right crunch, and the colorful candy decorations brought those treats to life. It was a little messy, sure, but watching those pencil shapes come together amid the frantic energy of the afternoon was oddly satisfying. I realized this simple snack had quietly become a back-to-school tradition in its own right: easy, playful, and a little bit unexpected, just like that surprise visit.
It stuck with me because it’s the kind of recipe that doesn’t need perfect planning or fancy ingredients—just a bit of creativity and a handful of pantry staples. Plus, they’re fun to make with kids, which always counts for something. So if you ever find yourself staring at an empty fridge with just Rice Krispies and marshmallows, remember, these fun pencil-shaped Rice Krispie treats might just save the day.
Why You’ll Love This Recipe
Making these fun pencil-shaped Rice Krispie treats is a total win if you’re juggling back-to-school chaos or just need a quick snack that feels special. I’ve made these dozens of times, tweaking the method to get the best texture and shape, and honestly, they never disappoint.
- Quick & Easy: Whip them up in about 20 minutes—perfect for last-minute snack emergencies or after-school cravings.
- Simple Ingredients: No fancy shopping list here; just Rice Krispies, marshmallows, butter, and a few colorful candies or frosting for decoration.
- Perfect for Back to School: These pencil shapes bring a playful, thematic touch that kids love—great for classroom parties or lunchbox surprises.
- Crowd-Pleaser: I’ve had picky eaters and sugar enthusiasts alike give these a thumbs-up. The nostalgic crunch combined with the sweet marshmallow goo is a winning combo.
- Creative Twist: Unlike regular squares, shaping these treats into pencils makes the snack feel like a mini project. Plus, the candy “eraser” and “tip” accents really bring that school vibe.
What makes these treats different is how they combine simplicity with a little bit of whimsy. I like to add a touch of food coloring to the marshmallow mix to get that perfect golden pencil body color—small detail, big impact. And decorating them with colored sugar or mini chocolate chips instead of just plain marshmallows gives them a more polished look. Honestly, it’s the kind of snack that makes you smile before you even take a bite.
Whether it’s the first day jitters or the midweek slump, these treats feel like a tiny celebration—comfort food with a fresh twist. Plus, they pair well with other homemade goodies, like the lemon blueberry zucchini muffins you might already have in your freezer.
What Ingredients You Will Need
This recipe uses straightforward pantry staples to create a playful and tasty snack. You probably have most of these on hand, making it hassle-free. The ingredients work together to deliver that classic sweet crunch with a fun back-to-school twist.
- Rice Krispies cereal – 6 cups (about 180 g). The crispy base that holds everything together.
- Marshmallows – 10 ounces (about 280 g), mini or regular. These melt into that gooey binder you want.
- Unsalted butter – 3 tablespoons (42 g), softened. Adds richness and helps the marshmallows melt evenly.
- Yellow food coloring – a few drops (optional). Gives the treats that pencil-yellow hue.
- Chocolate chips or black decorating gel – for the pencil tip detailing.
- Pink candy melts or pink frosting – for the eraser end. You can substitute with small pink candies like sprinkles or mini M&Ms.
- Wooden skewers or toothpicks (optional) – handy for shaping and decorating.
I personally like to use brands like Kellogg’s Rice Krispies for that authentic crispness. When it comes to marshmallows, I find that mini marshmallows melt more evenly, but regular ones work just fine if you cut them into smaller pieces. For the pink eraser, Wilton’s candy melts offer a nice smooth finish, but pink frosting is an easy alternative you can spread with a knife.
If you’re aiming for a gluten-free snack, this recipe fits the bill perfectly since Rice Krispies cereal is gluten-free. And if you want a dairy-free version, swap the butter for a plant-based alternative, and you’re good to go.
Equipment Needed
- Large saucepan: For melting butter and marshmallows together. A heavy-bottomed pan works best to avoid scorching.
- Large mixing bowl: To combine the melted marshmallow mixture with the cereal.
- Rubber spatula: Essential for folding ingredients gently without crushing the cereal.
- Baking sheet: Lined with parchment paper or a silicone mat for cooling and shaping the treats.
- Sharp knife: To cut the treats into pencil shapes.
- Spoons or piping bags: For applying chocolate and pink frosting details.
If you don’t have a large saucepan, a microwave-safe bowl can double for melting the marshmallows—just keep a close eye and stir frequently. I’ve also used silicone baking mats before, and they make cleanup a breeze, especially when working with sticky marshmallow mixtures.
Preparation Method
- Prepare your workspace: Line a baking sheet with parchment paper or a silicone mat. Lightly grease your hands with butter or cooking spray to prevent sticking.
- Melt the butter: In a large saucepan over low heat, melt 3 tablespoons (42 g) unsalted butter. This should take about 2-3 minutes. Keep the heat low to avoid browning.
- Add marshmallows: Add 10 ounces (280 g) of marshmallows to the melted butter. Stir continuously with a rubber spatula until completely melted and smooth, about 4-5 minutes.
- Add color (optional): If you want that classic pencil yellow, add a few drops of yellow food coloring and stir until evenly mixed. The color will deepen slightly as it cools.
- Mix in the cereal: Remove the saucepan from heat. Gradually add 6 cups (180 g) of Rice Krispies cereal, folding gently to coat all the cereal evenly with the marshmallow mixture. This step takes about 2 minutes. Don’t overmix or the cereal will lose its crunch.
- Transfer to baking sheet: Pour the mixture onto your prepared sheet. Using a buttered spatula or your greased hands, press the mixture down firmly and evenly to about 1-inch (2.5 cm) thickness. Work quickly before the marshmallow cools and hardens.
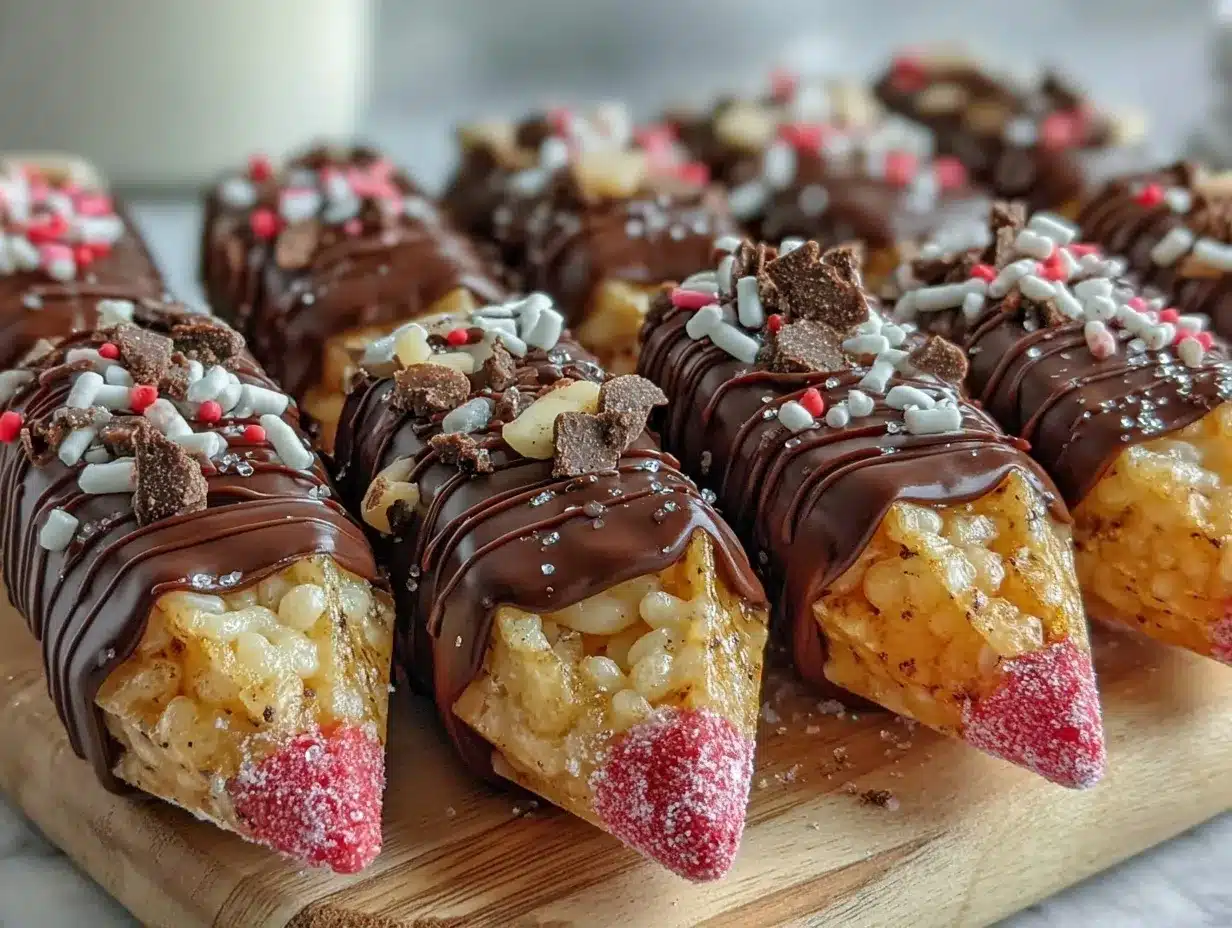
- Shape the pencils: After about 10 minutes of resting (when the treats are cool but still pliable), use a sharp knife to cut the treats into rectangles roughly 1-inch wide and 4 inches long (2.5 cm x 10 cm). Then, carefully round one end to form the pencil’s tip.
- Add the pencil tip: Melt a few chocolate chips or use black decorating gel to create the pencil tip on the rounded edge. Let it set for 5-10 minutes.
- Decorate the eraser: On the opposite end, spread a thin layer of pink frosting or press pink candy melts. If you want, you can add a thin line of white frosting between the yellow body and pink eraser for detail.
- Let cool completely: Place the treats in the fridge for 15-20 minutes to firm up before serving. This also helps the decorations set nicely.
Pro tip: If your marshmallow mixture starts to harden while shaping, gently warm it in the microwave for 10-15 seconds to soften. Just be careful not to overheat and burn yourself!
Cooking Tips & Techniques
Honestly, making Rice Krispie treats looks simple, but getting that perfect texture and shape takes a little know-how. Here’s what I’ve learned after more than one sticky kitchen moment:
- Low and slow melting: When melting butter and marshmallows, keep the heat low. High heat scorches marshmallows quickly, giving a burnt taste and tough texture.
- Grease your hands and tools well: Marshmallow mixtures stick like crazy. Butter your spatula and hands generously to make spreading and shaping less frustrating.
- Don’t overmix: Fold the cereal gently into the marshmallow mix. Stirring too vigorously crushes the cereal and loses that crisp texture.
- Shape while warm but not hot: Work with the treats when they’re cool enough to handle but still pliable. Waiting too long makes them brittle and cracks when cut.
- Decoration patience: Let each layer set before adding the next—especially the chocolate tip and pink eraser frosting. It keeps your pencils neat and avoids smudging.
- Multitasking tip: Melt the candy melts or frosting while the treats cool down to save time.
I once tried to speed things up by cutting the treats immediately after mixing, and that was a disaster—crumbly edges and uneven shapes everywhere. Now, I always wait the recommended 10 minutes, and it makes all the difference.
Variations & Adaptations
You can customize these pencil-shaped treats to suit your tastes or dietary needs. Here are a few ideas I’ve tried or thought about:
- Gluten-free option: Use gluten-free crispy rice cereal instead of the regular Rice Krispies. Just make sure your marshmallows are gluten-free too.
- Vegan adaptation: Substitute vegan marshmallows and use coconut oil or vegan butter instead of dairy butter. The texture is just as good with a slight coconut twist.
- Flavor twist: Add a teaspoon of vanilla extract or almond extract to the melted marshmallows for a subtle flavor boost. For a chocolate pencil, swap half the Rice Krispies with Cocoa Krispies.
- Seasonal colors: Swap the yellow food coloring for orange or green for Halloween or St. Patrick’s Day pencil treats. Or decorate with red and white for a festive touch.
- Nutty addition: Fold in a handful of chopped nuts or mini chocolate chips for extra texture and flavor.
One personal favorite variation is blending these treats with a few crushed easy classic refrigerator dill pickles on the side for a tangy snack combo—odd, I know, but the kids loved the contrast of sweet and sour!
Serving & Storage Suggestions
These pencil-shaped treats are best served at room temperature, with the chocolate and candy details firm but soft enough to bite into easily. They make a perfect handheld snack for lunchboxes or after-school munchies.
Pair them with a glass of milk or a fresh fruit smoothie for a balanced snack. They also complement savory bites like the savory cheddar herb zucchini bread during snack time.
For storage, keep the treats in an airtight container at room temperature. They stay fresh for up to 3 days, but honestly, they usually disappear faster than that. If you need to keep them longer, refrigeration is fine, though it might make the treats a bit firmer—just bring them back to room temp before serving.
To freeze, wrap each treat individually in plastic wrap and place in a freezer bag. Thaw overnight in the fridge or for a few hours at room temperature. The flavors hold up well, though the candy decorations may soften slightly.
Nutritional Information & Benefits
Each pencil-shaped Rice Krispie treat is approximately 150-180 calories depending on size and decoration choices. They are primarily a sweet treat, so enjoy them as an occasional snack rather than a meal replacement.
The recipe offers some quick energy from simple carbs and sugars, which can be handy for active school days or after sports practice. Using butter provides a little fat for satiety, and if you add nuts or seeds, you get a touch more protein and healthy fats.
Because they’re mostly made with common pantry ingredients, these treats fit gluten-free diets if you use certified gluten-free cereal and marshmallows. They’re dairy-free adaptable too, which is great for kids with allergies.
From a wellness perspective, these fun treats bring joy and a bit of creative play into snack time, which counts for something beyond just nutrition. Sharing these with kids makes snack time memorable and less of a chore.
Conclusion
These fun pencil-shaped Rice Krispie treats have become my go-to when life throws those unexpected back-to-school curveballs. They’re simple, quick, and bring a little cheer to chaotic afternoons. Plus, they offer a chance to get kids involved in the kitchen, making snack time a bit more playful.
Feel free to customize the colors, decorations, or mix-ins to suit your family’s tastes. That’s what makes this recipe stick around year after year—it’s flexible and fun. I love how these treats combine nostalgia with a fresh twist, turning pantry staples into a snack that feels special without any fuss.
If you try making these treats, I’d love to hear how you decorated your pencils or what variations you experimented with. Sharing those little kitchen wins always makes the day better. Here’s to stress-free school snacks that bring smiles and crunch!
Frequently Asked Questions
Can I use a different cereal instead of Rice Krispies?
Yes! You can substitute with any crispy rice cereal or gluten-free alternatives. Just make sure it’s light and crunchy to hold the shape well.
How long do these pencil-shaped treats stay fresh?
Stored in an airtight container at room temperature, they stay fresh for about 3 days. Refrigeration can extend freshness but might firm up the texture.
Can I make these treats ahead of time for a party?
Absolutely. Make them the day before, store in an airtight container, and decorate just before serving for the best look.
What if I don’t have food coloring? Will the treats still taste good?
Definitely! The yellow color is just for fun. The classic marshmallow and cereal flavor shines through regardless of color.
Can I freeze these treats?
Yes, wrap them individually and freeze. Thaw in the fridge overnight or at room temperature before serving.
Pin This Recipe!
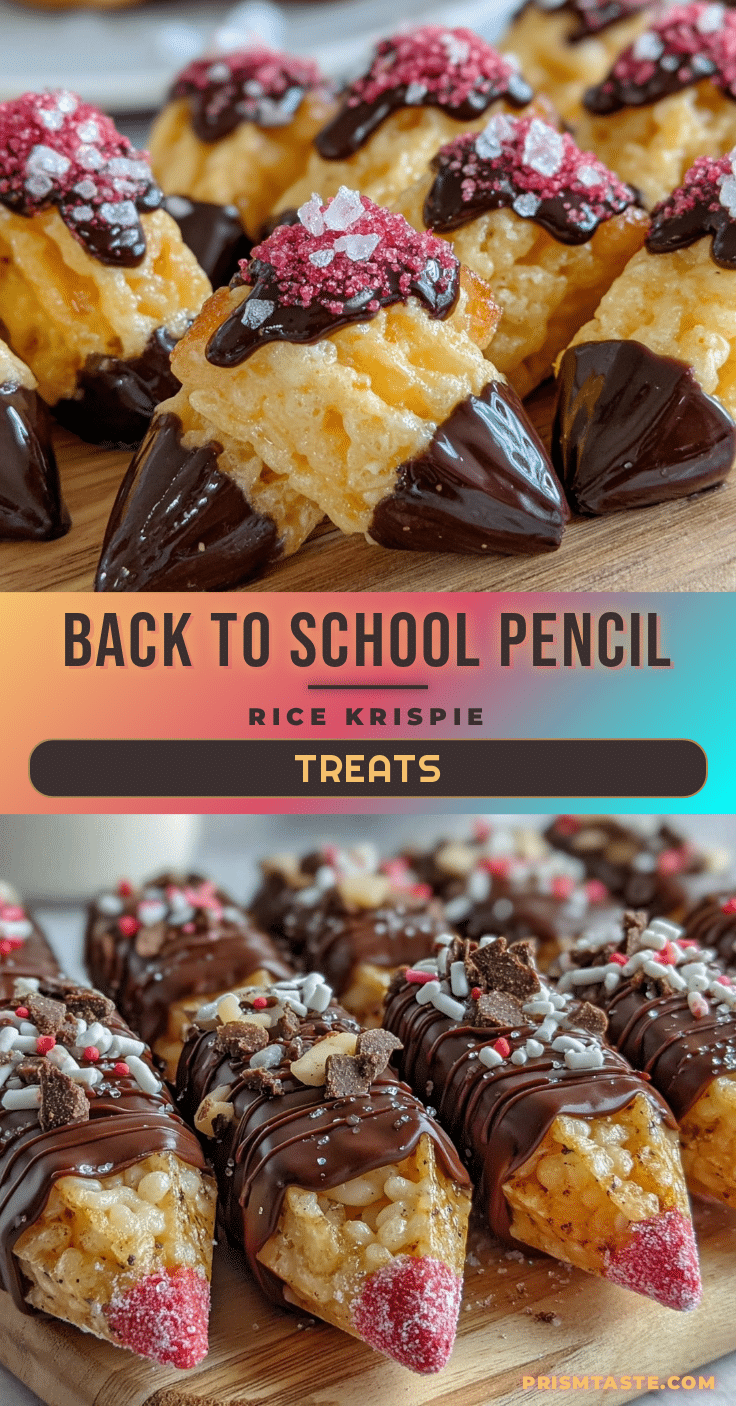
Fun Pencil-Shaped Rice Krispie Treats

These fun pencil-shaped Rice Krispie treats are a quick, easy, and playful back-to-school snack made with simple pantry staples. They combine the classic sweet crunch of Rice Krispies and marshmallows with colorful candy decorations for a nostalgic and creative treat.
- Prep Time: 10 minutes
- Cook Time: 10 minutes
- Total Time: 20 minutes
- Yield: 12 servings 1x
- Category: Snack
- Cuisine: American
Ingredients
- 6 cups Rice Krispies cereal (about 180 g)
- 10 ounces marshmallows (about 280 g), mini or regular
- 3 tablespoons unsalted butter (42 g), softened
- A few drops yellow food coloring (optional)
- Chocolate chips or black decorating gel for pencil tip detailing
- Pink candy melts or pink frosting for the eraser end
- Wooden skewers or toothpicks (optional, for shaping and decorating)
Instructions
- Line a baking sheet with parchment paper or a silicone mat. Lightly grease your hands with butter or cooking spray to prevent sticking.
- In a large saucepan over low heat, melt 3 tablespoons (42 g) unsalted butter, about 2-3 minutes. Keep heat low to avoid browning.
- Add 10 ounces (280 g) marshmallows to the melted butter. Stir continuously with a rubber spatula until completely melted and smooth, about 4-5 minutes.
- If desired, add a few drops of yellow food coloring and stir until evenly mixed.
- Remove saucepan from heat. Gradually add 6 cups (180 g) Rice Krispies cereal, folding gently to coat all cereal evenly with marshmallow mixture, about 2 minutes. Do not overmix.
- Pour mixture onto prepared baking sheet. Using a buttered spatula or greased hands, press mixture down firmly and evenly to about 1-inch (2.5 cm) thickness. Work quickly before mixture cools and hardens.
- Let rest about 10 minutes until cool but still pliable. Use a sharp knife to cut treats into rectangles roughly 1-inch wide and 4 inches long (2.5 cm x 10 cm). Carefully round one end to form pencil tip.
- Melt a few chocolate chips or use black decorating gel to create pencil tip on rounded edge. Let set for 5-10 minutes.
- On opposite end, spread thin layer of pink frosting or press pink candy melts for eraser. Optionally add thin white frosting line between yellow body and pink eraser for detail.
- Place treats in fridge for 15-20 minutes to firm up and set decorations before serving.
Notes
Keep heat low when melting butter and marshmallows to avoid scorching. Grease hands and tools well to prevent sticking. Fold cereal gently to maintain crunch. Shape treats when cool but still pliable to avoid cracking. Let each decoration layer set before adding the next. If mixture hardens while shaping, warm gently in microwave for 10-15 seconds.
Nutrition
- Serving Size: One pencil-shaped tr
- Calories: 165
- Sugar: 18
- Sodium: 90
- Fat: 5
- Saturated Fat: 3
- Carbohydrates: 29
- Protein: 1
Keywords: Rice Krispie treats, pencil-shaped treats, back to school snacks, easy snacks, kids snacks, marshmallow treats, gluten-free snacks


