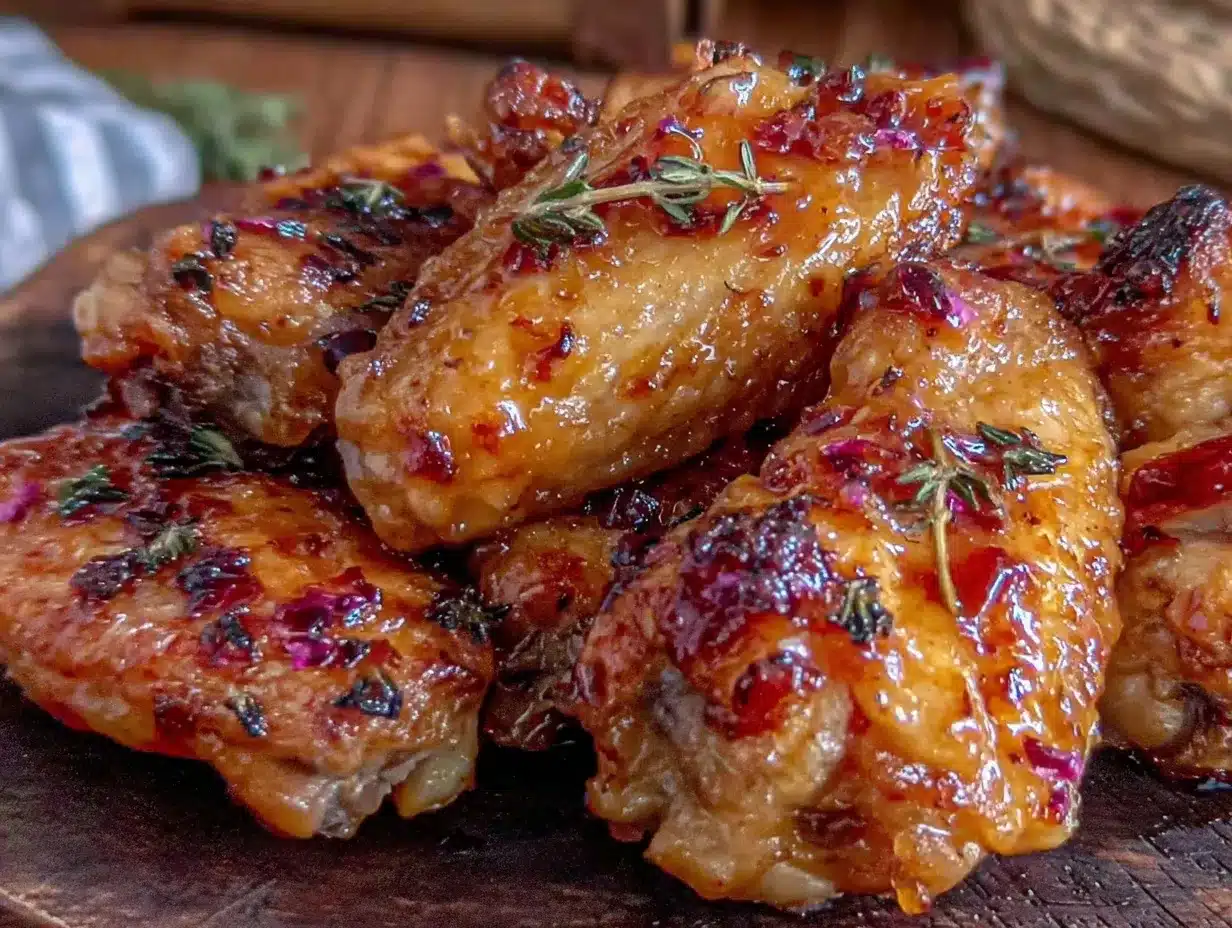
“Hey, you’ve got to try these wings,” my neighbor casually texted me one Friday evening. Honestly, I was skeptical—five ingredients? Garlic and herbs? I mean, I’ve had my share of wing recipes that promise the moon but deliver a soggy mess. But that sticky honey butter chicken wings recipe she swore by rang a bell, so I gave it a shot. The kitchen filled with the scent of melting butter and caramelizing honey, mingled with fresh garlic and herbs. It was one of those moments where the smell alone promised something good.
To my surprise, these wings came out gloriously sticky, golden, with just the right touch of sweet and savory. The garlic and herbs weren’t overpowering, just enough to whisper their presence. I found myself going back for more, even after a long day when cooking felt like a chore. There’s something about that sticky glaze that feels like a warm hug—comfort food but with a bit of flair. And honestly, making them only took about 30 minutes, which is a win in my book.
I’ve now made these wings a handful of times, sometimes as a quick dinner, other times as a last-minute snack when friends unexpectedly dropped by. They never fail to impress, and I’m pretty sure my new go-to for chicken wings just landed. Plus, the simple 5-ingredient list means no crazy shopping runs—always a win after a busy week. So, if you’re up for wings that are sticky, buttery, and have that fresh garlic-herb kick, this recipe’s got you covered.
After all, it’s the kind of dish that makes you pause mid-bite and think, “Why didn’t I make these sooner?”
Why You’ll Love This Recipe
Honestly, I’ve tried quite a few chicken wing recipes over the years, but this sticky honey butter chicken wings recipe stands out for several reasons that make it a keeper in my kitchen:
- Quick & Easy: You can have these wings ready in about 30 minutes, which is perfect when time’s tight but the craving for something flavorful hits hard.
- Simple Ingredients: With just honey, butter, garlic, herbs, and wings, it’s a recipe that doesn’t send you hunting for exotic spices or sauces.
- Perfect for Any Occasion: Whether it’s game night, a casual family dinner, or even an impromptu gathering, these wings always fit right in.
- Crowd-Pleaser: I’ve served these to kids and adults alike, and the rave reviews never stop. The sticky glaze is addictive without being too sweet.
- Unbelievably Delicious: That buttery, honeyed coating clings to the wings with just the right touch of garlic and herbs, creating a flavor combo that’s both comforting and exciting.
What sets this recipe apart? It’s the balance between the sticky sweetness and the fresh herbaceous notes that feel homemade but a little special. The garlic is gently cooked into the butter, so it’s mellow, not harsh, which makes for a glaze that’s rich yet light. Plus, you don’t need any fancy equipment or complicated steps—just good wings and a bit of patience while the magic happens on the stove and in the oven.
For me, this recipe isn’t just about food; it’s a quick way to bring people together without fuss. It’s a little reminder that sometimes simple ingredients, handled right, can create something truly memorable.
What Ingredients You Will Need
This flavorful sticky honey butter chicken wings recipe uses a handful of easy-to-find ingredients that work together to create that perfect balance of sweet, savory, and fresh. They’re mostly pantry staples, which makes it super convenient to whip up anytime.
- Chicken wings – about 2 pounds (900g), split into flats and drumettes. Fresh wings work best, but frozen ones are fine if thawed properly.
- Unsalted butter – 4 tablespoons (about 60g), melted. I prefer Kerrygold for its rich flavor, but any quality butter will do.
- Honey – 3 tablespoons. Use raw or wildflower honey if you want a deeper, floral sweetness.
- Garlic cloves – 3 large, minced or finely grated. Fresh garlic is essential here for that punch of flavor.
- Fresh herbs – about 2 tablespoons of chopped parsley, thyme, or rosemary (or a mix). I usually go with parsley for freshness and a bit of thyme for earthiness.
- Optional: pinch of salt and black pepper – to taste, but I find a little seasoning before cooking helps the wings shine.
You can swap out the fresh herbs with dried ones if needed—just reduce the amount by half since dried herbs are more concentrated. For a twist, sometimes I use fresh basil or oregano when I want a Mediterranean feel. If you want a bit of heat, adding a dash of cayenne or chili flakes to the butter mixture works wonders.
Equipment Needed
- Baking sheet or roasting pan: Preferably rimmed to catch drips from the sticky glaze.
- Wire rack: If you have one, placing wings on a rack lets the heat circulate and keeps the skin crispier. If not, you can place them directly on the baking sheet lined with foil or parchment paper.
- Mixing bowl: For tossing the wings with seasoning before cooking.
- Small saucepan: To melt butter and infuse it with garlic and herbs for the glaze.
- Sharp knife and cutting board: For prepping garlic and herbs.
- Tongs: Handy for turning wings and coating them evenly in the glaze.
Honestly, you don’t need anything fancy here. I’ve even made these wings using a cast-iron skillet for the initial sear before finishing in the oven—works like a charm if you want extra crispiness. Just make sure your baking sheet or pan can handle the sticky honey glaze without burning or sticking too much. Lining it with foil or parchment makes cleanup a breeze.
Preparation Method
- Prep the wings: Pat the chicken wings dry with paper towels—this step is crucial for crispy skin. Then, season them lightly with salt and black pepper. Let them sit at room temperature for about 10 minutes while you preheat the oven.
- Preheat your oven: Set it to 400°F (200°C). Line your baking sheet with foil and place a wire rack on top if you have one.
- Arrange the wings: Place the wings in a single layer on the rack or baking sheet. Make sure they’re not touching to allow even cooking. Pop them into the oven for 30 minutes, flipping them halfway through (around 15 minutes) to ensure both sides get crispy.
- Make the honey butter glaze: While the wings bake, melt the butter in a small saucepan over medium-low heat. Add the minced garlic and chopped herbs, letting them gently cook for 2–3 minutes. Don’t rush—low heat helps mellow that garlic without burning it. Stir in the honey and remove from heat once everything is combined and fragrant.
- Coat the wings: Once the wings are cooked and crispy, transfer them to a large mixing bowl. Pour the honey butter sauce over them and toss gently with tongs until each wing is generously coated in that sticky, flavorful glaze.
- Final bake: Return the coated wings back onto the baking sheet or rack and bake for an additional 5–7 minutes at 400°F (200°C). This step allows the glaze to thicken and stick beautifully to the wings.
- Serve immediately: Let the wings rest for a minute or two—they’ll be hot and sticky. Sprinkle extra fresh herbs on top for a pop of color and freshness before serving.
Quick tip: Keep an eye on the wings during the final bake to avoid burning the honey glaze—a little caramelization is great, but burnt bits? Not so much. If your oven runs hot, reducing the final bake time slightly can help.
Cooking Tips & Techniques
Getting the perfect sticky honey butter chicken wings is all about balancing texture and flavor. Here’s what I’ve learned from trial and error:
- Dry wings before baking: Moisture is the enemy of crispiness. Patting the wings dry before seasoning helps the skin get that satisfying crunch.
- Use a wire rack when possible: It allows air to circulate around the wings, preventing sogginess underneath.
- Low and slow with the garlic butter glaze: Cook garlic gently in melted butter to avoid a bitter burnt taste. It mellows the flavor and blends perfectly with the honey.
- Don’t skip flipping: Turning the wings halfway through baking ensures even cooking and browning on both sides.
- Coat wings while hot: Toss them immediately after baking with the honey butter glaze so it sticks well. If you wait too long, the wings cool and the sauce won’t cling as nicely.
- Final bake is key: Baking the wings again after coating helps the glaze set and become sticky rather than runny.
One mistake I made the first time was rushing the garlic step, cranking the heat too high. The taste was sharp and unpleasant. Now, I keep it slow and steady, and that little extra attention makes all the difference.
Variations & Adaptations
This sticky honey butter chicken wings recipe is flexible and easy to customize depending on what you have or what mood you’re in:
- Spicy kick: Add a teaspoon of smoked paprika or cayenne pepper to the butter glaze for a smoky heat that pairs perfectly with the sweetness.
- Herb swap: Instead of parsley and thyme, try rosemary or fresh oregano for a different herbal note. Fresh basil also works surprisingly well if you want a sweeter, aromatic touch.
- Gluten-free option: This recipe is naturally gluten-free, but double-check your honey source if you have strict dietary needs.
- Oven-free method: You can pan-fry the wings first to crisp them up, then toss in the honey butter sauce in the skillet over low heat to finish—the glaze will thicken nicely this way too.
- Healthier alternative: Use olive oil instead of butter for a lighter version, though it won’t have quite the same richness.
Personally, I once tried these wings with a splash of lemon juice added to the glaze right before tossing. It cut through the richness beautifully and made the dish feel lighter—perfect for a spring lunch.
Serving & Storage Suggestions
These wings are best enjoyed warm and sticky straight from the oven. Serve them on a platter sprinkled with fresh chopped herbs and maybe a few lemon wedges on the side for a little brightness. They pair wonderfully with simple sides like crisp celery sticks, carrot sticks, or a fresh salad such as the loaded Greek salad with feta for a refreshing contrast.
If you have leftovers (and sometimes there aren’t any!), store them in an airtight container in the refrigerator for up to 3 days. Reheat gently in the oven at 350°F (175°C) for about 10 minutes to re-crisp the skin and warm the glaze without burning it. Microwaving tends to make the skin soggy, so the oven is best.
Over time, the flavors actually deepen a bit in the fridge, though the wings lose some of their initial crispness. For a quick snack, these wings can also be enjoyed cold, where the sticky honey butter turns into a rich, almost candy-like coating.
Nutritional Information & Benefits
Each serving of these sticky honey butter chicken wings (about 6 wings) roughly contains:
| Nutrient | Amount |
|---|---|
| Calories | 350-400 kcal |
| Protein | 25-30g |
| Fat | 25g (mostly from butter) |
| Carbohydrates | 10-15g (mainly from honey) |
Chicken wings provide a good source of protein and essential amino acids. The fresh garlic offers immune-boosting properties, while the herbs add antioxidants without extra calories. Using unsalted butter keeps sodium levels manageable, and the small quantity of honey adds natural sweetness without refined sugars.
For those watching carbs, you can reduce honey slightly or swap for a keto-friendly syrup alternative. This recipe is naturally gluten-free and can be enjoyed by most dietary preferences with minimal tweaks.
Conclusion
To wrap it up, these flavorful sticky honey butter chicken wings with garlic and herbs are a simple yet delicious recipe that hits all the right notes. They’re easy enough for weeknights but impressive enough for guests. I love how just five ingredients can turn into a dish that feels indulgent but still homemade and real.
Feel free to adjust the herbs or spice level to suit your taste—this recipe is forgiving and welcoming to tweaks. For me, they’ve become a go-to when I want something comforting without fuss, and I’m pretty sure you’ll find the same satisfaction making (and eating!) them.
Got questions or your own spin on these wings? I’d love to hear how you make them yours!
Frequently Asked Questions
Can I use chicken drumsticks instead of wings?
Yes, drumsticks work well. Just increase the baking time by about 10 minutes to ensure they’re cooked through and crispy.
How do I keep the wings crispy after coating with honey butter?
Coating the wings while hot and returning them to the oven for a short final bake helps the glaze set and keeps the skin crispy. Using a wire rack also prevents sogginess.
Can I prepare the wings ahead of time?
You can bake and cool the wings, then store them in the fridge. Reheat with the glaze fresh to maintain stickiness and crispness.
Is there a way to make these wings less sweet?
Reduce the honey slightly or add a splash of lemon juice or apple cider vinegar to the glaze to balance the sweetness with acidity.
What herbs work best for this recipe?
Parsley, thyme, and rosemary are classic choices. Fresh herbs are best, but dried can be used in smaller amounts. Basil or oregano provide nice variations too.
If you enjoy this recipe, you might also appreciate the crispy air fryer loaded chicken wings recipe with 8 bold flavors for another take on flavorful wings, or the easy sheet pan loaded fajita bowl recipe for a quick, delicious dinner option full of bold tastes and minimal cleanup.
Pin This Recipe!
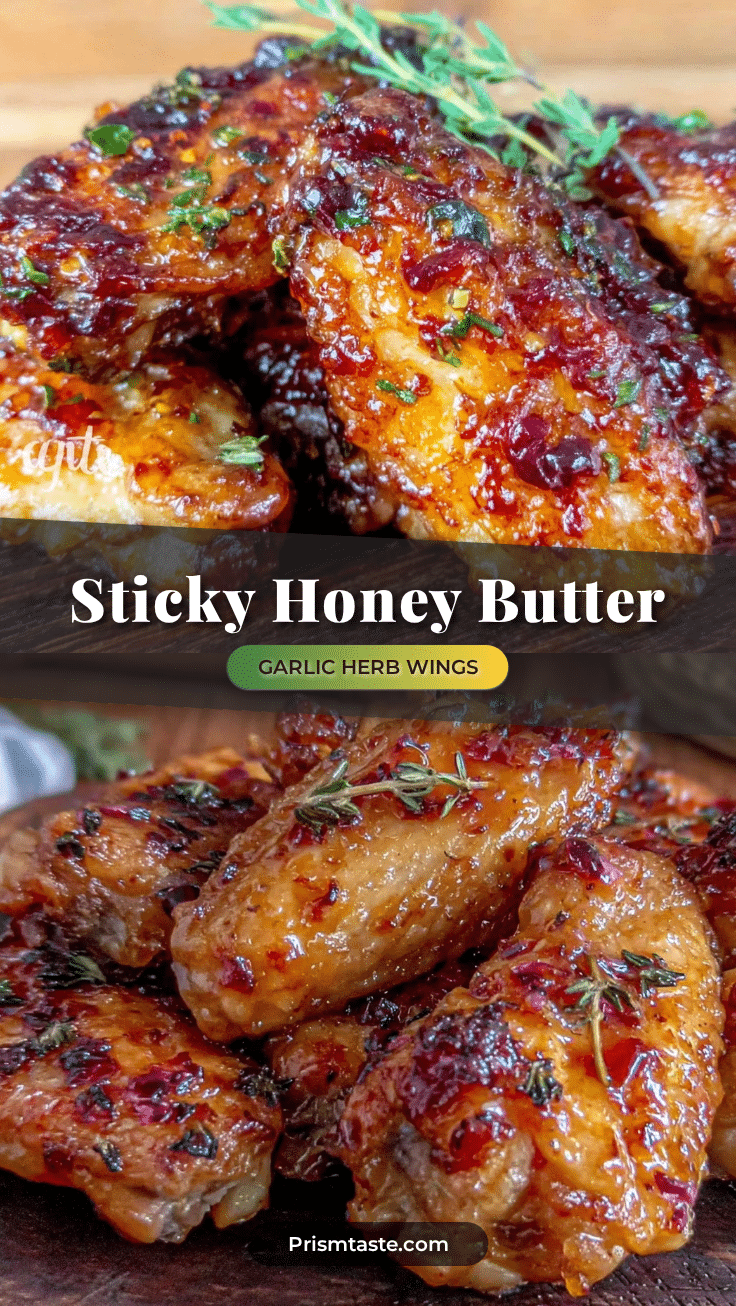
Sticky Honey Butter Chicken Wings

These sticky honey butter chicken wings are a quick and easy 5-ingredient recipe featuring a sweet and savory garlic herb glaze that delivers crispy, flavorful wings perfect for any occasion.
- Prep Time: 10 minutes
- Cook Time: 35 minutes
- Total Time: 45 minutes
- Yield: 4 servings (about 6 wings per serving) 1x
- Category: Main Course
- Cuisine: American
Ingredients
- 2 pounds chicken wings, split into flats and drumettes
- 4 tablespoons unsalted butter, melted
- 3 tablespoons honey
- 3 large garlic cloves, minced or finely grated
- 2 tablespoons fresh herbs (parsley, thyme, rosemary, or a mix), chopped
- Salt and black pepper, to taste (optional)
Instructions
- Pat the chicken wings dry with paper towels. Season lightly with salt and black pepper. Let sit at room temperature for about 10 minutes.
- Preheat oven to 400°F (200°C). Line a baking sheet with foil and place a wire rack on top if available.
- Arrange wings in a single layer on the rack or baking sheet, making sure they are not touching. Bake for 30 minutes, flipping halfway through at 15 minutes.
- While wings bake, melt butter in a small saucepan over medium-low heat. Add minced garlic and chopped herbs, cooking gently for 2–3 minutes without burning.
- Stir in honey and remove from heat once combined and fragrant.
- Transfer cooked wings to a large mixing bowl. Pour honey butter glaze over wings and toss gently with tongs until evenly coated.
- Return coated wings to the baking sheet or rack and bake for an additional 5–7 minutes at 400°F (200°C) to thicken the glaze.
- Let wings rest for 1–2 minutes before serving. Sprinkle extra fresh herbs on top if desired.
Notes
Pat wings dry before baking for crispiness. Use a wire rack if possible to keep skin crispy. Cook garlic gently in butter to avoid bitterness. Coat wings while hot and finish with a short bake to set glaze. Adjust final bake time to avoid burning the honey glaze. Variations include adding smoked paprika or cayenne for heat, swapping herbs, or using olive oil for a lighter version.
Nutrition
- Serving Size: About 6 wings
- Calories: 375
- Sugar: 10
- Sodium: 150
- Fat: 25
- Saturated Fat: 15
- Carbohydrates: 12
- Fiber: 0.5
- Protein: 27
Keywords: chicken wings, honey butter wings, garlic herb wings, sticky wings, easy chicken wings, 5-ingredient recipe, quick dinner, party wings