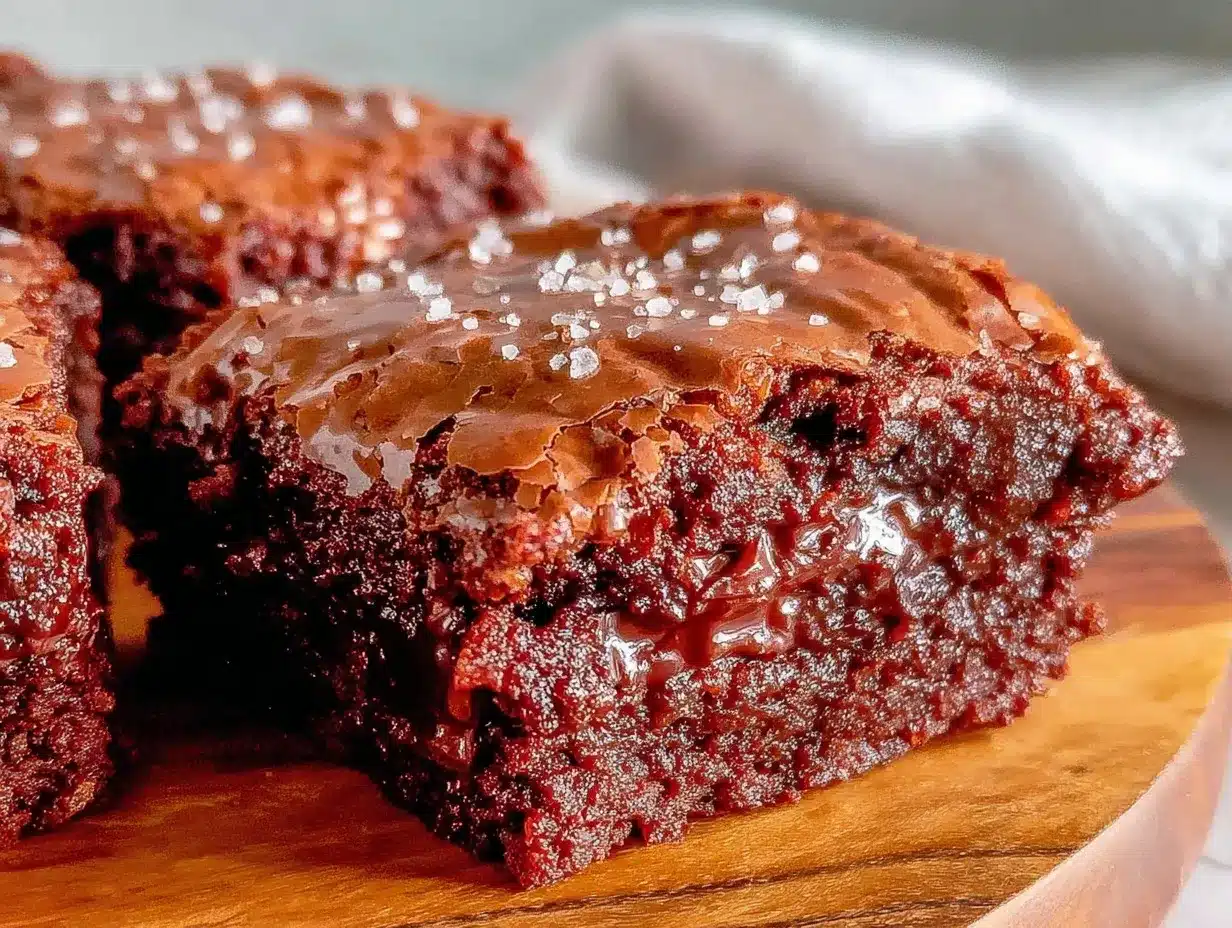
There was this evening when I was craving brownies—not just any brownies, but something with a deep, nutty twist that felt a little more grown-up. I only needed a few squares, but honestly, the idea of making a full batch sounded like overkill. So, I tinkered with a small batch recipe, and that’s how these rich browned butter brownies came to be my go-to. The smell of browned butter swirling through the kitchen was oddly comforting, like a warm hug after a hectic day. I remember standing by the oven, watching the edges crisp up just right, knowing this little batch was going to disappear fast.
The magic here is in the browned butter—it adds this caramelized, almost toasty depth that makes these brownies stand out from the basic fudgy kind. Plus, making a smaller quantity means you don’t waste a ton of ingredients or end up with leftovers that haunt your fridge. For me, this recipe stuck because it’s exactly the right size when I want a chocolate fix without the guilt of overindulging. And honestly, once you get a taste, you’ll understand why it’s hard to stop at just one piece.
It’s a quiet little secret in my kitchen now, one that proves you don’t need a fancy setup or a complicated recipe to make something that feels special, cozy, and just plain delicious.
Why You’ll Love This Recipe
- Quick & Easy: Comes together in about 30 minutes, perfect for those nights when you want a treat fast without a lot of fuss.
- Simple Ingredients: Uses pantry staples—flour, sugar, eggs, and that one secret weapon, browned butter.
- Perfect for Small Batches: Makes just six servings, so you can enjoy fresh brownies without the pressure of a giant pan.
- Crowd-Pleaser: I’ve shared this with friends and family, and it always disappears quickly—kids and adults alike love the rich flavor.
- Unbelievably Delicious: The browned butter adds a nutty, caramel note that makes the chewy, fudgy texture even more addictive.
This isn’t your average brownie recipe. The browned butter step is a little trick that turns simple ingredients into something that tastes like you spent hours perfecting it. I’ve tested this batch multiple times, tweaking the baking time and sugar ratios, and this version nails the balance every time. It’s that rare recipe that’s both comforting and impressive without requiring a lot of effort. Whether you’re making it for a quiet night in or need a quick dessert for unexpected guests, these brownies won’t let you down.
What Ingredients You Will Need
This recipe uses simple, wholesome ingredients to deliver a bold, rich flavor and a satisfying fudgy texture without any complicated steps. Most of these you probably have on hand, which makes this a perfect impromptu treat.
- Unsalted Butter (½ cup / 113g): The star here, browned to develop that nutty flavor. Use good quality butter like Kerrygold for best richness.
- Granulated Sugar (¾ cup / 150g): Balances the bitterness of cocoa and adds sweetness.
- Brown Sugar (¼ cup / 50g): Adds moisture and a slight caramel undertone.
- Large Egg (1, room temperature): Binds everything together and adds richness.
- Pure Vanilla Extract (1 tsp): Enhances the chocolate flavor.
- All-Purpose Flour (⅔ cup / 85g): Provides structure. For gluten-free option, substitute with almond flour (note: texture will be different).
- Unsweetened Cocoa Powder (⅓ cup / 35g): Use a good-quality Dutch-processed powder like Valrhona for deep flavor.
- Salt (½ tsp): Balances sweetness and highlights flavors.
- Chocolate Chips or Chunks (optional, ½ cup / 90g): For extra melty pockets—dark or semi-sweet work best.
If you want to make this dairy-free, swap the butter for a plant-based alternative that browns well, like Earth Balance. I’ve tried that once, and while it’s not quite the same, it’s still delicious. Also, if you like it extra fudgy, adding a tablespoon of espresso powder amplifies the chocolate without making it taste like coffee.
Equipment Needed
- Small Saucepan: For browning the butter. A light-colored pan helps you see when the butter reaches the perfect color without burning.
- Mixing Bowls: One medium for wet ingredients, one for dry—to keep things organized.
- Whisk and Spatula: To combine ingredients smoothly without overmixing.
- 6×6-inch Baking Pan: Ideal size for this small batch. You can also use an 8×8-inch pan but expect thinner brownies.
- Parchment Paper: For easy removal and cleanup.
- Cooling Rack: Helps brownies cool evenly and prevents soggy bottoms.
If you don’t have a whisk, a fork works fine for mixing. I once used a small silicone spatula when I lost my whisk in a drawer, and it did the job—though it took a bit more elbow grease. Also, for browning butter, keep a close eye; it goes from golden to burnt pretty quickly, so patience is key.
Preparation Method
- Brown the Butter (5-7 minutes): Place ½ cup (113g) unsalted butter in a small saucepan over medium heat. Stir frequently with a wooden spoon or heatproof spatula. The butter will melt, foam, and then start to brown with little brown specks forming and a nutty aroma filling your kitchen. Remove from heat just before it smells burnt. Pour into a heatproof bowl and let it cool for 5 minutes.
- Mix Sugars and Egg (3 minutes): Add ¾ cup (150g) granulated sugar and ¼ cup (50g) brown sugar to the browned butter. Stir well to combine. Add 1 large egg (room temperature) and 1 tsp pure vanilla extract. Whisk until smooth and glossy.
- Sift Dry Ingredients (2 minutes): In a separate bowl, sift together ⅔ cup (85g) all-purpose flour, ⅓ cup (35g) unsweetened cocoa powder, and ½ tsp salt. This ensures no lumps and even mixing.
- Combine Wet and Dry (2 minutes): Gradually fold the dry ingredients into the wet mixture using a spatula. Mix gently to avoid overworking the batter—stop when just combined. If using chocolate chips (½ cup / 90g), fold them in now.
- Prepare Baking Pan: Line a 6×6-inch pan with parchment paper, leaving an overhang for easy removal. Pour the batter in and spread evenly with the spatula.
- Bake (20-25 minutes): Preheat oven to 325°F (163°C). Bake for 20-25 minutes. Check doneness by inserting a toothpick near the center; a few moist crumbs are perfect. Don’t overbake—you want fudgy, not dry.
- Cool Before Cutting (30 minutes): Let brownies cool completely on a wire rack before slicing into 6 squares. This helps them set and prevents crumbling.
Pro tip: If your batter looks too thick after mixing, a teaspoon of milk can loosen it slightly without affecting texture. Also, if you notice your butter browning too fast, reduce the heat; it’s better to be slow and steady here. I learned that the hard way when I scorched a batch once and had to start over.
Cooking Tips & Techniques
When it comes to browned butter, patience is your friend. Stir often and watch for the golden-brown flecks and that irresistible nutty smell. If you wait too long, it turns bitter, and that will wreck your brownies.
Don’t skip the parchment paper—it makes cleanup a breeze and keeps your brownies intact when you remove them. I’ve tried greasing the pan alone, and sometimes those edges stick, which is a bummer.
Mixing the batter just enough is key. Overmix it, and you’ll end up with cakey brownies instead of fudgy. Once the dry ingredients go in, fold gently and stop as soon as it’s combined.
Timing in the oven is crucial. Start checking at 20 minutes because every oven heats differently. I learned to trust the toothpick test (moist crumbs, not wet batter) rather than relying solely on time.
If you want melty chocolate pockets, add good-quality chocolate chunks or chips right before baking. They melt beautifully but keep some shape, giving you those delightful gooey bites.
Finally, cooling is not to be rushed. Warm brownies crumble easily—waiting until they’re room temp gives you clean cuts and that perfect chewy edge.
Variations & Adaptations
- Nutty Addition: Stir in ½ cup chopped toasted walnuts or pecans for extra crunch and flavor contrast.
- Spiced Brownies: Add ½ tsp cinnamon and a pinch of cayenne pepper to the dry ingredients for a warm, spicy kick.
- Gluten-Free Version: Swap all-purpose flour for a 1:1 gluten-free baking mix. Texture will be a bit different but still very tasty.
- Vegan Adaptation: Use vegan butter for browning and replace the egg with a flax egg (1 tbsp ground flaxseed + 3 tbsp water, chilled 5 minutes). Expect a slightly denser texture.
- Salted Caramel Twist: Drizzle caramel sauce over the batter before baking and sprinkle flaky sea salt on top for a sweet-salty combo.
One variation I’ve made a few times is adding a tablespoon of instant espresso powder into the cocoa mix. It doesn’t make it taste like coffee but deepens that chocolate flavor beautifully. It’s one of those subtle tweaks that makes you think you’ve been missing something all along.
Serving & Storage Suggestions
These brownies are best served at room temperature, allowing the fudgy texture and rich flavors to shine. I like pairing them with a scoop of vanilla ice cream or a dollop of whipped cream to balance out the richness.
For a cozy touch, warm a brownie for 10-15 seconds in the microwave before serving. The edges soften slightly, and the chocolate chips get gloriously gooey.
Store leftovers in an airtight container at room temperature for up to 3 days. If you want them to last longer, keep them in the fridge—just bring them back to room temp before eating to avoid a hard, cold texture.
You can also freeze brownies individually wrapped in plastic wrap and then placed in a freezer bag for up to 2 months. Thaw at room temperature or warm gently in the microwave.
Flavors mellow beautifully after a day, making these brownies even more enjoyable the next day. Sometimes, waiting is worth it (though it’s hard not to sneak a piece right away!).
Nutritional Information & Benefits
Each serving of these rich browned butter brownies (1 of 6) contains approximately:
| Calories | 280 |
|---|---|
| Fat | 15g |
| Carbohydrates | 34g |
| Protein | 3g |
| Sugar | 25g |
Browned butter contains antioxidants from the milk solids that caramelize during cooking, adding a lovely depth of flavor and a slight boost in nutrients compared to plain melted butter. Cocoa powder, especially if unsweetened and high-quality, is rich in flavonoids which may support heart health.
This recipe is gluten-free adaptable and can be modified for dairy-free diets, making it accessible for various dietary needs. Just keep in mind the chocolate chips might contain dairy unless you choose vegan options.
While these brownies are a treat, their small batch size helps with portion control, which I appreciate when I want to indulge without going overboard.
Conclusion
This rich browned butter brownies small batch recipe has become a quiet favorite in my kitchen because it’s just right—fudgy, flavorful, and perfectly portioned. You don’t need a special occasion to enjoy brownies that feel a little luxurious but come together with everyday ingredients and a bit of patience.
Feel free to tweak it to your taste—more nuts, a sprinkle of sea salt, or a hint of spice. It’s that kind of recipe that welcomes personalization and rewards experimentation.
Honestly, it’s the kind of treat that makes you pause, savor, and maybe even close your eyes after the first bite. I hope you find that same comfort and satisfaction in your batch. Let me know how you make it your own—I’m always curious to hear new twists!
FAQs
Can I make this recipe without browning the butter?
Yes, but the browned butter adds a unique nutty flavor that really sets these brownies apart. If you skip this step, melt the butter gently instead for a milder taste.
What’s the best way to tell when the brownies are done?
Insert a toothpick near the center. If it comes out with a few moist crumbs but no wet batter, they’re perfect. Overbaking will dry them out.
Can I double this recipe for a larger batch?
Absolutely! Just double all ingredients and bake in a 9×9-inch pan. Keep an eye on baking time; it might need a few extra minutes.
How do I store leftover brownies?
Keep them in an airtight container at room temperature for up to 3 days, or refrigerate for longer storage. Warm gently before serving for best texture.
Can I add nuts or other mix-ins to this recipe?
Yes! Chopped walnuts, pecans, or even dried fruit work well. Add about ½ cup folded into the batter before baking.
Pin This Recipe!
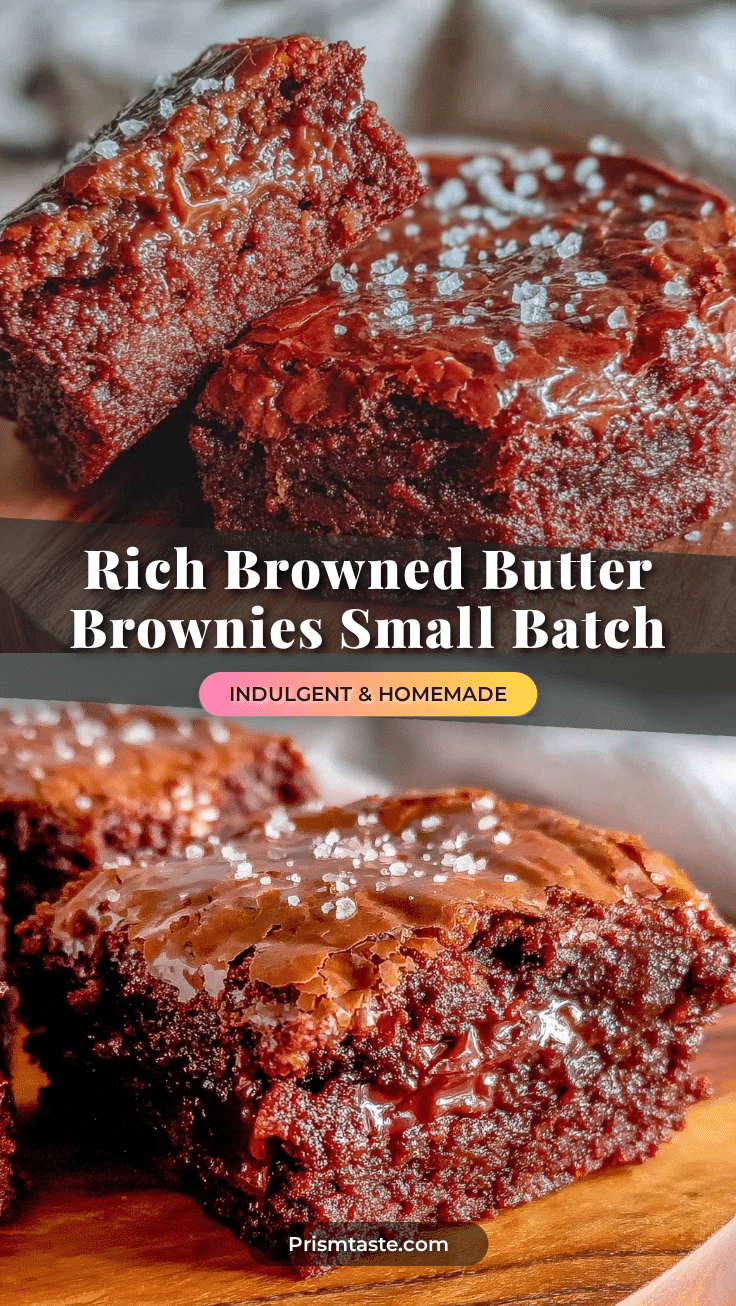
Rich Browned Butter Brownies Small Batch Recipe
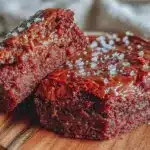
A small batch brownie recipe featuring browned butter for a deep, nutty flavor and fudgy texture, perfect for six servings without leftovers.
- Prep Time: 12 minutes
- Cook Time: 20-25 minutes
- Total Time: 42-47 minutes
- Yield: 6 servings 1x
- Category: Dessert
- Cuisine: American
Ingredients
- ½ cup (113g) unsalted butter
- ¾ cup (150g) granulated sugar
- ¼ cup (50g) brown sugar
- 1 large egg (room temperature)
- 1 tsp pure vanilla extract
- ⅔ cup (85g) all-purpose flour
- ⅓ cup (35g) unsweetened cocoa powder
- ½ tsp salt
- ½ cup (90g) chocolate chips or chunks (optional)
Instructions
- Brown the butter: Place ½ cup (113g) unsalted butter in a small saucepan over medium heat. Stir frequently until it melts, foams, and browns with nutty aroma, about 5-7 minutes. Remove from heat and cool for 5 minutes.
- Mix sugars and egg: Add ¾ cup granulated sugar and ¼ cup brown sugar to the browned butter. Stir well. Add 1 large egg and 1 tsp vanilla extract. Whisk until smooth and glossy.
- Sift dry ingredients: In a separate bowl, sift together ⅔ cup all-purpose flour, ⅓ cup cocoa powder, and ½ tsp salt.
- Combine wet and dry: Gradually fold dry ingredients into wet mixture gently until just combined. Fold in chocolate chips if using.
- Prepare baking pan: Line a 6×6-inch pan with parchment paper with overhang. Pour batter in and spread evenly.
- Bake: Preheat oven to 325°F (163°C). Bake for 20-25 minutes until toothpick inserted near center comes out with moist crumbs.
- Cool before cutting: Let brownies cool completely on a wire rack for about 30 minutes before slicing into 6 squares.
Notes
Use a light-colored pan to brown butter to avoid burning. Do not overmix batter to keep brownies fudgy. Use parchment paper for easy removal. Check doneness with toothpick test. For dairy-free, use plant-based butter that browns well. Adding a tablespoon of espresso powder enhances chocolate flavor. Let brownies cool completely before cutting to prevent crumbling.
Nutrition
- Serving Size: 1 brownie (1 of 6 sq
- Calories: 280
- Sugar: 25
- Fat: 15
- Carbohydrates: 34
- Protein: 3
Keywords: brownies, browned butter, small batch, fudgy brownies, easy dessert, chocolate, homemade brownies