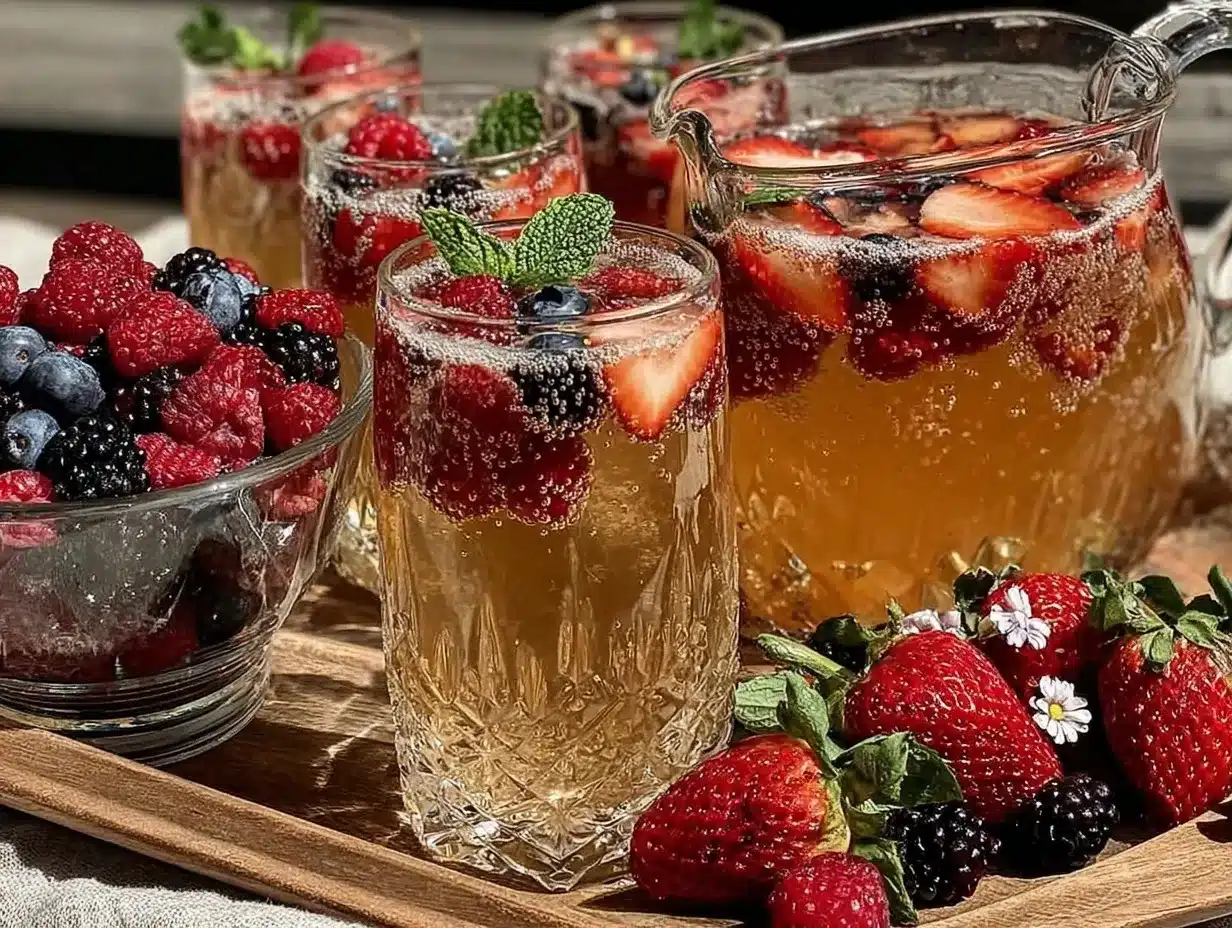
Let me tell you, the first time I set up a spring berry mimosa bar, the fresh scent of ripe berries mingling with chilled sparkling wine was enough to make anyone’s mouth water. You know that feeling when you walk into a party and instantly spot something so inviting, it feels like a warm hug in a glass? That’s exactly what this refreshing spring berry mimosa bar setup brings to your gatherings. The vibrant colors of strawberries, raspberries, blueberries, and blackberries scattered across crystal-clear glassware create a feast for the eyes before you even take a sip.
I stumbled upon this idea years ago during a lazy, rainy weekend when I wanted to brighten up a casual brunch with friends. Honestly, the first time I put it all together, I was instantly hooked—the kind of moment where you pause, take a deep breath, and just smile because you know you’re onto something truly special. When I was knee-high to a grasshopper, my family gatherings rarely had this kind of flair, so discovering this setup feels like a little party upgrade I wish I’d found years ago.
My family couldn’t stop sneaking berries off the table, and guests kept coming back for “just one more” mimosa (and I can’t really blame them). Let’s face it, this setup is dangerously easy but offers pure, nostalgic comfort with a fresh twist. Perfect for potlucks, bridal showers, or even a sweet treat for your kids’ spring celebrations, this mimosa bar brings a bit of sparkle and joy to any occasion. I’ve tested this setup more times than I can count—in the name of research, of course—and it’s become a staple for family gatherings, gifting, and even those quiet mornings when you just want to feel fancy without the fuss.
Why You’ll Love This Recipe
This refreshing spring berry mimosa bar setup isn’t just about pouring sparkling wine; it’s an experience that’s as visually stunning as it is delicious. From my many brunch experiments and party hosting trials, I can confidently say this setup hits all the right notes. Here’s why:
- Quick & Easy: Comes together in under 20 minutes, perfect for last-minute celebrations or casual get-togethers.
- Simple Ingredients: You likely already have everything in your kitchen or can grab it from the nearest market without breaking a sweat.
- Perfect for Elegant Gatherings: Whether it’s a bridal shower, baby reveal, or a sunny spring brunch, it adds instant charm.
- Crowd-Pleaser: Kids love the fruity options (sans bubbles), and adults rave about the customizable flavor combos.
- Unbelievably Delicious: The blend of tangy berries with crisp bubbles makes every sip feel like a mini celebration.
What sets this mimosa bar apart is the thoughtful layering of flavors and textures. I’ve found that macerating the berries ever so slightly releases their juices, giving the mimosas a natural sweetness and a hint of color. Plus, offering a mix of sparkling wine, sparkling water, and fresh juices means everyone gets exactly what they want without fuss. Honestly, this isn’t just another mimosa bar—it’s the best version you’ll make, the kind that makes you close your eyes after the first sip and smile.
This setup turns simple ingredients into a moment of pure joy, making your guests feel special without any stress on your part. It’s the kind of recipe that transforms a simple brunch into a memorable event, and I promise you’ll want to bookmark this one for every spring occasion.
What Ingredients You Will Need
This refreshing spring berry mimosa bar setup uses simple, wholesome ingredients to deliver bold flavor and vibrant color without the fuss. Most are pantry staples or easy-to-find fresh produce, perfect for springtime gatherings.
- Fresh Berries (for garnish and flavor):
- Strawberries, hulled and sliced (adds sweetness and vibrant red color)
- Raspberries (delicate tartness and pretty pink hue)
- Blueberries (burst of juicy freshness and deep blue color)
- Blackberries (earthy, bold flavor and rich purple tone)
- Sparkling Wine or Champagne (chilled):
- Choose a brut or extra dry for a balanced, crisp finish (I personally prefer Veuve Clicquot for celebrations)
- Fresh Juices:
- Orange juice, freshly squeezed if possible (adds classic citrus brightness)
- Pomegranate juice (optional, for a tart twist and deeper color)
- Peach nectar or puree (for a luscious, sweet variety)
- Sparkling Water or Club Soda (for non-alcoholic or lighter options)
- Fresh Herbs (optional garnishes):
- Mint sprigs (bright aroma and pretty green contrast)
- Edible flowers like pansies or violets (adds delicate elegance)
- Sweetener (optional):
- Simple syrup or honey (if you prefer a sweeter mimosa)
If you want to customize, you can easily swap ingredients based on availability or dietary needs. For example, use almond juice or coconut water instead of orange juice for a different flavor profile. In summer, fresh berries can be swapped with stone fruits like peaches or nectarines. For a gluten-free or vegan-friendly approach, just stick with sparkling water and fresh juices—still just as festive!
Equipment Needed
Setting up a spring berry mimosa bar is delightfully simple, and you don’t need fancy or expensive equipment to pull it off. Here’s what I recommend:
- Glassware: Flute glasses are ideal—they show off the bubbles and berries beautifully. If you don’t have flutes, clear wine glasses or even stemless glasses work just fine.
- Pitchers or Carafes: For the juices and sparkling water, easy-pour pitchers make serving a breeze. I’ve used simple glass carafes from the dollar store that clean up well.
- Spoons or Tongs: To serve the berries and herbs hygienically. Small serving spoons or cocktail forks do the trick.
- Ice Bucket or Cooler: To keep your sparkling wine chilled during the party. A basic bucket with ice and water works perfectly.
- Cutting Board and Knife: For prepping berries and herbs. A sharp paring knife and a colorful board add a nice touch to your setup.
If you want to get fancy, a small chalkboard or pretty label tags for your juice options add charm and help guests navigate the bar. I’ve found that budget-friendly options work just as well as pricier tools, so no need to stress about gear here!
Preparation Method
- Wash and Prep the Berries (10 minutes): Gently rinse all berries under cold water and pat dry with paper towels. Hull and slice the strawberries into thin pieces. Set aside in separate bowls or pretty serving dishes to showcase their colors.
- Macerate the Berries (Optional, 15 minutes): For a juicier, more flavorful mimosa, toss the berries with a teaspoon of sugar or a drizzle of honey. Let them sit at room temperature while you prepare the rest. You’ll notice the berries release a bit of juice, which adds natural sweetness to your drinks.
- Chill the Sparkling Wine and Juices (At least 1 hour): Keep your sparkling wine and juices in the fridge to ensure they’re ice-cold. If you’re short on time, fill a bucket with ice and water and chill the bottles for 15-20 minutes before serving.
- Prepare the Garnishes (5 minutes): Wash and gently pat dry fresh mint sprigs and edible flowers, if using. Place them in small bowls or jars for guests to add their own touch.
- Set Up the Mimosa Bar (10 minutes): Arrange the sparkling wine, juices, sparkling water, berries, and garnishes in an attractive layout. Use pitchers or carafes for the liquids and pretty bowls for the berries. Add small spoons or tongs for convenience.
- Provide Glassware and Instructions: Place flute glasses or your chosen glassware nearby with a little note or chalkboard sign explaining how to build a mimosa. For example: “Fill halfway with juice, top with sparkling wine, add berries and a sprig of mint.”
- Serve and Enjoy: Encourage guests to mix and match flavors, experiment with berry combinations, and savor the fresh, bubbly delight. Keep extra sparkling wine chilled and replenish berries as needed.
Pro tip: If your sparkling wine fizzes too much when poured, pour the juice first, then gently add the wine down the side of the glass to keep the bubbles under control. Also, keep an eye on berry freshness—fresh berries can last a day or two at room temp, but refrigeration extends their life if you prep ahead.
Cooking Tips & Techniques
Although this setup is more about assembly than cooking, a few professional tricks can make your mimosa bar stand out. First, always chill your sparkling wine and juices well in advance—nobody likes a warm mimosa! When prepping berries, I recommend gently patting them dry to avoid diluting the drinks with excess water.
One mistake I made early on was overcrowding the berry bowls, causing them to bruise and lose their bright color. Keep fruit in shallow dishes to preserve their shape and freshness. Also, macerating the berries with a little sugar is a game-changer—it softens the fruit and releases natural juices that subtly sweeten your drinks.
Timing is key: set up your mimosa bar right before guests arrive to keep everything fresh and bubbly. Multitasking helps—while the berries macerate, chill your glassware in the fridge for a crisp presentation. If you’re juggling other brunch dishes, enlist a helper to keep the bar stocked and looking neat.
Consistency is important; always taste your juices and sparkling wine together before serving to adjust sweetness if necessary. Sometimes a splash of pomegranate juice adds just the right tartness to balance the sweetness. Remember, this setup is flexible—trust your palate and feel free to tweak as you go!
Variations & Adaptations
One of the best things about this spring berry mimosa bar is how easy it is to adapt for different tastes and dietary needs. Here are a few of my favorite twists:
- Non-Alcoholic Version: Swap sparkling wine for sparkling water or a sparkling white grape juice. The berries and fresh juices keep it festive and just as tasty.
- Seasonal Fruit Swaps: In autumn or winter, swap berries for sliced pears, pomegranate seeds, or blood orange segments. Each offers a new flavor profile while keeping your bar fresh and colorful.
- Herbal Infusions: Add a rosemary or thyme sprig for a subtle savory note. I tried thyme once at a garden party, and it was surprisingly delightful with peach nectar mimosas.
- Dietary Adaptations: For a low-sugar option, use unsweetened sparkling water and fresh citrus juice. If gluten is a concern, just stick with naturally gluten-free sparkling wines and juices—most brands are safe.
Personally, I’ve experimented with adding a splash of elderflower liqueur for a floral twist, which got rave reviews. The key is to keep the setup approachable, so guests feel comfortable mixing their own drinks. This way, everyone leaves with their perfect mimosa in hand.
Serving & Storage Suggestions
Serve your spring berry mimosas chilled, ideally in flute glasses to showcase the sparkle and color. Present the berries in pretty bowls or small jars, and keep juices in clear pitchers for visual appeal. A small chalkboard sign with instructions adds a charming touch and helps guests get creative.
This mimosa bar pairs beautifully with light brunch dishes like quiche, fresh fruit salad, or buttery croissants. For beverages, coffee or herbal teas make a nice complement for guests who prefer non-alcoholic options.
Leftover berries can be stored in an airtight container in the refrigerator for up to two days—but best to enjoy fresh! If you have leftover sparkling wine, cork it tightly and refrigerate; it usually keeps its fizz for up to 2 days. Juices should be refrigerated promptly and consumed within 3 days.
To reheat, gently warm leftover juices (never the sparkling wine) if you want a cozy mimosa-inspired drink, but honestly, this setup shines best fresh and cold. Over time, the berries release more juice, deepening flavor but softening texture, so plan to refresh fruit for longer events.
Nutritional Information & Benefits
This spring berry mimosa bar isn’t just a pretty face; it offers some nutritional perks, too. Berries are packed with antioxidants, vitamins C and K, and fiber—great for a little immune boost and digestion support. Fresh orange juice adds a healthy dose of vitamin C and potassium.
Of course, sparkling wine has calories and alcohol content to keep in mind, so enjoy in moderation. For a lighter or alcohol-free option, sparkling water and fresh juices provide hydration with fewer calories. This setup is naturally gluten-free and can easily be made vegan by choosing the right sparkling wine.
From my personal wellness perspective, this mimosa bar is a fun way to include fresh fruit into your celebration without feeling heavy or overly sweet. It’s a festive treat that feels indulgent yet keeps things bright and refreshing.
Conclusion
If you’re looking for an easy way to impress at your next spring gathering, this refreshing spring berry mimosa bar setup is your answer. It’s simple, colorful, and inviting—everything you want for an elegant party without the stress. I love how it brings people together, sparks conversation, and adds a little sparkle to the day.
Feel free to customize the berries, juices, and garnishes to suit your style and taste. This mimosa bar is flexible enough to work for any crowd and any occasion. If you give it a try, I’d love to hear how you tweak it or what variations you enjoy. Please drop a comment below, share your photos, or tag me if you recreate this setup—you know I’m always excited to see your versions!
Here’s to bubbly moments, fresh flavors, and gatherings filled with joy. Cheers!
FAQs
What types of sparkling wine work best for a mimosa bar?
Brut or extra dry sparkling wines are ideal since they balance sweetness and acidity well. Prosecco, Cava, or Champagne all work beautifully depending on your budget and preference.
Can I prepare the mimosa bar the night before?
Yes, you can prep the berries and chill the juices and sparkling wine in advance. However, set up the bar right before your guests arrive to keep everything fresh and bubbly.
How do I keep the berries fresh during the party?
Keep the berries in shallow bowls and replenish them if they start to look soggy or lose color. Refrigerate extras and swap them out as needed.
What non-alcoholic options can I include?
Offer sparkling water, sparkling grape juice, or a mix of fresh juices so guests can create alcohol-free mimosas that still feel festive.
Can I use frozen berries for this setup?
Frozen berries can work in a pinch, but they tend to release more water and lose texture. If using frozen, thaw and drain them well before serving to avoid watering down your drinks.
Pin This Recipe!
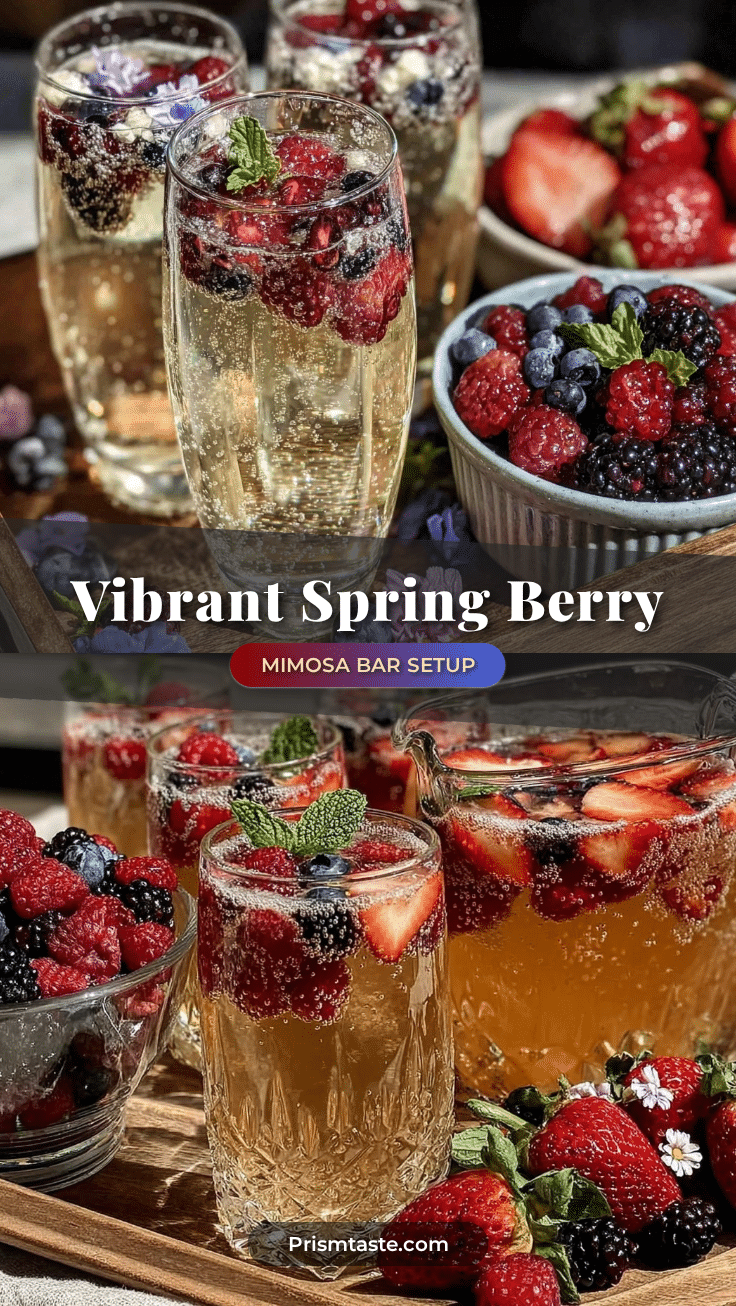
Refreshing Spring Berry Mimosa Bar Setup

A vibrant and easy-to-assemble mimosa bar featuring fresh berries, sparkling wine, and fresh juices, perfect for elegant spring gatherings and casual brunches.
- Prep Time: 20 minutes
- Cook Time: 0 minutes
- Total Time: 1 hour 20 minutes
- Yield: 8 servings
- Category: Beverage
- Cuisine: American
Ingredients
- Strawberries, hulled and sliced
- Raspberries
- Blueberries
- Blackberries
- Sparkling wine or Champagne (brut or extra dry, chilled)
- Orange juice, freshly squeezed
- Pomegranate juice (optional)
- Peach nectar or puree
- Sparkling water or club soda
- Mint sprigs (optional)
- Edible flowers like pansies or violets (optional)
- Simple syrup or honey (optional)
Instructions
- Wash and prep the berries by rinsing under cold water and patting dry. Hull and slice strawberries and place all berries in separate bowls or serving dishes.
- Optionally macerate the berries by tossing them with a teaspoon of sugar or a drizzle of honey and letting them sit at room temperature for 15 minutes to release juices.
- Chill the sparkling wine and juices in the refrigerator for at least 1 hour or use an ice bucket to chill for 15-20 minutes before serving.
- Prepare garnishes by washing and drying fresh mint sprigs and edible flowers, placing them in small bowls or jars.
- Set up the mimosa bar by arranging sparkling wine, juices, sparkling water, berries, and garnishes attractively using pitchers or carafes for liquids and bowls for berries. Provide spoons or tongs for serving.
- Place flute glasses or preferred glassware nearby with instructions on how to build a mimosa: fill halfway with juice, top with sparkling wine, add berries and a sprig of mint.
- Encourage guests to mix and match flavors and enjoy. Keep extra sparkling wine chilled and replenish berries as needed.
Notes
Pour juice first, then gently add sparkling wine down the side of the glass to control fizz. Keep berries in shallow dishes to avoid bruising. Macerating berries with sugar or honey enhances natural sweetness. Chill all liquids well in advance. Set up mimosa bar just before guests arrive for freshness. Leftover berries keep up to 2 days refrigerated; leftover sparkling wine keeps fizz up to 2 days if corked tightly.
Nutrition
- Serving Size: 1 glass (approx. 6-8
- Calories: 120
- Sugar: 7
- Sodium: 5
- Carbohydrates: 8
- Fiber: 1
Keywords: mimosa bar, spring berry mimosa, sparkling wine, brunch drinks, party drinks, fresh berries, easy mimosa, elegant party ideas