It was one of those evenings where I had a million things swirling in my head—emails to answer, laundry piled up, and the clock sneaking past dinner time. Honestly, I wasn’t in the mood to cook something complicated, and ordering takeout for the third time that week felt like admitting defeat. That’s when I remembered the batch of freezer-friendly loaded burritos I’d made a while back. I pulled one out, nuked it for a few minutes, and suddenly dinner was sorted without the usual chaos.
The magic of these easy freezer-friendly loaded burritos isn’t just in how quickly they come together on a busy weekday, but in the way they pack a punch of flavor and comfort. I first stumbled upon this idea when trying to simplify meal prep for those hectic weeks where cooking felt like climbing Everest. At first, I was skeptical—would frozen burritos taste good? Could they really hold all those fillings without turning soggy or bland? Turns out, with a few key tricks, they’re downright addictive.
Since then, these burritos have become my secret weapon, quietly waiting in the freezer to rescue me from hangry evenings. What started as a convenience hack has turned into a staple, one that friends often ask me about after I casually hand them a warm, stuffed tortilla. It’s funny how something so simple can feel like a small act of kindness — a little reminder that even busy days deserve food that feels homemade and satisfying. That’s why this recipe stuck with me, and why I keep making it again and again.
Why You’ll Love This Recipe
- Quick & Easy: These loaded burritos come together in about 30 minutes, perfect when time is tight but you want a hearty meal.
- Simple Ingredients: No fancy or hard-to-find items here—just pantry staples and fresh veggies you probably already have.
- Perfect for Busy Weekdays: Make a big batch on the weekend and enjoy stress-free dinners all week long.
- Crowd-Pleaser: Kids, roommates, or friends—everyone loves the mix of melty cheese, seasoned beans, and savory fillings.
- Unbelievably Delicious: The combination of spices, creamy textures, and a crisp tortilla shell delivers comfort food that feels indulgent but homemade.
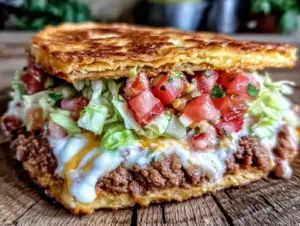
This recipe isn’t your typical freezer burrito. I like to use a blend of black beans and corn for texture, plus a touch of smoky chipotle powder that gives it a subtle kick without overwhelming the flavors. Wrapping tightly and flash freezing before storing keeps the tortillas from getting soggy, a trick I picked up after a few trial runs. Honestly, it’s become my go-to for meal prep because it balances convenience with that homemade feel—no one ever guesses it started frozen!
What Ingredients You Will Need
This recipe uses simple, wholesome ingredients to deliver bold flavor and satisfying texture without the fuss. Most are pantry staples, with a couple fresh veggies to brighten things up. Feel free to swap or customize based on seasonal availability or dietary needs.
- Large flour tortillas: Choose burrito-sized (10-12 inch) for easy wrapping. I prefer Mission brand for their flexibility and texture.
- Black beans: 1 can (15 oz), drained and rinsed (adds protein and creaminess).
- Corn kernels: 1 cup frozen or fresh (adds sweetness and crunch).
- Cooked rice: 1 cup (white, brown, or cauliflower rice for low-carb option).
- Shredded cheese: 1 cup (Cheddar, Monterey Jack, or a blend work well).
- Onion: 1 small, finely chopped (adds depth of flavor).
- Garlic: 2 cloves, minced (aromatic base).
- Bell pepper: 1 medium, diced (for color and sweetness).
- Chipotle chili powder: 1 teaspoon (smoky heat, optional but recommended).
- Cumin: 1 teaspoon (earthy warmth).
- Olive oil: 1 tablespoon (for sautéing).
- Salt & pepper: to taste.
- Sour cream or Greek yogurt: for serving (optional, adds creaminess).
- Fresh cilantro: a handful, chopped (optional, for freshness).
For substitutions: Use gluten-free tortillas if you need to avoid gluten, or swap black beans for pinto beans for a different flavor. If you’re dairy-free, skip the cheese or try a plant-based alternative—I’ve done it and it still tastes great! In summer, swapping fresh corn for frozen really brightens the burritos up.
Equipment Needed
- Medium skillet or sauté pan – essential for cooking the veggies and beans evenly.
- Mixing bowl – to combine the filling ingredients thoroughly.
- Wooden spoon or spatula – for stirring without scratching pans.
- Sharp knife and cutting board – for prepping onions, garlic, and peppers.
- Measuring cups and spoons – to keep the seasoning balanced.
- Baking sheet lined with parchment paper or silicone mat – perfect for flash freezing burritos before storage.
- Plastic wrap or aluminum foil – to wrap burritos individually before freezing.
If you don’t have a skillet, a nonstick frying pan works just fine. For budget-friendly options, you can find good-quality utensils and pans at your local discount stores or online. I recommend keeping your knives sharp—makes chopping way less frustrating. Also, silicone mats are a small investment that really help with easy cleanup and prevent sticking when freezing.
Preparation Method
- Prep the veggies: Finely chop 1 small onion, mince 2 garlic cloves, and dice 1 medium bell pepper. This should take about 5-7 minutes.
- Sauté aromatics: Heat 1 tablespoon olive oil in a medium skillet over medium heat. Add the onion and bell pepper, cooking for 4-5 minutes until softened and fragrant.
- Add garlic and spices: Stir in minced garlic, 1 teaspoon cumin, and 1 teaspoon chipotle chili powder. Cook for another minute until you can smell the spices blooming.
- Mix in beans and corn: Add 1 can of black beans (drained and rinsed) and 1 cup of corn kernels. Stir well and cook for 3-4 minutes until heated through.
- Combine with rice and cheese: Remove skillet from heat and stir in 1 cup cooked rice and 1 cup shredded cheese. Season with salt and pepper to taste.
- Warm tortillas: To make rolling easier, warm each tortilla for about 15-20 seconds in the microwave or on a dry skillet until flexible.
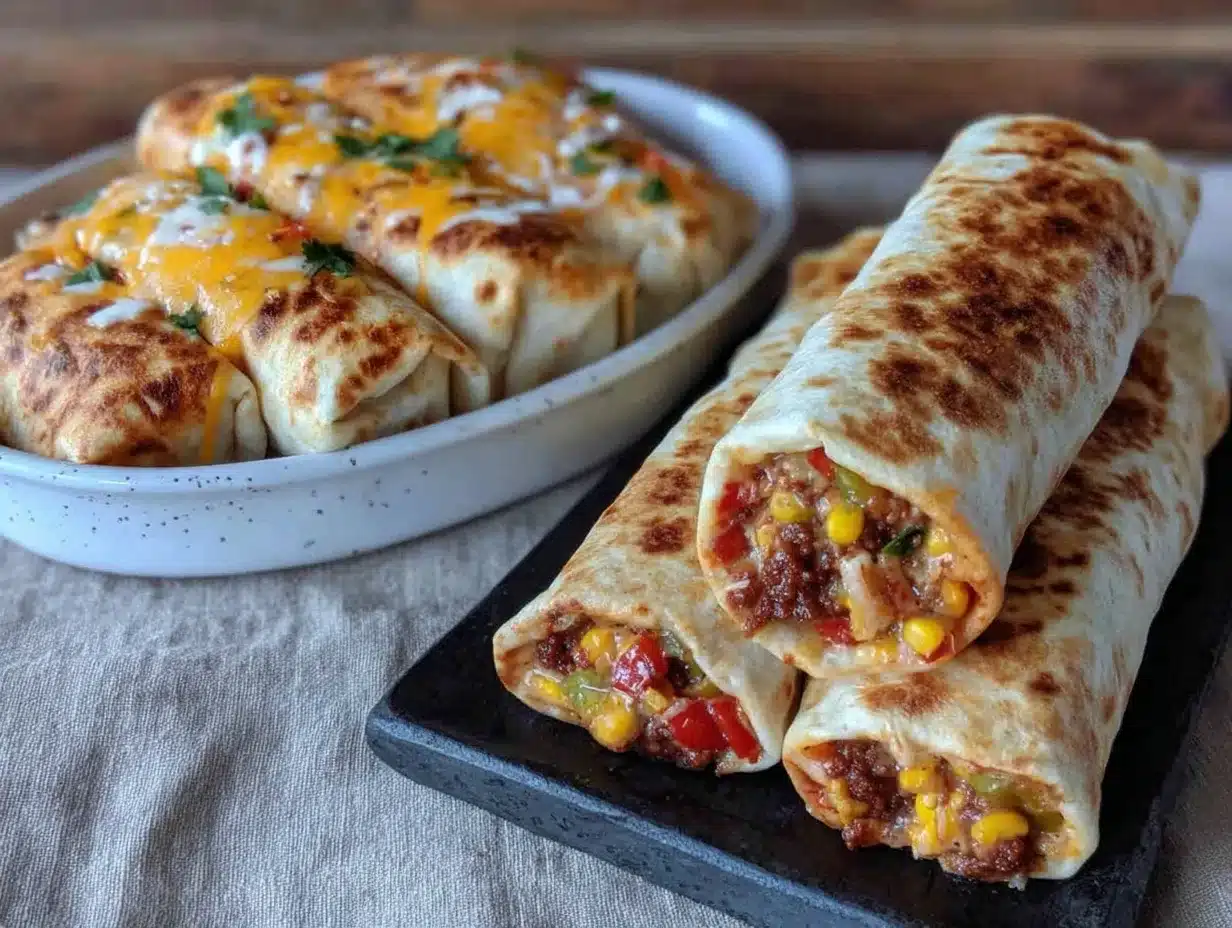
- Assemble the burritos: Spoon about ½ cup of the filling onto the center of each tortilla. Sprinkle with chopped cilantro if using. Fold in the sides and roll tightly from the bottom up to enclose the filling.
- Flash freeze: Place wrapped burritos on a parchment-lined baking sheet, making sure they don’t touch. Freeze uncovered for 1-2 hours until firm.
- Wrap and store: Once frozen, wrap each burrito tightly in plastic wrap or foil and place in a large freezer bag. Label with date and contents.
Tip: If your burritos feel loose or overstuffed, the filling might leak when reheating. Keep the filling amount moderate and roll snugly for best results. Also, warming the tortillas first helps prevent cracking.
Cooking Tips & Techniques
When it comes to making freezer-friendly burritos, a few tricks can really make the difference. First, don’t skip warming the tortillas before assembling. Cold tortillas tend to crack when you roll them, which can cause filling to spill during freezing or reheating. Trust me—I learned this the hard way after a messy first batch.
Using cooked rice instead of raw means the filling is ready to eat as soon as you heat the burrito. You want the rice tender but not mushy—leftover rice from the fridge works perfectly here. Also, be gentle when folding; a tight roll helps keep everything inside but avoid overstuffing.
Another tip is flash freezing before wrapping. Putting burritos directly into a bag can cause them to stick together, making it a pain to grab just one later. Flash freezing them individually keeps their shape and texture intact.
When reheating, microwave on medium power for 2-3 minutes, flipping halfway to avoid cold spots. Alternatively, you can unwrap and reheat in a toaster oven or skillet to get the tortilla crispy again. I usually keep a stash for days when I’m running late or just don’t want to think about dinner.
Variations & Adaptations
- Vegetarian: This recipe is naturally vegetarian, but you can add sautéed mushrooms or spinach for extra veggies.
- Vegan: Skip the cheese or use a plant-based alternative, and swap sour cream for dairy-free yogurt.
- Spicy Kick: Add diced jalapeños or a splash of hot sauce to the filling for more heat.
- Protein Boost: Add cooked shredded chicken, ground turkey, or tofu crumbles for extra protein.
- Grain Swap: Use quinoa or cauliflower rice if you want a gluten-free or lower-carb option.
I once tried a sweet potato and black bean combo with a touch of cinnamon and it was surprisingly delicious—almost like a southwestern twist. Feel free to experiment with your favorite beans, veggies, and spices to make these burritos truly your own.
Serving & Storage Suggestions
These loaded burritos are best served warm, topped with a dollop of sour cream or Greek yogurt, fresh salsa, or guacamole for extra flavor. Pair them with a simple side salad or tortilla chips if you want a fuller meal.
Store wrapped burritos in the freezer for up to 3 months. For best texture, thaw in the fridge overnight before reheating, or pop them straight from the freezer into the microwave or oven. If reheating in the oven or toaster oven, wrap in foil to avoid drying out, then unwrap near the end to crisp up the tortilla.
Flavors tend to deepen after a day or two in the fridge if you make a smaller batch to keep on hand, so leftovers can taste even better the next day. Just keep an eye on freshness and avoid refreezing once thawed.
Nutritional Information & Benefits
Each loaded burrito provides a balanced mix of protein, fiber, and carbs, making it a nourishing option for busy days. Black beans deliver plant-based protein and fiber that help keep you full longer. Corn adds a touch of sweetness along with vitamins A and C.
The use of olive oil and fresh veggies adds heart-healthy fats and antioxidants. Using whole wheat tortillas or cauliflower rice can bump up the fiber and reduce carbs if that’s your preference. Just be mindful of cheese and sour cream amounts if you’re watching saturated fats.
Overall, this recipe fits well within a balanced diet and can be adapted easily to suit gluten-free, vegetarian, or vegan lifestyles. I find it comforting to know I’m feeding myself well, even when life gets hectic.
Conclusion
Easy freezer-friendly loaded burritos have become one of my favorite hacks for busy days when cooking feels overwhelming. They strike just the right balance between convenience, flavor, and homemade goodness. Whether you’re feeding a family or just yourself, this recipe offers flexibility and a comforting meal that’s ready whenever you are.
Give yourself permission to customize the fillings and spices to your taste—it’s your kitchen and your schedule, after all. I still smile thinking about how these burritos quietly saved me on those chaotic evenings, and I hope they bring you the same little moments of ease and satisfaction.
Feel free to share your tweaks or questions—I love hearing how this recipe fits into your life. Here’s to quick, hearty meals that don’t skimp on flavor or soul.
FAQs about Easy Freezer-Friendly Loaded Burritos
How long can I store these burritos in the freezer?
You can keep them frozen for up to 3 months. Beyond that, the texture and flavor might start to decline.
Can I make these burritos ahead of time and freeze them raw?
It’s better to fully cook the filling and assemble the burritos before freezing. Raw tortillas can crack and fillings may not cook evenly if frozen raw.
What’s the best way to reheat a frozen burrito?
Microwave on medium power for 2-3 minutes, flipping halfway. Alternatively, reheat in a toaster oven or skillet for a crispier tortilla.
Can I freeze these burritos without wrapping them individually?
It’s not recommended because burritos may stick together and lose shape. Flash freezing individually before wrapping is the best method.
Are these burritos gluten-free?
Not with regular flour tortillas, but you can use gluten-free tortillas to make the recipe gluten-free.
Pin This Recipe!
Easy Freezer-Friendly Loaded Burritos Recipe for Busy Weekdays

These freezer-friendly loaded burritos come together quickly with simple ingredients, perfect for busy weekdays. They offer a flavorful, comforting meal that can be prepped in advance and enjoyed anytime.
- Prep Time: 15 minutes
- Cook Time: 15 minutes
- Total Time: 30 minutes
- Yield: 6 servings 1x
- Category: Main Course
- Cuisine: Mexican-inspired
Ingredients
- Large flour tortillas (10-12 inch), burrito-sized
- 1 can (15 oz) black beans, drained and rinsed
- 1 cup corn kernels, frozen or fresh
- 1 cup cooked rice (white, brown, or cauliflower rice)
- 1 cup shredded cheese (Cheddar, Monterey Jack, or blend)
- 1 small onion, finely chopped
- 2 cloves garlic, minced
- 1 medium bell pepper, diced
- 1 teaspoon chipotle chili powder
- 1 teaspoon cumin
- 1 tablespoon olive oil
- Salt and pepper, to taste
- Sour cream or Greek yogurt, for serving (optional)
- Fresh cilantro, a handful chopped (optional)
Instructions
- Finely chop 1 small onion, mince 2 garlic cloves, and dice 1 medium bell pepper (5-7 minutes).
- Heat 1 tablespoon olive oil in a medium skillet over medium heat. Add onion and bell pepper; cook 4-5 minutes until softened and fragrant.
- Stir in minced garlic, 1 teaspoon cumin, and 1 teaspoon chipotle chili powder; cook for 1 minute until spices bloom.
- Add 1 can black beans (drained and rinsed) and 1 cup corn kernels; stir and cook 3-4 minutes until heated through.
- Remove skillet from heat; stir in 1 cup cooked rice and 1 cup shredded cheese. Season with salt and pepper to taste.
- Warm each tortilla for 15-20 seconds in microwave or on dry skillet until flexible.
- Spoon about ½ cup filling onto center of each tortilla. Sprinkle with chopped cilantro if using. Fold sides and roll tightly from bottom up to enclose filling.
- Place wrapped burritos on parchment-lined baking sheet, ensuring they don’t touch. Freeze uncovered for 1-2 hours until firm.
- Once frozen, wrap each burrito tightly in plastic wrap or foil and place in a large freezer bag. Label with date and contents.
Notes
Warm tortillas before assembling to prevent cracking. Flash freeze burritos individually before wrapping to avoid sticking. Moderate filling amount to prevent leaking during reheating. Reheat in microwave on medium power for 2-3 minutes, flipping halfway, or use toaster oven/skillet for crispier tortilla.
Nutrition
- Serving Size: 1 burrito
- Calories: 350
- Sugar: 4
- Sodium: 450
- Fat: 12
- Saturated Fat: 5
- Carbohydrates: 45
- Fiber: 8
- Protein: 14
Keywords: freezer-friendly, loaded burritos, meal prep, quick dinner, easy recipe, vegetarian, freezer meals, busy weekdays