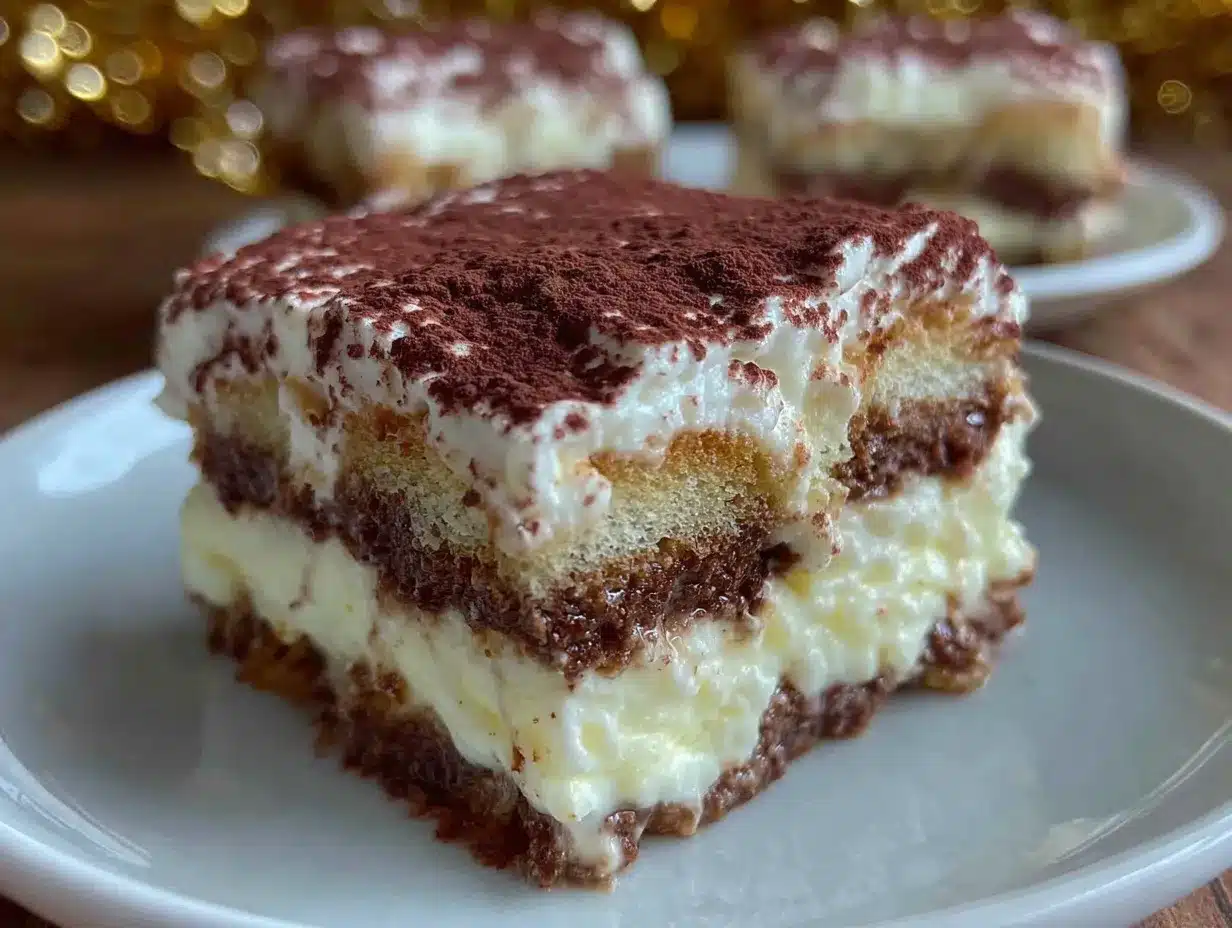
There’s just something magical about the first whiff of espresso and cocoa floating up when you slice into a pan of creamy no-bake tiramisu. It’s the kind of scent that drifts through your kitchen, clings to your memory, and makes your heart flutter a little (especially if you’re an unapologetic dessert lover like me). The glossy sheen of perfectly whipped mascarpone, the soft clouds of cream, and the bittersweet coffee-soaked ladyfingers—oh, it’s downright irresistible.
The first time I made this creamy no-bake tiramisu, I was a college student with zero patience for ovens or complicated desserts. I’d tasted the real deal at a sweet little trattoria in Florence years before, and I just had to recreate that moment. When I took my first forkful, I paused—just held my breath for a second—and grinned. That old-world flavor, right there in my tiny apartment! It was the kind of moment where you pause, take a deep breath, and just smile because you know you’re onto something truly special.
Growing up, my grandma would make a version of tiramisu for every family get-together (the “grown-up” dessert, she called it). I wasn’t allowed to sneak bites as a kid (though, of course, I tried), but when I finally got my own kitchen, this became my project. Now, my family can’t stop sneaking spoonfuls from the fridge before dinner’s even started, and honestly, I can’t blame them. This no-bake tiramisu is dangerously easy, the kind of thing you whip up on a rainy afternoon, for last-minute guests, or when you just need a little taste of Italy on a Tuesday night.
Let’s face it, this creamy no-bake tiramisu is perfect for potlucks, sweet treats for your kids (just skip the booze), or when you want to brighten up your Pinterest dessert board with something classic and crowd-pleasing. I’ve tested and tweaked this recipe more times than I can count—always, of course, in the name of research! It’s become a staple for birthdays, gifting, and every “just because” craving. If you want a dessert that feels like a warm hug from an Italian nonna, you’re going to want to bookmark this one.
Why You’ll Love This Creamy No-Bake Tiramisu Recipe
I’ve spent years tinkering with tiramisu recipes, and I can tell you—this one is the real deal. It’s got just the right balance of creamy and light, rich and refreshing. Whether you’re a seasoned baker or just getting started, this creamy no-bake tiramisu will have you feeling like a pastry pro (with none of the stress). Here’s why this recipe stands out, every single time:
- Quick & Easy: You don’t need an oven or any special equipment—just 20 minutes of hands-on time. It’s perfect for busy weeknights or those panicked moments when you remember you promised to bring dessert.
- Simple Ingredients: No need to hunt down fancy stuff. Mascarpone, eggs, coffee, ladyfingers, and cocoa powder—odds are, you have most things in your kitchen already.
- Perfect for Every Occasion: This creamy no-bake tiramisu shines at brunches, dinner parties, holiday feasts, or quiet evenings at home. It’s as at home on a buffet as it is on your couch for a Netflix night.
- Crowd-Pleaser: From picky eaters to food snobs, everyone sneaks back for seconds. It’s sweet, but not cloying; creamy, but not heavy.
- Unbelievably Delicious: The mascarpone layer is silky, the coffee-soaked ladyfingers are soft but not mushy, and the dusting of cocoa on top gives every bite a bittersweet finish. It’s pure, nostalgic comfort food.
What really sets this creamy no-bake tiramisu recipe apart is the method. Instead of whisking eggs over a double boiler (which, let’s be honest, is easy to mess up), I use a gentle folding technique that keeps everything light as air. Blending the mascarpone just enough (never over-mix!), and using strong espresso for soaking the ladyfingers, gives you that authentic taste without the fuss. I’ve tried all the “shortcut” versions, and nothing beats this creamy, classic approach.
Honestly, tiramisu is the kind of dessert that makes you close your eyes after the first spoonful and just sigh. It’s comfort food that feels a little fancy but is totally stress-free. This recipe is my go-to for impressing guests, spoiling family, or just making an ordinary day special. Give it a try—you’ll see why it’s my absolute favorite.
What Ingredients You Will Need
This creamy no-bake tiramisu is all about simple, classic ingredients coming together for one knockout Italian dessert. Each one actually plays a big part—no fillers, no weird substitutes (unless you want them, of course). You can find everything at your local grocery store, and probably already have a few things in the pantry.
- For the Cream:
- Mascarpone cheese (16 oz / 450g), chilled – The heart and soul of tiramisu. Stick with Italian brands like Galbani or BelGioioso if possible for that authentic, ultra-creamy texture.
- Large eggs (3), separated – Room temperature eggs whip up fluffier. Yes, we’ll be using them raw, but I’ll talk about safe handling later.
- Granulated sugar (1/2 cup / 100g) – Sweetens the cream without overpowering it.
- Heavy whipping cream (1 cup / 240ml) – Adds extra volume and that dreamy mouthfeel.
- Vanilla extract (1 tsp / 5ml) – A touch for warmth and aroma.
- For the Coffee Dip:
- Espresso or very strong coffee (1 1/2 cups / 360ml), cooled – Go for robust flavor. Instant espresso powder works too. Make it ahead and chill it.
- Dark rum or coffee liqueur (2-3 tbsp / 30-45ml), optional – If you’re serving kids, just use more coffee. For adults, Kahlúa or Marsala wine is fantastic.
- For Assembly:
- Ladyfingers (Savoiardi) (about 24-28, 7 oz / 200g) – Look for crisp, dry Italian ones. Avoid the soft sponge kind—they’ll turn to mush.
- Unsweetened cocoa powder (2-3 tbsp / 15-20g), for dusting – Dutch-process gives a rich color and flavor, but any unsweetened cocoa will work.
- Grated dark chocolate or chocolate curls (optional), for garnish – Adds a little flair if you’re feeling extra.
Ingredient Tips: If you can’t find mascarpone, full-fat cream cheese is an okay stand-in (just not quite the same). For a gluten-free version, swap in gluten-free ladyfingers (Schar brand does the trick). Dairy-free mascarpone is out there too, and coconut cream whips up nicely for a vegan twist. And in the summer, I sometimes swap the cocoa for a layer of fresh berries on top—so good.
This creamy no-bake tiramisu is as adaptable as you need, but it always tastes like a treat from your favorite Italian bakery—no passport needed.
Equipment Needed
You don’t need a fancy set-up for this creamy no-bake tiramisu. In fact, most of these tools are probably lurking somewhere in your kitchen cabinets. Here’s what I use every time:
- Mixing bowls: At least two medium-to-large ones. Glass or metal work best for whipping egg whites and cream.
- Electric mixer or stand mixer: A hand whisk is doable, but your arm will get a workout! Even a cheap electric hand mixer makes things much easier.
- Spatula: For gently folding ingredients together. A silicone one is my favorite, but any will do.
- 8×8-inch (20x20cm) square dish or similar-sized trifle bowl: Clear glass shows off those beautiful layers, but any baking dish works.
- Fine-mesh sieve: For dusting cocoa powder evenly on top. A tea strainer works in a pinch.
- Measuring cups and spoons: For accuracy. I always recommend double-checking your measurements for the creamiest results.
- Optional: Offset spatula for smoothing layers, and a vegetable peeler for making chocolate curls.
If you don’t have a stand mixer, don’t sweat it—an old-school whisk and elbow grease still get the job done (just takes a little more time). I’ve used everything from dollar-store spatulas to my grandma’s chipped Pyrex bowl, and the tiramisu always turns out delicious. Just make sure your equipment is clean and dry, especially for whipping cream and egg whites (a little grease ruins the fluff!).
How to Make Creamy No-Bake Tiramisu – Step-by-Step Method
-
Brew and Cool the Coffee:
Brew 1 1/2 cups (360ml) of strong espresso or coffee. Pour into a shallow dish and let it cool completely. If using liquor, stir in 2-3 tablespoons (30-45ml) of dark rum, coffee liqueur, or Marsala wine.
Tip: Coffee should be cold—hot coffee will make the ladyfingers fall apart! -
Separate the Eggs:
Carefully separate 3 large eggs, placing the whites in one bowl and the yolks in another.
Note: If you’re wary about raw eggs, use pasteurized eggs for safety. -
Whip the Egg Yolks with Sugar:
Add 1/2 cup (100g) of granulated sugar to the yolks. Beat with an electric mixer on medium speed for 2-3 minutes, until pale and thick. The mixture should form ribbons when you lift the beaters. -
Add Mascarpone:
Gently fold in 16 oz (450g) of mascarpone cheese and 1 teaspoon (5ml) of vanilla extract. Mix until smooth and creamy—don’t over-mix, or it’ll get runny. -
Whip the Egg Whites:
With clean beaters, whip the egg whites to stiff peaks (about 2-3 minutes). The whites should hold their shape when you lift the whisk.
Warning: Any yolk in your whites, and they won’t whip up! -
Whip the Cream:
In a separate bowl, whip 1 cup (240ml) heavy cream to soft peaks. It should look fluffy and hold a peak, but not be grainy. -
Fold Everything Together:
Using a spatula, gently fold the whipped cream into the mascarpone mixture. Then, fold in the whipped egg whites until just combined. The mixture should be light and airy.
Personal Tip: Fold gently—over-mixing will deflate the cream. -
Soak the Ladyfingers:
Quickly dip each ladyfinger (about 24-28, 200g) into the cooled coffee mixture—just 1-2 seconds per side. They should be soaked but not soggy.
Warning: If they get mushy, your layers will collapse. It’s okay if they’re a tad crunchy—they’ll soften as they chill. -
Layer the Tiramisu:
Arrange half the soaked ladyfingers in a single layer in your 8×8-inch (20x20cm) dish. Spread half the mascarpone mixture over the top, smoothing with a spatula. Repeat with the remaining ladyfingers and mascarpone. -
Chill:
Cover with plastic wrap and refrigerate for at least 4 hours (overnight is best). This lets the flavors meld and the dessert set.
Tip: I know it’s hard, but don’t skip the chilling—it makes all the difference. -
Finish and Serve:
Just before serving, sift 2-3 tablespoons (15-20g) of cocoa powder over the top. Add grated chocolate or curls if you like. Cut into squares or scoop with a spoon, and enjoy cold!
If you notice your cream looks a bit runny, pop it in the fridge for 20 minutes before assembling—the cold helps set it up. And if you’re in a rush, a quick 2-hour chill is better than nothing, though overnight is always king for creamy no-bake tiramisu.
Cooking Tips & Techniques for the Best No-Bake Tiramisu
-
Don’t over-soak the ladyfingers.
The number one mistake is soggy, collapsing layers! I dip each ladyfinger for 1-2 seconds—just enough to pick up flavor, not enough to fall apart. They’ll soften as the tiramisu chills. -
Use cold ingredients.
Cold mascarpone and whipping cream keep the filling thick and luscious. Warm ingredients can make the cream runny (been there, done that). -
Folding is your friend.
When combining whipped cream and egg whites with the mascarpone, use a gentle folding motion—think “scoop and turn.” Over-mixing knocks out all the air, leaving you with a dense filling (not what we want). -
Don’t skip the chill.
Four hours is the bare minimum for creamy no-bake tiramisu. Overnight is even better—the flavors develop, the layers meld, and it slices cleanly. -
Taste your coffee.
Bitter coffee makes bitter tiramisu. Use a brew you’d actually drink, and sweeten it slightly if you’re sensitive to strong flavors. -
Use pasteurized eggs if you’re nervous about raw eggs.
I’ve made this recipe with both raw and pasteurized eggs—no difference in taste, just peace of mind. -
Practice makes perfect.
My first tiramisu was too wet, the next too dry, and finally (after a few tries), I found my sweet spot. If you don’t nail it the first time, don’t worry—you’ll get better with each batch. -
Multitasking tip:
Whip your cream while your coffee cools, and separate eggs while the mixer runs. It saves time and keeps things moving.
This creamy no-bake tiramisu is forgiving, but a little care makes it restaurant-worthy. If you mess up a layer (I have!), just keep going—it always tastes amazing, even if it’s a little wobbly. And honestly, the cocoa dust covers a multitude of sins!
Variations & Adaptations
-
Kid-Friendly Version:
Swap the coffee for decaf or hot chocolate, and skip the alcohol. You can even sprinkle in some mini chocolate chips between the layers for extra fun. -
Gluten-Free Tiramisu:
Use gluten-free ladyfingers (Schar is a reliable brand), or try using gluten-free vanilla sponge cake cut into strips. The rest of the recipe is naturally gluten-free. -
Berry Tiramisu:
In the summer, I love swapping the coffee for sweetened berry puree (like raspberries or strawberries). It’s a fresh, fruity twist that’s perfect for picnics. -
Vegan/Dairy-Free Option:
Use plant-based mascarpone (like Tofutti or Violife), coconut cream in place of whipping cream, and egg replacer for the eggs. It’s surprisingly creamy and satisfying. -
Chocolate Lover’s Tiramisu:
Add a layer of chocolate ganache between the ladyfinger and cream layers, or swirl some Nutella into the mascarpone filling. Decadence at its best.
I’ve personally tried making creamy no-bake tiramisu with a splash of orange liqueur and candied orange peel—sort of a “holiday tiramisu.” The possibilities are endless, so feel free to get creative. You’ll find your family favorite in no time.
Serving & Storage Suggestions
This creamy no-bake tiramisu is all about that chilled, velvety texture. I recommend serving it straight from the fridge, cut into neat squares or scooped into bowls for a more rustic look. For a fancier presentation, assemble in individual glasses—so cute for parties or Pinterest-worthy photos!
- Serving temp: Always serve cold. If you want perfect clean slices, dip your knife in hot water and wipe between cuts.
- Pairings: Coffee or espresso is a classic, but it’s also amazing with a glass of dessert wine (Vin Santo, anyone?), or a splash of amaretto on the side. For a full Italian feast, pair with fresh berries and a simple green salad.
- Storage: Cover with plastic wrap and refrigerate for up to 3 days. The flavors actually get better as it sits. If you want to freeze tiramisu, wrap tightly and freeze for up to 1 month—thaw overnight in the fridge before serving.
- Reheating: No need! Tiramisu is best eaten cold. If it gets a little watery, just blot the top gently with a paper towel before serving.
- Flavor note: The cocoa topping can fade after a day—just add a fresh dusting right before serving for the prettiest slice.
Honestly, this creamy no-bake tiramisu rarely lasts long enough at my house to worry about storage. But if you’re lucky enough to have leftovers, they’re even better the next day!
Nutritional Information & Benefits
Here’s a quick look at what you’re getting in a typical serving (about 1/9th of the pan):
- Calories: ~350
- Fat: 24g
- Carbohydrates: 28g
- Protein: 7g
Mascarpone and eggs pack in some protein and healthy fats. If you use gluten-free ladyfingers or a sugar substitute, it fits nicely into gluten-free or lower-carb lifestyles. Just be aware of the raw egg and dairy if you have allergies. From a wellness perspective, I see desserts like this as pure joy—something to savor, not stress over. Everything in moderation, you know?
Conclusion
There’s a reason creamy no-bake tiramisu is beloved around the world—it’s simple, elegant, and feels like a little celebration in every bite. Whether you stick to the classic or try one of the fun twists, this recipe brings authentic Italian flavor right to your kitchen, with zero oven required. Don’t be afraid to tweak and make it your own—food is meant to be shared, enjoyed, and maybe even a little bit messy.
I make this creamy no-bake tiramisu for birthdays, holidays, and just because it’s Tuesday. The best part? It never fails to bring a smile, a sigh, and a whole lot of “can I have the recipe?” moments. If you try it, let me know in the comments—did you add a special twist? Did your family love it as much as mine? Pin it, share it, and don’t forget to come back for more Italian favorites. Happy layering, and buon appetito!
Frequently Asked Questions About Creamy No-Bake Tiramisu
Can I make creamy no-bake tiramisu without eggs?
Absolutely! Just whip extra cream (use 2 cups instead of 1) and fold it into the mascarpone with your sugar and vanilla. The texture is a little less traditional, but still creamy and delicious.
How long does tiramisu need to chill before serving?
At least 4 hours is best, but overnight is even better. This gives the flavors time to blend and the layers to set perfectly.
Is it safe to use raw eggs in tiramisu?
If you’re concerned, use pasteurized eggs, which are available at most grocery stores. You can also make an eggless version by replacing the eggs with more whipped cream.
What can I use instead of mascarpone cheese?
Full-fat cream cheese is the closest substitute, though the flavor is a bit tangier. You can also try a mix of cream cheese and sour cream for balance, or use vegan mascarpone for a dairy-free version.
Can I freeze creamy no-bake tiramisu?
Yes! Wrap it tightly and freeze for up to a month. Thaw overnight in the fridge before serving. The texture might be slightly softer, but it’s still tasty.
Pin This Recipe!
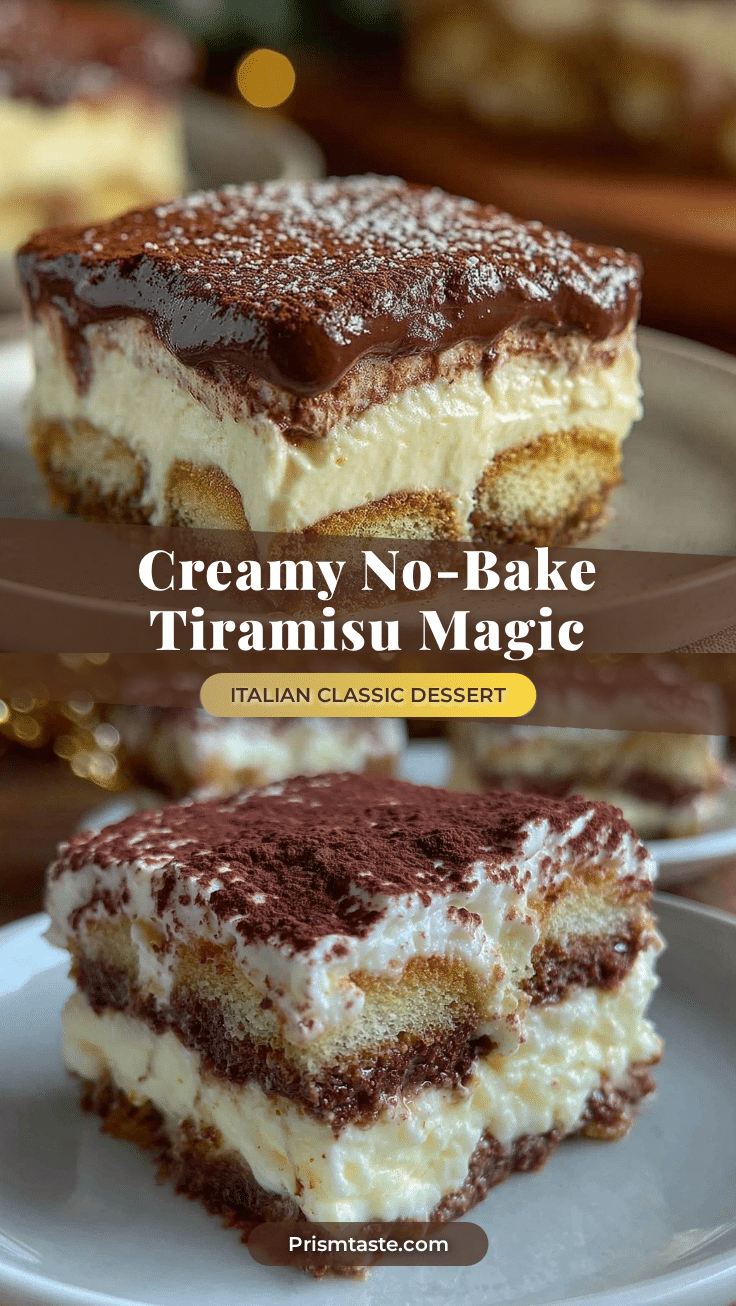
Creamy No-Bake Tiramisu

This creamy no-bake tiramisu is an easy, authentic Italian dessert featuring layers of coffee-soaked ladyfingers and silky mascarpone cream. It’s perfect for potlucks, holidays, or any time you crave a classic treat with zero oven required.
- Prep Time: 20 minutes
- Cook Time: 0 minutes
- Total Time: 4 hours 20 minutes
- Yield: 9 servings 1x
- Category: Dessert
- Cuisine: Italian
Ingredients
- 16 oz mascarpone cheese, chilled
- 3 large eggs, separated
- 1/2 cup granulated sugar
- 1 cup heavy whipping cream
- 1 teaspoon vanilla extract
- 1 1/2 cups espresso or very strong coffee, cooled
- 2–3 tablespoons dark rum or coffee liqueur (optional)
- 24–28 ladyfingers (Savoiardi), about 7 oz
- 2–3 tablespoons unsweetened cocoa powder, for dusting
- Grated dark chocolate or chocolate curls (optional), for garnish
Instructions
- Brew 1 1/2 cups strong espresso or coffee. Pour into a shallow dish and let cool completely. Stir in rum or liqueur if using.
- Separate 3 large eggs, placing whites in one bowl and yolks in another.
- Add 1/2 cup sugar to the yolks. Beat with an electric mixer on medium speed for 2-3 minutes, until pale and thick.
- Gently fold in mascarpone cheese and vanilla extract to the yolk mixture. Mix until smooth and creamy, but do not over-mix.
- With clean beaters, whip the egg whites to stiff peaks (about 2-3 minutes).
- In a separate bowl, whip heavy cream to soft peaks.
- Gently fold whipped cream into the mascarpone mixture, then fold in whipped egg whites until just combined.
- Quickly dip each ladyfinger into the cooled coffee mixture for 1-2 seconds per side.
- Arrange half the soaked ladyfingers in a single layer in an 8×8-inch dish. Spread half the mascarpone mixture over the top. Repeat with remaining ladyfingers and mascarpone.
- Cover with plastic wrap and refrigerate for at least 4 hours, preferably overnight.
- Just before serving, sift cocoa powder over the top and garnish with grated chocolate or curls if desired. Serve cold.
Notes
Use pasteurized eggs if concerned about raw eggs. Do not over-soak ladyfingers; a quick dip is enough. Chill tiramisu for at least 4 hours, overnight for best results. For gluten-free, use gluten-free ladyfingers. For kid-friendly, skip alcohol and use decaf coffee or hot chocolate. Tiramisu can be frozen for up to 1 month.
Nutrition
- Serving Size: 1/9th of 8x8-inch pa
- Calories: 350
- Sugar: 16
- Sodium: 90
- Fat: 24
- Saturated Fat: 14
- Carbohydrates: 28
- Fiber: 1
- Protein: 7
Keywords: tiramisu, no-bake, Italian dessert, mascarpone, coffee, ladyfingers, easy tiramisu, authentic tiramisu, creamy tiramisu, potluck dessert