Introduction
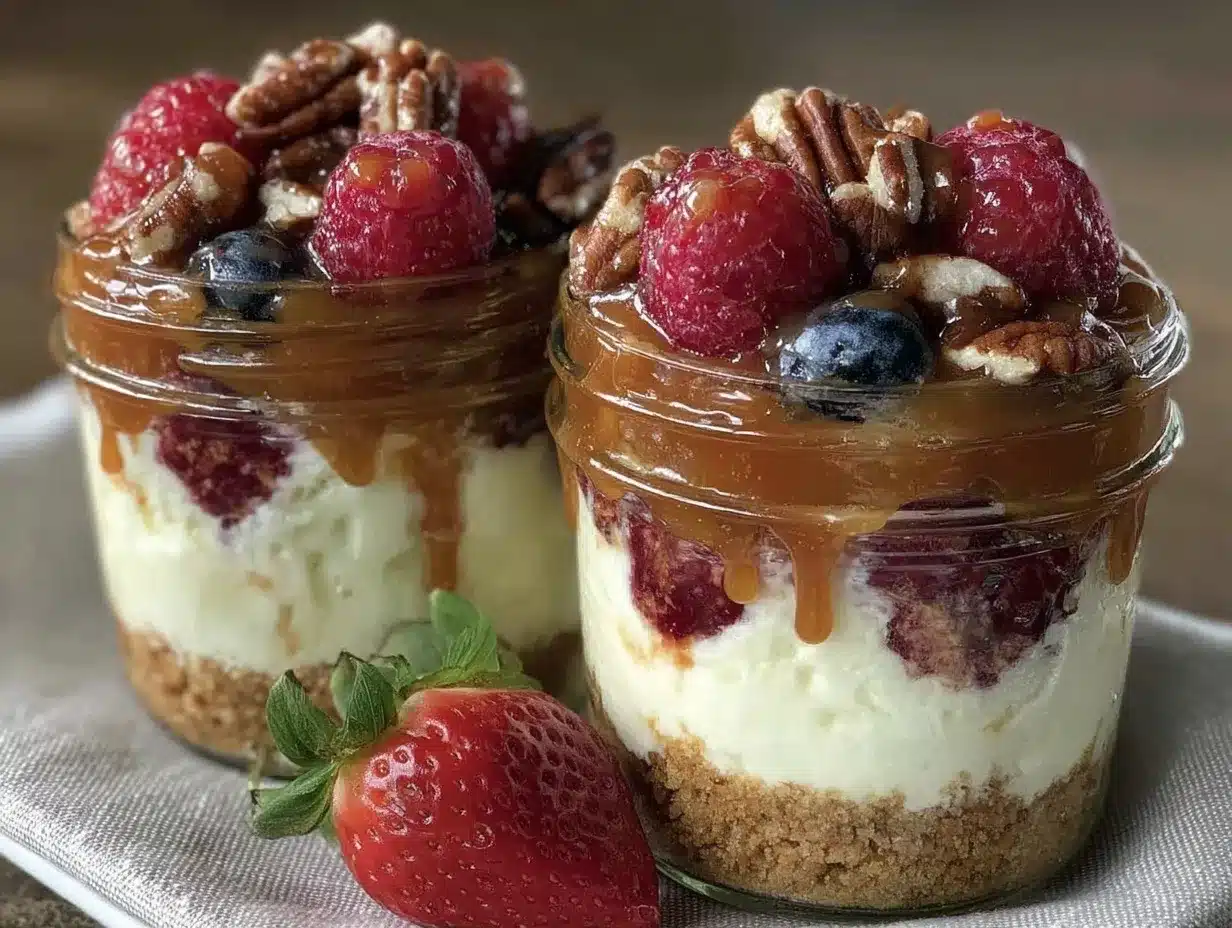
I remember one quiet Saturday evening when the craving hit me out of nowhere—something sweet but not too much, creamy, and definitely fuss-free. I wasn’t in the mood for a big baking project or hauling out the mixer and all those bowls. Honestly, I just wanted a little indulgence for myself, nothing complicated. So, I rummaged through my fridge and pantry, threw together a quick batch of these creamy small batch no-bake loaded cheesecake jars, and sat down with a spoon. The texture was silky, the flavor rich but balanced, and the toppings? Oh, those loaded layers made every bite a tiny celebration. It was this unexpected little win that turned into a go-to whenever I need a quick, impressive dessert without the drama. It’s funny how something so simple can feel like a treat made just for you.
What stuck with me was how these jars are just the right size—no leftovers haunting the fridge or waste piling up. They’re like a dessert hug in a jar, perfect for those solo moments or when you want to share just a bit without committing to a huge cake. That first spoonful, creamy and cool, with the crunch of the crust and a burst of whatever toppings I had on hand, felt like a small victory in a busy day. And since then, I keep tweaking and loading them up with different goodies, always coming back to that familiar, comforting base. These no-bake loaded cheesecake jars are proof that sometimes the easiest recipes turn out to be the most memorable.
Why You’ll Love This Recipe
- Quick & Easy: Ready in about 20 minutes, perfect for last-minute dessert cravings or a casual get-together.
- Simple Ingredients: Uses pantry staples and common fridge finds—cream cheese, graham crackers, and a handful of toppings you love.
- Perfect for Small Batches: No need to make a whole cheesecake; just enough for two or three jars, minimizing waste.
- Crowd-Pleaser: Sweet, creamy, and loaded with toppings that everyone always asks about.
- Unbelievably Delicious: The creamy texture paired with a buttery crust and bursts of fresh or sweet toppings make each spoonful satisfying.
This recipe isn’t just another no-bake cheesecake—it’s a little reinvention. The jars let you layer toppings and fillings so the flavor and texture build with every bite. Plus, blending the cream cheese and sour cream (or Greek yogurt) until ultra-smooth gives that perfect light yet decadent mouthfeel. Whether you’re after a quick dessert fix or a charming treat to impress your guests without stress, these jars have got you covered. It’s the kind of recipe that feels fancy but is honestly no-fuss, which is why it’s become a staple in my kitchen.
What Ingredients You Will Need
This recipe uses simple, wholesome ingredients to deliver bold flavor and satisfying texture without the fuss. Most are pantry staples, and you can swap a few to fit your preferences or dietary needs.
- For the crust:
- Graham cracker crumbs, about 1 cup (preferably finely crushed for that perfect crunch)
- Unsalted butter, 4 tablespoons, melted (adds richness and binds the crust)
- Granulated sugar, 1 tablespoon (balances the buttery crust)
- For the cheesecake filling:
- Cream cheese, 8 oz (225 g), softened (I recommend Philadelphia for smooth texture)
- Sour cream or Greek yogurt, ½ cup (120 ml) (adds tang and lightness)
- Powdered sugar, ⅓ cup (40 g), sifted (for smooth sweetness)
- Pure vanilla extract, 1 teaspoon (quality matters—Nielsen-Massey is a favorite)
- Heavy cream, ⅓ cup (80 ml), cold (to whip and lighten the filling)
- For the toppings (choose your favorites or mix it up):
- Fresh berries (strawberries, blueberries, raspberries) about ½ cup (seasonal freshness is best)
- Chocolate chips or mini chunks, 2 tablespoons (adds a sweet surprise)
- Crushed nuts (pecans, walnuts, or almonds), 2 tablespoons (for crunch and flavor)
- Caramel or chocolate drizzle, optional but highly recommended for extra indulgence
- Shredded coconut or mini marshmallows for a twist
If you’re gluten-free, swapping graham crackers for gluten-free cookies or almond flour crumbs works beautifully. For a dairy-free version, use vegan cream cheese and coconut yogurt, and swap butter for coconut oil. The flexibility means you can enjoy creamy small batch no-bake loaded cheesecake jars no matter your pantry or preferences.
Equipment Needed
- Mixing bowls (medium and small): Essential for creaming the cheese and whipping the cream.
- Electric hand mixer or stand mixer: Helpful for smooth, lump-free filling, but a sturdy whisk and a bit of muscle can do the job too.
- Measuring cups and spoons: Accurate measurements keep the balance just right.
- Spoons or spatulas: For folding ingredients gently without deflating the whipped cream.
- Small jars or dessert cups (4 to 6 oz size): These are perfect for single servings and presentation. Mason jars or glass ramekins work great.
- Food processor or rolling pin: To crush graham crackers finely. I like a food processor for speed, but a zip-top bag and rolling pin work too.
For a budget-friendly option, you can skip the mixer and whip cream by hand if you have a good whisk. Keeping cream cheese softened at room temperature before mixing makes the process smoother. Also, maintaining your blades clean and dry helps avoid lumps. I learned the hard way that cold cream cheese leads to a bumpy filling—so worth the wait!
Preparation Method
- Prepare the crust: In a medium bowl, combine 1 cup (100 g) of graham cracker crumbs, 4 tablespoons (60 g) melted unsalted butter, and 1 tablespoon (12 g) granulated sugar. Mix until the crumbs are fully coated and resemble wet sand. This usually takes about 2-3 minutes. If the mixture feels too dry, add a tiny splash of melted butter. Press about 2 tablespoons (30 g) of this mixture into the bottom of each jar or cup, firmly but gently, to create an even base. Set aside. (This step forms the crunchy foundation that contrasts with the creamy filling.)
- Make the cheesecake filling: In a large mixing bowl, beat 8 oz (225 g) softened cream cheese with ½ cup (120 ml) sour cream or Greek yogurt, ⅓ cup (40 g) powdered sugar, and 1 teaspoon vanilla extract on medium speed until smooth and creamy, usually about 2-3 minutes. Scrape down the sides to avoid lumps. (If it looks too thick, don’t worry; the whipped cream will lighten it.)
- Whip the heavy cream: In a chilled small bowl, whip ⅓ cup (80 ml) cold heavy cream until soft peaks form—this takes about 2-3 minutes with a hand mixer or slightly longer by hand. Be careful not to overbeat; you want it fluffy but not grainy.
- Fold the whipped cream into the cream cheese mixture: Using a spatula, gently fold the whipped cream into the cream cheese mixture in three additions. This keeps the filling light and airy. The filling should be smooth, creamy, and spreadable. (If you prefer a firmer set, refrigerate the filling for 20 minutes before assembling.)
- Assemble the jars: Spoon or pipe a thick layer of cheesecake filling over the crust in each jar, filling about ¾ full. Then, add your choice of toppings—fresh berries, chocolate chips, nuts, or drizzles. Feel free to layer toppings between filling portions for a loaded effect. (The combination of creamy, crunchy, and fresh is what makes these jars special.)
- Chill and serve: Refrigerate the jars for at least 2 hours to let the cheesecake set and flavors meld. They hold well for up to 3 days in the fridge. Just before serving, add any fresh garnishes or an extra drizzle of sauce if desired.
If the crust gets soggy, try pressing it a bit more firmly next time or chilling the jars right after assembly. Also, if you notice the filling is too runny, a bit more powdered sugar or a touch of gelatin can help stabilize it, but I rarely need to do that. These jars come together fast and taste like you spent hours fussing!
Cooking Tips & Techniques
One key to these creamy small batch no-bake loaded cheesecake jars is the texture of the filling. Softened cream cheese is non-negotiable—if it’s too cold, lumps sneak in and make mixing frustrating. I’ve learned to take it out an hour before starting, especially when the kitchen is chilly.
When whipping cream, cold heavy cream whips up faster and holds better. I pop the bowl in the fridge ahead of time if I can. Folding whipped cream into the cream cheese mix gently is crucial—too much stirring deflates the airiness, and that’s where the cheesecake can turn dense or heavy.
Pressing the crust firmly but not overly so keeps it crunchy without being rock hard. If you press too firmly, it becomes tough to dig into, but too loose and it falls apart. I usually test one jar first to find the right pressure.
Multitasking tip: While the crust sets in the fridge, whip your cream and cream cheese mixture. This saves time and keeps the cream cheese from warming up too much. Also, layering toppings between filling layers adds a fun surprise element, making the jars look more professional and taste more exciting.
Common mistake? Skipping the chilling time. I get it—impatience is real—but chilling helps the filling firm up and flavors meld. Without it, the jars can seem a bit runny and less flavorful.
Variations & Adaptations
- Fruit Swirl: Add a swirl of homemade berry compote or lemon curd into the cheesecake filling before folding in the whipped cream for a tangy twist.
- Chocolate Lover’s: Mix in 2 tablespoons (30 g) melted dark chocolate into the filling, or layer with chocolate cookie crumbs for the crust instead of graham crackers.
- Nut-Free Version: Skip the nuts and try toasted coconut flakes or crushed pretzels for crunch instead.
- Dairy-Free Adaptation: Use vegan cream cheese, coconut yogurt, and coconut cream whipped to stiff peaks. Use coconut oil for the crust instead of butter.
- Spiced Variation: Add ½ teaspoon cinnamon or pumpkin pie spice to the crust for a cozy flavor profile.
One personal favorite is topping the jars with candied pecans and a drizzle of bourbon caramel sauce—makes it feel like a grown-up treat. Also, these jars adapt well to layering with granola or chia seed pudding for a breakfast twist, which I’ve done more times than I can count when craving something sweet but wholesome.
Serving & Storage Suggestions
These cheesecake jars are best served chilled straight from the fridge, letting the creamy filling and crunchy crust shine. Presenting them in clear jars or cups lets all the layers show, which always gets compliments. If you want to dress them up for guests, add a dollop of whipped cream and fresh mint leaves on top right before serving.
Pair them with a hot cup of coffee, a glass of cold milk, or even a fruity iced tea for a balanced dessert experience. For brunch, they’re lovely alongside fresh fruit salad or light pastries.
Storage is simple: cover the jars tightly with lids or plastic wrap and refrigerate for up to 3 days. The crust holds up surprisingly well without getting soggy too fast. For longer storage, you can freeze the jars for up to a month—just thaw in the fridge overnight before enjoying. Reheat is not recommended as the texture changes, but a quick room temperature rest makes them easier to spoon.
Flavors deepen after a day in the fridge, so if you can wait, the jars taste even better the next day. That little bit of patience rewards you with a cheesecake that feels harmoniously blended and even creamier.
Nutritional Information & Benefits
Each jar (assuming 3 servings) roughly contains:
| Calories | 320 per serving |
|---|---|
| Fat | 22 g (mostly from cream cheese and butter) |
| Protein | 5 g |
| Carbohydrates | 25 g (includes sugar and crust carbs) |
| Fiber | 1-2 g depending on toppings |
The recipe delivers calcium from cream cheese and sour cream, plus antioxidants and vitamins if you add fresh berries. Using Greek yogurt can boost protein and reduce fat slightly. For those watching carbs, swapping crust crumbs for almond flour lowers carbohydrate content.
These jars are gluten-friendly if you use gluten-free crust alternatives. The recipe contains dairy and eggs (in cream), so it’s not suitable for strict dairy-free diets unless adapted.
From a personal wellness perspective, this dessert is a balanced treat—small portions, nutrient-dense toppings, and no baking stress. It’s about enjoying dessert without guilt or hassle.
Conclusion
Creamy small batch no-bake loaded cheesecake jars have become my go-to when I want a sweet fix that doesn’t take over my whole day or my fridge. They’re easy to make, endlessly customizable, and just the right size for sharing or savoring solo. Whether you love the fresh berry topping or prefer chocolate and nuts, this recipe invites you to make it your own.
Honestly, there’s something comforting about spooning into a jar layered with creamy goodness and a crunchy base, especially when you didn’t have to turn on your oven. It’s a little indulgence that doesn’t feel like one, and that’s why I keep coming back to it.
Try it out, play with your favorite toppings, and let me know how you load your jars—you might just find your own favorite twist on this small batch delight. It’s a recipe that feels like a quiet celebration every time.
FAQs
Can I make these cheesecake jars ahead of time?
Yes! These jars actually taste better after chilling for a couple of hours or even overnight. Just cover them tightly and keep them refrigerated.
What can I use instead of graham crackers for the crust?
Crushed digestive biscuits, gluten-free cookies, or almond flour mixed with a bit of melted butter work well as alternatives.
How do I prevent the crust from getting soggy?
Press the crust firmly into the jars and chill it before adding the filling. Also, avoid overly watery toppings directly on the crust.
Can I double or triple this recipe for a larger batch?
Absolutely! Just multiply the ingredients and assemble in larger jars or a trifle dish, but the jars are great for portion control and presentation.
Is there a vegan version of these cheesecake jars?
Yes, by using vegan cream cheese, coconut yogurt, coconut cream, and a plant-based crust, you can make a delicious dairy-free and vegan version.
Pin This Recipe!
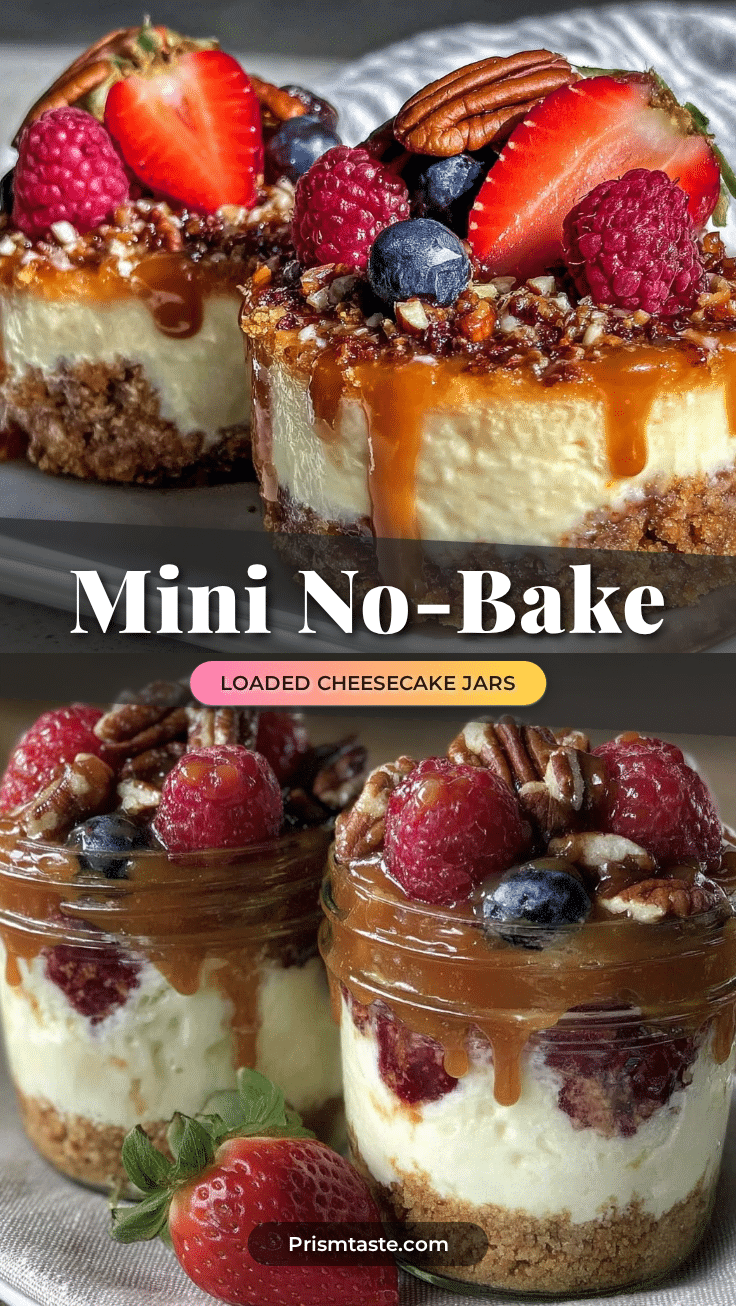
Creamy No-Bake Loaded Cheesecake Jars
A quick and easy no-bake cheesecake recipe perfect for small batches, featuring a creamy filling, buttery crust, and customizable toppings served in individual jars.
- Prep Time: 15 minutes
- Cook Time: 0 minutes
- Total Time: 2 hours 15 minutes
- Yield: 3 servings 1x
- Category: Dessert
- Cuisine: American
Ingredients
- 1 cup graham cracker crumbs (preferably finely crushed)
- 4 tablespoons unsalted butter, melted
- 1 tablespoon granulated sugar
- 8 oz cream cheese, softened
- 1/2 cup sour cream or Greek yogurt
- 1/3 cup powdered sugar, sifted
- 1 teaspoon pure vanilla extract
- 1/3 cup heavy cream, cold
- 1/2 cup fresh berries (strawberries, blueberries, raspberries)
- 2 tablespoons chocolate chips or mini chunks
- 2 tablespoons crushed nuts (pecans, walnuts, or almonds)
- Caramel or chocolate drizzle (optional)
- Shredded coconut or mini marshmallows (optional)
Instructions
- Prepare the crust: In a medium bowl, combine 1 cup graham cracker crumbs, 4 tablespoons melted unsalted butter, and 1 tablespoon granulated sugar. Mix until crumbs are fully coated and resemble wet sand. Press about 2 tablespoons of this mixture into the bottom of each jar or cup to create an even base. Set aside.
- Make the cheesecake filling: In a large mixing bowl, beat 8 oz softened cream cheese with 1/2 cup sour cream or Greek yogurt, 1/3 cup powdered sugar, and 1 teaspoon vanilla extract on medium speed until smooth and creamy, about 2-3 minutes. Scrape down the sides to avoid lumps.
- Whip the heavy cream: In a chilled small bowl, whip 1/3 cup cold heavy cream until soft peaks form, about 2-3 minutes.
- Fold the whipped cream into the cream cheese mixture gently in three additions until smooth, creamy, and spreadable.
- Assemble the jars: Spoon or pipe a thick layer of cheesecake filling over the crust in each jar, filling about 3/4 full. Add your choice of toppings such as fresh berries, chocolate chips, nuts, or drizzles. Layer toppings between filling portions for a loaded effect if desired.
- Chill and serve: Refrigerate the jars for at least 2 hours to let the cheesecake set and flavors meld. Add fresh garnishes or extra drizzle before serving.
Notes
Keep cream cheese softened at room temperature before mixing to avoid lumps. Whip heavy cream cold for best results. Press crust firmly but not too hard to maintain crunch without toughness. Chill jars for at least 2 hours for best texture and flavor melding. For gluten-free, use gluten-free cookies or almond flour crumbs. For dairy-free, use vegan cream cheese, coconut yogurt, and coconut oil instead of butter.
Nutrition
- Serving Size: 1 jar (approximately
- Calories: 320
- Fat: 22
- Carbohydrates: 25
- Fiber: 1.5
- Protein: 5
Keywords: no-bake cheesecake, cheesecake jars, small batch dessert, easy dessert, creamy cheesecake, quick dessert, loaded cheesecake, no bake dessert