It was one of those evenings where the sky outside was a dull gray, and the cold seemed to seep right through the windows. I had just wrapped up a long day juggling work calls and a kitchen that looked like a tornado had passed through it. Honestly, all I wanted was something warm, filling, and forgiving to make without too much fuss. That’s when the idea for this cozy gluten-free loaded chicken pot pie with biscuit topping came to life—not from a fancy plan, but from a desperate need to feed myself well without the usual stress.
I’d been skeptical at first. Gluten-free baking can be tricky, and I wasn’t sure if a biscuit topping would hold up or feel dry. But as the aroma of buttery biscuits mingling with savory chicken and veggies filled the kitchen, something clicked. This recipe wasn’t just a fallback—it became my go-to comfort meal during the chillier months. It’s loaded with tender chicken, garden-fresh vegetables, and a rich, creamy filling that’s perfectly hugged by fluffy, golden biscuits on top.
What really sold me, though, was how effortlessly it comes together, even on days when energy is low. The biscuit topping, light and flaky, is surprisingly easy to whip up with gluten-free flour blends I keep stocked. It’s a pot pie that doesn’t feel like a compromise but more like a warm hug on a plate. Somehow, this recipe stuck with me—not because it’s fancy, but because it’s reliable and full of heart.
Why You’ll Love This Recipe
- Quick & Easy: Ready in under 60 minutes, this recipe is perfect for busy nights when you want comfort without the wait.
- Simple Ingredients: Uses pantry staples and fresh produce you likely already have, no need for specialty shopping trips.
- Perfect for Cozy Nights: Ideal for chilly evenings, weekend dinners, or anytime you crave that warm, satisfying feeling.
- Crowd-Pleaser: Family and friends always ask for seconds—kids and adults alike love the creamy filling and biscuit crunch.
- Unbelievably Delicious: The combination of juicy chicken, hearty veggies, and buttery biscuit topping creates a comforting texture and flavor harmony.
- Gluten-Free with No Sacrifice: Many gluten-free recipes fall short, but this one nails the biscuit’s fluffiness and the pot pie’s richness without gluten.
- A Recipe That Feels Homemade: No weird additives or complicated steps, just honest cooking that tastes like it came from your favorite family cookbook.
This isn’t just another gluten-free pot pie. The biscuit topping gets that perfect golden crust while staying tender inside, and the filling is creamy without being heavy—thanks to a quick roux and chicken broth base. It’s the kind of dish that, after the first bite, makes you pause and think, “Yeah, this is exactly what I needed today.”
What Ingredients You Will Need
This recipe uses simple, wholesome ingredients to deliver bold flavor and a satisfying texture without the fuss. Most are pantry staples, with a few fresh picks to round things out. Here’s what you’ll need:
- For the Filling:
- 2 cups cooked chicken, shredded or diced (rotisserie chicken works great for convenience)
- 1 cup carrots, diced (adds natural sweetness and color)
- 1 cup celery, diced (for that subtle aromatic crunch)
- 1 cup frozen peas (no need to thaw, adds pops of green and sweetness)
- 1 small onion, finely chopped (builds savory depth)
- 3 cloves garlic, minced (brings warmth and flavor)
- 3 tablespoons unsalted butter (for richness)
- 3 tablespoons gluten-free all-purpose flour (I recommend Bob’s Red Mill 1-to-1 for best texture)
- 2 cups chicken broth (low sodium preferred)
- 1/2 cup whole milk or dairy-free alternative (for creaminess)
- 1 teaspoon dried thyme (earthy herbal note)
- Salt and freshly ground black pepper, to taste
- For the Biscuit Topping:
- 1 1/2 cups gluten-free all-purpose flour (same brand as above recommended)
- 1 1/2 teaspoons baking powder (for lift)
- 1/2 teaspoon baking soda (helps with rise and texture)
- 1/2 teaspoon salt
- 6 tablespoons unsalted butter, cold and cubed (cold butter is key for flaky biscuits)
- 3/4 cup buttermilk or dairy-free yogurt (adds tang and tenderness)
If you like, you can swap out the peas for green beans or diced zucchini in summer. For a dairy-free version, coconut milk works well in the filling, and plant-based butter substitutes keep the biscuit tender. The key is keeping your butter cold when making the biscuit dough—that’s the trick I learned after a few too many dense attempts!
Equipment Needed
- 1 large oven-safe baking dish (about 9×9 inches or equivalent)
- Medium saucepan for making the filling
- Mixing bowls (one for filling, one for biscuit dough)
- Whisk and wooden spoon for stirring
- Pastry cutter or two forks (to cut butter into the biscuit flour)
- Measuring cups and spoons (accuracy matters especially for gluten-free baking)
- Knife and cutting board for prepping veggies and chicken
If you don’t have a pastry cutter, cold butter cubes can be cut into flour using two knives or even your fingers—just work quickly so the butter doesn’t melt. A stand mixer isn’t necessary here; I prefer mixing the biscuit dough by hand for better texture control. For the baking dish, ceramic or glass works best to keep heat even and the crust crisp.
Preparation Method
- Preheat your oven to 400°F (200°C). This high temperature helps the biscuit topping brown nicely while the filling bubbles.
- Prepare the filling: In a medium saucepan, melt the 3 tablespoons of butter over medium heat. Once melted, add the chopped onion, carrots, and celery. Cook, stirring occasionally, until the vegetables are just tender—about 5 to 7 minutes.
- Add the minced garlic and cook for another minute until fragrant, careful not to burn it.
- Make the roux: Sprinkle the gluten-free flour over the vegetables and stir well to coat. Cook for 2 minutes, stirring constantly, to remove the raw flour taste and create a thick paste.
- Slowly whisk in the chicken broth, making sure to dissolve the roux completely. Then stir in the milk, thyme, salt, and pepper.
- Bring the mixture to a gentle simmer and cook until it thickens, about 5 minutes. You’re looking for a creamy sauce that coats the back of a spoon.
- Remove from heat and fold in the shredded chicken and frozen peas. Taste and adjust seasoning if needed.
- Transfer the filling to your baking dish, spreading it out evenly.
- Make the biscuit topping: In a mixing bowl, whisk together the gluten-free flour, baking powder, baking soda, and salt.
- Add the cold cubed butter. Use a pastry cutter or your fingers to cut the butter into the flour until the mixture resembles coarse crumbs with some pea-sized pieces.
- Pour in the buttermilk and stir gently just until the dough comes together. Avoid overmixing; the dough should be slightly sticky but manageable.
- Drop spoonfuls of biscuit dough evenly over the chicken filling, covering as much surface as possible. Don’t worry if there are small gaps—these will crisp up nicely.
- Bake for 25-30 minutes or until the biscuit topping is golden brown and the filling is bubbling around the edges.
- Let the pot pie rest for about 10 minutes before serving to allow the filling to set slightly.
Pro tip: If the biscuit topping browns too quickly, tent the dish loosely with foil halfway through baking. Also, be patient with the resting time—it really helps everything hold together when you cut into it.
Cooking Tips & Techniques
Gluten-free baking can be a bit temperamental, and this biscuit topping is no exception. One key thing I learned is to keep your butter very cold—if it warms too much, your biscuits can turn dense instead of flaky. I sometimes pop the butter cubes back in the freezer for a few minutes mid-mixing. It sounds fussy, but it makes a noticeable difference.
Another tip: don’t overmix the biscuit dough. It should come together but remain a bit lumpy and sticky. Overworking gluten-free flour blends can make the biscuits tough, so mix gently and stop as soon as it holds.
When cooking the filling, stirring constantly while making the roux prevents lumps and the dreaded raw flour taste. If you notice it getting too thick before adding broth, just add a splash of broth or milk to loosen it up.
Timing-wise, I like to prep the filling and biscuit dough simultaneously to save time. While the veggies are softening, I mix the biscuit dough. It’s a small multitasking win that keeps the whole process smooth and stress-free.
Variations & Adaptations
- Dairy-Free Version: Swap butter for a plant-based alternative and use coconut or almond milk instead of dairy milk. Use dairy-free yogurt or buttermilk substitutes for the biscuit.
- Vegetarian Adaptation: Replace chicken with cooked mushrooms and extra carrots or potatoes. Use vegetable broth in place of chicken broth.
- Low-Carb Twist: For a lower-carb biscuit topping, try almond flour combined with coconut flour and adjust liquids accordingly. The texture will be different but still tasty.
- Seasonal Veggies: In spring or summer, swap peas for fresh green beans or zucchini. In fall, roasted butternut squash or sweet potatoes add a lovely sweetness.
- Spiced Up: Add a dash of smoked paprika or a pinch of cayenne in the filling for a subtle warmth and twist on classic flavors.
One variation I’ve made a few times is adding sharp cheddar cheese to the biscuit topping for a cheesy crust. It’s not traditional but adds a lovely layer of flavor that my family can’t get enough of.
Serving & Storage Suggestions
This chicken pot pie is best served warm, straight from the oven, when the biscuit topping is still flaky and the filling is creamy. Pair it with a simple green salad or steamed green beans to balance the richness. A crisp white wine or a lightly spiced cider complements the flavors beautifully.
Leftovers keep well in the refrigerator for up to 3 days. Store covered tightly with plastic wrap or in an airtight container. When reheating, I recommend warming it gently in the oven at 350°F (175°C) for about 15 minutes to revive the biscuit’s texture—microwaving tends to make them soggy.
Flavors also deepen after a day, so if you can wait, the next-day pot pie is surprisingly good and comforting in its own right.
Nutritional Information & Benefits
Each serving of this gluten-free loaded chicken pot pie provides a balanced mix of protein from the chicken, fiber and vitamins from the vegetables, and healthy fats from butter. Using gluten-free flour blends makes this recipe accessible for those with gluten sensitivities or celiac disease without compromising taste.
The inclusion of veggies like carrots, celery, and peas adds antioxidants and essential nutrients, while the homemade roux uses moderate dairy for creaminess without excess calories. This meal is hearty but not overly heavy—a satisfying choice for anyone wanting comfort food with a thoughtful nutritional profile.
Just a heads-up: this recipe contains dairy and eggs (in the biscuit), so those with allergies should adjust accordingly.
Conclusion
This cozy gluten-free loaded chicken pot pie with biscuit topping is one of those recipes that feels like a gentle reset on a tough day. It’s reliable, straightforward, and delicious—no complicated steps, just honest ingredients coming together to make something that warms your belly and soul. I love how the biscuit topping is both fluffy and golden, a perfect counterpoint to the creamy, veggie-packed filling beneath.
Feel free to tweak it to suit your pantry or dietary needs—this recipe welcomes creativity and adapts well. Whether you’re cooking for yourself or a crowd, it’s the kind of dish that invites comfort and satisfaction without fuss.
If you try it, I’d love to hear how you made it your own. Share your twists, tips, or moments when this pot pie became your go-to—let’s keep the cozy vibes rolling!
FAQs
Can I use frozen chicken for this recipe?
Yes! Just make sure it’s fully thawed and cooked before adding it to the filling. Rotisserie chicken works great for convenience.
What if I don’t have buttermilk for the biscuit topping?
You can make a quick substitute by adding 1 tablespoon of lemon juice or white vinegar to 3/4 cup of milk. Let it sit for 5 minutes before using.
Can I prepare this pot pie ahead of time?
Absolutely. You can assemble it up to the baking step and refrigerate for a few hours before baking. Just add a few extra minutes to the baking time if chilled.
Is this recipe suitable for kids?
Yes, it’s a kid-friendly meal with familiar flavors and a soft biscuit topping that most kids enjoy. Just adjust seasoning if your kids prefer milder tastes.
How do I make the biscuit topping extra flaky?
Keep your butter very cold and don’t overmix the dough. Using a pastry cutter to leave pea-sized bits of butter helps create flaky layers when baked.
Pin This Recipe!

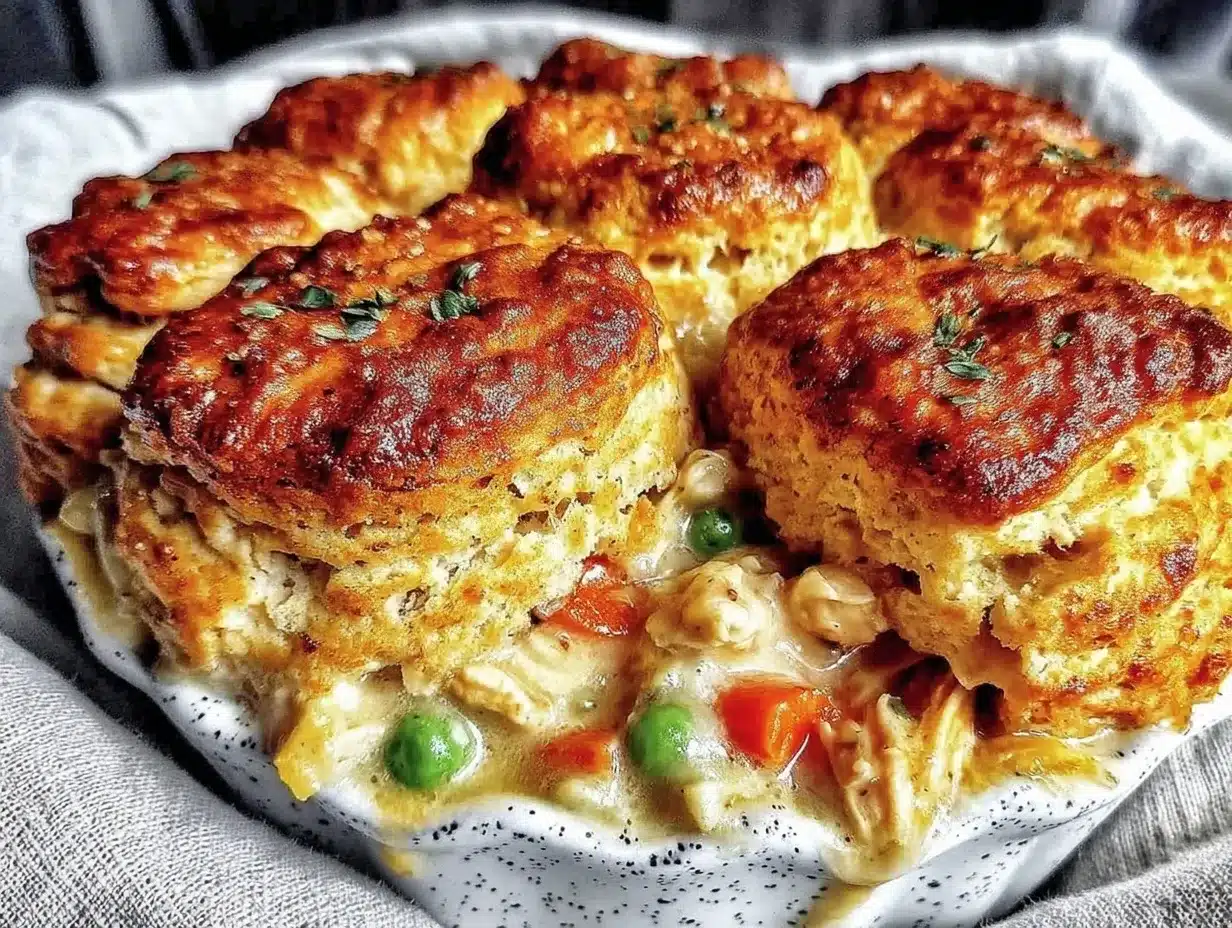
Cozy Gluten-Free Loaded Chicken Pot Pie Recipe with Easy Biscuit Topping

A warm, filling gluten-free chicken pot pie with a creamy vegetable filling and a fluffy, golden biscuit topping. Perfect for cozy nights and easy to prepare with pantry staples.
- Prep Time: 20 minutes
- Cook Time: 30 minutes
- Total Time: 50 minutes
- Yield: 6 servings 1x
- Category: Main Course
- Cuisine: American
Ingredients
- 2 cups cooked chicken, shredded or diced (rotisserie chicken works great for convenience)
- 1 cup carrots, diced
- 1 cup celery, diced
- 1 cup frozen peas
- 1 small onion, finely chopped
- 3 cloves garlic, minced
- 3 tablespoons unsalted butter
- 3 tablespoons gluten-free all-purpose flour (Bob’s Red Mill 1-to-1 recommended)
- 2 cups chicken broth (low sodium preferred)
- 1/2 cup whole milk or dairy-free alternative
- 1 teaspoon dried thyme
- Salt and freshly ground black pepper, to taste
- 1 1/2 cups gluten-free all-purpose flour
- 1 1/2 teaspoons baking powder
- 1/2 teaspoon baking soda
- 1/2 teaspoon salt
- 6 tablespoons unsalted butter, cold and cubed
- 3/4 cup buttermilk or dairy-free yogurt
Instructions
- Preheat your oven to 400°F (200°C).
- In a medium saucepan, melt 3 tablespoons of butter over medium heat. Add chopped onion, carrots, and celery; cook until vegetables are just tender, about 5 to 7 minutes.
- Add minced garlic and cook for another minute until fragrant.
- Sprinkle gluten-free flour over the vegetables and stir well to coat. Cook for 2 minutes, stirring constantly.
- Slowly whisk in chicken broth, dissolving the roux completely. Stir in milk, thyme, salt, and pepper.
- Bring mixture to a gentle simmer and cook until thickened, about 5 minutes.
- Remove from heat and fold in shredded chicken and frozen peas. Adjust seasoning if needed.
- Transfer filling to a 9×9 inch oven-safe baking dish, spreading evenly.
- In a mixing bowl, whisk together gluten-free flour, baking powder, baking soda, and salt.
- Add cold cubed butter and cut into flour using a pastry cutter or fingers until mixture resembles coarse crumbs with pea-sized pieces.
- Pour in buttermilk and stir gently just until dough comes together; avoid overmixing.
- Drop spoonfuls of biscuit dough evenly over the chicken filling, covering as much surface as possible.
- Bake for 25-30 minutes or until biscuit topping is golden brown and filling is bubbling.
- Let pot pie rest for about 10 minutes before serving.
Notes
Keep butter very cold when making biscuit dough to ensure flaky texture. Avoid overmixing biscuit dough to prevent toughness. Tent with foil if biscuit topping browns too quickly. Let pot pie rest 10 minutes before serving to set filling. For dairy-free version, substitute coconut milk and plant-based butter. Buttermilk can be substituted by adding 1 tablespoon lemon juice or vinegar to 3/4 cup milk and letting sit 5 minutes.
Nutrition
- Serving Size: 1 serving (approxima
- Calories: 350
- Sugar: 4
- Sodium: 450
- Fat: 18
- Saturated Fat: 9
- Carbohydrates: 28
- Fiber: 3
- Protein: 22
Keywords: gluten-free, chicken pot pie, biscuit topping, comfort food, easy dinner, cozy meal, gluten-free baking