“Hey, did you try those mini cheesecakes at the party?” That question kept popping up in texts after my nephew’s graduation bash last spring. Honestly, I wasn’t sure about making mini cheesecakes at first—I mean, who has time for fussy desserts when you’re juggling party prep, right? But those Perfect Mini Cheesecake Bites turned out to be a game-changer. They came together in a snap, and nobody could get enough of them.
It all started when I realized the usual bulky desserts wouldn’t fit well on the crowded table, and everyone wanted something easy to grab between congratulations and selfies. I figured, why not shrink down a classic cheesecake into bite-sized treats? The first batch was a bit of a happy accident—overbaked some pieces, underbaked others—but the flavor? Spot on. After a few tweaks, the recipe landed perfectly balanced, creamy yet light, with just the right crumbly crust.
There’s something about these cheesecake bites that makes you pause for a moment, savoring that silky texture before jumping back into the party chaos. Maybe it’s the nostalgic cream cheese sweetness or the way they melt in your mouth. Either way, these treats became the quiet stars of the night, and I’m convinced they’ll steal the show at any graduation party you throw. It’s those little bites of celebration you didn’t know you needed.
Why You’ll Love This Recipe
After testing this recipe multiple times (yes, several batches in one week), I can confidently say these Perfect Mini Cheesecake Bites are a keeper for any graduation party or casual get-together. Here’s what makes them stand out:
- Quick & Easy: Ready in about 45 minutes from start to finish—perfect for last-minute party prep or unexpected guests.
- Simple Ingredients: You probably have everything in your pantry already—cream cheese, sugar, eggs, and a few extras. No weird specialty items here!
- Perfect for Graduation Parties: Their bite-size nature means guests can enjoy them without needing a plate or fork, making mingling easier.
- Crowd-Pleaser: These bites vanish fast, whether kids or adults are around. The balance of creamy filling and crumbly crust hits the spot every time.
- Unbelievably Delicious: Thanks to a little trick of mixing the cream cheese until ultra-smooth and adding a hint of vanilla bean paste (a secret ingredient I swear by), these taste like they came from a fancy bakery.
This recipe isn’t just your average mini cheesecake. The crust uses finely crushed graham crackers combined with melted butter to create a buttery, crisp base that holds up well without sogginess. Plus, baking the bites in a muffin tin lined with paper cups means cleanup is a breeze and they keep their shape perfectly.
Honestly, these bites make it easy to impress without stress. You’ll find yourself reaching for them between other graduation party classics, like the loaded pasta bake I shared recently, which pairs beautifully alongside these sweet treats.
What Ingredients You Will Need
This recipe uses simple, wholesome ingredients to deliver bold flavor and satisfying texture without the fuss. Most are pantry staples, and you can swap a few for dietary needs without losing the magic.
- For the Crust:
- Graham cracker crumbs – finely crushed (about 1 1/2 cups / 150 g)
- Unsalted butter, melted (6 tablespoons / 85 g) (adds richness and binds the crust)
- Granulated sugar (2 tablespoons / 25 g) (balances the buttery crust)
- For the Cheesecake Filling:
- Cream cheese, softened (16 ounces / 450 g) – I prefer Philadelphia brand for its smoothness
- Granulated sugar (2/3 cup / 135 g)
- Large eggs, room temperature (2)
- Pure vanilla extract or vanilla bean paste (1 teaspoon) (use paste for a little extra flair)
- Sour cream (1/2 cup / 120 ml) (adds tang and creaminess)
- All-purpose flour (1 tablespoon / 8 g) (helps stabilize the filling)
- Optional Toppings:
- Fresh berries (blueberries, raspberries, or sliced strawberries)
- Fruit preserves or jam (a small dollop per bite)
- Shaved chocolate or caramel drizzle for a fancy touch
If you want a gluten-free option, swap the graham cracker crumbs with almond flour or gluten-free graham crumbs. For a dairy-free twist, try swapping the cream cheese with a vegan cream cheese alternative and use coconut milk yogurt instead of sour cream. These swaps work surprisingly well without losing that creamy texture.
Equipment Needed
- Muffin tin (12-cup size) – essential for shaping the mini cheesecake bites
- Paper cupcake liners – makes removal and cleanup so much easier
- Electric mixer or stand mixer – to beat the cream cheese smooth without lumps
- Mixing bowls – one for crust, one for filling
- Measuring cups and spoons – for precise ingredient amounts
- Spatula – for folding and scraping batter
- Fine mesh sieve (optional) – to sift flour for smoother batter
If you don’t have a stand mixer, a hand mixer works just fine, though you might need to scrape the bowl a bit more often. For a budget-friendly option, a sturdy whisk and muscle power can do the job, but it takes more time to get the cream cheese lump-free.
Make sure to grease your muffin tin lightly or rely on the cupcake liners to prevent sticking. Using silicone liners is a great reusable option that saves waste and holds up well in baking.
Preparation Method
- Preheat the oven to 325°F (163°C). Line a 12-cup muffin tin with paper cupcake liners. This step is key for easy removal and neat presentation. (5 minutes)
- Prepare the crust: In a medium bowl, combine 1 1/2 cups graham cracker crumbs, 6 tablespoons melted butter, and 2 tablespoons sugar. Stir until the mixture resembles wet sand. (3 minutes)
- Press about 1 tablespoon (15 g) of crust mixture firmly into the bottom of each cupcake liner. Use the back of a spoon or your fingers to create an even layer. Don’t skip firm pressing—it helps the crust hold together after baking. (5 minutes)
- Bake the crusts for 8 minutes. This pre-baking prevents sogginess once the filling goes in. Remove from oven and set aside to cool slightly. (8 minutes)
- Make the cheesecake filling: In a large bowl, beat 16 ounces softened cream cheese with an electric mixer on medium speed until completely smooth and creamy (about 2-3 minutes). Stop occasionally to scrape down the bowl. (5 minutes)
- Add 2/3 cup sugar and beat until combined. Then add 2 eggs one at a time, mixing just until blended after each addition—don’t overbeat to avoid cracks later. (3 minutes)
- Mix in 1 teaspoon vanilla extract or vanilla bean paste, 1/2 cup sour cream, and 1 tablespoon sifted all-purpose flour. Combine gently until smooth. (2 minutes)
- Divide the filling evenly among the 12 crust-lined cups. Fill almost to the top but don’t overfill; about 3 tablespoons per cup is perfect. (5 minutes)
- Bake for 20-25 minutes. The centers should still jiggle slightly when you gently shake the pan—this prevents overbaking and keeps the bites creamy. (20-25 minutes)
- Turn off the oven and crack the oven door open. Let the cheesecakes cool inside for 30 minutes to reduce cracking from temperature shock. (30 minutes)
- Remove from oven and refrigerate for at least 3 hours, preferably overnight. This chilling step lets the bites firm up and flavors meld perfectly. (3+ hours)
- Before serving, top with fresh berries or a small spoonful of fruit preserves for added color and zing. (optional)
Pro tip: If you’re short on time, chilling for at least 2 hours works, but overnight is ideal for best texture. Also, try not to overmix the batter once eggs are added—this keeps the cheesecake silky smooth without air bubbles.
Cooking Tips & Techniques
Getting mini cheesecakes just right can be tricky, but here are some tips that helped me avoid common pitfalls:
- Room temperature ingredients: Softened cream cheese and eggs mix more smoothly, so take them out 30 minutes before starting.
- Don’t overbeat: Once eggs go in, mix gently to prevent incorporating too much air which causes cracking.
- Pre-bake the crust: This prevents the dreaded soggy bottom and adds a lovely crunch.
- Use a water bath if possible: For ultra-smooth cheesecakes, placing the muffin tin in a larger pan filled halfway with hot water during baking helps regulate temperature. Not mandatory but a neat trick.
- Cooling gradually: Let cheesecakes cool in the oven with the door cracked open to prevent sudden temperature changes and cracking.
- Chill thoroughly: Don’t skip the refrigeration step—this sets the texture and enhances flavor.
My early attempts included overbaked edges and cracks, but following these tips turned those bites into silky-smooth gems. Also, multitasking by prepping the crust while the oven heated saved precious time during party prep. If you’re pressed for time, consider pairing these bites with a quick crowd-pleaser like the easy sheet pan loaded fajita bowl for a balanced party menu.
Variations & Adaptations
These mini cheesecake bites are incredibly versatile, and you can customize them to suit different tastes or dietary needs:
- Chocolate swirl: Add 2 tablespoons of melted dark chocolate to the batter and swirl it gently with a toothpick before baking.
- Lemon zest: Stir in 1 teaspoon of fresh lemon zest to the filling for a bright, citrusy twist that pairs well with fresh blueberries on top.
- Gluten-free crust: Replace graham cracker crumbs with almond flour or gluten-free cookie crumbs to keep it safe for gluten sensitivities.
- Vegan option: Use vegan cream cheese and flax eggs (1 tablespoon ground flaxseed + 3 tablespoons water per egg) and swap sour cream for coconut yogurt. Baking time might vary slightly.
- Festive toppings: For a graduation party, consider adding edible gold stars, sprinkles in school colors, or a drizzle of caramel for extra flair.
One personal favorite variation was a mini cheesecake topped with a layer of no-bake strawberry jam and a sprinkle of finely chopped pistachios—a crunchy surprise that guests loved. These tweaks keep the base recipe reliable but add personality depending on your occasion or mood.
Serving & Storage Suggestions
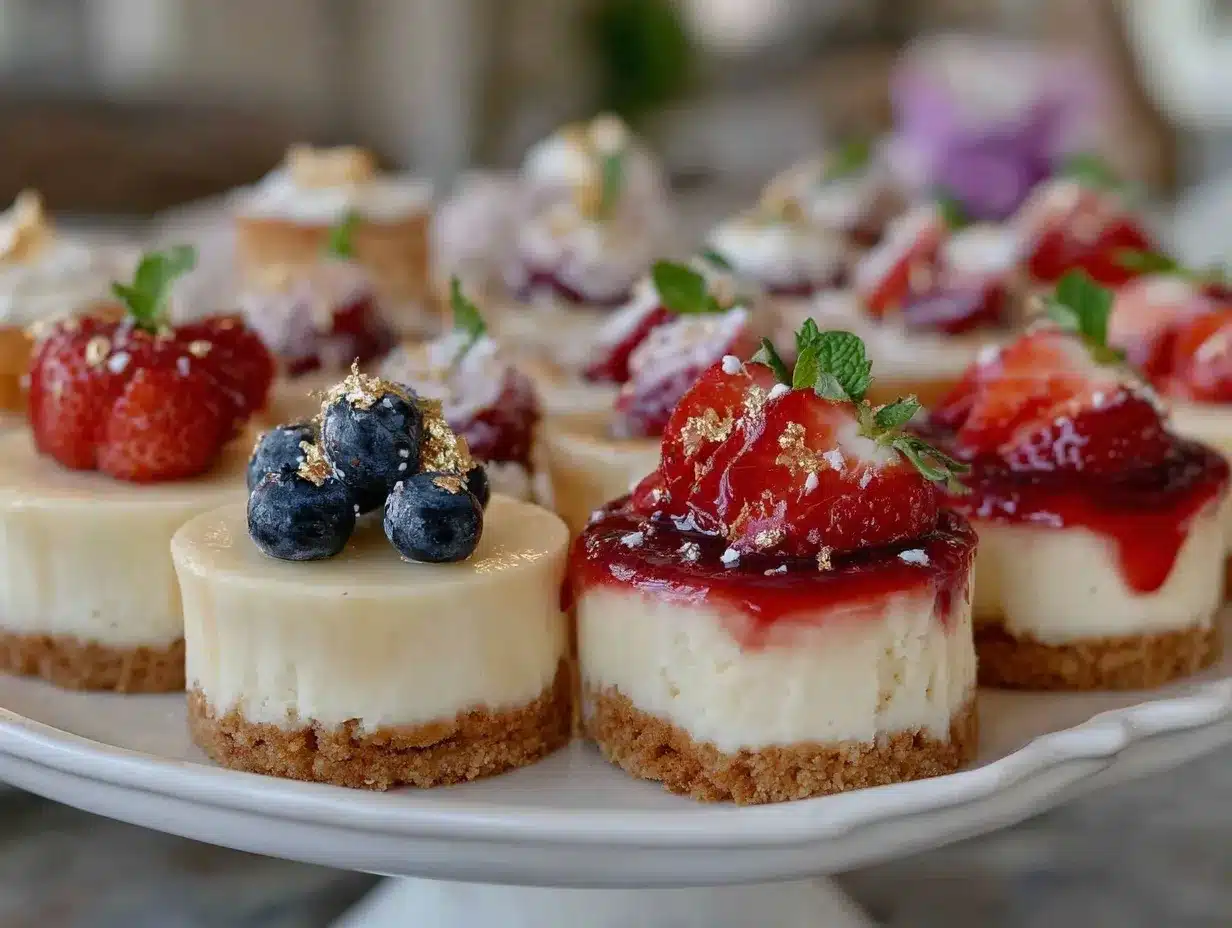
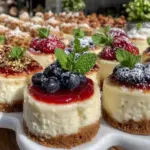
Serve these Perfect Mini Cheesecake Bites chilled straight from the fridge to keep their smooth texture intact. They look adorable on platters arranged with fresh berries or mint leaves for a pop of color.
They pair beautifully with a cup of coffee or sparkling cider—ideal for mingling at graduation parties where guests are moving and chatting.
For storage, keep leftovers in an airtight container in the refrigerator for up to 4 days. If you want to freeze them, wrap each bite tightly in plastic wrap then place in a freezer-safe container. When ready to enjoy, thaw overnight in the fridge.
Reheating is generally not recommended as it affects texture, but if you prefer a softer bite, let them sit at room temperature for 15-20 minutes before serving.
Flavors actually mellow and become richer after a day or two, so these cheesecake bites can be made a day ahead to save you stress on party day.
Nutritional Information & Benefits
Each mini cheesecake bite (assuming 12 servings) contains approximately:
| Calories | 180-200 kcal |
|---|---|
| Protein | 4-5 g |
| Fat | 13-15 g |
| Carbohydrates | 12-14 g |
| Sugar | 10-12 g |
Cream cheese provides a good source of calcium and protein, while the sour cream adds a bit of beneficial probiotics. Using real vanilla and fresh ingredients keeps the recipe free of unnecessary additives.
This dessert fits well within a balanced diet when enjoyed in moderation. For those mindful of gluten, the substitution with almond flour keeps it accessible. And, if you’re watching carbs, consider pairing these bites with a savory dish like the creamy one-pot beef stroganoff recipe to balance your meal.
Conclusion
These Perfect Mini Cheesecake Bites have earned a permanent spot in my party repertoire. They bring that creamy, dreamy cheesecake flavor in a convenient, shareable size that makes graduation celebrations just a bit sweeter and easier to enjoy. Plus, the recipe’s simplicity means you can customize it to your taste without the stress.
Whether you’re hosting or just bringing a dish to the festivities, these bites are sure to get compliments and requests for the recipe (trust me, it happens!). I love how they bring people together—one bite at a time.
Give them a try, tweak them your way, and don’t forget to share your own twists and party stories—I’d love to hear how they worked for your special day!
FAQs
Can I make these mini cheesecakes ahead of time?
Absolutely! They taste even better after chilling overnight, and you can prepare them up to 2 days in advance for easy party prep.
How do I prevent cracks on the cheesecake bites?
Mix the batter gently after adding eggs and cool the cheesecakes gradually in the oven with the door cracked open to reduce cracking.
Can I use a different crust instead of graham crackers?
Yes! Crushed digestive biscuits, Oreo crumbs (for a chocolate twist), or gluten-free cookie crumbs all work well.
What if I don’t have a muffin tin?
You can use mini tart pans or silicone molds, but adjust baking time slightly and monitor closely.
Are these mini cheesecake bites suitable for freezing?
Yes, freeze them wrapped tightly and thaw in the fridge overnight. Best enjoyed chilled rather than reheated.
Pin This Recipe!

Perfect Mini Cheesecake Bites
These bite-sized cheesecakes are creamy, light, and perfect for graduation parties or casual get-togethers. They feature a buttery graham cracker crust and a silky smooth filling, ready in about 45 minutes.
- Prep Time: 15 minutes
- Cook Time: 33-38 minutes
- Total Time: 3 hours 48 minutes to overnight (including chilling)
- Yield: 12 servings 1x
- Category: Dessert
- Cuisine: American
Ingredients
- 1 1/2 cups graham cracker crumbs (about 150 g)
- 6 tablespoons unsalted butter, melted (about 85 g)
- 2 tablespoons granulated sugar (about 25 g)
- 16 ounces cream cheese, softened (about 450 g)
- 2/3 cup granulated sugar (about 135 g)
- 2 large eggs, room temperature
- 1 teaspoon pure vanilla extract or vanilla bean paste
- 1/2 cup sour cream (about 120 ml)
- 1 tablespoon all-purpose flour (about 8 g)
- Optional toppings: fresh berries, fruit preserves or jam, shaved chocolate, caramel drizzle
Instructions
- Preheat the oven to 325°F (163°C). Line a 12-cup muffin tin with paper cupcake liners.
- In a medium bowl, combine graham cracker crumbs, melted butter, and sugar. Stir until the mixture resembles wet sand.
- Press about 1 tablespoon (15 g) of crust mixture firmly into the bottom of each cupcake liner.
- Bake the crusts for 8 minutes. Remove from oven and set aside to cool slightly.
- In a large bowl, beat softened cream cheese with an electric mixer on medium speed until completely smooth and creamy (about 2-3 minutes). Stop occasionally to scrape down the bowl.
- Add sugar and beat until combined. Then add eggs one at a time, mixing just until blended after each addition.
- Mix in vanilla extract or vanilla bean paste, sour cream, and sifted all-purpose flour until smooth.
- Divide the filling evenly among the 12 crust-lined cups, filling about 3 tablespoons per cup.
- Bake for 20-25 minutes until centers jiggle slightly when shaken.
- Turn off the oven and crack the oven door open. Let cheesecakes cool inside for 30 minutes.
- Remove from oven and refrigerate for at least 3 hours, preferably overnight.
- Before serving, top with fresh berries or a small spoonful of fruit preserves if desired.
Notes
Use room temperature cream cheese and eggs for smooth mixing. Do not overbeat after adding eggs to prevent cracks. Pre-bake crust to avoid sogginess. Cooling gradually in the oven with door cracked reduces cracking. Chilling overnight yields best texture. Water bath baking is optional for ultra-smooth texture. For gluten-free, substitute graham crackers with almond flour or gluten-free crumbs. For dairy-free, use vegan cream cheese and coconut yogurt.
Nutrition
- Serving Size: 1 mini cheesecake bi
- Calories: 190
- Sugar: 11
- Sodium: 120
- Fat: 14
- Saturated Fat: 8
- Carbohydrates: 13
- Fiber: 0.5
- Protein: 4.5
Keywords: mini cheesecake bites, graduation party treats, easy cheesecake recipe, bite-sized desserts, creamy cheesecake, graham cracker crust