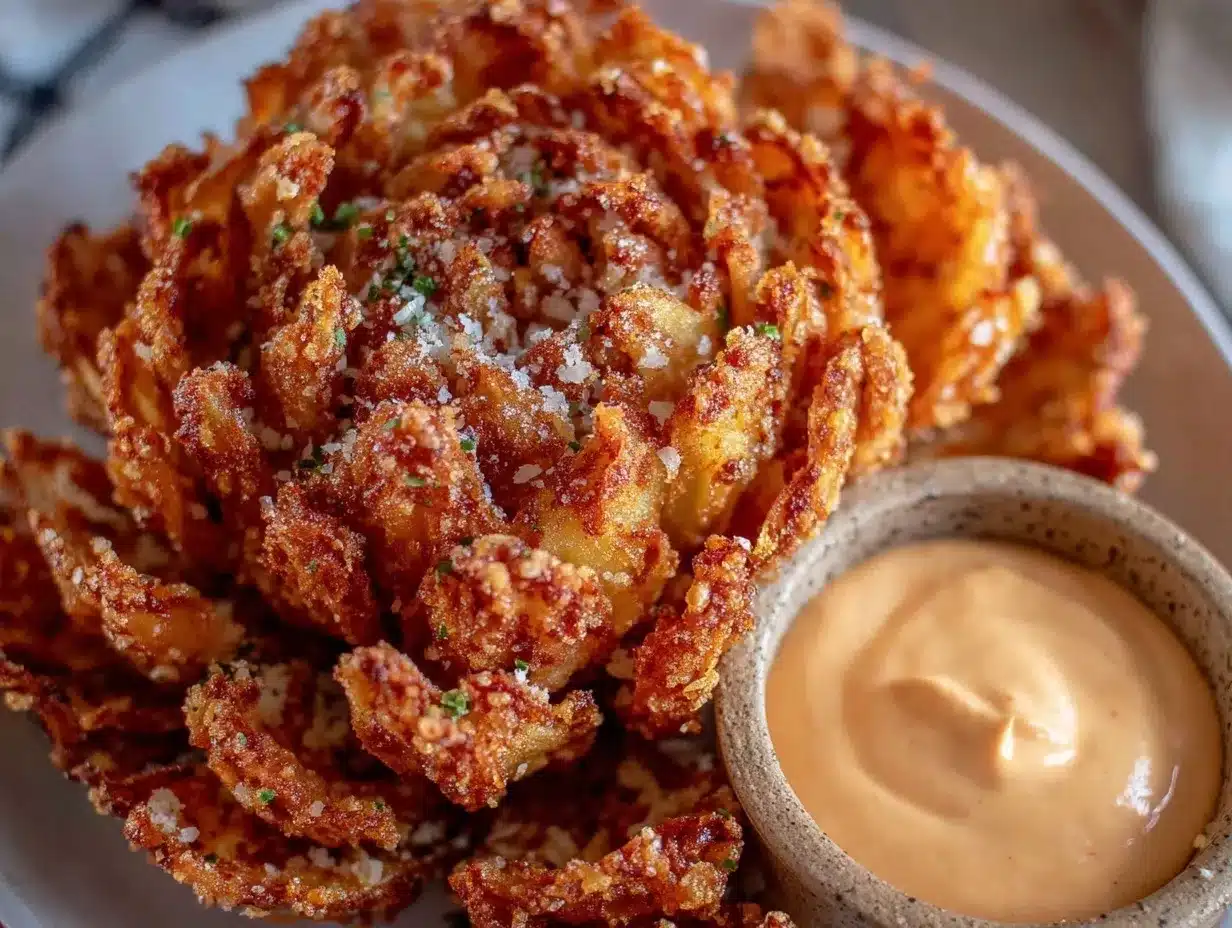
“You have to try this blooming onion,” my friend texted me one evening, attaching a picture of the iconic golden, crispy flower-like appetizer. I was skeptical—how could homemade possibly match the deep-fried masterpiece from Outback Steakhouse? But then came a confession: she’d been making it every weekend for the past month, tweaking the batter and seasoning until it was just right. I figured, why not give it a shot? The first time I tackled the crispy copycat Outback Steakhouse blooming onion recipe, my kitchen smelled like a fairground, and I was covered in flour and oil, but the result was worth every messy minute. That crunchy, flavorful onion with its creamy dipping sauce quickly became a favorite, a little indulgence that turned ordinary nights into something special.
What really won me over was how this recipe doesn’t just mimic the restaurant version—it has its own personality. The batter crisps up so perfectly, and the spice blend is just the right kick without being overpowering. Honestly, it’s the kind of recipe you don’t expect to nail on the first try, but once you do, you’ll find yourself making it again and again (and maybe even sneaking bites straight from the fryer). Plus, it’s a great way to impress guests without hours in the kitchen.
So, if you’ve ever eyed the blooming onion on the menu and wondered if you could whip up that crunchy, savory goodness at home, this easy step-by-step guide is for you. You’ll get the full scoop on ingredients, tools, and tips from someone who’s been through the trial and error—and came out with a dish that’s finger-licking good. Let’s get into it, and by the end, you might just find your new favorite appetizer to go alongside a juicy steak or even as the star of game day.
Why You’ll Love This Crispy Copycat Outback Steakhouse Blooming Onion Recipe
This blooming onion recipe isn’t just a copycat; it’s like having your own little Outback moment at home. After multiple rounds of testing and adjusting, I can say it nails that perfect balance of crispy and tender, salty and spicy, with a dipping sauce that pulls it all together.
- Quick & Easy: The whole process, from slicing to frying, takes about 45 minutes, making it doable for a weekend treat or casual gathering.
- Simple Ingredients: No need for obscure spices or fancy flours—you probably have everything you need sitting in your pantry and fridge right now.
- Perfect for Entertaining: Whether it’s a potluck, a casual dinner, or watching the big game, this blooming onion always steals the show.
- Crowd-Pleaser: Kids and adults alike can’t get enough of the crispy petals and that tangy, creamy dipping sauce.
- Unbelievably Delicious: The secret is in the seasoned batter and the double-dip frying method, which gives it that irresistible crunch and golden color.
What sets this recipe apart is the little tweaks that make it taste homemade but just as indulgent as the restaurant version. For example, blending the spices with a touch of smoked paprika gives it a subtle depth that’s not too spicy but plenty flavorful. And the dipping sauce? It’s a creamy combo of mayo, horseradish, and a hint of cayenne that perfectly complements the onion’s sweetness.
Honestly, this blooming onion recipe is one of those dishes that makes you close your eyes after the first bite and just savor the moment. It’s comfort food with a crispy twist, perfect for impressing guests without stress or just treating yourself to something fun. If you love hearty appetizers like the loaded fajita bowl or crave crispy indulgences similar to my crispy air fryer loaded chicken wings, this blooming onion will quickly become a new favorite.
What Ingredients You Will Need
This recipe uses simple, wholesome ingredients to deliver that bold, crunchy flavor and satisfying texture without the fuss. Most of these are pantry staples, and if you want to customize, I’ve included some handy substitutions below.
- 1 large sweet onion (Vidalia or Walla Walla preferred): The star of the show. Choose a firm onion with a nice round shape for easy slicing.
- 2 cups all-purpose flour: For the crispy coating. I recommend King Arthur flour for reliable texture.
- 2 teaspoons paprika: Adds smokiness and subtle color.
- 1 teaspoon cayenne pepper: Just a touch for that mild kick—adjust to taste.
- 1 teaspoon garlic powder: Classic flavor that complements the onion beautifully.
- 1 teaspoon onion powder: Boosts the onion flavor without overpowering.
- 1 teaspoon salt: Enhances all those savory notes.
- 1/2 teaspoon black pepper: For a little warmth.
- 2 large eggs, beaten: Helps the flour mixture stick to the onion petals.
- 1 cup buttermilk: Adds tang and tenderizes the onion—can substitute with 1 cup milk plus 1 tablespoon lemon juice if needed.
- Vegetable oil (for frying): Enough for a deep fryer or a large pot—about 4 cups.
Dipping Sauce Ingredients:
- 1/2 cup mayonnaise: Creamy base.
- 2 tablespoons ketchup: Adds sweetness and color.
- 1 tablespoon horseradish (prepared): The signature zing.
- 1 teaspoon smoked paprika: Echoes the coating’s flavor.
- 1/2 teaspoon garlic powder: Boosts savoriness.
- Pinch of cayenne pepper: Optional for extra heat.
- Salt and pepper to taste.
In summer, you can swap the onion for a milder sweet variety or even try this batter on thick slices of zucchini or eggplant for a twist. For gluten-free options, almond flour works well but expect a slightly different crispiness. If you’re dairy-free, swap the buttermilk and mayo with coconut milk and vegan mayo. I’ve always kept these tweaks in mind when making this for friends with dietary needs.
Equipment Needed
- Sharp chef’s knife: Essential for cutting the onion petals cleanly. A serrated knife can make the job harder—trust me, I learned that the hard way!
- Cutting board: Preferably large and sturdy to hold the onion steady while slicing.
- Large deep pot or Dutch oven: For frying. A heavy-bottomed pot helps maintain steady heat.
- Deep-fry thermometer: To keep oil temperature between 350-375°F (175-190°C). This is crucial for that perfect crisp without greasy results.
- Mixing bowls: For batter, eggs, and dipping sauce prep.
- Tongs or slotted spoon: For safely lowering and retrieving the onion from hot oil.
- Paper towels or wire rack: For draining excess oil after frying.
If you don’t have a deep fryer or thermometer, a heavy pan with steady medium heat works, but keep a close eye on the temperature. I once tried using a regular frying pan, and the onion got soggy because the oil wasn’t hot enough—lesson learned! For budget-friendly setups, a candy or meat thermometer from your local store works just fine.
Preparation Method
- Prep the onion (10 minutes): Trim the top of the onion and peel off the outer skin. Place the onion cut-side down on the cutting board. Using a sharp knife, make 12-16 vertical cuts around the onion, about 3/4 inch apart, cutting down toward the root but not through it so the petals stay connected. Gently separate the petals apart to form the “bloom.” If it’s stubborn, soak the onion briefly in ice water to help it open up.
- Prepare the batter and dredging station (10 minutes): In one bowl, whisk together flour, paprika, cayenne, garlic powder, onion powder, salt, and pepper. In a second bowl, mix the beaten eggs and buttermilk. Set both bowls near your prep area.
- Coat the onion (10 minutes): Dip the onion into the egg mixture, making sure to get between all the petals. Then transfer it to the flour mixture, sprinkling and pressing the flour into every petal evenly. Repeat this dipping and flouring process once more for a double coating that ensures extra crispiness.
- Heat the oil (10 minutes): Pour vegetable oil into your pot, about 3-4 inches deep. Heat to 350-375°F (175-190°C), monitoring with your thermometer to keep oil temperature steady. Too low and the onion will absorb oil; too high and it will burn.
- Fry the onion (5-7 minutes): Carefully lower the onion into the hot oil, cut-side down first. Fry for about 3 minutes, then flip and fry an additional 2-3 minutes until golden brown. The onion should be crisp without dark spots. Use tongs and be cautious—hot oil is no joke.
- Drain and rest (2 minutes): Remove the onion from oil and place on paper towels or a wire rack to drain excess oil. Let it rest for a minute to set the crisp.
- Make the dipping sauce (5 minutes): While the onion fries, whisk together mayonnaise, ketchup, horseradish, smoked paprika, garlic powder, cayenne, salt, and pepper until smooth. Adjust seasoning to taste.
- Serve: Place the blooming onion on a large plate with the dipping sauce in the center. Grab some napkins—you’re in for a crispy, flavor-packed treat!
Pro tip: If the batter gets too thick while coating, add a splash of buttermilk for better coverage. And always fry at the right temperature to prevent sogginess. I’ve found that a thermometer is your best friend here, especially if you’re making this for the first time.
Cooking Tips & Techniques
One of the trickiest parts about making the blooming onion is getting the onion sliced just right. If the petals are cut too thick, they won’t separate well or cook evenly; too thin and they might fall apart in the oil. I usually count my cuts carefully and practice on smaller onions first.
Maintaining oil temperature is another biggie. I’ve burned more than one batch by overheating the oil or letting it drop too low. Keeping the temperature between 350-375°F (175-190°C) ensures the onion crisps up perfectly without soaking in grease.
Double-dipping the onion in the egg and flour mixture gives it that signature crunch. Skipping this step leads to a thinner, less crispy coating. Also, don’t rush the draining step—letting the fried onion rest on a wire rack allows air to circulate, keeping the crust crisp instead of soggy.
For multitasking, start your dipping sauce before frying, so it’s ready when the onion comes out. And if you want to keep the fried onion warm, place it in a low oven (about 200°F or 90°C) on a wire rack to maintain crispness while you finish frying the batch.
Variations & Adaptations
- Spicy Blooming Onion: Add extra cayenne or a pinch of chili powder to the batter and dipping sauce for a fiery kick that wakes up your taste buds.
- Gluten-Free Version: Use almond flour or gluten-free all-purpose flour. The texture will be a bit different but still deliciously crispy.
- Air-Fryer Blooming Onion: For a lighter take, coat the onion as usual and cook in an air fryer at 360°F (182°C) for about 15-18 minutes. Flip halfway through to ensure even crisping.
- Herb-Infused Batter: Mix in finely chopped fresh herbs like parsley or thyme into the flour mixture for a subtle green freshness.
- Personal Favorite: I once swapped the classic dipping sauce for a creamy chipotle mayo, which added a smoky heat that paired beautifully with the sweet onion flavor.
Serving & Storage Suggestions
Serve this blooming onion hot and fresh for the best crunch. It’s fantastic as an appetizer alongside a hearty steak dinner or even as a fun party snack. Pair it with cold beer, a zesty lemonade, or a creamy cocktail sauce to mix up the dipping options.
If you have leftovers—which is rare—store any uneaten petals in an airtight container in the fridge for up to 2 days. Reheat them in a toaster oven or air fryer to bring back some crispiness. Avoid microwaving, as it tends to make them soggy.
One thing I love is how the flavors actually deepen if you make the dipping sauce ahead of time—the spices meld and get richer after a few hours. This blooming onion is a great dish to prep in stages if you have guests coming.
Nutritional Information & Benefits
Per serving (about 1/6th of the blooming onion), this recipe provides approximately 350 calories, with 20g fat, 35g carbohydrates, and 5g protein. While it’s definitely an indulgent treat, the sweet onion offers antioxidants like quercetin, and the homemade dipping sauce avoids the preservatives found in many store-bought versions.
For those watching carbs or calories, air-frying and using lighter mayo options can reduce fat content. This recipe is naturally gluten-friendly when using appropriate flour substitutes and dairy-free when swapping buttermilk and mayo with plant-based alternatives.
Conclusion
This crispy copycat Outback Steakhouse blooming onion recipe is one of those dishes that turns any meal into a celebration. It’s approachable, fun to make, and seriously satisfying to eat. Whether you’re craving that classic deep-fried crunch or want to impress friends without ordering takeout, this recipe has you covered.
Remember, it’s all about the perfect onion slice, steady oil temperature, and that double coating for maximum crunch. Feel free to tweak the spices and dipping sauce to make it your own—there’s room for plenty of personal flair here.
Making this blooming onion reminded me how cooking can be both an experiment and a comfort. If you enjoy dishes with that crispy, golden crust, you might also want to try my easy budget-friendly loaded pasta bake or the tender instant pot beef stew for cozy dinner ideas that delight.
Feel free to share your blooming onion adventures or any tweaks you’ve made—I love hearing how these recipes find a place in your kitchen. Happy frying!
FAQs About Crispy Copycat Outback Steakhouse Blooming Onion Recipe
How do I make sure the blooming onion doesn’t fall apart during frying?
Be careful not to cut all the way through the root end when slicing the onion petals. Keeping the base intact holds the petals together while frying.
Can I bake the blooming onion instead of frying it?
Yes! Bake at 425°F (220°C) for about 40-45 minutes, flipping halfway through. It won’t be as crispy as fried but still tasty and less oily.
What’s the best onion to use for this recipe?
Sweet onions like Vidalia or Walla Walla are ideal because they have a mild flavor and firm texture that crisps well.
How do I keep the oil from getting greasy?
Maintain a frying temperature between 350-375°F (175-190°C). Too low and the onion absorbs excess oil; too high and it burns quickly.
Can I prepare the dipping sauce ahead of time?
Absolutely. Making the sauce a few hours ahead lets the flavors meld and intensify. Store it covered in the fridge until ready to serve.
Pin This Recipe!
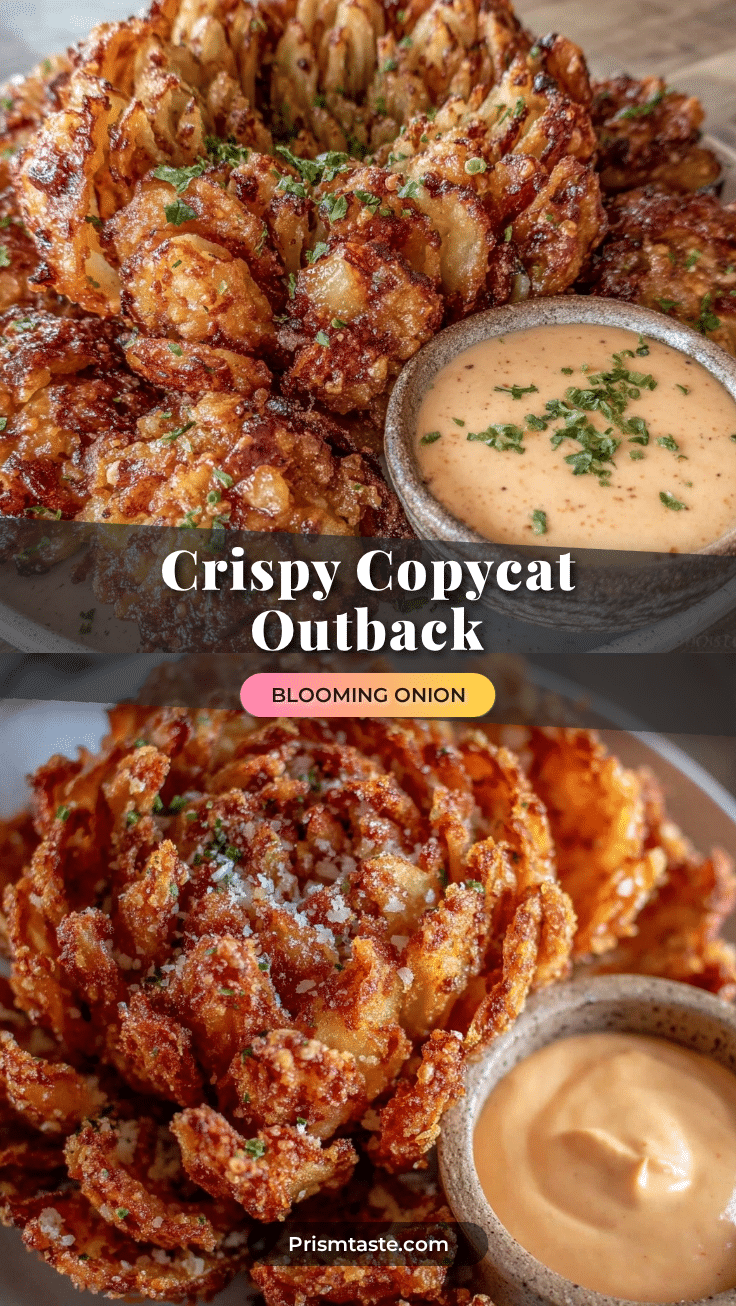
Crispy Copycat Outback Steakhouse Blooming Onion Recipe

A homemade version of the iconic Outback Steakhouse blooming onion, featuring a perfectly crispy battered onion with a creamy, tangy dipping sauce. This recipe delivers a crunchy, flavorful appetizer that’s great for entertaining or a fun treat.
- Prep Time: 30 minutes
- Cook Time: 15 minutes
- Total Time: 45 minutes
- Yield: 6 servings 1x
- Category: Appetizer
- Cuisine: American
Ingredients
- 1 large sweet onion (Vidalia or Walla Walla preferred)
- 2 cups all-purpose flour
- 2 teaspoons paprika
- 1 teaspoon cayenne pepper
- 1 teaspoon garlic powder
- 1 teaspoon onion powder
- 1 teaspoon salt
- 1/2 teaspoon black pepper
- 2 large eggs, beaten
- 1 cup buttermilk (or 1 cup milk plus 1 tablespoon lemon juice)
- Vegetable oil for frying (about 4 cups)
- Dipping Sauce Ingredients:
- 1/2 cup mayonnaise
- 2 tablespoons ketchup
- 1 tablespoon prepared horseradish
- 1 teaspoon smoked paprika
- 1/2 teaspoon garlic powder
- Pinch of cayenne pepper (optional)
- Salt and pepper to taste
Instructions
- Trim the top of the onion and peel off the outer skin. Place the onion cut-side down on a cutting board.
- Make 12-16 vertical cuts around the onion about 3/4 inch apart, cutting down toward the root but not through it to keep petals connected.
- Gently separate the petals to form the bloom. Soak in ice water briefly if stubborn.
- In one bowl, whisk together flour, paprika, cayenne, garlic powder, onion powder, salt, and pepper.
- In a second bowl, mix beaten eggs and buttermilk.
- Dip the onion into the egg mixture, making sure to get between all petals.
- Transfer to the flour mixture, sprinkling and pressing flour into every petal evenly.
- Repeat dipping in egg and flour mixture once more for a double coating.
- Pour vegetable oil into a large pot about 3-4 inches deep and heat to 350-375°F (175-190°C).
- Carefully lower the onion into hot oil, cut-side down first. Fry about 3 minutes, then flip and fry another 2-3 minutes until golden brown and crisp.
- Remove onion and drain on paper towels or wire rack. Let rest for 1-2 minutes.
- While frying, whisk together mayonnaise, ketchup, horseradish, smoked paprika, garlic powder, cayenne, salt, and pepper until smooth for dipping sauce.
- Serve the blooming onion hot with dipping sauce in the center.
Notes
Maintain oil temperature between 350-375°F to avoid greasy or burnt onion. Double-dip the onion in egg and flour for extra crispiness. Soak onion in ice water if petals are stubborn. Use a thermometer for best frying results. Leftovers can be stored in the fridge for up to 2 days and reheated in toaster oven or air fryer to restore crispiness. Dipping sauce flavors improve if made ahead and chilled.
Nutrition
- Serving Size: About 1/6th of the b
- Calories: 350
- Fat: 20
- Carbohydrates: 35
- Protein: 5
Keywords: blooming onion, copycat recipe, Outback Steakhouse, appetizer, fried onion, dipping sauce, crispy onion