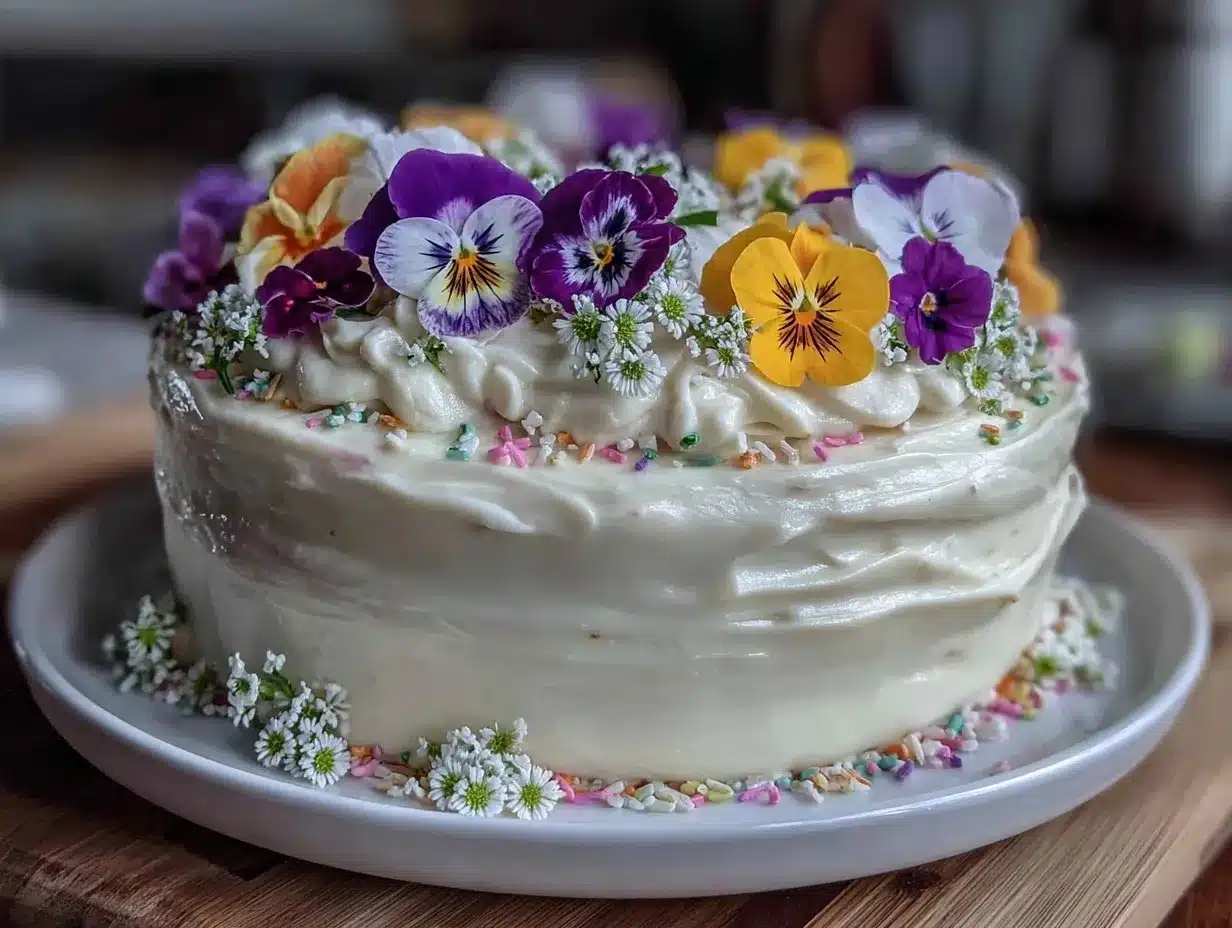
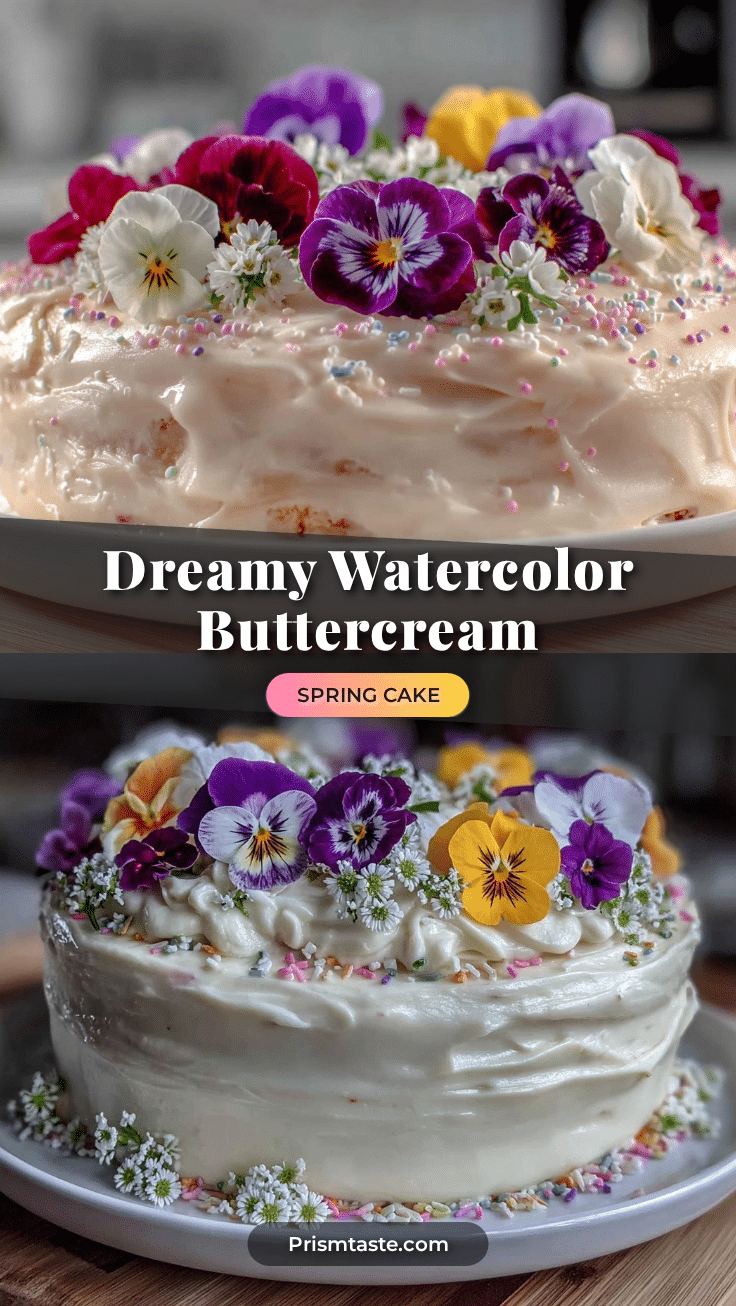
“Wait, are you really painting on a cake?” my niece asked, eyes wide as I swirled pastel blues and pinks across the buttercream. Honestly, I was just trying to whip up something cheerful for her spring birthday—nothing fancy, just a splash of color to brighten the day. What started as a quick, last-minute idea to disguise my less-than-perfect frosting skills turned into this delightful watercolor buttercream spring birthday cake that everyone couldn’t stop talking about.
There’s something wonderfully soothing about mixing those soft shades and brushing them gently onto cake layers, like edible art unfolding right in your kitchen. Initially, I doubted if this “watercolor” technique would hold up beyond the pictures, but it stuck—became my go-to for birthdays when I want something simple yet impressively pretty. The best part? It doesn’t demand hours of piping or fancy tools; just a little patience and a playful hand.
It’s funny how a cake born from a rushed afternoon can end up feeling like a quiet celebration of spring itself—fresh, light, and a little whimsical. So if you’ve ever hesitated to try your hand at decorated cakes because it seems too complicated, this one’s for you. It’ll charm your guests with its soft colors and buttery flavor without stressing you out.
In the end, this watercolor buttercream spring birthday cake became more than just a dessert—it’s a reminder that sometimes the simplest things, like playing with colors on frosting, bring the biggest smiles.
Why You’ll Love This Recipe
Having baked and decorated countless cakes, I can say this perfect watercolor buttercream spring birthday cake has a special place in my heart—and kitchen. Here’s why it might just become your favorite too:
- Quick & Easy: You can create this cake in about 2 hours from start to finish, including decorating. Perfect for last-minute celebrations or when you want to impress without the fuss.
- Simple Ingredients: No need for specialty items—just classic cake staples and buttercream basics you probably have on hand.
- Perfect for Spring Birthdays: The delicate pastel hues and fresh buttercream scream spring vibes, making it a standout for seasonal celebrations.
- Crowd-Pleaser: The light, buttery flavor paired with a fluffy crumb wins over both kids and adults, every single time.
- Unbelievably Delicious: The balance of creamy buttercream and moist cake layers makes every bite melt in your mouth.
What sets this cake apart is the watercolor technique itself—it’s less about precision piping and more about a loose, artistic approach that results in a cake looking professionally done without the stress. The colors blend softly, creating a dreamy effect that feels like a spring garden on a plate. Plus, I’ve found that using a stabilized buttercream keeps the texture just right for this painting method.
Honestly, this recipe has become my secret for easy, beautiful cakes that don’t feel cookie-cutter. It’s the kind of dessert that makes you pause for a moment, savoring both the taste and how lovely it looks. It’s a little celebration of creativity in frosting form.
What Ingredients You Will Need
This recipe calls for straightforward, wholesome ingredients that come together to create a tender cake and smooth, spreadable buttercream. Most are pantry staples, so you won’t need a special trip to the store. Here’s what you’ll gather:
- For the Cake:
- All-purpose flour (2 ½ cups / 312g) – gives structure and softness
- Baking powder (2 ½ teaspoons) – helps the cake rise nicely
- Salt (½ teaspoon) – balances sweetness
- Unsalted butter (1 cup / 227g), softened – adds richness and moisture
- Granulated sugar (1 ¾ cups / 350g) – sweetens and tenderizes
- Large eggs (4), room temperature – binds and adds fluffiness
- Whole milk (1 cup / 240ml), room temperature – keeps crumb tender
- Pure vanilla extract (2 teaspoons) – depth of flavor
- For the Buttercream:
- Unsalted butter (1 cup / 227g), softened – base for creamy frosting
- Powdered sugar (4 cups / 480g), sifted – sweetness and texture
- Heavy cream (2-4 tablespoons / 30-60ml) – adjusts consistency
- Pure vanilla extract (1 teaspoon) – flavor enhancer
- Gel food coloring in pastel shades (pink, blue, lavender, green) – for the watercolor effect (I prefer AmeriColor gels for vibrant, consistent colors)
When selecting butter, I recommend a European-style variety if you can find it—it has a higher fat content that makes the buttercream silkier. For milk, whole is best for a moist crumb, but you can swap with almond or oat milk if dairy-free.
If you want to make this cake gluten-free, try substituting the all-purpose flour with a 1-to-1 gluten-free baking flour blend. Just check that your baking powder is gluten-free too.
Equipment Needed
Getting the right tools makes the whole decorating process much smoother, but don’t worry if you don’t have fancy gadgets—there are always simpler alternatives!
- Mixing Bowls: Two medium bowls for dry and wet ingredients.
- Electric Mixer: Stand mixer or hand mixer to cream butter and sugar and to whip the buttercream until fluffy.
- 8-inch Round Cake Pans: Two or three pans, depending on your layering preference. Non-stick pans or pans lined with parchment paper make cake removal easier.
- Offset Spatula: Essential for spreading buttercream smoothly; a regular butter knife can work in a pinch.
- Bench Scraper or Cake Smoother: Helps achieve a neat finish on your cake sides but optional.
- Food-Safe Brushes or Small Sponges: For the watercolor painting effect on the buttercream. I like using a clean, soft paintbrush designated for food.
- Turntable: Makes frosting and painting easier but you can simply rotate the cake with your hand if needed.
For budget-friendly baking, I’ve used disposable aluminum pans and clean silicone spatulas with great results. Keeping your tools clean and at room temperature (especially butter and eggs) really impacts the texture and ease of frosting.
Preparation Method
- Preheat and Prep: Set your oven to 350°F (175°C). Grease and flour your cake pans or line them with parchment paper to prevent sticking. This takes about 10 minutes.
- Mix Dry Ingredients: In a bowl, sift together 2 ½ cups (312g) all-purpose flour, 2 ½ teaspoons baking powder, and ½ teaspoon salt. Set aside.
- Cream Butter and Sugar: Using a stand or hand mixer, beat 1 cup (227g) softened unsalted butter with 1 ¾ cups (350g) granulated sugar on medium speed until light and fluffy—around 3-5 minutes. This step is key for a tender cake crumb.
- Add Eggs: Crack in 4 large room-temperature eggs, one at a time, mixing well after each addition. This helps the batter emulsify properly.
- Incorporate Dry and Milk: Alternately add the dry ingredients and 1 cup (240ml) room-temperature whole milk to the butter mixture, starting and ending with the dry. Mix gently each time just until combined to avoid overmixing.
- Finish with Vanilla: Stir in 2 teaspoons pure vanilla extract for a warm, inviting flavor.
- Bake: Divide the batter evenly between your pans. Bake for 25-30 minutes or until a toothpick inserted in the center comes out clean. Keep an eye to avoid overbaking, which dries the cake.
- Cool Completely: Let your cakes cool in the pans for 10 minutes, then turn onto wire racks to cool fully. Frosting on warm cake equals meltdown city!
- Make Buttercream: Beat 1 cup (227g) softened unsalted butter on medium speed until creamy. Gradually add 4 cups (480g) sifted powdered sugar, mixing on low to avoid a sugar cloud. Add 2-4 tablespoons (30-60ml) heavy cream and 1 teaspoon vanilla extract; beat on high for 3-5 minutes until light and fluffy.
- Divide and Color Buttercream: Portion the buttercream into small bowls and tint each with a different pastel gel color. Remember, less is more here—you want a soft watercolor effect, not bold neon.
- Assemble and Crumb Coat: Place one cake layer on your board or plate. Spread an even layer of buttercream on top, then stack the next layer. Apply a thin crumb coat around the entire cake and chill for 20-30 minutes to set.
- Watercolor Painting: Using a clean offset spatula or butter knife, spread a thin layer of plain buttercream over the cake. Then, dip your food-safe brush into the colored buttercream and gently dab or swipe onto the cake surface. Blend the colors softly by brushing lightly with a clean brush or sponge. Rotate the cake as you go for even coverage.
- Final Chill and Serve: Refrigerate the cake for about 30 minutes to set the buttercream layers. Let it sit at room temperature for 20 minutes before slicing for the best texture.
Cooking Tips & Techniques
One trick I learned the hard way is always letting your butter and eggs come to room temperature before mixing. Cold ingredients can cause your batter to seize or your buttercream to curdle, which isn’t fun when you’re on a schedule.
When mixing your buttercream, start slow when adding powdered sugar to avoid a cloudy mess, and scrape down the sides frequently to get a smooth, even texture.
For the watercolor effect, less color is better. Use gel colors sparingly and dab on the frosting gently—think of it more like painting a soft wash than covering a canvas with thick paint.
Also, chilling the cake between the crumb coat and final decoration really helps the frosting hold its shape and keeps colors from blending too much.
When assembling, using a cake board slightly smaller than your cake pans makes transferring easier and cleaner. I often multitask by prepping the buttercream while the cakes bake to save time, which is a lifesaver on busy days.
Variations & Adaptations
- Flavor Variations: Add lemon zest and a tablespoon of fresh lemon juice to the batter for a bright citrus twist perfect for spring. Alternatively, try almond extract instead of vanilla for a subtle nutty note.
- Dietary Adaptations: Swap the all-purpose flour for a gluten-free blend to make the cake gluten-free. Use dairy-free butter and coconut cream instead of heavy cream for a vegan-friendly buttercream. Just be sure to taste as you go since dairy-free substitutes can affect texture.
- Color Palette: Instead of pastels, try deeper jewel tones for a more dramatic look or a monochromatic gradient for a minimalist approach.
- Alternate Decoration: If painting isn’t your style, try the simple piping technique with star tips for flowers or rosettes to complement the watercolor base.
- Seasonal Twist: For a spring garden feel, top the cake with edible flowers or fresh berries after the buttercream sets.
Personally, I once swapped gel colors for natural beet and matcha powders mixed into white chocolate, creating a subtle, naturally tinted watercolor effect. It was a bit more finicky but added a lovely earthiness to the cake.
Serving & Storage Suggestions
This cake is best served at room temperature to allow the buttercream to soften just enough for that melt-in-your-mouth experience. I like to slice it thinly since it’s rich and buttery.
Pair it with a light cup of green tea or a sparkling elderflower lemonade for a refreshing complement. For a heartier dessert, serve alongside vanilla bean ice cream or fresh fruit salad.
Store leftover cake in an airtight container in the refrigerator for up to 3 days. Bring slices to room temperature before serving to revive the buttercream’s soft texture. You can also freeze the cake wrapped tightly in plastic wrap and foil for up to 2 months; thaw overnight in the fridge.
Interestingly, the watercolor colors tend to deepen slightly after chilling, adding a richer hue to the frosting that’s quite charming.
Nutritional Information & Benefits
Per slice (based on 12 servings), this cake has approximately 350-400 calories, with 18g of fat, 45g of carbohydrates, and 4g of protein.
Key ingredients like eggs and butter provide essential fats and vitamins, while the option to use whole milk adds calcium and richness. Using pure vanilla extract instead of artificial flavoring keeps it natural and wholesome.
This recipe can be easily adapted to be gluten-free or dairy-free, catering to various dietary needs without sacrificing taste or texture, making it a versatile dessert option.
From a wellness perspective, enjoying a slice of homemade cake like this feels like a small, joyful treat that fits into a balanced lifestyle—especially when paired with fresh fruits or a light meal.
Conclusion
This perfect watercolor buttercream spring birthday cake is proof that beauty and simplicity can go hand in hand in baking. It’s approachable enough for home bakers who want to try something new without getting overwhelmed but impressive enough to make any birthday feel special.
Feel free to tweak the colors, flavors, or size to fit your celebration style. I’ve loved how this cake brings a little artistry and joy into what could otherwise be just another dessert.
So next time you’re craving a cake that looks like a spring day and tastes like a dream, you know what to reach for. And hey, if you ever find yourself craving something savory to balance this sweet treat, my easy sheet pan loaded fajita bowl recipe is a quick, flavorful winner that pairs beautifully with lighter desserts.
Happy baking, and may your kitchen be filled with color and laughter!
Frequently Asked Questions
- Can I use food coloring liquids instead of gel? Liquid food coloring can thin your buttercream and make it harder to work with, so gel colors are recommended for vibrant shades and better consistency.
- How far in advance can I make this cake? You can bake the cake layers up to 2 days ahead and keep them wrapped at room temperature. Buttercream frosting and decorating are best done the same day.
- What if I don’t have a turntable? No worries! You can rotate the cake carefully by hand on your cake board or plate while painting the buttercream.
- Can I use a different frosting instead of buttercream? This watercolor technique works best with stabilized buttercream. Cream cheese frosting is softer and less stable, which can make painting tricky.
- How do I fix a frosting that’s too soft for painting? Chill the buttercream for 15-20 minutes in the fridge to firm it up slightly before applying colors with your brush.
Pin This Recipe!
Perfect Watercolor Buttercream Spring Birthday Cake
A light, buttery cake decorated with a simple yet stunning watercolor buttercream technique, perfect for spring birthdays and easy enough for home bakers.
- Prep Time: 30 minutes
- Cook Time: 30 minutes
- Total Time: 2 hours
- Yield: 12 servings 1x
- Category: Dessert
- Cuisine: American
Ingredients
- 2 ½ cups (312g) all-purpose flour
- 2 ½ teaspoons baking powder
- ½ teaspoon salt
- 1 cup (227g) unsalted butter, softened
- 1 ¾ cups (350g) granulated sugar
- 4 large eggs, room temperature
- 1 cup (240ml) whole milk, room temperature
- 2 teaspoons pure vanilla extract
- 1 cup (227g) unsalted butter, softened (for buttercream)
- 4 cups (480g) powdered sugar, sifted
- 2–4 tablespoons (30-60ml) heavy cream
- 1 teaspoon pure vanilla extract (for buttercream)
- Gel food coloring in pastel shades (pink, blue, lavender, green)
Instructions
- Preheat oven to 350°F (175°C). Grease and flour cake pans or line with parchment paper.
- Sift together flour, baking powder, and salt in a bowl; set aside.
- Beat softened butter and granulated sugar on medium speed until light and fluffy, about 3-5 minutes.
- Add eggs one at a time, mixing well after each addition.
- Alternately add dry ingredients and milk to the butter mixture, starting and ending with dry ingredients; mix gently until combined.
- Stir in vanilla extract.
- Divide batter evenly between pans and bake for 25-30 minutes or until a toothpick comes out clean.
- Cool cakes in pans for 10 minutes, then transfer to wire racks to cool completely.
- Beat softened butter for buttercream until creamy. Gradually add powdered sugar on low speed to avoid dust clouds.
- Add heavy cream and vanilla extract; beat on high for 3-5 minutes until light and fluffy.
- Divide buttercream into small bowls and tint each with different pastel gel colors.
- Place one cake layer on a board or plate. Spread an even layer of buttercream, then stack next layer.
- Apply a thin crumb coat around the cake and chill for 20-30 minutes.
- Spread a thin layer of plain buttercream over the cake.
- Using a food-safe brush, dab or swipe colored buttercream onto the cake surface to create a watercolor effect, blending softly.
- Refrigerate cake for 30 minutes to set buttercream. Let sit at room temperature for 20 minutes before serving.
Notes
Use European-style butter for silkier buttercream. Let butter and eggs come to room temperature before mixing. Use gel food coloring for best results. Chill cake between crumb coat and final decoration to help frosting hold shape. For gluten-free, substitute flour with gluten-free blend and ensure baking powder is gluten-free. For vegan, use dairy-free butter and coconut cream.
Nutrition
- Serving Size: 1 slice (1/12th of c
- Calories: 375
- Sugar: 32
- Sodium: 180
- Fat: 18
- Saturated Fat: 11
- Carbohydrates: 45
- Fiber: 1
- Protein: 4
Keywords: watercolor buttercream cake, spring birthday cake, pastel cake, easy decorated cake, buttercream frosting, simple cake recipe