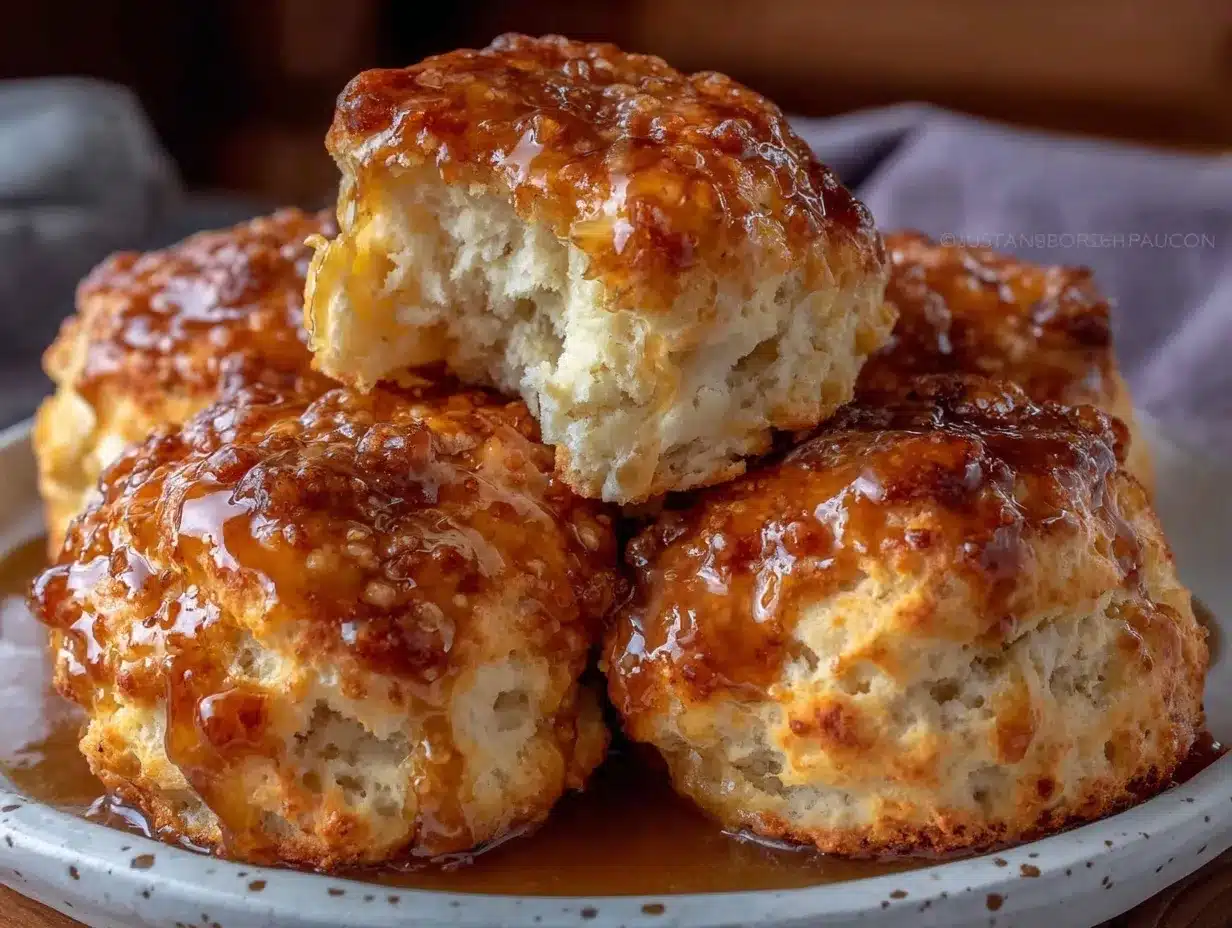
It was one of those quiet Sunday mornings when the kitchen felt just a little too empty, and honestly, I was craving something warm and comforting but without the fuss of a big baking project. I had this tiny bit of browned butter leftover from another recipe — you know how it goes, a spoonful here, a splash there — and I started wondering if I could turn it into something special without making a whole batch. The idea of Perfect Small Batch Browned Butter Scones popped into my head, and I figured, why not? I was skeptical at first — scones usually feel like a commitment, right? But as the nutty aroma of browned butter filled the kitchen, I knew I was onto something.
The first bite was a little revelation: flaky layers with a subtle caramel undertone from the butter, not too sweet but just right to enjoy with a cup of coffee or a dollop of jam. Honestly, this recipe stuck with me because it’s the kind of thing you can whip up without any stress, especially when you don’t want a dozen scones staring at you for days. It became my go-to for those mornings when I want something cozy but quick — and it’s just the right size for one or two people without waste.
What I love most? This recipe feels like a quiet little treat, a small moment of indulgence that somehow makes ordinary mornings feel special. And that’s why I keep coming back to these Perfect Small Batch Browned Butter Scones — because sometimes less is more, and flaky, buttery goodness in a small batch is exactly what the day needs.
Why You’ll Love This Recipe
- Quick & Easy: Comes together in under 30 minutes, perfect for busy mornings or spontaneous tea times.
- Simple Ingredients: Uses pantry staples you likely already have, no fancy shopping trips necessary.
- Perfect for Small Batches: Makes just enough for 4 scones, so there’s no leftover pressure or waste.
- Crowd-Pleaser: The nutty flavor from browned butter combined with flaky texture always gets compliments.
- Unbelievably Delicious: The browned butter adds a deep, rich flavor that takes these scones beyond basic.
- Unique Technique: Browning the butter before adding it to the dough gives the scones a toasty aroma and moist crumb that’s hard to beat.
What sets this recipe apart is the way it balances ease with that homemade bakery feel. I’ve tested dozens of scone recipes, and this small-batch version is something I keep returning to because it doesn’t sacrifice texture or flavor. Plus, it’s a great way to enjoy fresh scones without the overwhelming quantity. Whether you want a quiet breakfast or a sweet afternoon pick-me-up, these scones have your back.
What Ingredients You Will Need
This recipe uses simple, wholesome ingredients to deliver bold flavor and satisfying texture without the fuss. You’ll find most of these are pantry staples, and a few tips for choosing the best options are included to make your scones shine.
- Unsalted butter, 4 tablespoons (56g), browned and cooled slightly (adds richness and that signature nutty flavor)
- All-purpose flour, 1 cup (125g), sifted for lighter texture
- Baking powder, 1 teaspoon (4g), fresh for proper rise
- Sugar, 2 tablespoons (25g), granulated or fine sugar for subtle sweetness
- Salt, 1/4 teaspoon (1.5g), balances flavor
- Heavy cream, 1/4 cup (60ml), plus extra for brushing (adds tenderness and golden tops)
- Vanilla extract, 1/2 teaspoon (2.5ml), optional but recommended for warmth
- Optional add-ins: 1/4 cup (40g) chocolate chips, dried cranberries, or chopped nuts (personal favorite: toasted pecans for extra crunch)
For browning butter, I like using a small stainless steel skillet to keep an eye on the color and smell. If you want a dairy-free twist, you can swap the butter for a plant-based alternative and use almond or oat milk instead of cream, though it changes the texture slightly. The all-purpose flour works perfectly here, but for a gluten-free option, a 1:1 baking blend can be tried, just expect a bit less rise.
Equipment Needed
- Small skillet or saucepan: For browning the butter; a light-colored pan helps you see the color change better.
- Mixing bowl: Medium size, for combining dry and wet ingredients smoothly.
- Whisk and fork: To mix and blend ingredients without overworking the dough.
- Baking sheet: Preferably lined with parchment paper for easy cleanup and even baking.
- Pastry cutter or fork: Optional, to cut butter into the flour if you skip browning and want a traditional approach.
- Measuring cups and spoons: Accuracy counts here, especially for leavening agents.
If you don’t have a pastry cutter, no worries — two forks or even your fingers (quick work!) can do the job. I usually keep parchment paper handy because it saves me from scrubbing the pan later, and it helps the scones bake evenly. While a kitchen scale is great for precision, measuring cups work fine for this recipe, especially if you’re baking casually.
Preparation Method
- Browns the butter: Place 4 tablespoons (56g) of unsalted butter in a small skillet over medium heat. Stir frequently as it melts and starts to foam, then watch carefully for a golden-brown color and a nutty aroma — about 4 to 5 minutes. Remove from heat and let it cool slightly while you prepare the dry ingredients.
- Mix dry ingredients: In a medium bowl, whisk together 1 cup (125g) sifted all-purpose flour, 1 teaspoon (4g) baking powder, 2 tablespoons (25g) sugar, and 1/4 teaspoon (1.5g) salt. Make sure the baking powder is fresh to get that nice lift.
- Combine wet ingredients: Add the browned butter, 1/4 cup (60ml) heavy cream, and 1/2 teaspoon (2.5ml) vanilla extract to the dry ingredients. Stir gently with a fork until just combined. The dough will be slightly sticky but should hold together when pressed.
- Add extras (optional): Fold in 1/4 cup (40g) of your chosen add-ins like chocolate chips or dried cranberries, if using. This step is where you make it your own.
- Shape the dough: Turn the dough out onto a lightly floured surface. Gently pat it into a 6-inch (15cm) circle about 3/4-inch (2cm) thick. Try not to overwork it — you want to keep that flaky texture.
- Cut the scones: Using a sharp knife or a bench scraper, cut the circle into 4 equal wedges. Transfer them carefully to a parchment-lined baking sheet, spacing them about 2 inches (5cm) apart.
- Brush and chill: Brush the tops with a little heavy cream to encourage browning. Refrigerate the scones for 10 minutes to firm up the butter and help with rise.
- Bake: Preheat your oven to 400°F (200°C). Bake the scones for 15-18 minutes until they’re golden brown on top and a toothpick inserted comes out clean. The kitchen will smell incredible at this point.
- Cool slightly and serve: Let the scones cool on the baking sheet for 5 minutes before transferring to a wire rack. Enjoy warm with jam, clotted cream, or just as they are.
Pro tip: If your dough feels too sticky to handle, dust your hands and surface lightly with flour, but don’t add too much or the scones get tough. Also, keeping the butter cool before baking helps create those signature flaky layers.
Cooking Tips & Techniques
One thing I learned the hard way is that browning butter takes a bit of patience and attention. You don’t want to walk away because it can go from golden to burnt quickly. The smell is a great guide — once it’s nutty and fragrant, it’s ready. Using browned butter instead of just melted butter makes a big difference in flavor and moisture.
When mixing the dough, less is definitely more. Overmixing activates gluten and makes the scones dense, which is the opposite of what you want. Stir until the ingredients just come together, then stop. It’s okay if the dough looks a bit rough.
Chilling the shaped scones before baking isn’t a step to skip. It helps the butter firm up again so when baked, you get nice flaky layers. Also, brushing with cream instead of milk gives a better golden color and subtle richness.
Don’t crowd the baking sheet. Giving scones space means the heat circulates properly, so they bake evenly and get that tender crumb and crisp edges.
Finally, let them cool for a few minutes but eat them while warm — that’s when they taste best, tender inside with a slight crunch outside.
Variations & Adaptations
- Sweet berry scones: Fold in fresh or frozen blueberries or raspberries (about 1/4 cup/40g). Add a simple glaze by mixing powdered sugar and lemon juice for extra zing.
- Savory herb scones: Skip the sugar, add 1 teaspoon (1g) dried herbs like rosemary or thyme, and fold in 1/4 cup (25g) grated sharp cheddar. Brush with egg wash instead of cream for a shiny top.
- Gluten-free version: Use a 1:1 gluten-free baking flour blend. You might need to add an extra tablespoon of cream if the dough feels dry.
- Vegan adaptation: Swap butter for vegan butter, cream for full-fat coconut milk, and use a flax egg (1 tablespoon ground flaxseed + 3 tablespoons water) instead of vanilla if you want extra binding.
- Personal favorite twist: I love adding a handful of toasted pecans and a pinch of cinnamon for a fall-inspired scone that tastes like a warm hug.
Serving & Storage Suggestions
These Perfect Small Batch Browned Butter Scones are best enjoyed warm, fresh out of the oven, but they’re also wonderful at room temperature. Serve them with clotted cream, your favorite jam, or simply a pat of butter. A hot cup of tea or coffee pairs beautifully — honestly, that combo is hard to beat.
If you have leftovers (which rarely happens), store scones in an airtight container at room temperature for up to two days. For longer storage, place them in a freezer-safe bag and freeze for up to one month. To reheat, thaw at room temperature and warm in a 350°F (175°C) oven for 5-7 minutes to regain that just-baked texture.
Over time, flavors deepen, especially when add-ins like nuts or dried fruit are involved. The scones might lose a bit of their crisp exterior but stay tender inside, making them perfect for a quick snack or breakfast on the go.
Nutritional Information & Benefits
One scone provides approximately 220 calories, with 12g of fat, 25g of carbohydrates, and 4g of protein. The browned butter contributes healthy fats and a dose of vitamin A, while the flour provides energy-boosting carbs. Using simple, whole ingredients keeps this recipe straightforward and satisfying.
For those monitoring gluten, remember that these are made with all-purpose flour, but substitutions are available. The recipe is naturally vegetarian and can be adapted for vegan diets. While the recipe contains dairy and gluten, modifications can make it suitable for various dietary needs.
From a wellness perspective, having a small batch recipe means you’re less likely to overindulge or waste food, making it a thoughtful balance between indulgence and mindfulness.
Conclusion
These Perfect Small Batch Browned Butter Scones are a little kitchen gem — quick to make, easy to customize, and just enough for when you want fresh, flaky scones without a mountain of leftovers. They’ve become a staple for those quiet moments when a simple, buttery treat feels just right.
Whether you like them sweet or savory, with nuts or berries, this recipe invites you to make it your own. I keep mine simple and buttery, but I’m always trying new twists, and that’s part of the fun.
Give it a try, and you might just find yourself making scones more often than you planned — but hey, that’s never a bad thing. I’d love to hear how you customize yours or any tricks you discover along the way. Happy baking!
FAQs
Can I make these scones ahead of time?
Yes! You can shape and cut the scones, then refrigerate them for up to 24 hours before baking. Just add a couple of extra minutes to the baking time if chilled.
What if I don’t have heavy cream?
You can substitute with whole milk or half-and-half, but the scones may be slightly less tender and not brown as deeply.
How do I know when the butter is perfectly browned?
Look for a golden-brown color with tiny brown specks, and you’ll smell a nutty aroma. Remove it from the heat immediately to avoid burning.
Can I freeze the dough instead of baked scones?
Definitely! Wrap the shaped dough tightly in plastic wrap and freeze for up to one month. Thaw in the fridge overnight before baking.
Why are my scones sometimes tough instead of flaky?
Overmixing the dough or adding too much flour can cause toughness. Mix just until combined and handle the dough gently to keep it tender and flaky.
Pin This Recipe!

Perfect Small Batch Browned Butter Scones

A quick and easy recipe for flaky, buttery scones made with browned butter, perfect for small batches and cozy mornings.
- Prep Time: 10 minutes
- Cook Time: 18 minutes
- Total Time: 28 minutes
- Yield: 4 scones 1x
- Category: Breakfast
- Cuisine: American
Ingredients
- 4 tablespoons (56g) unsalted butter, browned and cooled slightly
- 1 cup (125g) all-purpose flour, sifted
- 1 teaspoon (4g) baking powder, fresh
- 2 tablespoons (25g) granulated sugar
- 1/4 teaspoon (1.5g) salt
- 1/4 cup (60ml) heavy cream, plus extra for brushing
- 1/2 teaspoon (2.5ml) vanilla extract (optional)
- Optional add-ins: 1/4 cup (40g) chocolate chips, dried cranberries, or chopped nuts (e.g., toasted pecans)
Instructions
- Place 4 tablespoons (56g) of unsalted butter in a small skillet over medium heat. Stir frequently as it melts and starts to foam, then watch carefully for a golden-brown color and a nutty aroma — about 4 to 5 minutes. Remove from heat and let it cool slightly.
- In a medium bowl, whisk together 1 cup (125g) sifted all-purpose flour, 1 teaspoon (4g) baking powder, 2 tablespoons (25g) sugar, and 1/4 teaspoon (1.5g) salt.
- Add the browned butter, 1/4 cup (60ml) heavy cream, and 1/2 teaspoon (2.5ml) vanilla extract to the dry ingredients. Stir gently with a fork until just combined. The dough will be slightly sticky but should hold together when pressed.
- Fold in 1/4 cup (40g) of your chosen add-ins like chocolate chips or dried cranberries, if using.
- Turn the dough out onto a lightly floured surface. Gently pat it into a 6-inch (15cm) circle about 3/4-inch (2cm) thick.
- Using a sharp knife or bench scraper, cut the circle into 4 equal wedges. Transfer them carefully to a parchment-lined baking sheet, spacing about 2 inches (5cm) apart.
- Brush the tops with a little heavy cream to encourage browning. Refrigerate the scones for 10 minutes to firm up the butter and help with rise.
- Preheat oven to 400°F (200°C). Bake the scones for 15-18 minutes until golden brown on top and a toothpick inserted comes out clean.
- Let the scones cool on the baking sheet for 5 minutes before transferring to a wire rack. Serve warm.
Notes
Do not overmix the dough to keep scones tender and flaky. Chill shaped scones before baking to help create flaky layers. Brush with cream for a golden top. If dough is too sticky, lightly dust hands and surface with flour but avoid adding too much.
Nutrition
- Serving Size: 1 scone
- Calories: 220
- Fat: 12
- Carbohydrates: 25
- Protein: 4
Keywords: browned butter scones, small batch scones, flaky scones, easy scones, homemade scones, quick scones, buttery scones