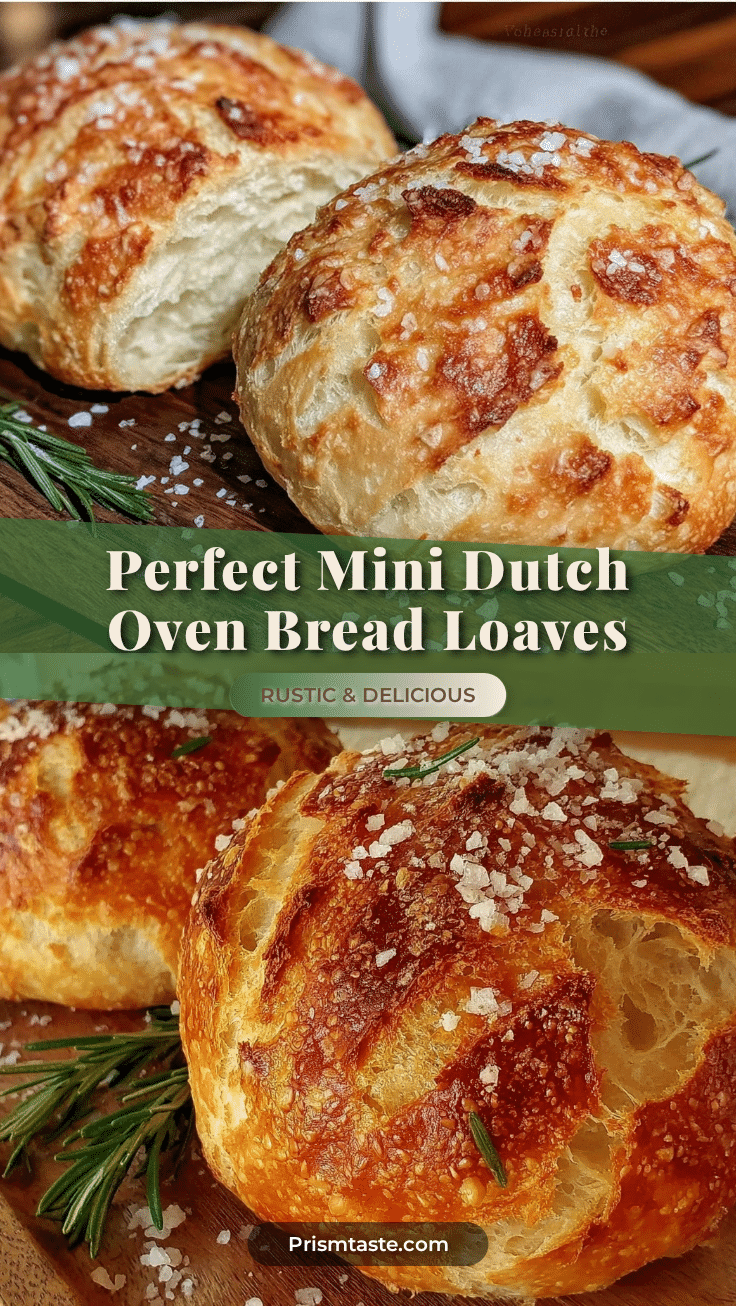
There was this one chilly evening when I found myself craving fresh bread but didn’t want to bake a huge loaf that would last a week. You know the feeling—sometimes you just want that warm, crusty bread, fresh from the oven, without leftovers staring back at you for days. That’s when I stumbled onto the charm of cozy mini Dutch oven bread loaves for two. Honestly, it started as a bit of an experiment: I used my trusty small Dutch ovens, which usually sit quietly on a shelf, and gave them a go for baking tiny loaves. The result? A perfect crust, a soft crumb, and just the right size for a couple of people.
What really hooked me was how those little loaves transformed the whole experience. There’s something just so comforting about pulling a mini loaf out of a Dutch oven, the smell filling the kitchen with a warm, yeasty hug. It’s the kind of bread that invites you to slow down, tear off a chunk, and savor the moment. I’ve made these mini loaves more times than I can count now—sometimes twice in a week—and each time, it feels like a small celebration of simple pleasures. So, if you’re someone who loves homemade bread but hates juggling giant recipes or wasting food, this recipe might quietly become your new favorite, too.
Why You’ll Love This Recipe
- Quick & Easy: This recipe comes together in about 3 hours total, with most of that being hands-off time—ideal for busy evenings or lazy weekends.
- Simple Ingredients: You probably have everything in your pantry already—flour, yeast, salt, water. No fancy add-ins required.
- Perfect for Cozy Nights: Whether it’s a quiet dinner for two or a slow Sunday morning, these mini loaves fit the mood beautifully.
- Crowd-Pleaser: The crusty exterior and soft interior consistently earn compliments—even from folks who usually shy away from baking.
- Unbelievably Delicious: The Dutch oven traps steam perfectly, giving you bakery-quality crust and crumb. It’s bread that feels both rustic and homey.
- This isn’t just any bread recipe—it’s designed specifically for small batches, so you’re not stuck with a giant loaf. I tweaked the hydration and proofing times to get the texture just right for mini Dutch ovens, making baking at home less intimidating and more satisfying.
- There’s a subtle magic in how the bread smells as it bakes, and honestly, it’s one of those things that makes you pause and really appreciate the little moments in cooking.
What Ingredients You Will Need
This recipe uses simple, wholesome ingredients to deliver bold flavor and satisfying texture without the fuss. You’ll find these are mostly pantry staples, easy to source, and flexible for substitutions.
- All-purpose flour (about 3 cups / 360 g) – I prefer King Arthur for its consistent quality.
- Instant yeast (1 teaspoon) – no need to proof; this speeds things up.
- Salt (1 ½ teaspoons) – fine sea salt works best for even seasoning.
- Lukewarm water (1 ¼ cups / 300 ml) – make sure it’s not too hot or it’ll kill the yeast.
- Olive oil (1 tablespoon) – optional, adds a slight richness and keeps the crust tender.
- Optional add-ins: fresh herbs like rosemary or thyme, or a tablespoon of honey for a touch of sweetness.
If you want a gluten-free version, swapping in a gluten-free blend that’s good for bread baking works well—just keep an eye on the dough’s hydration. For dairy-free and vegan diets, this recipe is naturally fitting since it uses no dairy or eggs.
Equipment Needed
- Two mini Dutch ovens (about 3-4 quarts each) – if you don’t have Dutch ovens, heavy oven-safe pots with lids work as a substitute.
- Mixing bowls – a large one for dough mixing and a smaller one for proofing.
- Dough scraper or spatula – helps with folding and handling sticky dough.
- Kitchen scale – highly recommended for accuracy, especially with flour and water.
- Kitchen thermometer – handy to check water temperature for perfect yeast activation.
- Cooling rack – to let the loaves rest and crisp up after baking.
I started baking these loaves with just a single Dutch oven and a baking sheet, but the mini Dutch ovens really change the game. They create a steamy environment that makes the crust incredible. If you don’t want to invest in one right away, try using a cast-iron skillet with a metal bowl as a lid—you’ll get similar results for less.
Preparation Method

- Mix dry ingredients: In a large bowl, combine 3 cups (360 g) all-purpose flour, 1 teaspoon instant yeast, and 1 ½ teaspoons salt. Stir gently to distribute everything evenly. (5 minutes)
- Add water and oil: Gradually pour in 1 ¼ cups (300 ml) lukewarm water and 1 tablespoon olive oil. Use a wooden spoon or your hand to mix until a shaggy dough forms. It should be sticky but not soupy. (5 minutes)
- Knead the dough: Transfer dough to a floured surface and knead gently for about 8 minutes. The dough will be wet and elastic, a bit sticky but manageable. If it’s too sticky, sprinkle just a tad more flour—don’t overdo it. (8 minutes)
- First rise: Place dough in a lightly oiled bowl, cover with a damp towel or plastic wrap, and let it rise at room temperature for 1 to 1.5 hours, or until it doubles in size. You’ll notice the dough getting puffier and airy—this is where the magic starts. (60-90 minutes)
- Shape the loaves: Turn the dough out onto a lightly floured surface. Gently deflate it and divide it into two equal parts. Shape each into a tight round ball by folding edges underneath. Let them rest for 15 minutes. (15 minutes)
- Second rise: Place each shaped dough into a floured kitchen towel-lined bowl or proofing basket, seam side down. Cover and let rise for 45 minutes to an hour until they look puffy again. (45-60 minutes)
- Preheat Dutch ovens: While the dough is undergoing the second rise, place your mini Dutch ovens (with lids) into the oven and preheat to 450°F (230°C). This step is key for the crust to form properly. (30 minutes)
- Bake the bread: Carefully remove the hot Dutch ovens from the oven. Gently transfer each loaf into its pot (seam side up), cover with the lid, and bake for 25 minutes. Then, remove the lids and bake for another 10-15 minutes until the crust is deep golden brown and crisp. (35-40 minutes)
- Cool down: Remove loaves from the Dutch ovens and place them on a cooling rack. Let cool for at least 30 minutes before slicing to finish the crumb setting. (30 minutes)
Pro tip: If your dough feels too sticky while shaping, wet your hands instead of adding flour. This helps keep the dough moist and airy. Also, don’t rush the rises—the longer, slower fermentation makes all the difference in flavor and texture.
Cooking Tips & Techniques
One trick I learned is to really trust the dough’s feel, not just the clock. Sometimes my kitchen is colder, so the dough takes longer to rise. It’s better to wait than to rush and end up with dense bread. Also, when shaping the loaves, don’t overwork the dough; gentle folding keeps the crumb tender.
Preheating the Dutch ovens is crucial. Without that searing heat, you won’t get that signature crust. I’ve burned a few batches by rushing this step, so patience pays off here. Using a kitchen thermometer to check water temperature (around 100°F / 38°C) helps keep yeast happy and active.
Another tip: after removing the lids halfway through baking, watch closely. The crust can go from golden to burnt quickly. If you want an extra shiny crust, brushing the loaves lightly with olive oil right after baking works wonders.
Lastly, I try to bake these loaves on lower oven racks so the bottom gets that nice crisp finish but doesn’t burn. Multitasking is easy here—you can prepare a quick salad or soup while the bread bakes.
Variations & Adaptations
- Herb-infused: Add 1-2 teaspoons chopped fresh rosemary, thyme, or sage to the dry ingredients for a fragrant twist.
- Whole wheat blend: Replace half the all-purpose flour with whole wheat flour for a nuttier, earthier flavor. You might need to add a little more water to keep the dough hydrated.
- Cheese-studded: Fold in ½ cup shredded sharp cheddar or parmesan cheese just before the first rise for a savory surprise.
- Gluten-free option: Use a gluten-free all-purpose baking flour blend that contains xanthan gum. Adjust water slightly; gluten-free dough is usually stickier.
- Alternative baking method: If you don’t have Dutch ovens, bake the loaves on a preheated baking stone or sheet and place a tray of hot water underneath the oven rack to create steam.
- I once tried adding roasted garlic and caramelized onions to the dough—it was a game-changer. The slow-cooked sweetness paired beautifully with the crusty bread.
Serving & Storage Suggestions
Serve these mini Dutch oven bread loaves warm or at room temperature. They’re fantastic sliced thick with butter melting right in, or alongside a bowl of soup or stew. I like pairing them with a simple olive oil and balsamic dip or a sharp cheese platter for a cozy meal.
To store, wrap the cooled loaves loosely in a kitchen towel and keep at room temperature for up to two days. For longer storage, slice and freeze the bread in zip-top bags—toast slices straight from the freezer for a fresh taste.
Reheating works best in the oven at 350°F (175°C) for 10 minutes wrapped in foil to warm through without drying out. The crust regains some crispness if you unwrap it for the last few minutes.
Flavors deepen a bit after a day, so if you can resist, letting the loaf rest wrapped overnight enhances the taste and texture. Honestly, there’s nothing quite like that first slice fresh from the oven, though—it’s worth savoring every crumb.
Nutritional Information & Benefits
Each mini loaf serves two, with an estimated 300-350 calories per serving, depending on exact measurements and any add-ins. The bread provides a good source of carbohydrates for energy and some protein from the flour.
Using simple ingredients keeps this recipe free from additives and preservatives common in store-bought bread. Whole wheat variations add fiber and extra minerals, which support digestion and heart health.
Since the recipe is naturally dairy- and egg-free, it fits well into vegetarian and vegan diets. For gluten-free adaptations, you’ll need to use specialized flour blends if you have sensitivities.
From my experience, making bread at home like this feels nourishing—not just physically but emotionally too. There’s a real satisfaction in breaking bread you made yourself, and that’s part of the recipe’s quiet magic.
Conclusion
Cozy mini Dutch oven bread loaves for two are a small but mighty way to enjoy homemade bread without the overwhelm of large batches. This recipe sticks with me because it’s approachable, comforting, and always delivers that crackly crust and tender crumb I crave. I love how it invites you to slow down, share a moment, and enjoy something simple but special.
Feel free to tweak the herbs, flour blends, or add-ins to make it your own. Bread baking is an adventure, and these mini loaves are a friendly place to start. If you give it a try, I’d love to hear how it turns out for you—sometimes, the best recipes come from shared stories and little adjustments.
Here’s to many cozy bites and warm kitchens ahead!
FAQs
Can I use active dry yeast instead of instant yeast?
Yes! If using active dry yeast, dissolve it in the lukewarm water with a pinch of sugar and let it sit for 5-10 minutes until foamy before mixing with the dry ingredients.
What if I don’t have mini Dutch ovens?
You can bake the loaves on a preheated baking stone or sheet and create steam by placing a pan of hot water in the oven. A heavy pot with a lid can also work as a substitute.
How do I know when the bread is fully baked?
The crust should be deep golden brown and sound hollow when tapped underneath. Using a thermometer, the internal temperature should reach around 200°F (93°C).
Can I prepare the dough ahead of time?
Absolutely! After the first rise, you can refrigerate the dough overnight. Just bring it back to room temperature before shaping and proceeding with the second rise.
Is this recipe suitable for beginners?
Yes, it’s designed to be straightforward with minimal ingredients and steps. The mini Dutch ovens make the baking process forgiving and produce consistent results.
Pin This Recipe!
Cozy Mini Dutch Oven Bread Loaves for Two

This recipe makes small, crusty bread loaves perfect for two people, using mini Dutch ovens for a bakery-quality crust and soft crumb. It’s simple, quick, and ideal for cozy nights or small batches without leftovers.
- Prep Time: 35 minutes
- Cook Time: 40 minutes
- Total Time: 3 hours
- Yield: 2 mini loaves (4 servings) 1x
- Category: Bread
- Cuisine: American
Ingredients
- 3 cups (360 g) all-purpose flour
- 1 teaspoon instant yeast
- 1 ½ teaspoons salt
- 1 ¼ cups (300 ml) lukewarm water
- 1 tablespoon olive oil (optional)
- Optional add-ins: fresh herbs like rosemary or thyme, or 1 tablespoon honey
Instructions
- Mix dry ingredients: In a large bowl, combine 3 cups all-purpose flour, 1 teaspoon instant yeast, and 1 ½ teaspoons salt. Stir gently to distribute evenly. (5 minutes)
- Add water and oil: Gradually pour in 1 ¼ cups lukewarm water and 1 tablespoon olive oil. Mix until a shaggy dough forms, sticky but not soupy. (5 minutes)
- Knead the dough: Transfer dough to a floured surface and knead gently for about 8 minutes until wet, elastic, and slightly sticky. Add a little flour if too sticky. (8 minutes)
- First rise: Place dough in a lightly oiled bowl, cover, and let rise at room temperature for 1 to 1.5 hours until doubled in size. (60-90 minutes)
- Shape the loaves: Deflate dough, divide into two equal parts, shape each into a tight round ball, and let rest for 15 minutes. (15 minutes)
- Second rise: Place shaped dough seam side down in floured towel-lined bowls or proofing baskets, cover, and let rise for 45 to 60 minutes until puffy. (45-60 minutes)
- Preheat Dutch ovens: Place mini Dutch ovens with lids in the oven and preheat to 450°F (230°C). (30 minutes)
- Bake the bread: Remove hot Dutch ovens, transfer each loaf seam side up into its pot, cover with lid, and bake for 25 minutes. Remove lids and bake another 10-15 minutes until crust is deep golden and crisp. (35-40 minutes)
- Cool down: Remove loaves from Dutch ovens and place on a cooling rack. Cool at least 30 minutes before slicing. (30 minutes)
Notes
If dough is too sticky while shaping, wet your hands instead of adding flour to keep dough moist and airy. Do not rush the rises; longer fermentation improves flavor and texture. Preheat Dutch ovens thoroughly for best crust. Watch crust closely after removing lids to avoid burning. Brushing loaves with olive oil after baking adds shine. Baking on lower oven racks helps crisp the bottom without burning.
Nutrition
- Serving Size: 1 mini loaf (serves
- Calories: 300350
- Sugar: 1
- Sodium: 350
- Fat: 4
- Saturated Fat: 0.5
- Carbohydrates: 60
- Fiber: 2
- Protein: 8
Keywords: mini bread, Dutch oven bread, homemade bread, small batch bread, crusty bread, easy bread recipe, bread for two, simple bread