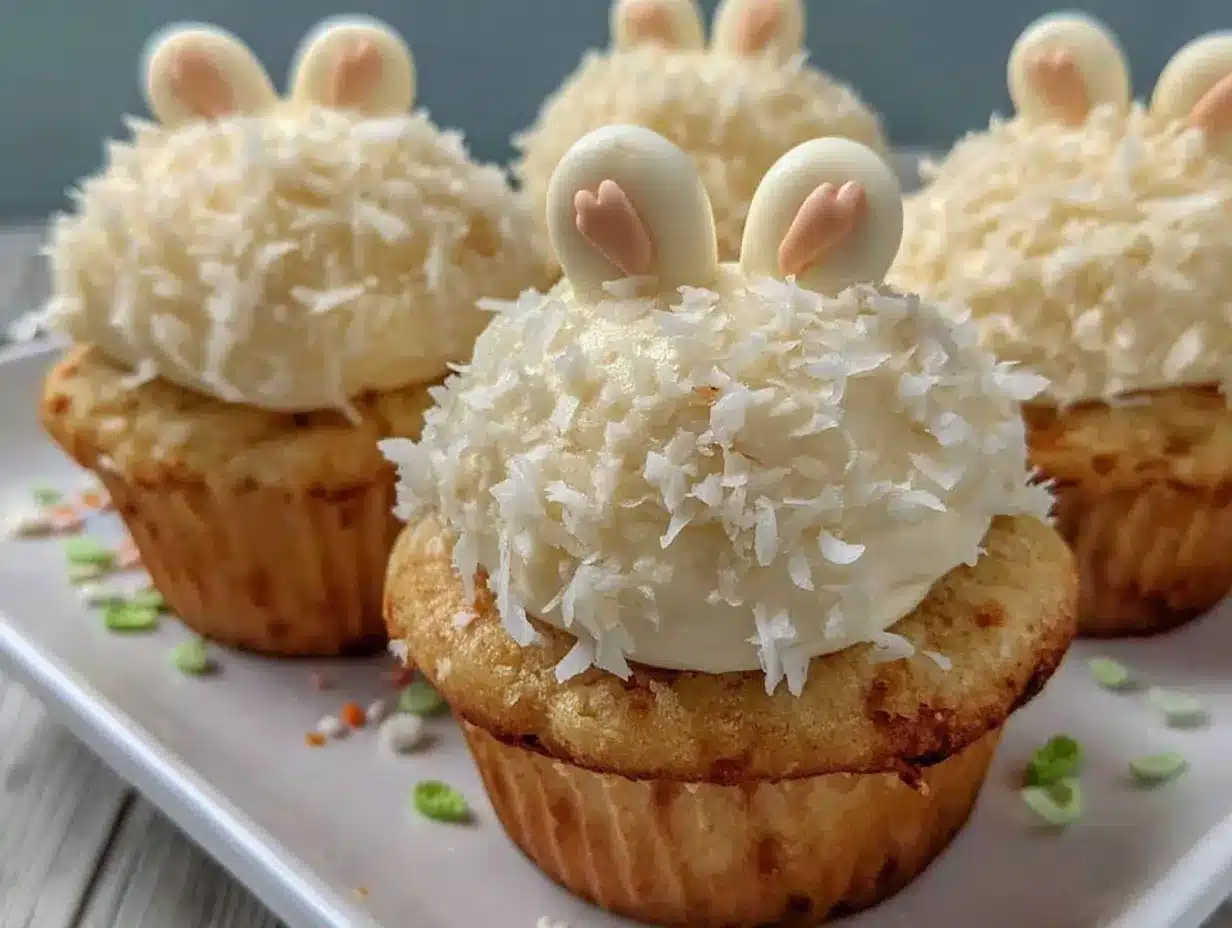
Picture this: you walk into your kitchen and the scent of warm vanilla cake and sweet buttercream frosting fills the air. It’s the kind of smell that makes you pause, close your eyes, and just grin—because you know you’re about to whip up something adorable (and really, dangerously delicious). The first time I made these Bunny Butt Cupcakes, I was instantly hooked. My daughter and I spent a rainy afternoon giggling as we shaped little bunny feet and fluffy tails, and let’s be honest, more than a few marshmallows “mysteriously” disappeared during decorating. These cupcakes aren’t just cute—they’re pure, nostalgic comfort with a fun twist that’ll have kids and grownups alike sneaking seconds off the cooling rack.
Honestly, I wish I’d stumbled upon this idea years ago (you know, back when I was knee-high to a grasshopper and my grandma was baking up a storm for Easter). There’s something about the combination of a pillowy cupcake, creamy frosting, and playful decorations that just makes every spring celebration feel extra special. My family couldn’t stop laughing as we lined up our bunny butts for a “cutest cupcake” contest. Even my husband, who claims he’s “not a sweets guy,” was caught licking frosting off his fingers. These cupcakes have become a staple for birthdays, playdates, and yes—any spring gathering that needs a little dose of whimsy. They’re perfect for potlucks, Easter brunches, or just brightening up your Pinterest board with a pop of pastel cheer.
I’ve tested this recipe more times than I can count (all in the name of research, of course), and each batch feels like a warm hug. Bunny Butt Cupcakes are the kind of treat you’ll want to bookmark, pin, and share—because trust me, they’re every bit as delightful as they look. Whether you’re baking with kids, hosting a party, or just craving a sweet pick-me-up, these cupcakes deliver on all fronts. Let’s face it: sometimes you just need a recipe that brings pure joy. And this is it.
Why You’ll Love These Bunny Butt Cupcakes
Let me tell you, there’s a reason these Bunny Butt Cupcakes have become my go-to for spring parties and Easter mornings. I’m not just saying that because they’re cute—though, honestly, that’s a big part of it! Here’s what makes them a standout treat you’ll want to make again and again:
- Quick & Easy: Comes together in under an hour, so you’re not stuck in the kitchen all day. Perfect for last-minute cravings or when you need a showstopper treat—fast.
- Simple Ingredients: You won’t need anything fancy. Most of what you’ll use is already in your pantry or fridge, which means no frantic grocery runs (always a win in my book).
- Perfect for Spring Celebrations: These cupcakes are a hit at Easter brunches, baby showers, and any garden party. They add instant cheer to the table.
- Crowd-Pleaser: Kids go wild for the marshmallow bunny tails and pink “feet,” while adults appreciate the moist, flavorful cupcake base. My last batch disappeared before I could even get a decent photo!
- Unbelievably Delicious: The cupcakes are tender and buttery, the frosting is rich, and those fluffy marshmallow details add the perfect touch of sweetness.
What sets this recipe apart is the decorating technique. You don’t need fancy piping skills—just a little patience and a sense of fun. I use a simple vanilla cupcake base that’s reliable and moist, then top it with homemade buttercream. The bunny feet are made with halved marshmallows and pink candy melts, which means you get playful color without tricky fondant. It’s the best version I’ve tried, and trust me—I’ve tested plenty in my years of baking for family and friends.
This recipe isn’t just good—it’s the kind that makes you close your eyes after the first bite, savoring the soft cake and creamy frosting. It’s comfort food reimagined for spring, and it’s perfect for impressing guests (without any stress). Whether you’re baking with little ones or just want to make someone smile, Bunny Butt Cupcakes deliver happiness in every bite.
What Ingredients You Will Need
These Bunny Butt Cupcakes rely on simple, wholesome ingredients that come together for bold flavor and the cutest presentation. Most are pantry staples, and a few are easy to swap for dietary needs or flavor preferences. Here’s everything you’ll need to get hopping:
- For the Cupcake Batter:
- All-purpose flour (180g / 1 1/2 cups) – go with unbleached for best texture
- Granulated sugar (200g / 1 cup)
- Unsalted butter, softened (115g / 1/2 cup) – adds richness
- Large eggs, room temperature (2)
- Whole milk (120ml / 1/2 cup) – or dairy-free milk for allergies
- Pure vanilla extract (5ml / 1 teaspoon)
- Baking powder (7g / 1 1/2 teaspoons)
- Salt (2g / 1/2 teaspoon)
- For the Buttercream Frosting:
- Unsalted butter, softened (115g / 1/2 cup)
- Powdered sugar (240g / 2 cups)
- Whole milk or cream (15ml / 1 tablespoon)
- Pure vanilla extract (5ml / 1 teaspoon)
- Pinch of salt
- For Decorating:
- Large marshmallows (about 12) – for bunny tails and feet
- Mini marshmallows (about 24) – for bunny toes
- Pink candy melts or pink icing – for paw pads
- White sanding sugar or shredded coconut – optional, for extra fluff
- Edible glue or a dab of frosting – to stick decorations
Ingredient tips: I usually reach for King Arthur flour (it’s my go-to for cupcakes), and I swear by real vanilla extract for that classic flavor. If you want to go gluten-free, swap in your favorite gluten-free flour blend (Bob’s Red Mill works well). For dairy allergies, use plant-based butter and oat milk—they’re both solid substitutes. And if you’re in a pinch, store-bought frosting will work, but homemade buttercream is honestly worth the extra five minutes.
Seasonal swaps: In spring, you can lighten things up with lemon zest in the batter or use pastel sprinkles for extra color. For a chocolate version, sub 1/4 cup of flour with unsweetened cocoa powder. These ingredients are forgiving, so don’t be afraid to play around!
Equipment Needed
Gathering the right kitchen tools makes these Bunny Butt Cupcakes even easier. Here’s what you’ll want on hand (plus a few tips from my own baking adventures):
- 12-cup muffin tin – standard size works perfectly
- Paper cupcake liners – for easy clean-up and cute presentation
- Mixing bowls (medium and large)
- Electric mixer or stand mixer – hand mixing works too, but a mixer makes fluffier cupcakes
- Rubber spatula – for scraping every last bit of batter
- Measuring cups and spoons – accuracy matters for the best texture
- Small offset spatula or butter knife – handy for spreading frosting
- Scissors – to cut marshmallows for bunny feet
- Toothpicks – for adding details with candy melts
- Wire cooling rack – helps cool cupcakes evenly
If you don’t have a stand mixer, don’t worry! I’ve made these with just a wooden spoon and a little elbow grease, and they still turned out great. For cupcake liners, I love the pastel ones from Wilton (they really pop for spring photos). And if you’re on a budget, most dollar stores carry everything you need. Just be sure to wash your tools well after working with sticky marshmallows—they can gunk up scissors and spatulas fast.
Preparation Method
Ready to make Bunny Butt Cupcakes that’ll wow your friends and family? Here’s the step-by-step method, with all my personal tips and troubleshooting notes built in. Let’s get baking!
-
Prep your pan and oven:
Line a 12-cup muffin tin with paper liners. Preheat oven to 350°F (175°C). This helps get even rise and prevents sticking. -
Mix dry ingredients:
In a medium bowl, whisk together 1 1/2 cups (180g) all-purpose flour, 1 cup (200g) sugar, 1 1/2 teaspoons (7g) baking powder, and 1/2 teaspoon (2g) salt. Mixing dry first avoids clumps later. -
Cream butter and sugar:
In a large bowl, beat 1/2 cup (115g) softened butter until creamy and light—about 2 minutes. Add sugar and beat another minute until fluffy. If your butter is cold, microwave it for 10 seconds (but don’t melt!). -
Add eggs and vanilla:
Beat in 2 large eggs (room temp is best) one at a time. Add 1 teaspoon (5ml) vanilla extract. Scrape down bowl as needed. -
Blend dry and wet:
Add half the dry ingredients to the wet mixture, stir gently. Pour in 1/2 cup (120ml) milk, then add remaining dry ingredients. Mix just until combined—overmixing can make cupcakes tough. -
Fill and bake:
Divide batter evenly among liners (about 1/4 cup each). Bake for 18-20 minutes, until tops are golden and a toothpick comes out clean. If edges brown too quickly, rotate the pan halfway through. -
Cool completely:
Remove cupcakes to a wire rack. Let them cool at least 30 minutes before frosting. Rushing this step can melt your buttercream (trust me, I’ve learned the hard way). -
Prepare buttercream:
Beat 1/2 cup (115g) softened butter until smooth. Add 2 cups (240g) powdered sugar, 1 tablespoon (15ml) milk or cream, and 1 teaspoon (5ml) vanilla. Beat until fluffy and pale. If too stiff, add a splash more milk. -
Frost cupcakes:
Spread a generous dollop of buttercream on each cooled cupcake. Aim for a round mound—this gives the bunny butts their shape. -
Make bunny tails:
Cut large marshmallows in half. Roll the sticky side in white sanding sugar or coconut for extra fluff. Place one tail on each cupcake, slightly off-center. -
Make bunny feet:
Cut large marshmallows in half for feet. Use pink candy melts or icing to dot “pads” and “toes”—I use a toothpick for this. Add two feet per cupcake, angled outward. -
Finish details:
Attach mini marshmallows as toes using a dab of frosting. Let decorated cupcakes set for 10 minutes before serving—this helps everything stay put.
Extra notes: If your buttercream feels grainy, beat it a minute longer—it smooths out. Cupcakes sinking? Check oven temp or don’t overbeat the batter. Have fun and don’t stress if bunny butts aren’t “perfect”—the charm is in the homemade look!
Cooking Tips & Techniques
You know what? I’ve had my share of cupcake disasters over the years, and Bunny Butt Cupcakes taught me a few lessons. Here’s what I’ve learned (so you don’t have to go through the same messes!):
- Don’t overmix the batter: After combining wet and dry, mix gently—just until no streaks remain. Overmixing leads to dense, flat cupcakes. It’s tempting to keep stirring, but resist!
- Room temperature ingredients matter: If butter or eggs are cold, the batter won’t blend as smoothly, and you might end up with weird lumps. Let everything sit out for 30 minutes before starting.
- Watch your oven: Ovens run hot or cold (mine’s been all over the place). Always check cupcakes at the minimum bake time and use the toothpick test—if it comes out clean, they’re done.
- Frosting consistency is key: Too thin and it’ll slide right off those little bunny butts; too thick and it’s hard to spread. I add milk a teaspoon at a time until I get a soft, creamy texture that holds its shape.
- Decorating shortcuts: If you’re pressed for time, use pre-made pink icing in a tube for the paws. Kids love helping with this step—it’s messy but fun!
- Multitask smartly: While cupcakes are cooling, prep your marshmallows and candy melts. This way, everything’s ready to go once you start decorating (less stress, more fun).
- Don’t sweat the imperfections: Honestly, I’ve had bunny feet facing the wrong way, tails off-center, and even a few “mutant” bunnies. They still taste amazing and everyone laughs—which is really the point!
Remember, baking should be joyful. The best Bunny Butt Cupcakes are the ones you make with a smile (and maybe a little frosting on your nose). If you hit a snag, just keep going. These cupcakes are forgiving and always a hit, even if they’re a little quirky.
Variations & Adaptations
One of my favorite things about Bunny Butt Cupcakes is how easy they are to customize. Here are a few ways to make them your own:
- Chocolate Bunny Butts: Swap 1/4 cup of flour for unsweetened cocoa powder in the batter and use chocolate frosting instead of vanilla. My kids love this for a “double chocolate” treat!
- Dairy-Free / Vegan: Use plant-based butter and milk in both the cupcakes and frosting. Try Dandies vegan marshmallows for decorating. I’ve made these for a vegan friend and they turned out super tasty.
- Gluten-Free: Sub in your favorite gluten-free flour blend, like Bob’s Red Mill. The texture is still light and fluffy—just be sure to check for doneness, as gluten-free cupcakes can bake a touch faster.
- Seasonal Flavors: Add lemon zest or almond extract to the batter for a springy twist. For fall, pumpkin spice and orange coloring make adorable “autumn bunnies.”
- Allergen Substitutions: Nut allergies? Skip almond extract and stick to vanilla. Egg-free? Use a flax egg (1 tablespoon ground flax + 2.5 tablespoons water, mixed and rested).
- Personal twist: Last year, I made a batch using coconut frosting and rolled the tails in extra coconut flakes. They looked fluffy and tasted tropical—highly recommend if you love coconut!
Don’t be afraid to play around. Bunny Butt Cupcakes are all about fun and creativity, so use what you have and make them fit your needs. Every batch I’ve tried has been a hit, no matter the tweaks!
Serving & Storage Suggestions
Bunny Butt Cupcakes are best served fresh, at room temperature, with all those marshmallow and frosting details intact. Here’s how I like to present and store them for maximum wow-factor:
- Serving: Arrange cupcakes on a pastel platter or cake stand. Group them together so the bunny butts “face” outward—kids love picking their favorite. They pair perfectly with a cold glass of milk or a spring punch (lemonade is my top pick for parties).
- Presentation: Add edible grass (the shredded coconut kind) around the cupcakes for a “garden” look. A sprinkle of pastel confetti or mini chocolate eggs makes the tray extra festive.
- Storage: Store in an airtight container at room temperature for up to 2 days. If it’s hot out, refrigerate—but let cupcakes sit out for 30 minutes before serving to soften frosting and marshmallows.
- Freezing: Unfrosted cupcakes freeze well for up to 2 months. Wrap tightly, thaw overnight, and decorate fresh. Frosted cupcakes can be frozen, but marshmallow details get a little chewy, so I recommend decorating last-minute.
- Reheating: If cupcakes feel a bit dry, microwave for 5 seconds (no more!)—just enough to refresh the texture.
- Flavor development: These cupcakes taste best the day they’re made, but the vanilla flavor deepens overnight. Just be sure to cover tightly to keep them moist.
Trust me, these cupcakes disappear fast, so you probably won’t have leftovers. But if you do, they’re just as delightful the next day—sometimes even better!
Nutritional Information & Benefits
Bunny Butt Cupcakes are a sweet treat, so enjoy them as a special occasion dessert. Here’s a quick rundown of the nutritional values (per cupcake, approximate):
- Calories: 210
- Fat: 9g
- Carbohydrates: 32g
- Protein: 2g
- Sugar: 22g
The main ingredients—flour, eggs, and milk—provide a bit of protein and calcium, while marshmallows and frosting bring the fun. For a healthier twist, use less sugar in the batter or swap frosting for whipped cream. These cupcakes are nut-free (unless you add almond extract) and can be made gluten-free or vegan with the substitutions above. If you’re watching allergens, check labels on marshmallows and candy melts. I see treats like this as part of a balanced lifestyle—enjoyed in moderation and always with a smile!
Conclusion
There’s something magical about Bunny Butt Cupcakes—they’re whimsical, delicious, and guaranteed to bring a smile (no matter how old you are). I love how easy they are to customize, and how they turn even the simplest gathering into a celebration. Whether you’re baking for a crowd or just making memories with your kids, these cupcakes are worth every minute. Honestly, they’ve become a favorite in my house—partly because they taste amazing, and partly because they remind me of happy, messy kitchen moments.
Go ahead, make these Bunny Butt Cupcakes your own. Try different flavors, play with the decorations, and let your creativity loose. I’d love to hear how you adapt the recipe—leave a comment or share a picture if you try them! Here’s to sweet spring moments, and cupcakes that make you laugh. Happy baking, friends!
Frequently Asked Questions
Can I use a cake mix for Bunny Butt Cupcakes?
Absolutely! A boxed vanilla or chocolate cake mix works fine if you’re short on time. Just follow the package directions and decorate as described.
What if I don’t have marshmallows for the bunny decorations?
You can use white chocolate truffles or halved strawberries for tails and feet. Fondant circles also work in a pinch.
Can I make Bunny Butt Cupcakes ahead of time?
Yes! Bake cupcakes a day ahead, store unfrosted, then decorate fresh before serving. This keeps marshmallows soft and frosting firm.
How do I make vegan Bunny Butt Cupcakes?
Use plant-based butter and milk, flax eggs, and vegan marshmallows (like Dandies). They taste just as good and look super cute!
Are Bunny Butt Cupcakes safe for nut allergies?
Yes, just stick to vanilla extract and check all packaged ingredients for traces of nuts. Skip almond extract and use nut-free candy melts for decorating.
Pin This Recipe!
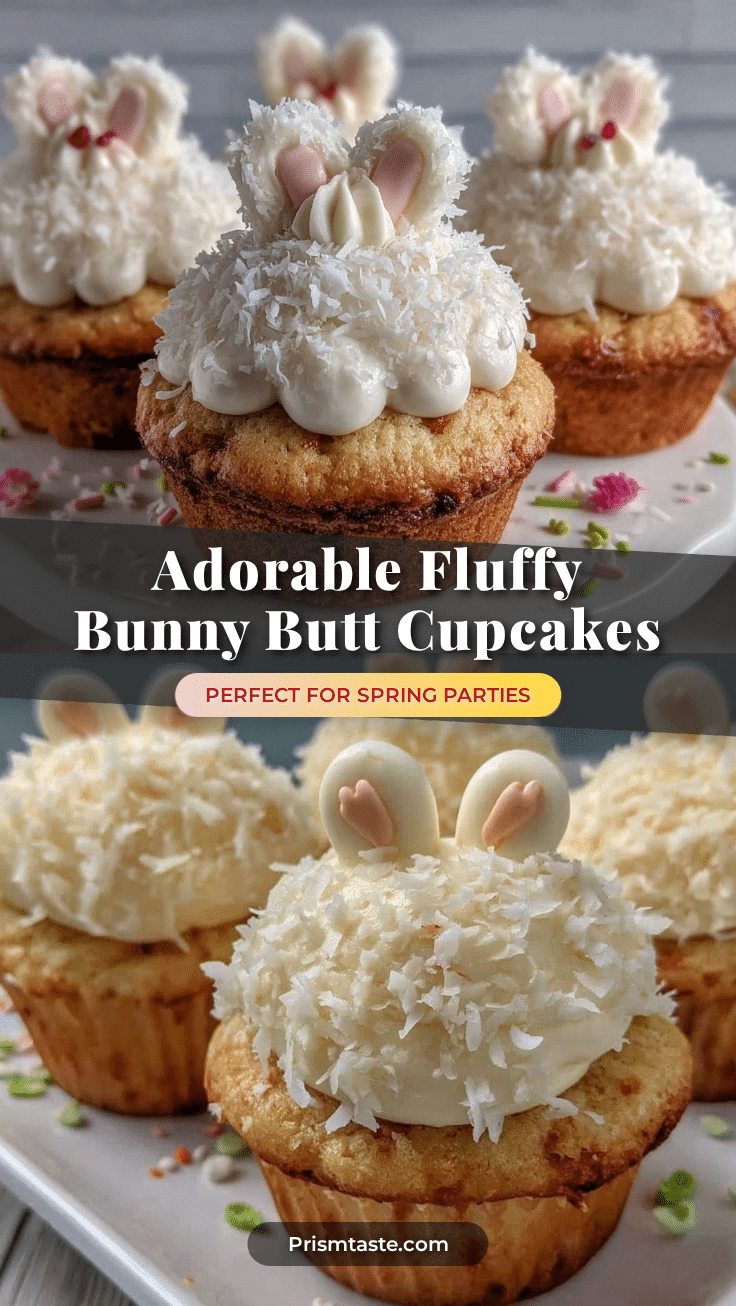
Bunny Butt Cupcakes: Easy Spring Treats for Parties & Kids
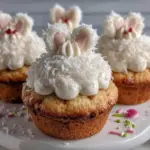
These Bunny Butt Cupcakes are a whimsical and delicious spring treat, perfect for Easter, parties, or baking with kids. Tender vanilla cupcakes are topped with creamy buttercream and decorated with marshmallows to create adorable bunny butts that will delight guests of all ages.
- Prep Time: 20 minutes
- Cook Time: 20 minutes
- Total Time: 50 minutes
- Yield: 12 cupcakes 1x
- Category: Dessert
- Cuisine: American
Ingredients
- 1 1/2 cups all-purpose flour (180g)
- 1 cup granulated sugar (200g)
- 1/2 cup unsalted butter, softened (115g)
- 2 large eggs, room temperature
- 1/2 cup whole milk (120ml) or dairy-free milk
- 1 teaspoon pure vanilla extract (5ml)
- 1 1/2 teaspoons baking powder (7g)
- 1/2 teaspoon salt (2g)
- For the Buttercream Frosting:
- 1/2 cup unsalted butter, softened (115g)
- 2 cups powdered sugar (240g)
- 1 tablespoon whole milk or cream (15ml)
- 1 teaspoon pure vanilla extract (5ml)
- Pinch of salt
- For Decorating:
- About 12 large marshmallows (for bunny tails and feet)
- About 24 mini marshmallows (for bunny toes)
- Pink candy melts or pink icing (for paw pads)
- White sanding sugar or shredded coconut (optional, for extra fluff)
- Edible glue or a dab of frosting (to stick decorations)
Instructions
- Line a 12-cup muffin tin with paper liners and preheat oven to 350°F (175°C).
- In a medium bowl, whisk together flour, sugar, baking powder, and salt.
- In a large bowl, beat softened butter until creamy and light, about 2 minutes. Add sugar and beat another minute until fluffy.
- Beat in eggs one at a time, then add vanilla extract. Scrape down the bowl as needed.
- Add half the dry ingredients to the wet mixture and stir gently. Pour in milk, then add remaining dry ingredients. Mix just until combined.
- Divide batter evenly among liners (about 1/4 cup each). Bake for 18-20 minutes, until tops are golden and a toothpick comes out clean.
- Remove cupcakes to a wire rack and let cool at least 30 minutes before frosting.
- For the buttercream, beat softened butter until smooth. Add powdered sugar, milk or cream, vanilla, and a pinch of salt. Beat until fluffy and pale. Add more milk if needed for consistency.
- Spread a generous dollop of buttercream on each cooled cupcake, shaping into a round mound.
- Cut large marshmallows in half for bunny tails. Roll sticky side in sanding sugar or coconut if desired. Place one tail on each cupcake, slightly off-center.
- Cut more large marshmallows in half for feet. Use pink candy melts or icing to dot ‘pads’ and ‘toes’ on each foot. Add two feet per cupcake, angled outward.
- Attach mini marshmallows as toes using a dab of frosting. Let decorated cupcakes set for 10 minutes before serving.
Notes
For best results, use room temperature ingredients and avoid overmixing the batter. Decorate cupcakes just before serving for the freshest look. Cupcakes can be made gluten-free or vegan with simple substitutions. Store in an airtight container at room temperature for up to 2 days, or refrigerate if needed. Unfrosted cupcakes freeze well for up to 2 months.
Nutrition
- Serving Size: 1 cupcake
- Calories: 210
- Sugar: 22
- Sodium: 90
- Fat: 9
- Saturated Fat: 5
- Carbohydrates: 32
- Protein: 2
Keywords: bunny butt cupcakes, Easter cupcakes, spring dessert, kid-friendly baking, vanilla cupcakes, marshmallow cupcakes, party treats, cute cupcakes