Picture this: the scent of sweet vanilla cake mingling with creamy frosting, the kitchen humming with energy, and pastel-colored sprinkles scattered across every surface. That’s what Easter morning looked like in my house when I first made these Easter egg cake pops—tiny, adorable, and almost too pretty to eat (almost!). The first time I rolled the cake into egg shapes and dipped them in candy melts, I felt like I’d stumbled into a spring wonderland, and honestly, my kids’ eyes nearly popped out of their heads when they saw the bright, shiny eggs lined up on the counter.
You know those moments when you’re just chasing nostalgia? That’s what inspired these cake pops. Growing up, Easter meant backyard egg hunts and my grandma’s legendary coconut cake. One rainy April weekend, I decided to mash those memories together and, voila, this Easter egg cake pops recipe was born. I still remember pausing in the kitchen, cake crumbs on my hands, just grinning because I knew this was a keeper. It’s dangerously easy, makes a mess in the most fun way, and brings pure, nostalgic comfort with every bite.
Let’s face it: these cake pops aren’t just for kids. My family can’t keep their hands off them, and they disappear at every brunch and party. I’ve made them for school bake sales, spring baby showers, and as a sweet treat tucked into Easter baskets. If you’re looking for something that’ll brighten up your Pinterest board and wow your friends, you’ve got to try these cake pops. I tested (and tasted) this recipe more times than I care to admit in the name of research, of course. Now, it’s a staple for family gatherings and gifting—truly, it feels like a hug wrapped up in candy coating. Trust me, you’re going to want to bookmark this one.
Why You’ll Love This Recipe
If you’ve ever hesitated to make cake pops because they seem fussy or time-consuming, let me put your mind at ease. These Easter egg cake pops are my go-to for spring parties, and they come with a handful of reasons to love them:
- Quick & Easy: You can whip up a whole batch in under 90 minutes, which is perfect for those last-minute “Mom, I need something for the class party!” moments.
- Simple Ingredients: No need to hunt for exotic stuff—just basic cake mix, frosting, and some candy melts. Odds are, you’ve got most of it in your pantry already.
- Perfect for Celebrations: These are a hit at Easter brunch, spring potlucks, or even as a rainy-day baking project with the kids.
- Crowd-Pleaser: I’ve never seen a plate of these last more than a few minutes. Kids and adults both sneak extras when they think no one is looking (including me!).
- Unbelievably Delicious: There’s something about the soft, sweet cake inside and the crisp candy shell outside that’s just pure comfort. Plus, you can flavor the cake how you like—lemon, vanilla, or even carrot!
What really sets this recipe apart is how forgiving it is. I blend the cake with frosting until it’s just the right level of moist—never soggy or dry. The secret is chilling the shaped pops before dipping, which keeps them from falling apart (been there, done that). There’s also a freedom to decorate: pastel sprinkles, edible glitter, or a drizzle of white chocolate. No two have to look alike, and that’s the magic.
This isn’t just another cake pop recipe. It’s my best version, tried and tested in a real home kitchen. The result? A treat that brings smiles and makes any table feel festive. If you want a dessert that’s as fun to make as it is to eat, and guaranteed to spark a little joy (even on a dreary spring day), these Easter egg cake pops are it. They’re celebration in every bite, and a sweet memory in the making.
What Ingredients You Will Need
This Easter egg cake pops recipe uses simple, wholesome ingredients to deliver bold flavor and a satisfying texture without any fuss. Most of these are pantry staples, and you can easily swap things based on what you have at home. Here’s what you’ll need:
- For the Cake:
- 1 box vanilla or yellow cake mix (about 15.25 oz / 432 g)
- 3 large eggs
- 1 cup (240 ml) water
- 1/3 cup (80 ml) vegetable oil
- (Feel free to use your favorite homemade cake recipe if you prefer!)
- For the Frosting:
- 1/2 cup (120 g) store-bought or homemade vanilla frosting
- (I like using a stabilizer-free frosting for smoother blending—Pillsbury is a good choice)
- For the Coating and Decoration:
- 2 cups (340 g) pastel candy melts (yellow, pink, blue, purple—your pick)
- 1 tbsp coconut oil or shortening (makes the candy melts smoother and shinier)
- Assorted pastel sprinkles, edible glitter, or mini chocolate chips
- Food coloring (optional, for custom colors)
- For Assembly:
- 24 lollipop sticks or paper straws
- Styrofoam block or an empty egg carton (to hold pops upright while they set)
Ingredient Tips: If you want to go gluten-free, use a gluten-free cake mix and double-check your candy melts. For dairy-free, swap the frosting and cake mix with suitable alternatives (Simple Mills has good options). I’ve also tried lemon cake with lemon zest for a zesty twist.
In a pinch, you can use leftover cake or even brownies (just watch out for excess moisture). And if you’re feeling extra festive, use a dash of almond extract for a lovely spring flavor. The best part? No special trips to the store needed—just a little creativity and a sprinkle of fun.
Equipment Needed
- Large Mixing Bowl: For combining the cake and frosting (a stand mixer or hand mixer works too, but clean hands do the job just fine!)
- Baking Pan: 9×13-inch (23×33 cm) pan for baking the cake
- Wire Cooling Rack: For cooling the baked cake quickly
- Baking Sheet: Lined with parchment paper to hold shaped cake eggs before dipping
- Microwave-Safe Bowl: For melting candy melts
- Lollipop Sticks or Paper Straws: These make the pops easy to dip and serve—if you don’t have any, thick toothpicks also work in a pinch
- Styrofoam Block or Egg Carton: To keep the pops upright as they dry (I’ve even used a colander turned upside down before!)
- Spoons and Forks: For mixing and dipping
- Plastic Wrap and Airtight Containers: For storing leftovers
If you don’t have a stand mixer, don’t sweat it—a sturdy wooden spoon and some elbow grease get the job done. Any microwave-safe bowl will work for melting the candy, but glass bowls hold heat longer and make the process smoother. I always keep a stash of lollipop sticks and paper straws just for projects like this—they’re cheap and cheerful, and you can find them at most craft stores.
For easy cleanup, line your baking sheets with parchment. If you don’t have a Styrofoam block handy, just poke holes in an empty egg carton. And if you’re the type who likes things super neat, a small offset spatula helps with shaping the eggs. Honestly, this is a recipe where imperfections just add to the homemade charm!
How to Make Easter Egg Cake Pops

-
Bake the Cake
Preheat your oven to 350°F (175°C). Grease a 9×13-inch (23×33 cm) baking pan. In a large bowl, mix the cake mix, eggs, water, and oil according to the package instructions. Pour the batter into the pan and bake for 28-32 minutes, or until a toothpick inserted into the center comes out clean. Let the cake cool completely on a wire rack (about 45 minutes).
Tip: Don’t rush the cooling! Warm cake will melt the frosting and make a gooey mess.
-
Crumble the Cake
Once cooled, break the cake into large pieces and add to a big mixing bowl. Use your hands or a fork to crumble it into fine crumbs. (It’s oddly satisfying, trust me.)
-
Mix With Frosting
Add 1/2 cup (120 g) frosting to the cake crumbs. Mix together until fully combined and the mixture holds together when squeezed. If it’s too dry, add a tablespoon of frosting at a time. Don’t overdo it—too much frosting makes the pops soggy.
Note: The perfect texture is like playdough: moist but not sticky.
-
Shape Into Eggs
Scoop about 1.5 tablespoons (about 25 g) of mixture and roll between your hands to form an egg shape. Place each egg on a parchment-lined baking sheet. Repeat until all the mixture is used (you’ll get about 24 eggs).
Tip: If the mixture sticks to your hands, lightly grease them with a bit of oil.
-
Chill the Eggs
Freeze the shaped eggs for 20 minutes, or refrigerate for at least 1 hour. This helps them keep their shape during dipping.
Warning: Don’t skip this step or your eggs may fall apart in the candy coating!
-
Insert Sticks
Melt a small amount of candy melts (about 2 tbsp / 30 g) in a microwave-safe bowl. Dip one end of each lollipop stick into the melted candy, then insert into the base of each egg, about halfway through. The melted candy acts as glue.
-
Dip the Cake Pops
Melt the remaining candy melts with 1 tbsp coconut oil or shortening in a microwave-safe bowl, heating in 30-second bursts and stirring until smooth. Dip each cake pop into the melted candy, covering completely. Gently tap off the excess and decorate with sprinkles or edible glitter right away before the coating sets.
Tip: If the coating gets thick, microwave it for 10-15 seconds and stir again.
-
Dry and Set
Stick each pop upright in a Styrofoam block or egg carton to set. Let them dry for at least 20 minutes at room temperature or pop them in the fridge for faster results.
-
Serve and Enjoy!
Once set, arrange your Easter egg cake pops on a pretty platter or tuck into baskets with Easter grass. Get ready for lots of “oohs” and “aahs.”
If you run into trouble with the coating cracking, your eggs might be too cold—let them sit at room temp for 5 minutes before dipping. And if the pops slide off the sticks, use a bit more of the melted candy “glue.”
Cooking Tips & Techniques
Let’s get real: cake pops can be tricky if you don’t know a few secrets. Here are some pro-tips I’ve picked up (sometimes the hard way):
- Keep It Cool: Always chill your shaped eggs before dipping. Warm cake pops will fall apart or slide off the sticks. I learned this after losing several to the bottom of my candy bowl—not fun!
- Thin Your Candy Coating: If the candy melts seem thick, add a teaspoon of coconut oil or shortening at a time. This makes dipping smoother and gives you that professional, glossy finish.
- Work in Batches: Only take out a few eggs from the fridge at a time. If they warm up, they get soft and are harder to dip.
- Decorate Quickly: Add sprinkles or decorations right after dipping each pop. The coating sets fast, and once it does, nothing will stick (learned this the hard way—sprinkles everywhere but the pop!).
- Use the Right Tools: A fork or spoon helps tap off the extra coating, and a tall, narrow cup is perfect for dipping pops evenly.
I’ve also found that using a microwave for melting candy melts is easiest, but go slow—overheating them can make the coating grainy. If you’re new to cake pops, don’t stress about perfection. The occasional lopsided pop just adds homemade charm. And if you’re multitasking (because, who isn’t?), set up your decorating station ahead of time so you’re not scrambling for sprinkles with sticky hands.
Consistency is all about chilling, not rushing, and keeping things fun. The more you make these, the easier it gets—and honestly, the best part is getting your hands a little messy and letting your creativity shine.
Variations & Adaptations
One of my favorite things about these Easter egg cake pops is how flexible they are. No two batches have to be exactly alike! Here are some fun variations to try:
- Dietary Swaps: For gluten-free cake pops, use a gluten-free cake mix and check that your candy melts are gluten-free. Dairy-free? Substitute the cake mix, frosting, and candy melts with dairy-free options (Miss Jones Baking Co. does a great vanilla cake mix!).
- Flavor Twists: Try lemon or strawberry cake mix for a fruity spring flavor. Add lemon zest to the frosting for a burst of freshness. Carrot cake with cream cheese frosting is a classic, too.
- Decorating Styles: Use white chocolate and tint it with pastel food coloring for a soft, watercolor effect. Or drizzle pops with contrasting colors for a fancy look. Edible gold dust adds a luxe touch for grown-up parties.
- Cooking Methods: If you don’t want to bake a cake, use store-bought pound cake or brownies—just watch the moisture level (brownies need less frosting).
- Custom Shapes: Make mini eggs or even bunny shapes using silicone molds. Kids love getting creative with shapes and decorations.
The last time I made these, I used leftover carrot cake and rolled the eggs in shredded coconut after dipping—my family went wild for the texture and flavor. The beauty of this recipe is that you can adapt it to fit dietary needs, seasonal flavors, or whatever you have in your pantry. Don’t be afraid to experiment and make them your own!
Serving & Storage Suggestions
For the cutest presentation, serve your Easter egg cake pops upright in a decorated mug filled with Easter grass or in a pretty basket lined with parchment. If you’re setting up a dessert table, arrange them in rows by color for a real wow-factor (great for those Pinterest photos!).
These cake pops taste best at room temperature but hold their shape nicely in the fridge. To store, place them in a single layer in an airtight container, separating layers with parchment paper. They’ll keep in the refrigerator for up to 5 days or in the freezer (well-wrapped) for up to 2 months—just thaw in the fridge overnight before serving.
For parties, you can make these a day or two ahead. If the pops lose a bit of their shine in the fridge, let them sit out for 10 minutes before serving. Pair with a light sparkling lemonade or a cup of coffee for adults—trust me, it’s a perfect match. The flavors actually get even better after a day as the cake and frosting meld together. And if you have leftovers (which is rare!), just pop them in your kids’ lunchboxes for a sweet surprise.
Nutritional Information & Benefits
Each Easter egg cake pop (based on 24 pops per recipe) has roughly 130 calories, 5g fat, 20g carbs, and 1g protein. While these are a treat (hey, it’s a holiday!), they can easily fit into most spring celebrations in moderation.
The recipe is naturally nut-free as written, but always double-check your ingredients if allergies are a concern. For a lighter option, use a lower-sugar cake mix and frosting, or swap in Greek yogurt frosting. Gluten-free and dairy-free adaptations work well with this recipe, so everyone can enjoy a festive bite.
From a wellness perspective, I’m all about balance. These sweet treats are about celebration—sharing joy, making memories, and indulging in a little fun. And honestly, sometimes happiness is the best health benefit of all!
Conclusion
If you’re searching for a fun, easy, and downright adorable treat for your spring festivities, these Easter egg cake pops are the answer. They’re simple enough for beginners, customizable for every taste, and guaranteed to bring a little extra sparkle to your table. I love how these pops bring my family together—kids, grown-ups, everyone gets involved, and the kitchen is filled with laughter and sprinkles.
Don’t be afraid to play with flavors, decorations, or even shapes. Make them gluten-free, dairy-free, or add a punch of lemon zest—this recipe is all about making it your own. I hope these cake pops become a new tradition in your home, just like they have in mine.
If you make this recipe, I’d love to hear your creative twists! Drop a comment below, share your photos, or let me know what made them special for your family. Wishing you the happiest (and tastiest) spring—go ahead, give these a try and spread a little sweetness!
FAQs About Easter Egg Cake Pops
Can I make Easter egg cake pops ahead of time?
Absolutely! You can make them 1-2 days in advance and store in the fridge. For longer storage, freeze them (well-wrapped) for up to 2 months and thaw overnight in the fridge before serving.
Why are my cake pops cracking after dipping?
This usually happens when the cake pops are too cold and the candy coating is too hot. Let your pops sit at room temp for 5 minutes before dipping to help prevent cracks.
What cake flavors work best for Easter egg cake pops?
Classic vanilla, lemon, or carrot cake are all fantastic. You can use any flavor you love, just keep an eye on the moisture when mixing with frosting.
How can I decorate cake pops without candy melts?
You can use white chocolate (tinted with food coloring) or a simple glaze made from powdered sugar and milk. Just make sure to chill the pops before dipping.
Are these safe for kids with nut allergies?
The base recipe is nut-free, but always check your cake mix, candy melts, and decorations to be sure. When making for a crowd, it’s best to verify all labels for cross-contamination risks.
Pin This Recipe!
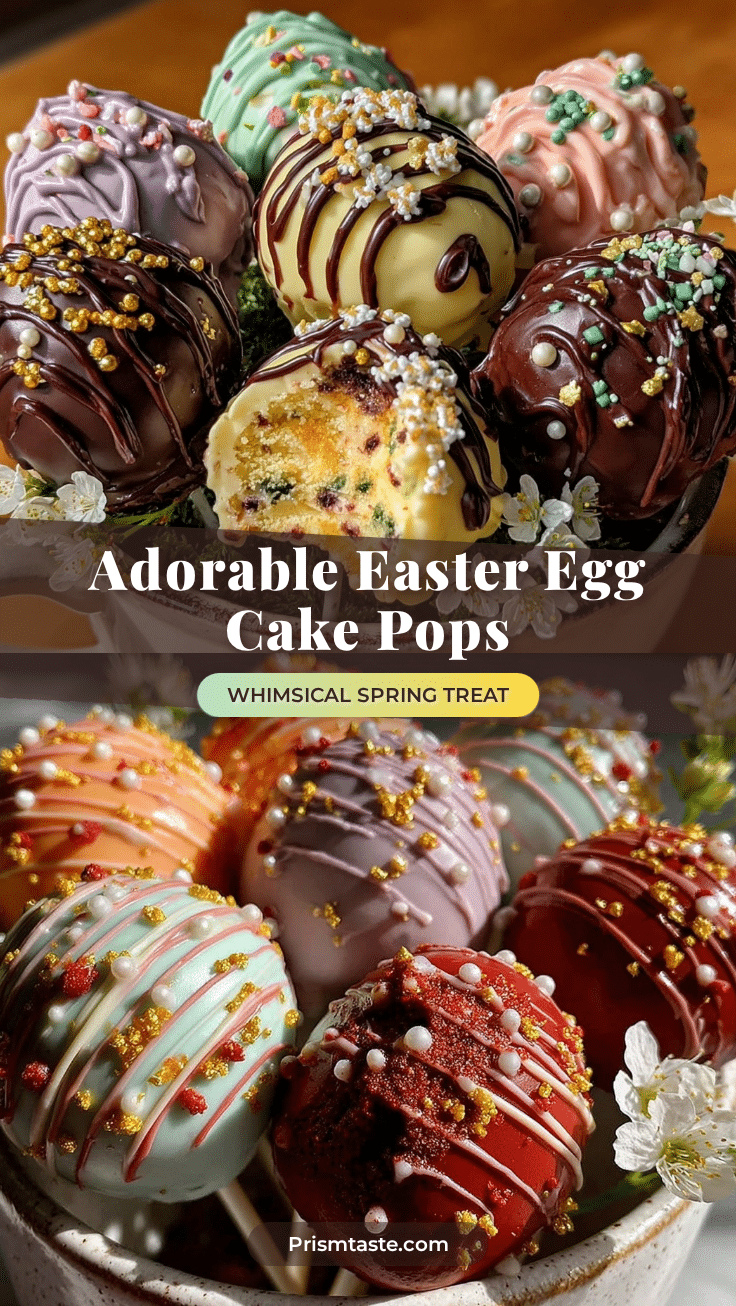
Easter Egg Cake Pops

These Easter egg cake pops are a festive, easy-to-make treat featuring moist cake blended with frosting, shaped into eggs, and dipped in colorful candy melts. Perfect for spring celebrations, they’re customizable, fun to decorate, and guaranteed to bring smiles to any gathering.
- Prep Time: 45 minutes
- Cook Time: 30 minutes
- Total Time: 1 hour 30 minutes
- Yield: 24 cake pops 1x
- Category: Dessert
- Cuisine: American
Ingredients
- 1 box vanilla or yellow cake mix (about 15.25 oz)
- 3 large eggs
- 1 cup water
- 1/3 cup vegetable oil
- 1/2 cup vanilla frosting (store-bought or homemade)
- 2 cups pastel candy melts (yellow, pink, blue, purple, or your choice)
- 1 tbsp coconut oil or shortening
- Assorted pastel sprinkles, edible glitter, or mini chocolate chips
- Food coloring (optional, for custom colors)
- 24 lollipop sticks or paper straws
- Styrofoam block or empty egg carton (for setting pops upright)
Instructions
- Preheat oven to 350°F (175°C). Grease a 9×13-inch baking pan.
- In a large bowl, mix cake mix, eggs, water, and oil according to package instructions. Pour into pan and bake for 28-32 minutes, or until a toothpick comes out clean. Cool completely on a wire rack (about 45 minutes).
- Break cooled cake into large pieces and crumble into fine crumbs in a large mixing bowl.
- Add 1/2 cup frosting to cake crumbs and mix until fully combined and mixture holds together when squeezed. Add more frosting a tablespoon at a time if too dry.
- Scoop about 1.5 tablespoons of mixture and roll into egg shapes. Place on a parchment-lined baking sheet. Repeat for all mixture (about 24 eggs).
- Freeze shaped eggs for 20 minutes or refrigerate for at least 1 hour.
- Melt a small amount of candy melts (about 2 tbsp) in a microwave-safe bowl. Dip one end of each lollipop stick into melted candy, then insert into the base of each egg halfway through.
- Melt remaining candy melts with 1 tbsp coconut oil or shortening in a microwave-safe bowl, heating in 30-second bursts and stirring until smooth.
- Dip each cake pop into melted candy, covering completely. Gently tap off excess and decorate with sprinkles or edible glitter before coating sets.
- Stick each pop upright in a Styrofoam block or egg carton to set. Let dry for at least 20 minutes at room temperature or refrigerate for faster results.
- Once set, arrange cake pops on a platter or in baskets with Easter grass and serve.
Notes
Chill shaped eggs before dipping to prevent them from falling apart. Thin candy melts with coconut oil or shortening for a smooth coating. Decorate pops immediately after dipping, as the coating sets quickly. For gluten-free or dairy-free, use suitable cake mix, frosting, and candy melts. Store in an airtight container in the fridge for up to 5 days or freeze for up to 2 months.
Nutrition
- Serving Size: 1 cake pop
- Calories: 130
- Sugar: 13
- Sodium: 90
- Fat: 5
- Saturated Fat: 2
- Carbohydrates: 20
- Protein: 1
Keywords: Easter, cake pops, spring dessert, kid-friendly, party treats, pastel, easy baking, nut-free, holiday, brunch