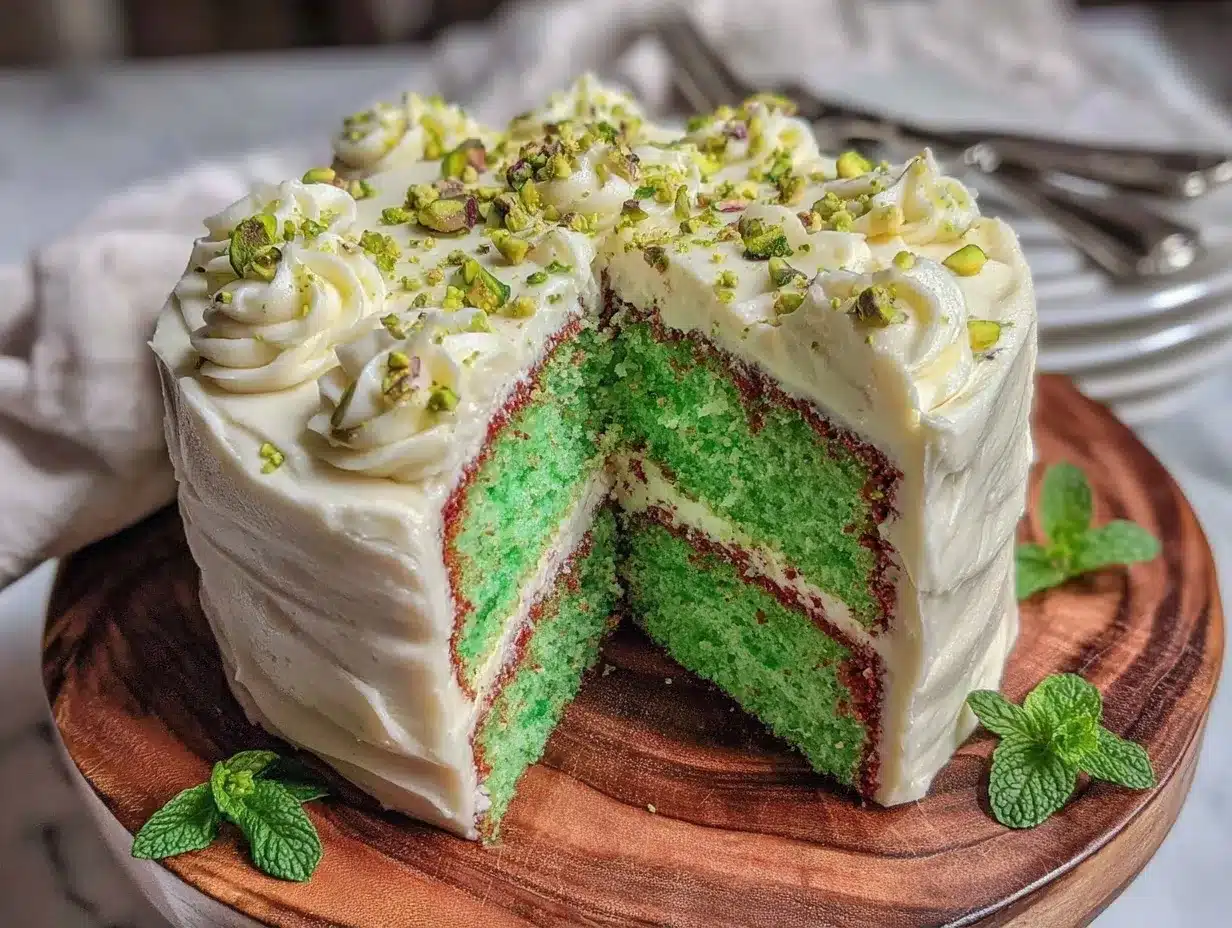
Let me set the scene: the moment you slice into this green velvet cake, there’s this bold pop of emerald that just begs for a second glance (and, honestly, a spot on your Pinterest board). The scent of cocoa mingling with a hint of vanilla and the gentle tang of buttermilk floats through the kitchen and instantly makes it feel like a cozy holiday. The first time I pulled this green velvet cake out of the oven, the color alone made me grin—like I’d stumbled upon a secret garden in the middle of winter. I couldn’t help but pause, take a deep breath, and just smile because you know you’ve found something special.
This recipe has roots in my family’s love for classic red velvet, but I was always the one to sneak food coloring into things as a kid (just for fun). One St. Patrick’s Day, years ago, I decided to swap the red for green, and the result was so much more magical than I expected. My grandma, the queen of cake, actually asked for seconds—and if you knew her, you’d know that’s a massive deal. My kids, meanwhile, couldn’t stop sneaking little bits of frosting from the bowl, and my husband declared it “the best cake you’ve made yet” (he says that a lot, but this time I think he meant it).
Honestly, this green velvet cake is dangerously easy to whip up, and it’s become our go-to for everything from birthdays to random rainy weekends when we need a little cheer. It’s the kind of cake that feels like a warm hug, with layers so soft and a cream cheese frosting that’s pure, nostalgic comfort. If you’re looking for a showstopper for a potluck, a sweet treat for your kids, or just a dessert to brighten up your feed (or your day), you’re in the right place. I’ve tested this recipe more times than I care to admit—in the name of research, of course—and it’s become a staple for family gatherings and gifts. Trust me, you’re going to want to bookmark this one.
Why You’ll Love This Recipe
Here’s the thing—after years of baking, tweaking, and testing every velvet cake recipe under the sun, I can honestly say this green velvet cake with cream cheese frosting has a special place in my heart (and my recipe box). I’ve made it for bake sales, birthday parties, and even just for fun, and it’s never let me down. It’s the kind of cake that makes people stop and ask, “Wait, how did you get it so green?” followed by, “And can I have another slice?”
- Quick & Easy: You can have this cake in the oven in about 15 minutes—perfect for when you need a last-minute showstopper or just want to treat yourself.
- Simple Ingredients: No need for fancy specialty stores; most of these ingredients are probably already in your kitchen.
- Perfect for Parties and Holidays: The vibrant green color makes it a favorite for St. Patrick’s Day, Christmas, or any time you want to wow a crowd.
- Crowd-Pleaser: Kids are fascinated by the color, and adults love the classic velvet texture and tangy frosting. There’s always someone asking for the recipe.
- Unbelievably Delicious: Tender, moist layers meet the creamy, slightly tangy frosting for a combo that’s pure comfort food (with a twist!).
So, what makes this green velvet cake different from all the others? I blend the oil and buttermilk for extra moisture, use a touch of cocoa powder for that classic velvet flavor, and whip the frosting till it’s cloud-like and super spreadable. I only use gel food coloring for the brightest green (no muddy shades here!). There’s a balance between sweetness and tang—nothing cloying, just enough to keep every bite interesting.
This cake isn’t just good—it’s the kind of dessert that makes you pause after the first forkful. It’s comfort food reimagined: easy, fast, and forgiving, but with all the nostalgia of grandma’s best cake. Whether you’re out to impress your guests, bake with the kids, or just spoil yourself, this green velvet cake recipe is the one you’ll keep coming back to (and, let’s face it, brag about just a little).
What Ingredients You Will Need
This green velvet cake recipe uses simple, wholesome ingredients to deliver bold color and flavor without the fuss. Most of these are pantry staples, and I’ll share my favorite brands and a few easy swaps for when you’re in a pinch.
- For the Cake:
- All-purpose flour – 2 1/2 cups (315g) (King Arthur is my go-to for consistent results)
- Granulated sugar – 1 1/2 cups (300g)
- Unsweetened cocoa powder – 2 tablespoons (Dutch-process for deeper color, but natural works too)
- Baking powder – 1 teaspoon
- Baking soda – 1/2 teaspoon
- Salt – 3/4 teaspoon
- Buttermilk – 1 cup (240ml), room temperature (adds tang, can sub with whole milk + 1 tbsp lemon juice if needed)
- Vegetable oil – 1 cup (240ml) (can use canola or a mild olive oil in a pinch)
- Large eggs – 2, room temperature
- Vanilla extract – 2 teaspoons (real vanilla is worth it, but use what you have)
- Distilled white vinegar – 1 teaspoon (helps the color pop and keeps things tender)
- Green gel food coloring – about 1 tablespoon, or to desired shade (I use AmeriColor Leaf Green; liquid food coloring works but the color is less vibrant)
- For the Cream Cheese Frosting:
- Cream cheese – 8 oz (225g), softened (Philadelphia is my favorite for smoothness)
- Unsalted butter – 1/2 cup (115g), softened
- Powdered sugar – 3 1/2 cups (420g), sifted
- Vanilla extract – 1 teaspoon
- Pinch of salt
Ingredient Tips & Swaps:
- For a gluten-free version, use a 1:1 gluten-free flour blend—just check the packaging to make sure it’s for cakes.
- If you need dairy-free, swap buttermilk for your favorite plant-based milk with a teaspoon of lemon juice, and use dairy-free cream cheese and butter for the frosting.
- Can’t find gel food coloring? Use liquid, but you’ll need more, and the color may be less intense.
- Want to add a flavor twist? Try almond extract in the cake or a little lemon zest in the frosting.
All the ingredients are easy to find, budget-friendly, and can be swapped in a pinch. No stress, no weird specialty items, just honest-to-goodness cake goodness.
Equipment Needed
- Two 8-inch (20cm) or 9-inch (23cm) round cake pans (I like the Wilton nonstick pans for easy release)
- Electric mixer (hand or stand mixer—either works, but a stand mixer makes the frosting a breeze)
- Large mixing bowls (at least two: one for dry, one for wet ingredients)
- Measuring cups and spoons (accurate measurements make all the difference)
- Rubber spatula (for scraping every last bit of batter and frosting—no cake left behind!)
- Wire rack (for cooling the cake layers evenly)
- Offset spatula or butter knife (for frosting those layers like a pro)
- Parchment paper (to line cake pans—trust me, it saves headaches)
If you don’t have two matching pans, bake the layers one at a time—the batter can hang out for a few minutes. No electric mixer? Good old elbow grease and a whisk will work (I’ve done it when visiting family). For cleanup, I always soak my beaters and bowls in hot soapy water right away—less scrubbing later. And if you’re on a budget, you don’t need fancy equipment: I made this cake with thrift store pans and a $10 hand mixer for years, and it still turned out just as delicious.
Preparation Method
-
Get Ready
Preheat your oven to 350°F (175°C). Grease two 8-inch (20cm) or 9-inch (23cm) round cake pans and line the bottoms with parchment paper. This step is key for easy cake removal—no sticking, no heartbreak! -
Mix the Dry Ingredients
In a large bowl, whisk together 2 1/2 cups (315g) flour, 1 1/2 cups (300g) sugar, 2 tablespoons cocoa powder, 1 teaspoon baking powder, 1/2 teaspoon baking soda, and 3/4 teaspoon salt. Make sure there are no lumps—sometimes cocoa hides in the corners! -
Mix the Wet Ingredients
In another bowl, combine 1 cup (240ml) buttermilk, 1 cup (240ml) vegetable oil, 2 eggs, 2 teaspoons vanilla extract, and 1 teaspoon white vinegar. Whisk until smooth and well blended. -
Add the Green
Stir in your green gel food coloring, starting with 1 tablespoon. If you want a deeper green, add a little more. The batter should be a vibrant, even shade—don’t worry, it’ll look less intense after baking. -
Combine Wet and Dry
Pour the wet mixture into the dry ingredients. Using a mixer on low or a sturdy spatula, mix until just combined. Don’t overmix! A few lumps are totally fine. Overmixing can make the cake tough. -
Bake
Divide the batter evenly between your prepared pans (I use a kitchen scale for precision, but eyeballing works too). Smooth the tops with a spatula. Bake for 28–32 minutes, or until a toothpick inserted in the center comes out clean or with a few moist crumbs. The cakes should spring back when lightly pressed. -
Cool
Let the cakes cool in their pans on a wire rack for 10 minutes. Then, run a knife around the edges, invert onto the rack, and carefully peel off the parchment. Cool completely—frosting a warm cake is a recipe for disaster (trust me, I’ve had sliding layers before). -
Make the Cream Cheese Frosting
In a large bowl, beat 8 oz (225g) softened cream cheese and 1/2 cup (115g) softened butter with an electric mixer until smooth and fluffy, about 2 minutes. Add 1 teaspoon vanilla and a pinch of salt. Gradually beat in 3 1/2 cups (420g) sifted powdered sugar, 1 cup at a time, until smooth and spreadable. If it’s too thin, add more sugar; if too stiff, a splash of milk helps. -
Assemble
Place one cake layer on your serving plate. Spread about 1/3 of the frosting on top. Add the second layer and cover the top and sides with the remaining frosting. For a smooth finish, dip your spatula in warm water and go over the sides. -
Chill (Optional)
For cleaner slices and a set frosting, chill the cake in the fridge for 30–60 minutes before serving. Or, if you’re like me and can’t wait, just dig in!
Notes: If your cake domes in the oven, just trim the tops with a serrated knife for perfect, even layers. And if any crumbs sneak into your frosting, do a thin “crumb coat” first: spread a light layer of frosting, chill for 15 minutes, then finish with the rest. No one will know but you!
Cooking Tips & Techniques
I’ve made this green velvet cake more times than I can count, and here are my top tips for a perfect bake every time:
- Room Temperature Ingredients: This is the secret to a smooth batter and fluffy frosting. Cold eggs or buttermilk can make the batter separate. If you forget to take them out, just set the eggs in a bowl of warm water for five minutes.
- Gel Food Coloring: It gives you that vivid green without watering down the batter. If you only have liquid, use more, but expect a lighter green.
- Don’t Overmix: Once you combine wet and dry ingredients, mix just until there are no dry spots. Overmixing leads to a dense cake (been there, regretted that).
- Check Early: Ovens can be sneaky. Start checking the cakes at 28 minutes—every oven is a little different. The toothpick test never fails me.
- Soft Frosting: If your frosting is too runny, chill it for 10 minutes. If it’s too stiff, beat in a teaspoon of milk at a time. Humidity can mess with frosting consistency, so adjust as needed.
- Crumb Coat Magic: A thin base layer of frosting traps crumbs and makes the final coat smooth. I used to skip this step, but now I swear by it for clean, bakery-style layers.
- Chilling Before Slicing: For the neatest slices (and the prettiest photos), chill the finished cake for at least half an hour. A hot knife also makes for tidy cuts.
Don’t worry if your first attempt isn’t bakery-perfect (mine sure wasn’t). The taste is what matters most, and with these tricks, you’ll get better every time. And if you have little helpers, let them add the food coloring—it’s the best part!
Variations & Adaptations
There’s more than one way to enjoy this green velvet cake recipe! Here are a few fun twists and swaps I’ve tried or recommended to friends:
- Dietary: For a gluten-free version, use a 1:1 gluten-free flour blend. For dairy-free, swap buttermilk with plant milk plus lemon juice, and use dairy-free cream cheese and butter for the frosting. It’s still delicious—just a little different in texture.
- Seasonal: At Christmas, I sprinkle crushed peppermint candies between the layers and on top. For spring, add lemon zest to the batter and frosting for a bright, citrusy kick. In fall, try a dash of cinnamon for warmth.
- Flavor Variations: Swap vanilla extract for almond (just a half teaspoon goes a long way) or add a tablespoon of espresso powder to the dry ingredients for a subtle mocha twist.
- Different Formats: Bake the batter as cupcakes (about 18–20 minutes at 350°F/175°C), or even as a sheet cake for easy slicing and serving at parties.
- Fun for Kids: Let the kids add sprinkles or use cookie cutters to make fun shapes from baked, cooled cake layers.
One of my favorite adaptations? I once made this as a checkerboard cake by baking half green and half classic red velvet, then cutting and stacking the layers. It looked impressive and made for great photos! The best part about this recipe is how flexible it is—so don’t be afraid to experiment and make it your own.
Serving & Storage Suggestions
This green velvet cake is best served at room temperature—the frosting gets perfectly creamy and the flavors really shine. For an extra-pretty presentation, I like to garnish with a sprinkle of green sanding sugar or a few fresh mint leaves (totally optional, but it looks festive).
Pair it with a hot cup of coffee, a mug of tea, or, for a special occasion, a glass of cold milk or bubbly. It’s a hit for brunch, afternoon tea, or as a showstopper dessert after dinner. If you’re making it for a party, slice it ahead and arrange the pieces on a pretty cake stand—it’s always the first to disappear.
To store, cover the cake tightly with plastic wrap or place in an airtight container. It keeps well at room temperature for up to 2 days, or in the fridge for 5 days. For longer storage, freeze individual slices wrapped in plastic and foil (up to 2 months). Thaw overnight in the fridge, then bring to room temp before serving. The flavors mellow and deepen after a day or two—sometimes the leftovers are even better!
Nutritional Information & Benefits
Each slice of this green velvet cake (about 1/12 of the cake) has approximately 400 calories, 17g fat, 60g carbohydrates, and 4g protein. The cake provides a moderate amount of calcium and vitamin A, thanks to the buttermilk and cream cheese.
If you use gluten-free flour or dairy-free swaps, the nutritional content will vary slightly, but the cake remains a special treat rather than an everyday snack. It contains eggs, wheat, and dairy—so if you’re serving guests, be sure to check for allergies. I’m a firm believer in balance: enjoy a slice, savor it, and know you’re getting a little nostalgia and a lot of joy in each bite.
Conclusion
This green velvet cake recipe with cream cheese frosting is one of those desserts you’ll want to make again and again—whether for a holiday, a birthday, or just because you need a little magic on a random Tuesday. The tender, colorful layers and tangy-sweet frosting hit all the right notes, and the recipe is easy enough for beginners but impressive enough for seasoned bakers.
I love this cake for its cheerful color, classic flavor, and just how happy it makes everyone who tries it. Don’t be afraid to put your own spin on it—swap the flavors, play with the frosting, or add new toppings. If you try it, leave a comment, share your photos, or let me know what creative twist you used. You might just start a new tradition in your own kitchen. Happy baking, and may your days be as bright as this cake!
Frequently Asked Questions
Can I make this green velvet cake ahead of time?
Absolutely! You can bake the cake layers up to two days in advance. Wrap them tightly and store at room temperature. Frost the cake the day you plan to serve it for the freshest taste.
Can I use liquid food coloring instead of gel?
Yes, but you’ll need more to achieve a deep green color, and the shade may end up lighter. Gel food coloring is best for vibrant results without thinning the batter.
Can I freeze the frosted cake?
Definitely. Freeze whole or sliced, tightly wrapped, for up to 2 months. Thaw overnight in the fridge, then bring to room temperature before serving for the best texture.
What can I use instead of buttermilk?
If you don’t have buttermilk, mix 1 cup (240ml) whole milk with 1 tablespoon lemon juice or vinegar. Let it sit for 5 minutes—works like a charm!
Is this recipe suitable for cupcakes?
Yes! This batter makes about 24 cupcakes. Bake at 350°F (175°C) for 18–20 minutes, or until a toothpick comes out clean. Frost as usual and enjoy!
Pin This Recipe!
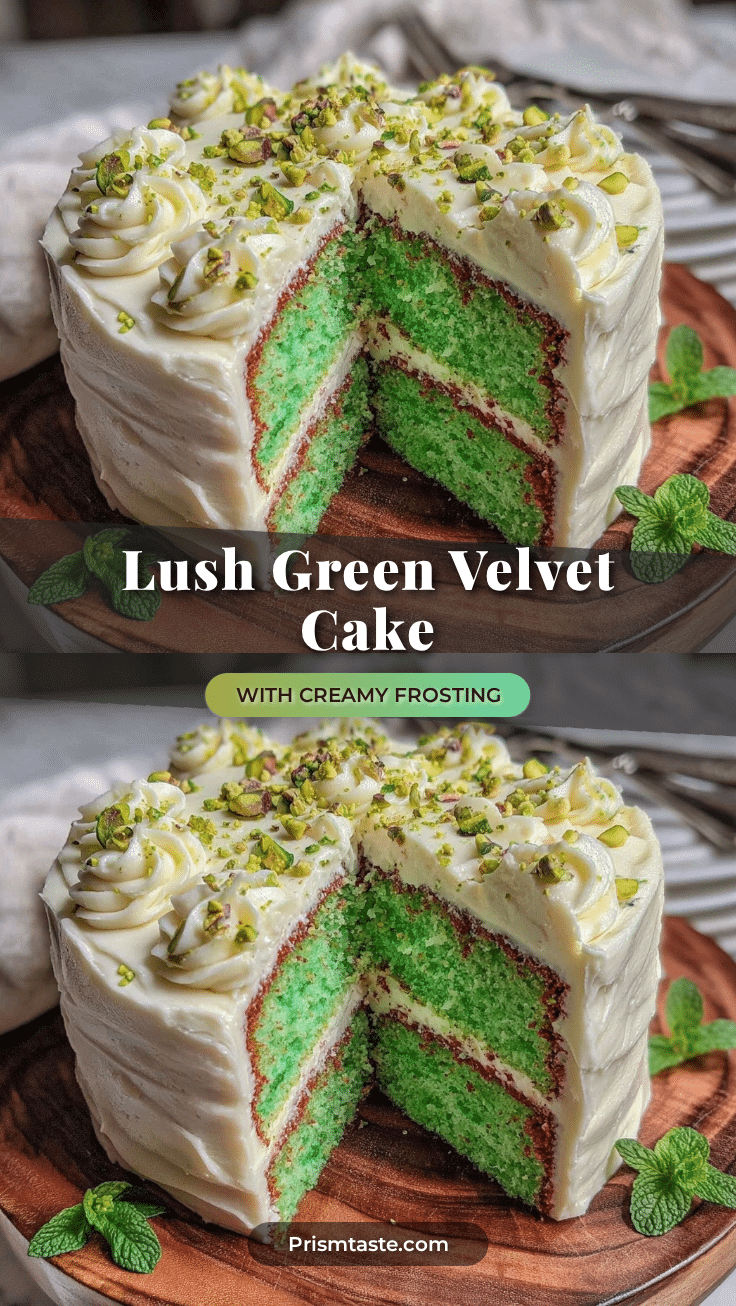
Green Velvet Cake with Cream Cheese Frosting

This green velvet cake features vibrant, tender layers with a hint of cocoa and tangy buttermilk, all wrapped in a cloud-like cream cheese frosting. It’s easy to make, visually stunning, and perfect for holidays, birthdays, or any occasion that needs a little extra magic.
- Prep Time: 15 minutes
- Cook Time: 30 minutes
- Total Time: 1 hour
- Yield: 12 servings 1x
- Category: Dessert
- Cuisine: American
Ingredients
- 2 1/2 cups (315g) all-purpose flour
- 1 1/2 cups (300g) granulated sugar
- 2 tablespoons unsweetened cocoa powder (Dutch-process or natural)
- 1 teaspoon baking powder
- 1/2 teaspoon baking soda
- 3/4 teaspoon salt
- 1 cup (240ml) buttermilk, room temperature (or 1 cup whole milk + 1 tbsp lemon juice)
- 1 cup (240ml) vegetable oil (can use canola or mild olive oil)
- 2 large eggs, room temperature
- 2 teaspoons vanilla extract
- 1 teaspoon distilled white vinegar
- 1 tablespoon green gel food coloring (or to desired shade)
- 8 oz (225g) cream cheese, softened
- 1/2 cup (115g) unsalted butter, softened
- 3 1/2 cups (420g) powdered sugar, sifted
- 1 teaspoon vanilla extract
- Pinch of salt
Instructions
- Preheat oven to 350°F (175°C). Grease two 8-inch or 9-inch round cake pans and line the bottoms with parchment paper.
- In a large bowl, whisk together flour, sugar, cocoa powder, baking powder, baking soda, and salt until well combined.
- In another bowl, whisk together buttermilk, vegetable oil, eggs, vanilla extract, and vinegar until smooth.
- Stir in green gel food coloring to the wet ingredients until you reach your desired shade.
- Pour the wet mixture into the dry ingredients. Mix on low speed or with a spatula until just combined; do not overmix.
- Divide the batter evenly between the prepared pans. Smooth the tops.
- Bake for 28–32 minutes, or until a toothpick inserted in the center comes out clean or with a few moist crumbs.
- Let cakes cool in pans on a wire rack for 10 minutes. Run a knife around the edges, invert onto the rack, and peel off parchment. Cool completely.
- For the frosting: In a large bowl, beat softened cream cheese and butter with an electric mixer until smooth and fluffy, about 2 minutes.
- Add vanilla and a pinch of salt. Gradually beat in powdered sugar, 1 cup at a time, until smooth and spreadable. Adjust consistency with more sugar or a splash of milk if needed.
- Place one cake layer on a serving plate. Spread about 1/3 of the frosting on top. Add the second layer and cover the top and sides with remaining frosting. For a smooth finish, dip spatula in warm water and smooth the sides.
- Optional: Chill the cake in the fridge for 30–60 minutes before slicing for cleaner cuts.
Notes
For best results, use room temperature ingredients. If your cake domes, trim the tops for even layers. For a smooth finish, apply a thin crumb coat of frosting, chill, then finish frosting. The cake can be made gluten-free or dairy-free with appropriate substitutions. Store covered at room temperature for 2 days or in the fridge for up to 5 days. Cake slices freeze well for up to 2 months.
Nutrition
- Serving Size: 1 slice (1/12 of cak
- Calories: 400
- Sugar: 45
- Sodium: 350
- Fat: 17
- Saturated Fat: 8
- Carbohydrates: 60
- Fiber: 1
- Protein: 4
Keywords: green velvet cake, cream cheese frosting, St. Patrick's Day dessert, holiday cake, easy layer cake, colorful cake, velvet cake, party dessert