For years, I told myself I wasn’t a stuffed pepper person. The texture always felt a little sad to me—soggy peppers, mushy filling, all that wasted potential. I’d see them at potlucks and walk right by. Then last October, my friend Maria texted me a photo from her kids’ Halloween party. It was a bell pepper carved like a jack-o-lantern, stuffed with something that looked absolutely incredible. I asked what was in it, and she sent a blurry voice note that ended with, “Just make them for your Halloween thing—you’ll see.” Honestly, I was skeptical. I mean, I’d spent years avoiding stuffed peppers. But I made them for a small gathering that weekend, mostly to prove myself right. Instead, I caught my neighbor Dave sneaking a second one straight from the pan before anyone else had even sat down. That’s when I knew I had to get the recipe down for real. This version—the one I’ve tweaked and tested through three Halloween parties and two family dinners—is the one that finally converted me. It’s fun, it’s festive, and it actually tastes as good as it looks. Maybe you’ve been a stuffed pepper skeptic too. I get it. But these little guys? They’re different.
Why You’ll Love This Recipe
This isn’t just another stuffed pepper recipe. It’s the one that gets people talking at the table, the one that makes kids actually excited about eating vegetables, and the one that saves you from spending hours in the kitchen while your guests arrive. I’ve tested this recipe on my pickiest relatives and my food-snob friends, and it works every single time.
- Quick & Easy: From start to table in about 45 minutes. You can even prep the filling a day ahead.
- Simple Ingredients: Ground beef, rice, cheese, tomato sauce, and bell peppers—all stuff you probably already have in your kitchen.
- Perfect for Halloween Parties: The jack-o-lantern faces make them an instant hit with kids and adults alike. No fancy carving skills required.
- Crowd-Pleaser: I’ve served these at three different gatherings now, and every single time, someone asks for the recipe. They disappear fast.
- Unbelievably Delicious: The cheese gets all melty and golden on top, the filling is perfectly seasoned, and the peppers stay just tender enough without turning mushy.
What makes this recipe different from all the other stuffed pepper recipes out there? It’s the little details. I par-cook the peppers just enough so they hold their shape but aren’t crunchy. I use a mix of ground beef and Italian sausage for way more flavor. And the jack-o-lantern faces? I use a small paring knife and a cookie cutter for the eyes—game changer. This is comfort food with a festive twist, and it’s designed to impress without stressing you out.
What Ingredients You Will Need
This recipe uses simple, everyday ingredients to deliver big flavor and that crowd-pleasing look. Most of these are pantry staples, and the substitutions are easy if you need them.
For the Filling
- 1 lb ground beef (80/20 works best—lean enough but not dry)
- 1/2 lb Italian sausage (mild or hot, your call—I use mild for the kids)
- 1 cup cooked white rice (leftover rice is perfect here)
- 1 small yellow onion, diced (about 1/2 cup)
- 3 cloves garlic, minced (I use a microplane for this—so much faster)
- 1 can (15 oz) tomato sauce (I prefer Hunt’s or Muir Glen for flavor)
- 1 tsp dried oregano
- 1 tsp dried basil
- 1/2 tsp smoked paprika (adds a subtle smokiness)
- Salt and black pepper to taste
- 1 cup shredded mozzarella cheese (plus more for topping)
- 1/4 cup grated Parmesan cheese
For the Peppers
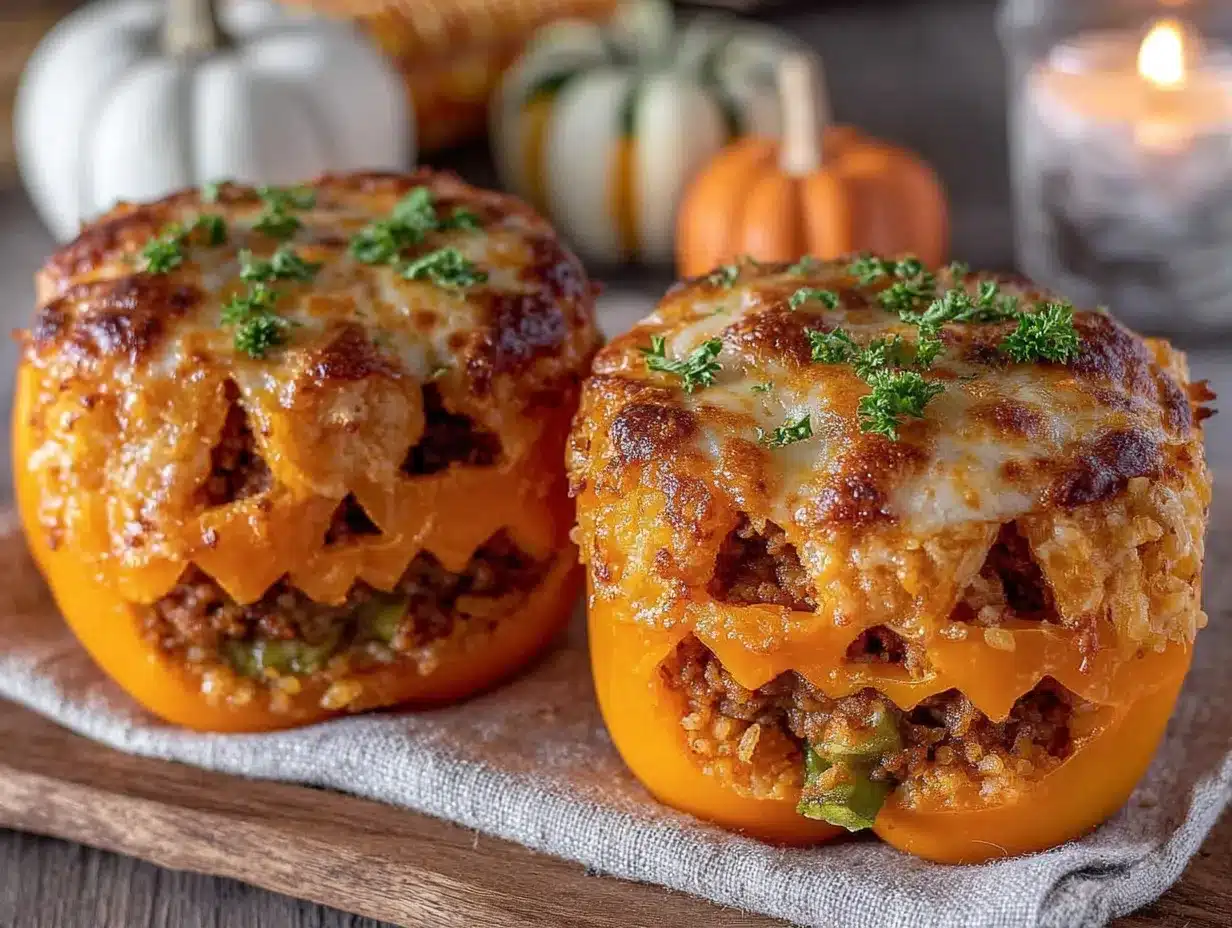
- 6 large orange bell peppers (look for ones that sit flat on their own—makes carving way easier)
- 1 tbsp olive oil (for brushing the peppers before baking)
If you want to swap the ground beef for ground turkey or chicken, go for it—just add a little olive oil to the pan so it doesn’t dry out. For a vegetarian version, use cooked lentils or a plant-based ground meat substitute. The rice can be swapped for quinoa or cauliflower rice if you’re watching carbs. And if you’re dairy-free, use a plant-based mozzarella shreds—they melt surprisingly well.
Equipment Needed
You don’t need anything fancy for this recipe, which is part of why I love it. Here’s what you’ll want to have on hand:
- Large skillet or sauté pan (for cooking the filling)
- Sharp paring knife (for carving the jack-o-lantern faces—a small serrated knife also works)
- Small round cookie cutter (optional, but makes perfect eyes in seconds)
- Baking dish (a 9×13-inch dish works perfectly for 6 peppers)
- Mixing bowls (one large for the filling, one small for the tomato sauce mixture)
- Measuring cups and spoons
- Aluminum foil (for covering the peppers while they bake)
- Cutting board
If you don’t have a cookie cutter, just use the tip of your paring knife to cut small triangles for the eyes—it’s honestly just as cute. And if you don’t have a 9×13 dish, a large cast-iron skillet works great too.
Preparation Method
- Preheat your oven to 375°F (190°C). While it’s heating up, start a pot of water for par-cooking the peppers.
- Prepare the peppers. Wash and dry your orange bell peppers. Using a sharp paring knife, cut a small circle around the stem of each pepper—about the size of a quarter. Lift off the top carefully, then scoop out the seeds and membranes from inside. Don’t throw away the tops—you can chop them up and add them to the filling for extra veggie goodness.
- Carve the faces. This is the fun part. Using your paring knife, cut small triangle eyes and a zigzag mouth into each pepper. You can do classic jack-o-lantern faces or get creative with different expressions. I like to cut the eyes a little bigger than I think I need—they shrink slightly during baking. Place the carved peppers in your baking dish, standing upright.
- Par-cook the peppers. Bring a large pot of water to a boil. Carefully lower the peppers into the water using a slotted spoon. Let them boil for 3-4 minutes—just until they start to soften but still hold their shape. Drain them carefully and set them aside to cool slightly. This step is crucial for avoiding crunchy peppers.
- Cook the filling. While the peppers are par-cooking, heat your large skillet over medium-high heat. Add the ground beef and Italian sausage, breaking it up with a wooden spoon. Cook for 5-6 minutes until browned, then add the diced onion and minced garlic. Cook for another 2-3 minutes until the onion is translucent. Drain off any excess fat if needed.
- Add the seasonings. Stir in the dried oregano, dried basil, smoked paprika, and a generous pinch of salt and pepper. Let it cook for 30 seconds until fragrant.
- Mix in the tomato sauce and rice. Pour in the tomato sauce and stir in the cooked rice. Let everything simmer together for 3-4 minutes so the flavors meld. Taste and adjust seasoning—I usually add another pinch of salt here.
- Add the cheese. Remove the skillet from heat. Stir in the mozzarella and Parmesan until just combined. The cheese should be melty and gooey.
- Stuff the peppers. Spoon the filling into each carved pepper, packing it gently but firmly. Don’t overstuff—you want the filling to stay inside the pepper, not spill out over the faces. Mound it slightly on top.
- Top with extra cheese. Sprinkle a little more mozzarella on top of each stuffed pepper. This gets golden and bubbly in the oven.
- Bake. Cover the baking dish with aluminum foil and bake for 20 minutes. Then remove the foil and bake for another 10 minutes, until the cheese is melted and the peppers are tender.
- Rest and serve. Let the peppers sit for 5 minutes before serving. This helps them hold their shape when you transfer them to a plate.
Cooking Tips & Techniques
I’ve made these peppers about a dozen times now, and I’ve learned a few things the hard way. Here are my best tips:
- Don’t skip the par-cook. I tried skipping this step once because I was in a hurry, and the peppers came out crunchy and sad. Three minutes in boiling water makes all the difference.
- Make the faces bigger than you think. The peppers shrink slightly as they bake, so those tiny eyes you cut? They’ll be almost invisible after 30 minutes in the oven. Go bold.
- Use a cookie cutter for the eyes. A small round cookie cutter (about 1/2 inch) makes perfect eyes every time. Just press it through the pepper skin and pop out the circle. It’s way faster than cutting triangles.
- Don’t overstuff. I know it’s tempting to pack as much filling as possible, but overstuffed peppers tend to split open during baking. Leave a little breathing room.
- Let them rest. Those 5 minutes after baking aren’t just for show. The filling sets up, the peppers firm up, and everything holds together better when you serve them.
One time, I forgot to drain the fat from the sausage before adding the rice, and the filling came out greasy. Learn from my mistake—always drain off that excess fat.
Variations & Adaptations
This recipe is super flexible, which is why I keep coming back to it. Here are some ways to switch it up:
- Vegetarian Version: Swap the meat for 2 cups of cooked lentils or a 12 oz package of plant-based ground. Add an extra 1/2 cup of rice to bulk it up. I’ve made this for my vegetarian sister-in-law, and she went back for thirds.
- Low-Carb Version: Skip the rice and use 1 1/2 cups of riced cauliflower instead. Sauté it with the onions and garlic before adding the meat. It’s surprisingly good—my husband didn’t even notice the swap.
- Spicy Version: Use hot Italian sausage, add 1/2 tsp of red pepper flakes to the filling, and throw in some diced jalapeño with the onions. My neighbor Dave loves this version.
- Cheese Lover’s Version: Mix in 1/2 cup of cream cheese with the mozzarella and Parmesan. It makes the filling extra creamy and indulgent. I did this for a Halloween party once, and the peppers disappeared in 10 minutes.
- Mexican-Inspired Version: Swap the oregano and basil for cumin and chili powder. Use salsa instead of tomato sauce, and top with Monterey Jack cheese. Serve with sour cream and fresh cilantro.
Serving & Storage Suggestions
These peppers are best served warm, right out of the oven. The cheese should be melted and bubbly, and the faces should still be visible and fun. I like to serve them on a large platter with a sprinkle of fresh parsley or chives for color. They’re a complete meal on their own, but they pair beautifully with a simple green salad or some crusty garlic bread.
For Halloween parties, I arrange them on a platter with a few fake spiders or little plastic skeletons around the edges. The kids absolutely lose their minds over it.
If you have leftovers (which honestly, rarely happens in my house), store them in an airtight container in the refrigerator for up to 4 days. To reheat, pop them in a 350°F oven for 10-12 minutes, or microwave for 2-3 minutes. The microwave is faster, but the oven keeps the peppers from getting too soft.
You can also freeze these peppers! Assemble them completely, but don’t bake them. Wrap each pepper tightly in plastic wrap, then place them in a freezer bag. They’ll keep for up to 3 months. When you’re ready to eat, thaw them in the refrigerator overnight, then bake as directed (add 5-10 minutes to the baking time since they’re starting from cold).
The flavors actually get better after a day in the fridge—the filling absorbs all the tomato sauce and seasonings, and the peppers soften just a little more. I’ve been known to make a double batch just for the leftovers.
Nutritional Information & Benefits
These stuffed peppers are surprisingly balanced for a comfort food dish. Here’s the approximate nutritional breakdown per stuffed pepper (based on the recipe as written):
| Nutrient | Amount per Serving |
|---|---|
| Calories | 385 |
| Protein | 28g |
| Fat | 18g |
| Carbohydrates | 24g |
| Fiber | 4g |
| Sugar | 8g |
| Sodium | 680mg |
Bell peppers are packed with vitamin C—one medium pepper gives you over 150% of your daily needs. They’re also a great source of vitamin A, which is good for your eyes and immune system. The protein from the beef and sausage keeps you full and satisfied, while the rice provides steady energy. If you’re watching your sodium, use low-sodium tomato sauce and skip the extra salt in the filling.
This recipe is naturally gluten-free (just make sure your sausage is gluten-free) and can be made dairy-free with plant-based cheese. It’s also nut-free and egg-free, making it a safe option for most food allergies.
Conclusion
These jack-o-lantern stuffed bell peppers are the kind of recipe that makes you look like a rockstar host without actually working that hard. They’re fun, festive, and genuinely delicious—the kind of dish that gets people talking and coming back for seconds. I’ve made them for Halloween parties, fall potlucks, and even just a random Tuesday dinner when I wanted something cozy and a little silly. Every single time, they deliver.
I hope you give them a try, and I hope they surprise you the way they surprised me. If you make them, I’d love to hear how they turned out—leave a comment below and let me know what faces you carved, what variations you tried, and whether anyone went back for seconds. Tag me in your photos on social media too—I love seeing your creations!
Happy Halloween, and happy cooking. You’ve got this.
Frequently Asked Questions
Can I make these stuffed peppers ahead of time?
Absolutely. You can assemble the peppers completely (stuff them and top with cheese), then cover and refrigerate for up to 24 hours before baking. When you’re ready, just add 5-10 minutes to the baking time since they’re starting from cold. This is my go-to strategy for Halloween parties—I do all the work the day before, then just pop them in the oven while guests arrive.
What if I can’t find orange bell peppers?
Orange bell peppers are ideal for the jack-o-lantern look, but red or yellow peppers work too. They won’t look as Halloween-y, but they’ll still taste great. Green peppers work in a pinch, but they’re less sweet and can be a little bitter. If you’re set on the orange color, check multiple grocery stores—they’re usually available from September through November.
Can I use ground turkey instead of beef?
Yes, absolutely. Ground turkey works great, but it’s leaner than beef, so add a tablespoon of olive oil to the pan when cooking it. I also recommend using dark meat turkey if you can find it—it stays juicier. And don’t skip the Italian sausage if you’re using turkey—the sausage adds so much flavor that you’d miss otherwise.
How do I keep the peppers from tipping over in the baking dish?
This is a common issue, and I’ve got two solutions. First, choose peppers that sit flat on their own—give them a little test at the store. Second, if they’re still wobbly, cut a thin slice off the bottom of each pepper (just enough to create a flat surface). Be careful not to cut through the pepper—you just want to level it out.
Can I freeze these stuffed peppers?
Yes, and they freeze beautifully. Assemble the peppers completely but don’t bake them. Wrap each one individually in plastic wrap, then place them in a freezer-safe bag or container. They’ll keep for up to 3 months. When you’re ready to eat, thaw in the refrigerator overnight, then bake as directed. Add 5-10 minutes to the baking time since they’re starting from cold. I always make a double batch and freeze half for busy weeknights.
Pin This Recipe!
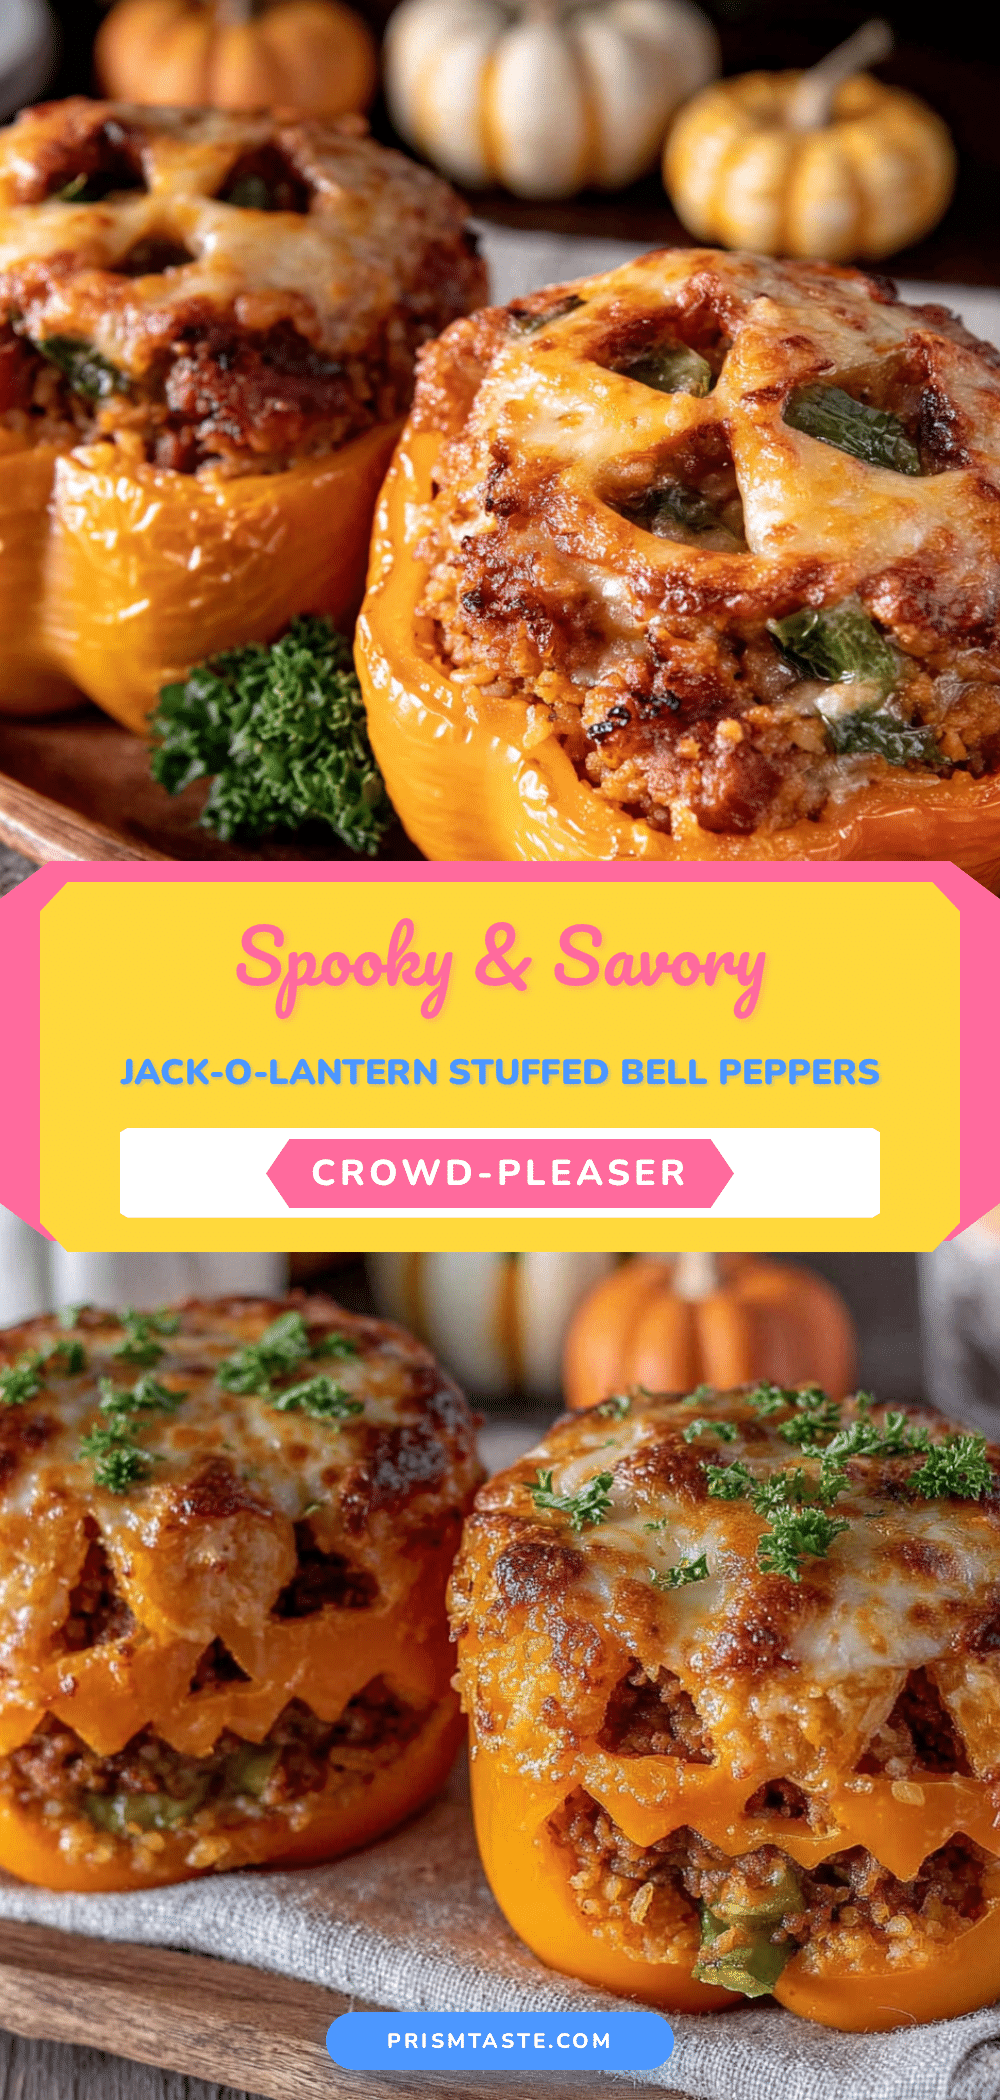
Best Easy Jack-O-Lantern Stuffed Bell Peppers Recipe
These festive jack-o-lantern stuffed bell peppers are filled with a savory mixture of ground beef, Italian sausage, rice, and cheese, then baked until tender and golden. Perfect for Halloween parties or a fun family dinner, they’re quick, easy, and guaranteed to impress.
- Prep Time: 15 minutes
- Cook Time: 30 minutes
- Total Time: 45 minutes
- Yield: 6 servings 1x
- Category: Main Course
- Cuisine: American
Ingredients
- 1 lb ground beef (80/20)
- 1/2 lb Italian sausage (mild or hot)
- 1 cup cooked white rice
- 1 small yellow onion, diced (about 1/2 cup)
- 3 cloves garlic, minced
- 1 can (15 oz) tomato sauce
- 1 tsp dried oregano
- 1 tsp dried basil
- 1/2 tsp smoked paprika
- Salt and black pepper to taste
- 1 cup shredded mozzarella cheese (plus more for topping)
- 1/4 cup grated Parmesan cheese
- 6 large orange bell peppers
- 1 tbsp olive oil
Instructions
- Preheat your oven to 375°F (190°C). Start a pot of water for par-cooking the peppers.
- Wash and dry the orange bell peppers. Using a sharp paring knife, cut a small circle around the stem of each pepper—about the size of a quarter. Lift off the top carefully, then scoop out the seeds and membranes from inside. (Optional: chop the tops and add to the filling.)
- Carve jack-o-lantern faces into each pepper: cut triangle eyes and a zigzag mouth. Make the eyes a little bigger than you think—they shrink during baking. Place the carved peppers upright in a baking dish.
- Bring a large pot of water to a boil. Carefully lower the peppers into the water using a slotted spoon. Boil for 3-4 minutes until they start to soften but still hold their shape. Drain and set aside to cool slightly.
- While the peppers par-cook, heat a large skillet over medium-high heat. Add the ground beef and Italian sausage, breaking it up with a wooden spoon. Cook for 5-6 minutes until browned, then add the diced onion and minced garlic. Cook for another 2-3 minutes until the onion is translucent. Drain off any excess fat.
- Stir in the dried oregano, dried basil, smoked paprika, and a generous pinch of salt and pepper. Cook for 30 seconds until fragrant.
- Pour in the tomato sauce and stir in the cooked rice. Let everything simmer together for 3-4 minutes. Taste and adjust seasoning.
- Remove the skillet from heat. Stir in the mozzarella and Parmesan until just combined.
- Spoon the filling into each carved pepper, packing gently but firmly. Don’t overstuff—leave a little room. Mound the filling slightly on top.
- Sprinkle extra mozzarella on top of each stuffed pepper.
- Cover the baking dish with aluminum foil and bake for 20 minutes. Remove the foil and bake for another 10 minutes, until the cheese is melted and the peppers are tender.
- Let the peppers rest for 5 minutes before serving.
Notes
Don’t skip par-cooking the peppers—it prevents them from being crunchy. Make the faces bigger than you think because they shrink during baking. Use a cookie cutter for perfect eyes. Don’t overstuff the peppers to avoid splitting. Let them rest for 5 minutes after baking to help them hold their shape. For a vegetarian version, use cooked lentils or plant-based ground meat. For a low-carb version, substitute cauliflower rice. For a spicy version, use hot Italian sausage and add red pepper flakes. For a cheese lover’s version, mix in 1/2 cup cream cheese. For a Mexican-inspired version, use cumin, chili powder, salsa, and Monterey Jack cheese. Leftovers can be stored in an airtight container in the refrigerator for up to 4 days. To reheat, bake at 350°F for 10-12 minutes or microwave for 2-3 minutes. To freeze, assemble completely but do not bake; wrap individually in plastic wrap and place in a freezer bag for up to 3 months. Thaw overnight in the refrigerator before baking, adding 5-10
Nutrition
- Serving Size: 1 stuffed pepper
- Calories: 385
- Sugar: 8
- Sodium: 680
- Fat: 18
- Saturated Fat: 7
- Carbohydrates: 24
- Fiber: 4
- Protein: 28
Keywords: stuffed bell peppers, jack-o-lantern peppers, Halloween dinner, stuffed peppers recipe, easy stuffed peppers, ground beef stuffed peppers, festive dinner


