Megan wasn’t trying to be the Halloween hero of the neighborhood. She’d texted me that morning saying, “I have a weird amount of white chocolate and I need to use it up before the kids get home from school,” and honestly, I thought she was just complaining about her pantry situation. I’d stopped by to borrow a bundt pan—mine had mysteriously vanished after last Thanksgiving—and the smell of melted marshmallows hit me before I even got through the screen door.
There she was, standing at her kitchen counter in sweatpants, casually wrapping these little white treats with a fork like she was born doing it. “They’re mummies,” she said when she caught me staring. “The kids will think they’re funny.” She shrugged like it was nothing. But let me tell you, those Spooky No-Bake Mummy Rice Krispie Treats were the cutest things I’d seen all October, and she was acting like she’d just made toast. I mean, I’ve been known to go all out for Halloween—the inflatable graveyard in my front yard is basically a fire hazard—but this was genius-level simple. You know that feeling when you see something and think, “Why didn’t I think of that?” That was me, standing in Megan’s kitchen, holding a borrowed bundt pan I’d completely forgotten about.
The best part? She didn’t even have a recipe written down. She just did it from memory, the way you do something you’ve made a hundred times. And that’s what stuck with me—not the treat itself (which was amazing, obviously), but how effortless it was. There’s something about watching someone make magic without realizing it that makes you want to learn exactly what they did. So I stood there, asked a million questions, and eventually pried the method out of her between sips of coffee. These Spooky No-Bake Mummy Rice Krispie Treats have been my go-to Halloween recipe ever since, and I’m pretty sure they’ll become yours too.
Why You’ll Love This Recipe
Let me be real with you for a second—I’ve tested a lot of Halloween recipes over the years. Some are too complicated, some look nothing like the photos, and some just flat-out don’t taste good. These Spooky No-Bake Mummy Rice Krispie Treats are none of those things. They’re the recipe I keep coming back to, and here’s why:
- No baking required: Seriously, the oven doesn’t even need to be turned on. Perfect for those chaotic Halloween afternoons when you’re already juggling costume fittings and candy shopping.
- Simple ingredients: You probably have most of this stuff in your pantry right now. No weird specialty items or trips to three different stores.
- Perfect for Halloween parties: These little guys are the life of the party. Kids go nuts for them, and adults secretly love them too.
- Quick to make: From start to finish, you’re looking at about 20 minutes of active work. The hardest part is waiting for the chocolate to set.
- Customizable: You can make them spooky, silly, or anywhere in between. The mummy look is just the beginning.
- No-bake magic: This is the kind of recipe that makes you look like you spent hours in the kitchen when you really didn’t. Your secret is safe with me.
What makes these different from every other rice krispie treat recipe out there? It’s the texture, honestly. Megan taught me to press the treats just firm enough so they hold their shape but still have that soft, chewy bite. Most recipes turn out either rock-hard or fall-apart crumbly. These? They’re just right. Plus, the white chocolate “bandages” add this creamy sweetness that balances the marshmallow perfectly. It’s not just another version—it’s the version you’ll actually want to make again next year.
What Ingredients You Will Need
This recipe uses simple, everyday ingredients to create something that looks way more impressive than it actually is. Here’s what you’ll need to gather before you start making your Spooky No-Bake Mummy Rice Krispie Treats:
For the Treat Base
- 3 tablespoons unsalted butter (plus extra for greasing the pan) — I use salted butter in a pinch, just skip the salt in the recipe. Land O’Lakes is my go-to brand for consistent results.
- 1 package (10 ounces) marshmallows — Regular size works best. Mini marshmallows melt faster but can be harder to measure evenly. Jet-Puffed is reliable.
- 6 cups crispy rice cereal — Kellogg’s Rice Krispies are the classic choice, but store brands work fine too. Just make sure they’re fresh and crispy, not stale.
- 1/4 teaspoon vanilla extract — Pure vanilla is better than imitation, but honestly, use what you have. It adds a subtle warmth that balances the sweetness.
- Pinch of salt — Don’t skip this. It keeps the treats from tasting overly sweet and makes the other flavors pop.
For the Mummy Decorations
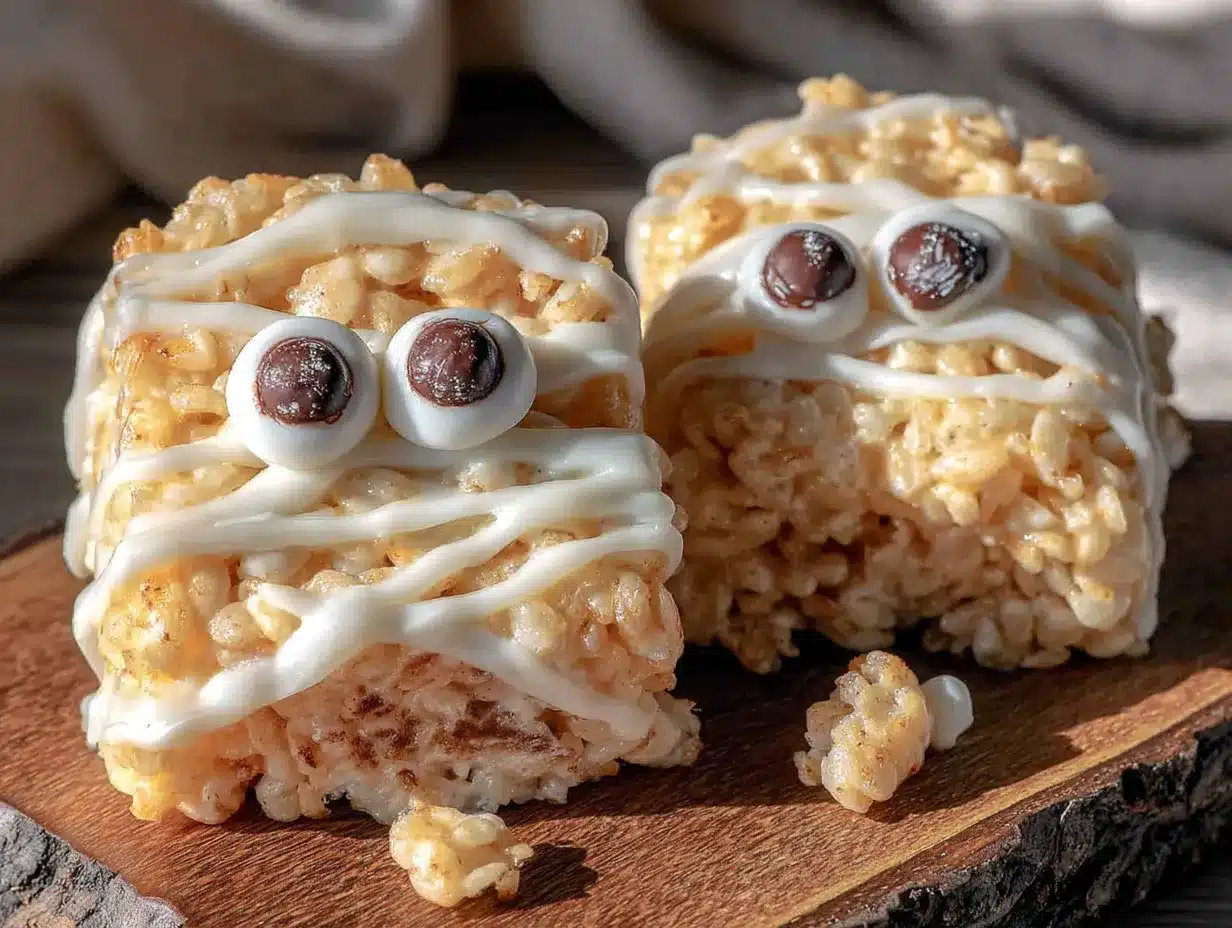
- 1 cup white melting wafers or white chocolate chips — Melting wafers (like Ghirardelli or Wilton) give a smoother finish, but white chocolate chips work perfectly too. Just add a teaspoon of coconut oil to thin them out if needed.
- Candy eyes — You can find these at craft stores or online. Wilton makes good ones. If you can’t find them, use mini chocolate chips or M&M’s with the M printed side down.
- Optional: black decorating gel — For drawing little mouths or extra spooky details on your mummies.
- Optional: orange or black sprinkles — For adding a festive touch to the background or around the eyes.
Ingredient Tips from My Kitchen
I’ve made these Spooky No-Bake Mummy Rice Krispie Treats about a dozen times now, and here are a few things I’ve learned the hard way. First, always use fresh marshmallows. Stale ones don’t melt as smoothly and can leave you with lumpy treats. Second, if you’re using white chocolate chips instead of melting wafers, add a tiny splash of vegetable oil or coconut oil to help them melt smoothly. I once skipped this step and ended up with a clumpy mess that looked more like zombie bandages than mummy wraps. Not cute.
For the candy eyes, I prefer the ones that come in a mix of sizes. The little ones look adorable on mini mummies, and the bigger ones give the regular-sized treats more personality. If you’re making these with kids, let them pick out the eyes—it becomes part of the fun.
Equipment Needed
You don’t need a fancy kitchen to make these Spooky No-Bake Mummy Rice Krispie Treats. Here’s what you’ll need:
- Large saucepan — A 4-quart pot works perfectly. Make sure it’s big enough to stir the marshmallow mixture without spilling over.
- Wooden spoon or silicone spatula — Silicone is better because it doesn’t scratch your pan and the marshmallow doesn’t stick to it as much. Trust me on this one.
- 9×13-inch baking dish — For shaping the treats. Glass or metal both work fine. If you want thicker treats, use an 8×8-inch pan instead.
- Parchment paper or wax paper — Lining the pan makes removal so much easier. I learned this after spending 20 minutes trying to pry treats out of an unlined pan.
- Microwave-safe bowl — For melting the white chocolate. Glass or ceramic works best.
- Small piping bag or zip-top bag — For drizzling the white chocolate. A zip-top bag with a tiny corner snipped off works perfectly and costs nothing.
- Sharp knife — For cutting the treats into rectangles. A serrated knife works best to avoid squishing them.
- Cooling rack — Optional but helpful for letting the chocolate set evenly.
If you don’t have a piping bag, don’t stress. I’ve used a fork to drizzle chocolate before, and it actually gives a more rustic, mummy-like look. The imperfections are part of the charm!
Preparation Method
Alright, let’s get to the fun part. Here’s how to make these Spooky No-Bake Mummy Rice Krispie Treats step by step. I’ll walk you through it like we’re in the kitchen together.
- Prepare your pan: Line a 9×13-inch baking dish with parchment paper, leaving some overhang on the sides. Lightly grease the parchment with butter or non-stick spray. This makes lifting the treats out later super easy.
- Melt the butter: In a large saucepan over medium-low heat, melt the 3 tablespoons of butter. Swirl the pan occasionally so it melts evenly. Don’t rush this step—if the butter burns, the whole batch is ruined.
- Add the marshmallows: Once the butter is fully melted, add the entire package of marshmallows. Stir constantly with your wooden spoon or silicone spatula until the marshmallows are completely melted and smooth. This usually takes about 5-7 minutes. The mixture should be glossy and stretchy when you lift the spoon.
- Season the mixture: Remove the pan from heat. Stir in the vanilla extract and pinch of salt. The salt is subtle but important—it balances the sweetness and keeps the treats from tasting one-dimensional.
- Add the cereal: Pour the 6 cups of crispy rice cereal into the marshmallow mixture. Fold gently until all the cereal is evenly coated. Work quickly here—the mixture starts to set as it cools. Don’t overmix or the cereal will break into smaller pieces.
- Press into the pan: Transfer the mixture to your prepared pan. Use a piece of wax paper or greased spatula to press it into an even layer. Be firm but gentle—you want the treats to hold together without being too dense. Pressing too hard makes them rock-hard.
- Let them set: Allow the treats to cool completely at room temperature, about 30 minutes. Don’t rush this by putting them in the fridge—they can become too firm and hard to cut cleanly.
- Cut into rectangles: Once cooled, lift the treats out of the pan using the parchment overhang. Use a sharp serrated knife to cut them into rectangles. I aim for about 2×3-inch pieces, but size doesn’t matter much. You can also use a cookie cutter for fun shapes!
- Melt the white chocolate: Place the white melting wafers or white chocolate chips in a microwave-safe bowl. Microwave in 30-second intervals, stirring between each, until smooth. Be careful not to overheat—white chocolate burns easily. If it’s too thick, stir in 1/2 teaspoon of coconut oil.
- Decorate the mummies: Transfer the melted white chocolate to a small piping bag or zip-top bag with a tiny corner snipped off. Drizzle the chocolate back and forth across each treat to create the “bandage” look. Don’t try to cover the whole surface—leave some gaps so the treat shows through.
- Add the eyes: While the chocolate is still wet, press two candy eyes onto each mummy. Position them wherever looks cutest—some slightly crooked adds personality.
- Let the chocolate set: Place the decorated treats on a cooling rack or parchment-lined baking sheet. Let the chocolate set completely, about 15-20 minutes at room temperature. If you’re in a hurry, pop them in the fridge for 5 minutes.
A few things I’ve learned along the way: If the marshmallow mixture starts to cool and stiffen before you’ve pressed it into the pan, pop the saucepan back on low heat for 30 seconds to loosen it up. And if your white chocolate drizzle looks messy, that’s actually perfect—mummies aren’t supposed to look neat!
Cooking Tips & Techniques
I’ve made these Spooky No-Bake Mummy Rice Krispie Treats enough times to have a few tricks up my sleeve. Here are the things I wish someone had told me the first time:
Don’t overmix the cereal. I know it’s tempting to keep stirring until everything looks perfectly coated, but the more you mix, the more the cereal breaks down. You want those little crispy pieces to stay intact for the best texture. Fold gently, about 10-12 strokes, and stop as soon as everything looks combined.
Temperature matters more than you think. I once made these on a humid summer day and the marshmallow mixture never set properly. The treats were sticky and wouldn’t hold their shape. If you’re making these in humid weather, consider adding an extra 1/4 cup of cereal to absorb the moisture. Also, let them set in an air-conditioned room if possible.
Wet your hands. If you’re pressing the mixture into the pan with your hands (which some people prefer), wet them slightly with cold water first. The marshmallow mixture is sticky and will cling to dry hands. A little water creates a barrier that makes pressing so much easier.
My biggest failure: The first time I made these, I forgot to grease the parchment paper. The treats stuck to the paper, and I ended up with a crumbled mess that looked more like a mummy that had been through a blender. Now I always double-check that step. Learn from my mistake!
Multitasking strategy: While the treats are cooling, melt your white chocolate and set up your decorating station. Have the candy eyes ready in a small bowl and your piping bag prepped. This way, when the treats are ready to decorate, everything is right there and you can work quickly before the chocolate sets.
Variations & Adaptations
One of the best things about these Spooky No-Bake Mummy Rice Krispie Treats is how easy they are to customize. Here are some variations I’ve tried and loved:
Gluten-free version: Most crispy rice cereals are naturally gluten-free, but double-check the label. Some brands contain malt flavoring that has gluten. Look for certified gluten-free options like One Degree Organic or Erewhon. The rest of the ingredients are already gluten-free, so this swap is simple.
Chocolate mummies: Use chocolate rice cereal (like Cocoa Krispies) instead of regular for a darker, more “spooky” base. The chocolate flavor pairs beautifully with the white chocolate bandages. My kids actually prefer this version.
Peanut butter twist: Add 1/4 cup of creamy peanut butter to the marshmallow mixture along with the vanilla. It adds a savory depth that balances the sweetness and makes the treats more filling. Just make sure no one has peanut allergies if you’re serving these at a party.
Mini mummies: Press the mixture into a smaller pan (8×8-inch) for thicker treats, then cut them into bite-sized squares. These are perfect for classroom parties or trick-or-treat bags. The mini size also makes them easier for little hands to hold.
Spooky color twist: Add a few drops of orange or green food coloring to the marshmallow mixture before adding the cereal. It gives the treats a festive color that peeks through the white chocolate bandages. Gel food coloring works best—liquid can make the mixture too wet.
My personal favorite variation: I once made these with a layer of melted dark chocolate spread on the bottom before adding the marshmallow mixture. The dark chocolate adds a grown-up twist that balances the sweetness. I called them “Vampire Mummies” and they were a hit at my Halloween party.
Serving & Storage Suggestions
These Spooky No-Bake Mummy Rice Krispie Treats are best served at room temperature. The texture is perfect—soft, chewy, and just slightly crispy. If you’ve refrigerated them, let them sit out for 10-15 minutes before serving to soften up a bit.
Presentation ideas: Arrange the mummies on a platter lined with black or orange tissue paper for a festive look. You can also stand them upright in a jar or vase for a fun centerpiece. For a Halloween party, scatter some candy corn or pumpkin candies around the platter for extra color.
What to serve with them: These treats pair beautifully with warm apple cider or hot chocolate. For a grown-up gathering, try them with a pumpkin spice latte or a dark beer. The sweetness of the treats balances the bitterness of coffee or beer nicely.
Storage instructions: Store the treats in an airtight container at room temperature for up to 5 days. Layer them between sheets of wax paper to prevent sticking. Do not refrigerate them—the cold makes them hard and the white chocolate can develop condensation, which ruins the look.
Freezing tips: You can freeze these treats for up to 2 months. Wrap each mummy individually in plastic wrap, then place them in a freezer-safe bag. When you’re ready to serve, thaw them at room temperature for about 30 minutes. The texture might be slightly softer after freezing, but they still taste amazing.
Flavor development: Honestly, these treats taste best the day they’re made. The marshmallow is at its peak softness, and the white chocolate is perfectly snappy. That said, they’re still delicious on day two or three—just slightly denser. I’ve never had them last longer than that in my house anyway!
Nutritional Information & Benefits
Let’s be real—these Spooky No-Bake Mummy Rice Krispie Treats are a treat, not a health food. But here’s the nutritional info if you’re curious:
Per serving (1 mummy, based on 12 servings):
- Calories: 210
- Total Fat: 8g
- Saturated Fat: 5g
- Cholesterol: 15mg
- Sodium: 180mg
- Total Carbohydrates: 34g
- Dietary Fiber: 0g
- Sugars: 20g
- Protein: 2g
Now, here’s the thing—these treats are made with real ingredients. Butter, marshmallows, cereal. No weird preservatives or artificial flavors (unless you add food coloring). The crispy rice cereal does provide some iron and B vitamins, and the butter gives you a little vitamin A. But let’s not pretend these are anything other than a fun Halloween indulgence.
Dietary considerations: As written, this recipe contains dairy (butter, white chocolate) and is not suitable for vegans. To make it dairy-free, use vegan butter and dairy-free white chocolate. The recipe is naturally egg-free and nut-free (if you skip the peanut butter variation). Always check labels if you’re serving people with allergies.
My personal take: I believe in balance. These treats are part of the Halloween fun, and I don’t stress about the sugar content. My philosophy is that a treat is a treat—enjoy it, savor it, and move on. Life’s too short to worry about calories in a mummy-shaped rice krispie treat!
Conclusion
These Spooky No-Bake Mummy Rice Krispie Treats are everything I want in a Halloween recipe—fun, easy, and genuinely delicious. They’re the kind of treat that makes people smile, whether they’re five years old or fifty-five. And honestly, that’s what Halloween is all about, right? A little bit of spooky fun, a whole lot of sweetness, and memories made in the kitchen.
I hope you give these a try and make them your own. Maybe you’ll add green food coloring for a Frankenstein vibe, or use chocolate cereal for a darker twist. That’s the beauty of this recipe—it’s a starting point, not a rulebook. The mummies are waiting for their personality, and that’s where you come in.
If you make these, I’d love to hear about it! Drop a comment below and tell me how your mummies turned out. Did you add any fun variations? Did the kids help? Did you eat three before they even set? (No judgment here—I’ve been there.) Share your photos on Pinterest and tag me so I can see your spooky creations. Happy Halloween, and happy snacking!
Frequently Asked Questions
Can I make these Spooky No-Bake Mummy Rice Krispie Treats ahead of time?
Absolutely! You can make them up to 2 days in advance. Store them in an airtight container at room temperature, and wait to add the white chocolate decorations until the day you’re serving them for the freshest look.
Why did my treats turn out hard?
This usually happens when you press the mixture too firmly into the pan or overcook the marshmallows. Press gently and remove the marshmallow mixture from heat as soon as it’s smooth. Also, make sure you’re using fresh marshmallows—stale ones can cause texture issues.
Can I use dark chocolate instead of white chocolate for the bandages?
Of course! Dark chocolate creates a spookier look and balances the sweetness. Just melt it the same way as white chocolate, and drizzle it over the treats. You could even do half white and half dark for a two-tone mummy effect.
How do I keep the candy eyes from falling off?
Press the eyes into the white chocolate while it’s still wet and warm. If the chocolate has started to set, dab a tiny bit of fresh melted chocolate on the back of each eye before placing it on the treat. This acts like glue and holds them in place.
Can I use a different cereal instead of Rice Krispies?
Yes! Cocoa Krispies, Fruity Pebbles, or even crushed cornflakes can work. Just keep in mind that different cereals have different textures and sweetness levels. You might need to adjust the marshmallow-to-cereal ratio slightly for the best results.
Pin This Recipe!
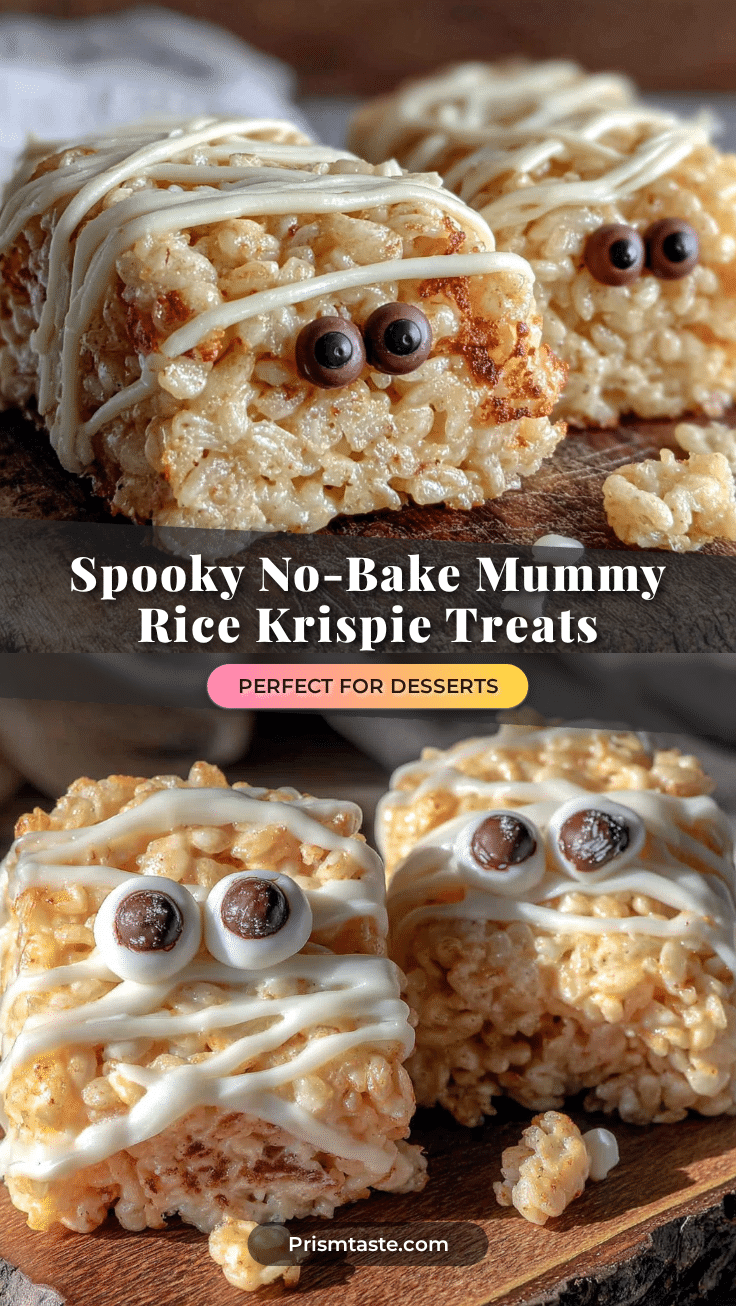
Spooky No-Bake Mummy Rice Krispie Treats: Easy Halloween Recipe
These no-bake mummy rice krispie treats are a fun and easy Halloween recipe that kids and adults love. Made with simple ingredients and decorated with white chocolate bandages and candy eyes, they’re perfect for parties and quick to make.
- Prep Time: 20 minutes
- Cook Time: 10 minutes
- Total Time: 1 hour 10 minutes
- Yield: 12 servings 1x
- Category: Dessert
- Cuisine: American
Ingredients
- 3 tablespoons unsalted butter (plus extra for greasing the pan)
- 1 package (10 ounces) marshmallows
- 6 cups crispy rice cereal
- 1/4 teaspoon vanilla extract
- Pinch of salt
- 1 cup white melting wafers or white chocolate chips
- Candy eyes
- Optional: black decorating gel
- Optional: orange or black sprinkles
Instructions
- Line a 9×13-inch baking dish with parchment paper, leaving some overhang on the sides. Lightly grease the parchment with butter or non-stick spray.
- In a large saucepan over medium-low heat, melt the 3 tablespoons of butter. Swirl the pan occasionally so it melts evenly.
- Once the butter is fully melted, add the entire package of marshmallows. Stir constantly until the marshmallows are completely melted and smooth, about 5-7 minutes.
- Remove the pan from heat. Stir in the vanilla extract and pinch of salt.
- Pour the 6 cups of crispy rice cereal into the marshmallow mixture. Fold gently until all the cereal is evenly coated.
- Transfer the mixture to your prepared pan. Use a piece of wax paper or greased spatula to press it into an even layer. Be firm but gentle.
- Allow the treats to cool completely at room temperature, about 30 minutes.
- Once cooled, lift the treats out of the pan using the parchment overhang. Use a sharp serrated knife to cut them into rectangles (about 2×3 inches).
- Place the white melting wafers or white chocolate chips in a microwave-safe bowl. Microwave in 30-second intervals, stirring between each, until smooth.
- Transfer the melted white chocolate to a small piping bag or zip-top bag with a tiny corner snipped off. Drizzle the chocolate back and forth across each treat to create the ‘bandage’ look.
- While the chocolate is still wet, press two candy eyes onto each mummy.
- Place the decorated treats on a cooling rack or parchment-lined baking sheet. Let the chocolate set completely, about 15-20 minutes at room temperature.
Notes
Don’t overmix the cereal to keep it intact. If the marshmallow mixture starts to cool and stiffen before pressing, reheat on low for 30 seconds. For humid weather, add an extra 1/4 cup of cereal. Wet hands slightly with cold water to prevent sticking when pressing the mixture. Store in an airtight container at room temperature for up to 5 days; do not refrigerate. Freeze for up to 2 months by wrapping individually in plastic wrap.
Nutrition
- Serving Size: 1 mummy
- Calories: 210
- Sugar: 20
- Sodium: 180
- Fat: 8
- Saturated Fat: 5
- Carbohydrates: 34
- Protein: 2
Keywords: Halloween, no-bake, rice krispie treats, mummy, easy, kids, party


