My niece Lily asked why I couldn’t just use black cocoa powder instead of all that gel food coloring. I started to explain why that wouldn’t work — then stopped. Honestly, I had no good reason. I’d just always done it the messy way, with sticky black gel staining my fingers for days. She was nine, watching me with that patient look kids get when adults are being stubborn for no reason.
So I tried it. And let me tell you, she was completely right. The color was deeper, the flavor was better, and my hands stayed clean. I felt equal parts thrilled and ridiculous. Here I’d been making black velvet cupcakes for years, wrestling with bottles of food coloring, when the answer was sitting on the baking aisle shelf the whole time. Kids see things so simply, don’t they?
That’s how these Perfect Black Velvet Halloween Cupcakes with Cream Cheese Frosting came to be. They’re the version I should have been making all along — rich, dark, and honestly, a little bit magical. The cake is tender with that classic velvet crumb, but the color comes naturally from black cocoa. It tastes like Oreo’s sophisticated cousin, if that makes sense.
I’ve been making these every October since, and every time I pull them out of the oven, I think about Lily’s smug little smile. Maybe you’ve been there — someone suggests something that goes against everything you thought you knew, and it turns out they were right all along. That’s baking, I guess. Always learning, always being humbled by a nine-year-old.
Why You’ll Love This Recipe
These aren’t just another Halloween cupcake. They’re the ones people remember. I’ve tested this recipe more times than I care to admit, tweaking the cocoa ratio and the buttermilk balance until everything clicked. Here’s why they work:
- Naturally Dark Color : Black cocoa powder gives you that dramatic black crumb without a bottle of food coloring. Your fingers stay clean, and the flavor is incredible.
- Simple Ingredients : You probably have most of this already. No weird extracts or specialty flours — just good baking staples.
- Perfect for Halloween : These look stunning on any dessert table, from school parties to adult get-togethers. They’re spooky without being childish.
- Crowd-Pleaser : Kids love the color, adults love the flavor. I’ve watched people take one bite and immediately ask for the recipe.
- Unbelievably Tender : The cream cheese frosting is the perfect partner — tangy, smooth, and not too sweet. Together, they’re next-level comfort food.
What makes this recipe different is the technique. Using hot coffee in the batter might sound strange, but it deepens the chocolate flavor without making the cake taste like coffee. It’s a trick I learned from a pastry chef friend, and honestly, it changed everything. This isn’t just another version of black velvet cupcakes — it’s the best version.
The first time I made these, I closed my eyes after the first bite. That’s the kind of recipe this is. It’s comfort food reimagined — darker, richer, but with the same soul-soothing satisfaction. Perfect for impressing guests without stress, or turning a simple October evening into something memorable.
What Ingredients You Will Need
This recipe uses simple, wholesome ingredients to deliver that dramatic black color and rich flavor. Most of these are pantry staples, which makes these cupcakes perfect for last-minute Halloween baking.
For the Cupcakes
- Black cocoa powder, 1/2 cup (I recommend Rodelle or King Arthur Flour brands for the deepest color)
- All-purpose flour, 1 1/2 cups (spoon and level for accuracy)
- Granulated sugar, 1 cup (adds sweetness and helps with tenderness)
- Baking soda, 1 teaspoon (the only leavening agent — don’t skip it)
- Salt, 1/2 teaspoon (balances the sweetness)
- Vegetable oil, 1/2 cup (keeps the cake moist for days)
- Buttermilk, 1 cup, room temperature (adds tang and activates the baking soda)
- Large egg, 1, room temperature
- Vanilla extract, 2 teaspoons
- Hot coffee, 1/2 cup, freshly brewed (deepens the chocolate flavor without tasting like coffee)
For the Cream Cheese Frosting
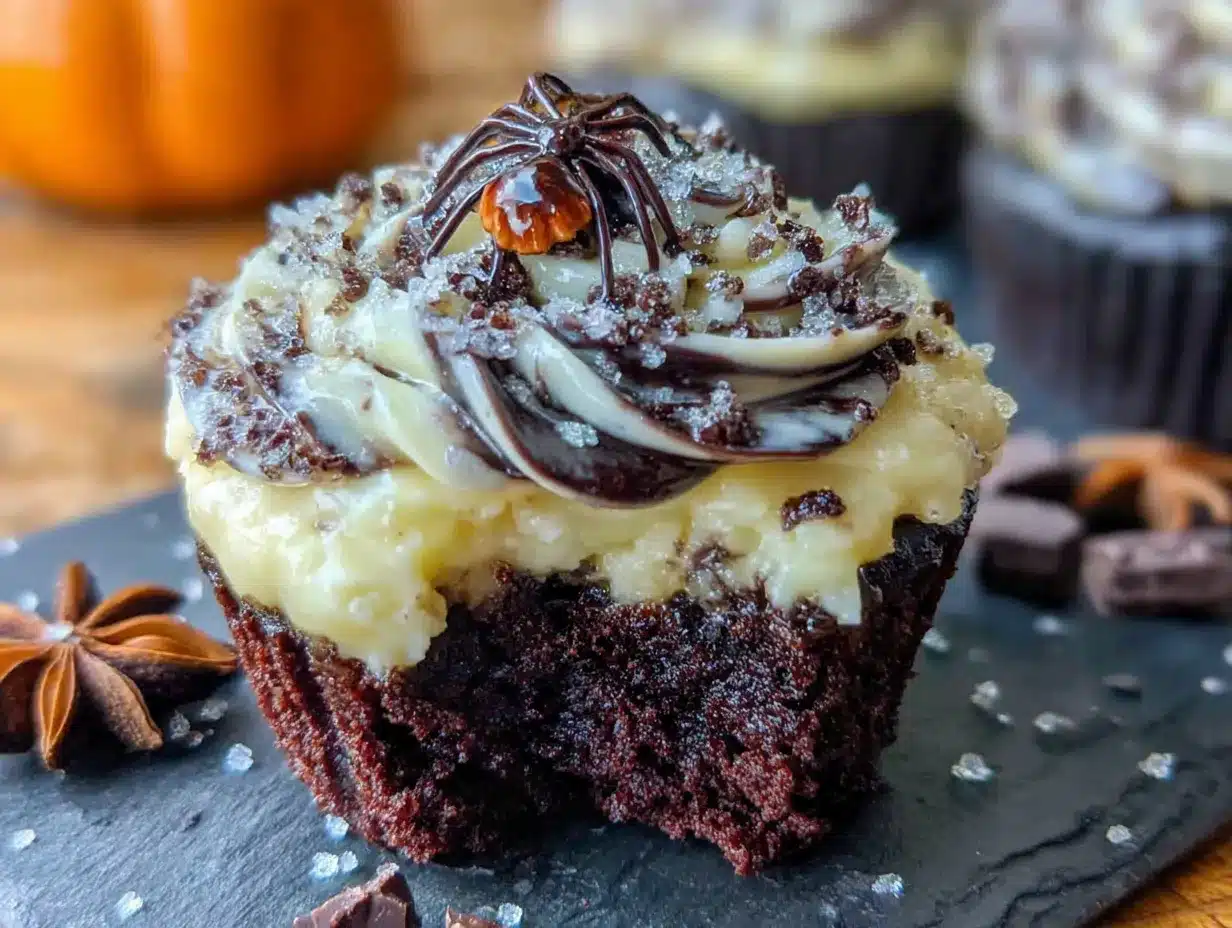
- Cream cheese, 8 ounces, softened (full-fat works best for stability)
- Unsalted butter, 1/2 cup, softened
- Powdered sugar, 3 to 4 cups, sifted
- Vanilla extract, 1 teaspoon
- Pinch of salt (cuts the sweetness)
A few notes on ingredients. Black cocoa powder is different from regular Dutch-process cocoa. It’s more alkalized, which gives it that dark color and mild flavor. If you can’t find it, use Dutch-process cocoa and add a teaspoon of black gel food coloring — but honestly, the black cocoa is worth hunting down. For the buttermilk, if you don’t have it, add a tablespoon of lemon juice to regular milk and let it sit for five minutes. It works perfectly.
For the frosting, make sure your cream cheese is truly softened. Cold cream cheese will leave lumps, and nobody wants lumpy frosting. I learned that the hard way, let me tell you.
Equipment Needed
You don’t need much for these cupcakes, which is part of their charm. Here’s what you’ll need:
- Muffin tin, standard 12-cup (non-stick is nice but not necessary)
- Paper liners (black or orange ones make these extra festive)
- Mixing bowls, one large and one medium
- Whisk (for dry ingredients)
- Hand mixer or stand mixer (for the frosting)
- Measuring cups and spoons
- Cooling rack
- Piping bag with star tip (or a zip-top bag with the corner snipped off)
If you don’t have a piping bag, don’t worry. A zip-top bag works just fine. I’ve used one more times than I can count. For the muffin tin, any standard one will do. I’ve used cheap ones from the grocery store and fancy ones from kitchen stores, and honestly, they all work the same. Just make sure you use paper liners — these cupcakes are tender and might stick otherwise.
Preparation Method
Let’s get to the fun part. This method is straightforward, but I’ve included all the little details that make the difference between good cupcakes and unforgettable ones.
- Preheat and prepare : Preheat your oven to 350°F (175°C). Line your muffin tin with 12 paper liners. This is non-negotiable — the batter is thin and will stick to bare metal.
- Mix dry ingredients : In a large bowl, whisk together the flour, black cocoa powder, sugar, baking soda, and salt. Make sure there are no lumps. Black cocoa can be clumpy, so take your time here. I usually sift it if I’m feeling patient.
- Combine wet ingredients : In a medium bowl, whisk together the vegetable oil, buttermilk, egg, and vanilla extract. Whisk until smooth and well combined. The mixture will look a bit thin — that’s normal.
- Combine wet and dry : Pour the wet ingredients into the dry ingredients. Stir gently with a spatula until just combined. A few lumps are okay — overmixing will make the cupcakes tough.
- Add hot coffee : Slowly pour in the hot coffee while stirring gently. The batter will become very thin — almost like a milkshake. Don’t panic. This is exactly how it should look. The hot coffee helps bloom the cocoa and creates that tender crumb.
- Fill the liners : Divide the batter evenly among the 12 liners. Fill each about two-thirds full. The batter is thin, so pour carefully. I use a measuring cup with a spout for this.
- Bake : Bake for 18 to 22 minutes, or until a toothpick inserted in the center comes out clean or with a few moist crumbs. The tops will look set and spring back when touched lightly. My oven runs hot, so I check at 18 minutes.
- Cool completely : Let the cupcakes cool in the pan for 5 minutes, then transfer to a cooling rack. They must be completely cool before frosting. I mean completely — warm cupcakes will melt your frosting into a puddle.
- Make the frosting : While the cupcakes cool, beat the softened cream cheese and butter together until smooth and creamy, about 2 minutes. Add the vanilla and salt. Gradually add the powdered sugar, one cup at a time, beating on low speed. Scrape down the sides as needed. Beat until light and fluffy, about 3 minutes total.
- Frost and decorate : Once the cupcakes are cool, pipe or spread the frosting on top. I like a tall swirl, but however you do it, it’ll look beautiful. Add sprinkles or decorations right away before the frosting sets.
A note on timing: The entire process takes about an hour from start to finish, with about 30 minutes of active work. The rest is baking and cooling. Plan ahead for the cooling time — it’s the part people always forget.
Cooking Tips & Techniques
I’ve made these cupcakes more times than I can count, and I’ve learned a few things along the way. Here are the tips that make the biggest difference.
Don’t overmix the batter. I know I said this already, but it’s worth repeating. Overmixing develops gluten, which makes cupcakes tough. You want tender, velvety crumbs. Stir until the flour disappears, then stop. A few lumps are your friend.
Room temperature ingredients matter. Cold buttermilk and cold egg will make the batter seize up. Take them out of the fridge 30 minutes before you start. If you forget, place the egg in warm water for 5 minutes and microwave the buttermilk for 10 seconds. I’ve done both more times than I’d like to admit.
Use a cookie scoop for even batter. A standard 2-tablespoon cookie scoop gives you perfectly even cupcakes every time. No more guessing, no more lopsided pans. It’s one of those tools that seems unnecessary until you use it once.
The coffee trick works. I was skeptical the first time someone told me to add hot coffee to chocolate cake. But it really does deepen the flavor without making it taste like coffee. If you’re serving these to kids who can’t have caffeine, use decaf. It works the same way.
Chill the frosting if it’s too soft. Cream cheese frosting can be finicky. If it seems too soft to pipe, pop it in the fridge for 15 minutes. It’ll firm up nicely. Don’t chill it too long, or it’ll be too stiff to pipe smoothly.
One mistake I made early on: I frosted the cupcakes while they were still warm. The frosting melted into a sad, runny mess. I had to scrape it all off and start over. Learn from my failure — wait until they’re completely cool. I mean completely.
Variations & Adaptations
These cupcakes are wonderful as written, but they’re also a great base for experimenting. Here are some variations I’ve tried and loved.
Gluten-Free Version : Substitute the all-purpose flour with a 1:1 gluten-free baking flour. I’ve used King Arthur Flour’s measure-for-measure blend with great results. The texture is slightly more delicate, but the flavor is spot on.
Dairy-Free Option : Use dairy-free butter and cream cheese for the frosting. For the cupcakes, substitute the buttermilk with almond milk mixed with a tablespoon of lemon juice. The cake will be a bit less tender, but still delicious.
Spooky Decorations : Top with candy eyeballs, crushed Oreos for “dirt,” or orange and black sprinkles. I once made a batch with little plastic spiders on top — they were a hit at my nephew’s Halloween party.
Cupcake Pops : Crumble leftover cupcakes, mix with a bit of frosting, and roll into balls. Dip in black candy melts and add sprinkles. They’re adorable and perfect for parties.
Muffin Version : For a less sweet option, reduce the sugar to 3/4 cup and skip the frosting. Dust with powdered sugar instead. They’re perfect for breakfast on Halloween morning.
I tried a pumpkin spice version once by adding a teaspoon of pumpkin pie spice to the dry ingredients. It was good, but honestly, it competed with the black cocoa flavor. Stick with the original — it’s perfect as is.
Serving & Storage Suggestions
These cupcakes are best served at room temperature. The frosting softens slightly, and the cake is at its most tender. If you’ve refrigerated them, let them sit out for 30 minutes before serving.
For presentation, I like to arrange them on a black cake stand with some fake cobwebs and plastic spiders. It looks dramatic without being over the top. For Halloween parties, arrange them on a platter with orange and black napkins. Simple and effective.
Storage is straightforward. Keep frosted cupcakes in an airtight container in the refrigerator for up to 5 days. The cream cheese frosting needs to be refrigerated, but the cake stays moist thanks to the oil. Let them come to room temperature before serving for the best texture.
You can freeze unfrosted cupcakes for up to 3 months. Wrap them individually in plastic wrap, then place in a freezer bag. Thaw at room temperature, then frost. The texture holds up remarkably well. Frosted cupcakes don’t freeze as well — the frosting can get grainy when thawed.
One thing I’ve noticed: these cupcakes actually taste better the next day. The flavors meld together, and the crumb becomes even more tender. So if you’re making them for a party, bake them a day ahead. Your future self will thank you.
Nutritional Information & Benefits
Let’s be real — these are cupcakes, not health food. But that doesn’t mean they can’t fit into a balanced lifestyle. Here’s the estimated nutritional breakdown per cupcake (with frosting):
- Calories : Approximately 380
- Fat : 22 grams
- Carbohydrates : 45 grams
- Protein : 5 grams
- Sugar : 32 grams
Black cocoa powder actually has some benefits. It’s rich in antioxidants called flavonoids, which can help reduce inflammation. The cream cheese provides calcium and protein, and the buttermilk adds probiotics. Of course, these benefits are modest given the sugar content, but it’s nice to know there’s something good in there.
For those with dietary restrictions, these cupcakes contain gluten, dairy, and eggs. The variations section above has options for gluten-free and dairy-free versions. Always check your ingredient labels if you’re cooking for someone with allergies.
My personal philosophy? Enjoy the cupcake. Life is short, and sometimes you need something dramatic and delicious. Balance it with a salad at dinner and call it a win.
Conclusion
These Perfect Black Velvet Halloween Cupcakes with Cream Cheese Frosting are everything I want in a Halloween treat. They’re dramatic, delicious, and surprisingly easy to make. The black cocoa gives them that deep, dark color without the mess of food coloring, and the cream cheese frosting is the perfect tangy counterpoint.
I love that this recipe came from a nine-year-old’s simple question. It reminds me that sometimes the best ideas come from unexpected places. So if you’re making these for a Halloween party, a school event, or just because it’s October and you want something special, know that they’ve been tested and loved by many.
Please, make these your own. Add your favorite decorations, experiment with the frosting, or double the batch because one dozen is never enough. And when you make them, come back and tell me how they turned out. I love hearing your stories — it’s my favorite part of this whole thing.
Happy Halloween, and happy baking. You’ve got this.
Frequently Asked Questions
Can I use regular cocoa powder instead of black cocoa?
You can, but the color won’t be as dark. Regular cocoa powder gives a brown color, while black cocoa gives that dramatic black crumb. If you use regular cocoa, add a teaspoon of black gel food coloring to get closer to the look.
Why is my batter so thin?
Don’t worry — that’s normal. The hot coffee makes the batter very thin, almost like a milkshake. It bakes up perfectly into tender, velvety cupcakes. Trust the process.
Can I make these cupcakes ahead of time?
Absolutely. Bake the cupcakes a day ahead and store them unfrosted in an airtight container. Make the frosting and frost them the day you serve them. They actually taste better the next day.
How do I get the frosting to pipe smoothly?
Make sure your cream cheese and butter are truly softened. If the frosting seems too soft, chill it for 15 minutes. If it’s too stiff, add a tablespoon of milk. Practice on a piece of wax paper before piping on the cupcakes.
Can I freeze these cupcakes?
Yes, but freeze them unfrosted. Wrap each cupcake individually in plastic wrap, then place in a freezer bag. They’ll keep for up to 3 months. Thaw at room temperature, then frost and serve.
Pin This Recipe!
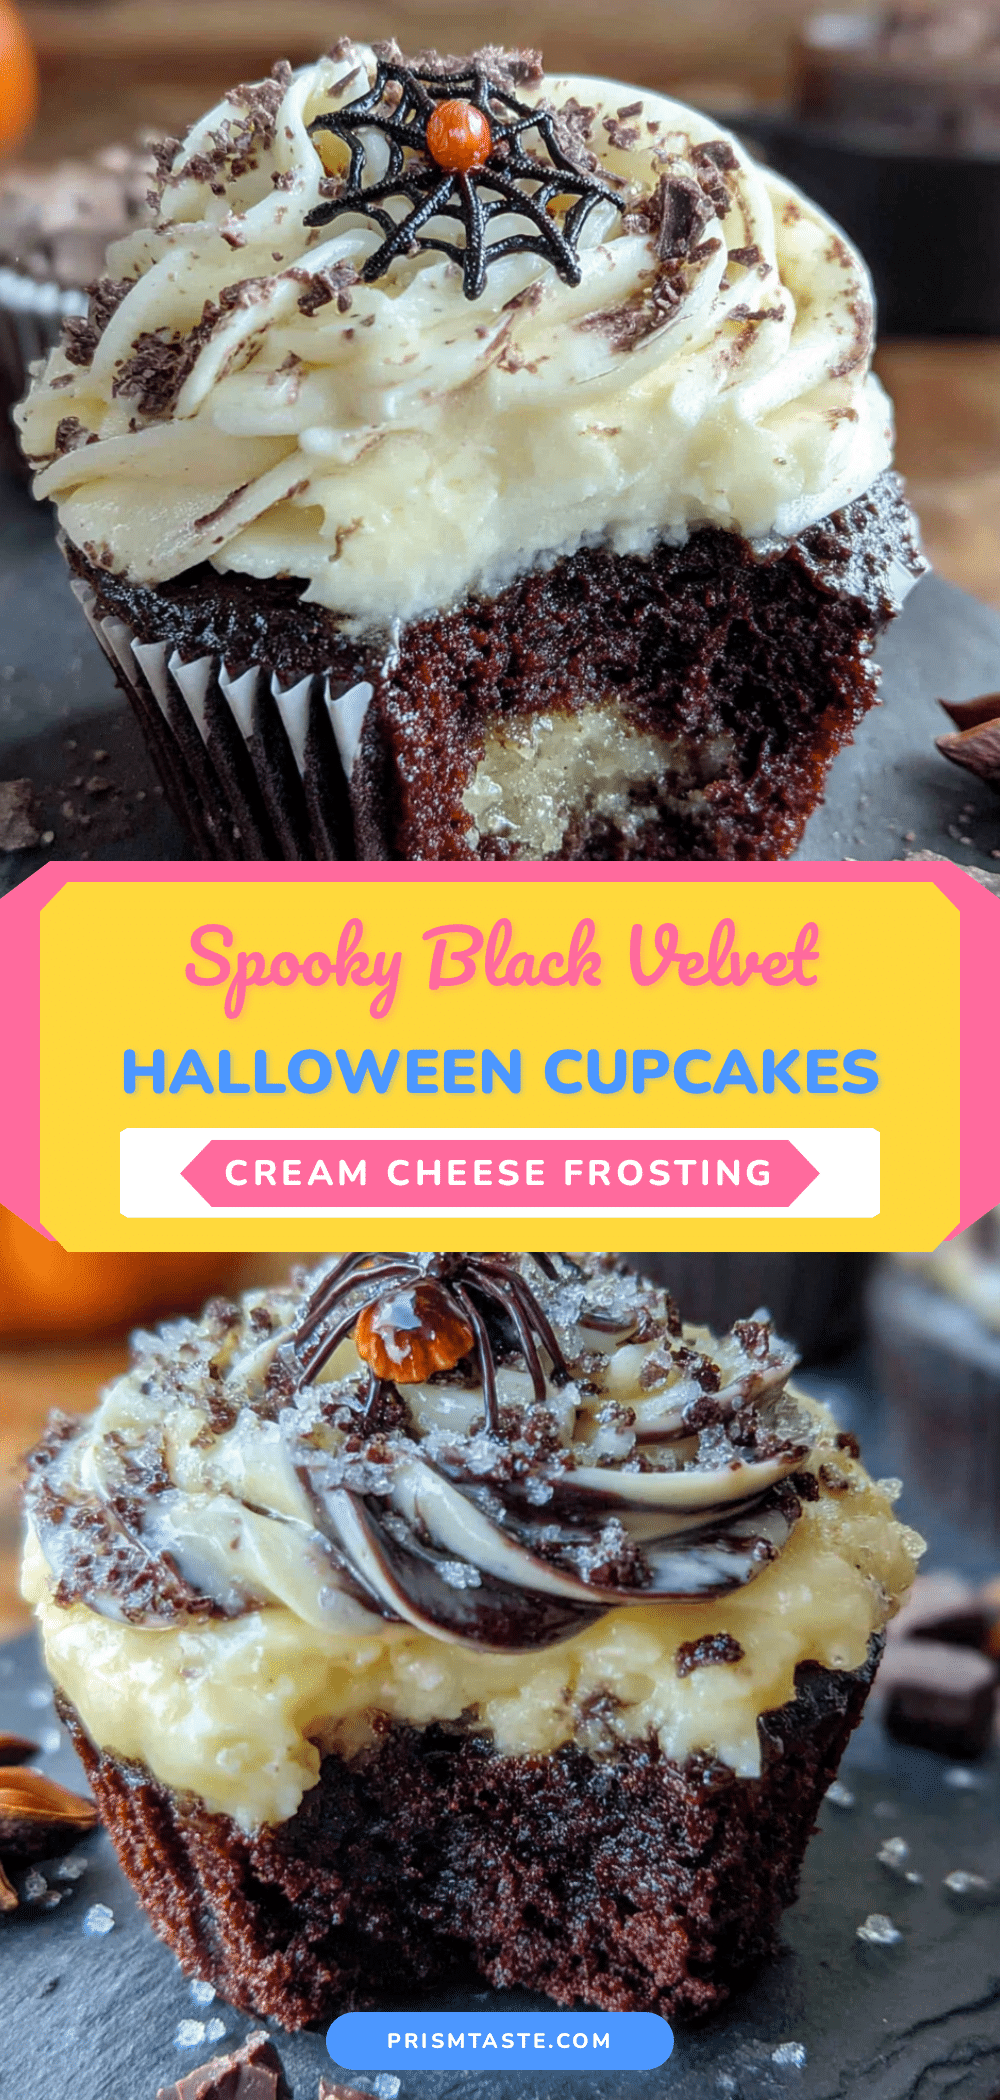
Perfect Black Velvet Halloween Cupcakes with Cream Cheese Frosting
Rich, dark, and naturally colored with black cocoa powder, these tender black velvet cupcakes are topped with tangy cream cheese frosting. A Halloween favorite that’s surprisingly easy to make and always a crowd-pleaser.
- Prep Time: 30 minutes
- Cook Time: 20 minutes
- Total Time: 1 hour
- Yield: 12 cupcakes 1x
- Category: Dessert
- Cuisine: American
Ingredients
- 1/2 cup black cocoa powder (recommended: Rodelle or King Arthur Flour)
- 1 1/2 cups all-purpose flour (spoon and level)
- 1 cup granulated sugar
- 1 teaspoon baking soda
- 1/2 teaspoon salt
- 1/2 cup vegetable oil
- 1 cup buttermilk, room temperature
- 1 large egg, room temperature
- 2 teaspoons vanilla extract
- 1/2 cup hot coffee, freshly brewed
- 8 ounces cream cheese, softened (full-fat)
- 1/2 cup unsalted butter, softened
- 3 to 4 cups powdered sugar, sifted
- 1 teaspoon vanilla extract
- Pinch of salt
Instructions
- Preheat oven to 350°F (175°C). Line a 12-cup muffin tin with paper liners.
- In a large bowl, whisk together flour, black cocoa powder, sugar, baking soda, and salt until no lumps remain.
- In a medium bowl, whisk together vegetable oil, buttermilk, egg, and vanilla extract until smooth.
- Pour wet ingredients into dry ingredients. Stir gently with a spatula until just combined (a few lumps are okay).
- Slowly pour in hot coffee while stirring gently. Batter will become very thin.
- Divide batter evenly among the 12 liners, filling each about two-thirds full.
- Bake for 18 to 22 minutes, or until a toothpick inserted in center comes out clean or with a few moist crumbs.
- Let cupcakes cool in pan for 5 minutes, then transfer to a cooling rack to cool completely.
- For frosting: Beat softened cream cheese and butter together until smooth and creamy, about 2 minutes. Add vanilla and salt.
- Gradually add powdered sugar, one cup at a time, beating on low speed. Beat until light and fluffy, about 3 minutes total.
- Once cupcakes are completely cool, pipe or spread frosting on top. Add decorations immediately.
Notes
Black cocoa powder is key for natural dark color without food coloring. Use room temperature ingredients for best results. Don’t overmix batter. Cupcakes taste even better the next day. For gluten-free, use 1:1 gluten-free baking flour. For dairy-free, use dairy-free butter and cream cheese, and substitute buttermilk with almond milk mixed with 1 tablespoon lemon juice.
Nutrition
- Serving Size: 1 cupcake
- Calories: 380
- Sugar: 32
- Fat: 22
- Carbohydrates: 45
- Protein: 5
Keywords: black velvet cupcakes, Halloween cupcakes, black cocoa cupcakes, cream cheese frosting, Halloween dessert, black velvet cake, spooky cupcakes


