I’m not supposed to play favorites with recipes, but honestly, this one is different. After testing it for a neighbor’s birthday potluck last fall, I realized something: it’s not just another dirt pudding. It’s the one people text me about the next day, asking for the recipe. I’ve made it for game nights, backyard barbecues, and even a casual dinner party where I needed a dessert that wouldn’t stress me out. It’s quick, it’s forgiving, and it disappears fast.
- Quick & Easy : Comes together in under 10 minutes with no baking required. Perfect for last-minute cravings or when guests arrive early.
- Simple Ingredients : You probably already have cream cheese, pudding mix, and Oreos in your pantry. No fancy grocery trips needed.
- Perfect for Parties : Great for potlucks, birthday parties, holiday gatherings, or any time you want to impress without spending hours in the kitchen.
- Crowd-Pleaser : Always gets rave reviews from kids and adults alike. The creamy texture and crunchy cookie topping are irresistible.
- Unbelievably Delicious : The combination of silky pudding, tangy cream cheese, and crushed Oreos is next-level comfort food. It’s the kind of dessert that makes you close your eyes after the first bite.
What makes this recipe different from the rest? It’s the balance. The cream cheese adds a subtle tang that cuts through the sweetness, and the crushed Oreos provide just the right crunch. I’ve tried variations with whipped topping only, but they always feel flat. This version has depth. It’s comfort food reimagined—faster, simpler, but with the same soul-soothing satisfaction. Perfect for impressing guests without stress, or turning a simple meal into something memorable.
What Ingredients You Will Need
This recipe uses simple, wholesome ingredients to deliver bold flavor and satisfying texture without the fuss. Most are pantry staples, so you likely have everything on hand. Here’s what you’ll need:
- 1 (3.4 oz) box instant vanilla pudding mix – I recommend Jell-O brand for best texture. It sets up perfectly and stays creamy.
- 2 cups cold milk – Whole milk works best for richness, but 2% is fine. Use oat milk for a dairy-free option.
- 1 (8 oz) block cream cheese, softened – Let it sit at room temperature for 30 minutes before mixing. This prevents lumps.
- 1/2 cup unsalted butter, softened – Adds richness and helps the cream cheese blend smoothly. Salted butter works too—just skip the salt.
- 1 cup powdered sugar – Sifted if possible. This sweetens the cream cheese layer without graininess.
- 1 (8 oz) container frozen whipped topping, thawed – Cool Whip is my go-to. It keeps the texture light and airy.
- 1 (14.3 oz) package Oreo cookies – Regular or Double Stuf both work. You’ll crush them for the “dirt” layer.
- Optional: gummy worms – For a fun garnish. Kids love them, and they add a playful touch for parties.
Ingredient Selection Tips: Look for firm, small-curd cream cheese for best texture. If you’re using a different brand of pudding mix, check the package—some require different milk amounts. For a richer flavor, try using chocolate pudding mix instead of vanilla. And if you’re feeling fancy, crush the Oreos in a bag with a rolling pin for uneven chunks—it looks more rustic and homemade.
Equipment Needed
You don’t need much for this recipe, which is part of its charm. Here’s what I use:
- Large mixing bowl – Any bowl works, but a wide one makes mixing easier.
- Electric hand mixer or stand mixer – A hand mixer is perfect. If you don’t have one, a whisk and some elbow grease will do, but it takes longer.
- Medium bowl – For mixing the pudding.
- Whisk – For combining the pudding mix and milk.
- Food processor or zip-top bag and rolling pin – For crushing the Oreos. I prefer the bag method—it’s less cleanup and gives you control over chunk size.
- Small cups or serving dishes – Clear plastic cups are fun for parties, but small mason jars, ramekins, or even a single 9×13 dish work great.
- Spatula – For scraping every last bit of that cream cheese mixture.
Budget-Friendly Options: If you don’t have a hand mixer, you can beat the cream cheese and butter with a wooden spoon until smooth—it just takes a few extra minutes. For the Oreos, skip the food processor and use a bag and rolling pin. It’s actually more satisfying.
Preparation Method
Ready to make the best dirt pudding of your life? Follow these steps, and you’ll have a crowd-pleasing dessert in no time. I’ve made this dozens of times, so trust me on the details.
- Crush the Oreos. Place the entire package of Oreos (cream filling included) in a large zip-top bag. Seal it, then crush with a rolling pin until you have a mix of fine crumbs and small chunks. You want texture, not dust. Set aside. (Pro tip: Do this first so the crumbs are ready when you need them.)
- Make the pudding. In a medium bowl, whisk together the instant vanilla pudding mix and 2 cups cold milk. Whisk for about 2 minutes until thickened. Set aside to set while you work on the cream cheese layer. It should be thick but still pourable.
- Beat the cream cheese mixture. In a large mixing bowl, beat the softened cream cheese and unsalted butter together with an electric hand mixer on medium speed until smooth and creamy—about 2 minutes. Scrape down the sides of the bowl with a spatula. Add the powdered sugar and beat until combined, about 1 minute. The mixture should be light and fluffy.
- Fold in the whipped topping. Add the thawed whipped topping to the cream cheese mixture. Use a spatula to fold it in gently until no white streaks remain. Be careful not to overmix—you want it airy. This is the base that makes the dessert so creamy.
- Combine with pudding. Pour the prepared pudding into the cream cheese mixture. Fold together until just combined. The final mixture should be smooth, thick, and a pale tan color. Taste it—I dare you not to eat a spoonful.
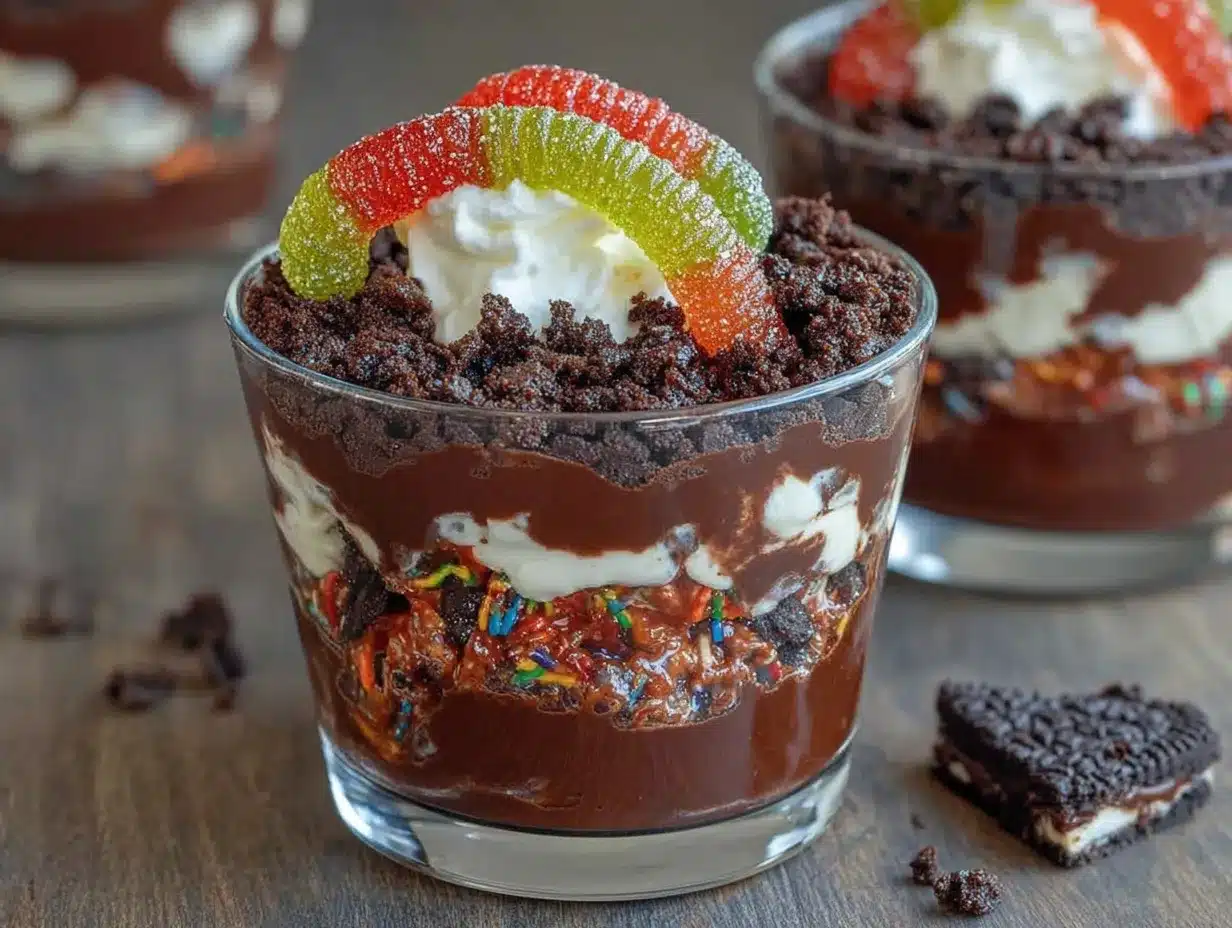
- Layer the cups. Grab your serving cups. Start with a layer of crushed Oreos at the bottom—about 1-2 tablespoons per cup. Then add a generous layer of the pudding mixture (about 1/4 cup). Repeat with another layer of Oreos and another layer of pudding. End with a final sprinkle of Oreo crumbs on top. This creates the “dirt” effect.
- Chill (optional but recommended). Refrigerate the cups for at least 30 minutes before serving. This helps the layers set and the flavors meld. If you’re in a rush, you can serve immediately, but the texture is better after chilling.
- Garnish and serve. Just before serving, add a few gummy worms poking out of the “dirt” for a fun presentation. It’s a guaranteed conversation starter.
Sensory Cues: When you fold the whipped topping, it should feel light and cloud-like. The pudding mixture should be thick enough that it doesn’t run when spooned. The Oreo crumbs should smell chocolatey and slightly sweet. If the cream cheese mixture looks lumpy, your cream cheese wasn’t soft enough—next time, let it sit out longer.
Cooking Tips & Techniques
I’ve learned a few things the hard way so you don’t have to. Here are my best tips for perfect dirt pudding every time:
- Soften your cream cheese properly. This is the most common mistake. If it’s cold, you’ll get lumps. Leave it on the counter for 30 minutes, or microwave it in 10-second bursts until it’s soft to the touch but not warm.
- Don’t overmix the whipped topping. Fold it gently. Overmixing deflates the air, and you’ll end up with a dense, heavy dessert. You want it light and mousse-like.
- Crush Oreos unevenly. A mix of fine crumbs and small chunks gives the best texture. Fine crumbs alone look like mud, and big chunks are hard to eat. Aim for pea-sized pieces.
- Chill for at least 30 minutes. I know it’s hard to wait, but this step is crucial. The layers set, and the flavors deepen. I once served it immediately, and it was runny. Never again.
- Use clear cups for presentation. The layers are part of the fun. Clear plastic cups or small mason jars let everyone see the dirt effect. It’s a small touch that makes a big difference at parties.
- Make it ahead of time. This dessert actually gets better after a few hours in the fridge. The Oreo crumbs soften slightly, and the pudding firms up. Perfect for prepping before guests arrive.
My Biggest Failure: The first time I made this, I used fat-free cream cheese and skim milk. It was watery and sad. Don’t do that. Full-fat ingredients are non-negotiable here—they provide the richness that makes this dessert crave-worthy.
Variations & Adaptations
This recipe is endlessly customizable. Here are some of my favorite twists:
- Chocolate Lover’s Version: Use chocolate pudding mix instead of vanilla. It doubles down on the chocolate flavor and pairs beautifully with the Oreos. I’ve made this for a friend’s birthday, and it was a hit.
- Peanut Butter Dirt Pudding: Add 1/2 cup creamy peanut butter to the cream cheese mixture before folding in the whipped topping. It adds a salty-sweet depth that’s incredible. Use chocolate pudding mix for a Reese’s-inspired treat.
- Dairy-Free Adaptation: Use dairy-free cream cheese, vegan butter, oat milk, and a dairy-free whipped topping. The texture is slightly less rich, but it still tastes amazing. I’ve served this at a potluck where half the guests were dairy-free, and no one complained.
- Mint Oreo Version: Use Mint Oreos instead of regular. The cool mint flavor pairs perfectly with the creamy pudding. Garnish with a sprig of mint for a fresh look.
- Single-Serving Adaptation: Make this in a 9×13 dish instead of individual cups. Layer the Oreos and pudding mixture in the dish, then chill. Scoop into bowls for serving. It’s faster and works well for larger crowds.
Seasonal Twist: In the fall, add a teaspoon of pumpkin pie spice to the cream cheese mixture. It gives the dessert a warm, cozy flavor that’s perfect for Thanksgiving or Halloween parties.
Serving & Storage Suggestions
This dessert is best served cold, straight from the fridge. The texture is creamy, the Oreo crumbs are slightly softened, and the flavors are perfectly balanced. Here’s how to serve and store it:
- Serving Temperature: Serve chilled. If you’ve made it ahead, let it sit at room temperature for 5 minutes before serving—it softens slightly without getting runny.
- Presentation Tips: Use clear cups to show off the layers. Add gummy worms on top for a playful touch. For a more elegant look, top with a dollop of whipped cream and a single Oreo half.
- Complementary Dishes: Serve alongside fresh fruit like strawberries or raspberries—they cut through the richness. A cup of coffee or cold milk is the perfect beverage pairing.
- Storage Instructions: Cover the cups with plastic wrap or a lid and refrigerate for up to 3 days. The Oreo crumbs will soften over time, but the flavor stays great.
- Freezing Tips: You can freeze the pudding mixture (without the Oreo layers) for up to 2 months. Thaw in the fridge overnight, then layer with fresh crushed Oreos before serving. I’ve done this for unexpected guests, and it works perfectly.
- Reheating: This dessert is served cold, so no reheating needed. If you want to soften the Oreo crumbs, let it sit at room temperature for 10 minutes.
Flavor Development: The flavors deepen after a few hours in the fridge. The cream cheese tang mellows, and the Oreo crumbs meld with the pudding. It’s even better the next day—if it lasts that long.
Nutritional Information & Benefits
Let’s be honest: this is a treat, not a health food. But knowing what’s in it helps you enjoy it mindfully. Here’s the estimated nutritional breakdown per serving (based on 12 servings):
| Nutrient | Amount Per Serving |
|---|---|
| Calories | 380 |
| Total Fat | 22g |
| Saturated Fat | 12g |
| Cholesterol | 45mg |
| Sodium | 320mg |
| Total Carbohydrates | 42g |
| Dietary Fiber | 1g |
| Sugars | 30g |
| Protein | 5g |
Health Benefits of Key Ingredients: Oreos contain cocoa, which is rich in antioxidants. Cream cheese provides calcium and protein. And milk is a good source of vitamin D and calcium. Of course, these benefits come with sugar and fat, so enjoy in moderation.
Dietary Considerations: This recipe contains gluten, dairy, and eggs (in the Oreos). For a gluten-free version, use gluten-free chocolate sandwich cookies. For a dairy-free version, follow the adaptation above.
My Wellness Perspective: I believe in balance. This dessert is meant for celebrations and special occasions. I don’t stress about the numbers—I focus on the joy of sharing something delicious with people I love.
Frequently Asked Questions
Can I make this dirt pudding ahead of time?
Absolutely! In fact, it’s better when made a few hours ahead. Assemble the cups, cover them, and refrigerate for up to 24 hours. The flavors meld beautifully, and the texture stays creamy.
Can I use sugar-free pudding mix?
Yes, you can use sugar-free instant pudding mix. It works the same way. The overall sweetness will be slightly less, so you might want to add an extra tablespoon of powdered sugar to the cream cheese mixture.
How do I crush Oreos without a food processor?
Place the Oreos in a large zip-top bag and crush them with a rolling pin, a heavy skillet, or even your hands. It’s quick, messy in a fun way, and gives you control over the chunk size.
Can I use a different type of cookie?
Yes! Chocolate wafer cookies, graham crackers, or even vanilla wafers work well. Each gives a slightly different flavor and texture. I’ve used gluten-free chocolate cookies with great results.
How long will these dirt pudding cups last in the fridge?
They’ll keep for up to 3 days in an airtight container in the refrigerator. The Oreo crumbs will soften over time, but the flavor remains delicious. I don’t recommend freezing them after assembly—the texture changes.
Conclusion
This easy Oreo dirt pudding recipe is the kind of dessert that makes you look like a hero with almost no effort. It’s creamy, crunchy, and endlessly customizable—perfect for parties, potlucks, or any time you need a crowd-pleaser. I’ve made it for birthdays, barbecues, and lazy Sunday afternoons, and it never fails to bring smiles.
I encourage you to make it your own. Swap the pudding flavor, try different cookies, or add your favorite toppings. The beauty of this recipe is its flexibility. And when you do make it, I’d love to hear how it turns out. Drop a comment below, share your twist, or tag me in your photos. Let’s keep the dessert conversation going!
So go ahead—grab your Oreos, your cream cheese, and your favorite serving cups. This 10-minute dessert is about to become your new secret weapon. Happy cooking, and remember: the best recipes are the ones shared with people you love.
Pin This Recipe!

Easy Oreo Dirt Pudding Cups: The Best 10-Minute Party Dessert

This quick and easy no-bake dessert combines creamy pudding, tangy cream cheese, and crunchy Oreo crumbs for a crowd-pleasing treat that comes together in under 10 minutes. Perfect for parties, potlucks, or any occasion where you want to impress without stress.
- Prep Time: 10 minutes
- Cook Time: 0 minutes
- Total Time: 40 minutes (including chilling)
- Yield: 12 servings 1x
- Category: Dessert
- Cuisine: American
Ingredients
- 1 (3.4 oz) box instant vanilla pudding mix
- 2 cups cold milk
- 1 (8 oz) block cream cheese, softened
- 1/2 cup unsalted butter, softened
- 1 cup powdered sugar
- 1 (8 oz) container frozen whipped topping, thawed
- 1 (14.3 oz) package Oreo cookies
- Optional: gummy worms for garnish
Instructions
- Crush the Oreos: Place the entire package of Oreos (cream filling included) in a large zip-top bag. Seal it, then crush with a rolling pin until you have a mix of fine crumbs and small chunks. Set aside.
- Make the pudding: In a medium bowl, whisk together the instant vanilla pudding mix and 2 cups cold milk. Whisk for about 2 minutes until thickened. Set aside to set.
- Beat the cream cheese mixture: In a large mixing bowl, beat the softened cream cheese and unsalted butter together with an electric hand mixer on medium speed until smooth and creamy—about 2 minutes. Scrape down the sides. Add the powdered sugar and beat until combined, about 1 minute.
- Fold in the whipped topping: Add the thawed whipped topping to the cream cheese mixture. Use a spatula to fold it in gently until no white streaks remain.
- Combine with pudding: Pour the prepared pudding into the cream cheese mixture. Fold together until just combined. The mixture should be smooth, thick, and a pale tan color.
- Layer the cups: In serving cups, start with a layer of crushed Oreos (about 1-2 tablespoons). Add a generous layer of the pudding mixture (about 1/4 cup). Repeat with another layer of Oreos and another layer of pudding. End with a final sprinkle of Oreo crumbs on top.
- Chill (optional but recommended): Refrigerate the cups for at least 30 minutes before serving to help the layers set and flavors meld.
- Garnish and serve: Just before serving, add a few gummy worms poking out of the ‘dirt’ for a fun presentation.
Notes
For best results, soften cream cheese at room temperature for 30 minutes to avoid lumps. Crush Oreos unevenly for a mix of fine crumbs and small chunks. Chilling for at least 30 minutes is recommended for better texture and flavor melding. Full-fat ingredients are key for richness. This dessert can be made ahead and stored in the refrigerator for up to 3 days.
Nutrition
- Serving Size: 1 serving (1 cup)
- Calories: 380
- Sugar: 30
- Sodium: 320
- Fat: 22
- Saturated Fat: 12
- Carbohydrates: 42
- Fiber: 1
- Protein: 5
Keywords: Oreo dirt pudding, no-bake dessert, easy dessert, party dessert, 10-minute dessert, Oreo dessert, pudding cups


