This was supposed to be a roasted carrot situation. You know, the kind where you toss them in oil, sprinkle them with salt, and let the oven do all the work while you prep the rest of dinner. Except my oven had other plans that Tuesday night. It decided to heat unevenly, burning the edges of one tray while barely warming another. I was already running late, my kids were circling the kitchen asking when dinner would be ready, and honestly, I was this close to just serving them raw carrot sticks with ranch dressing. That’s when I grabbed the wrong pot — a skillet instead of a baking sheet — and threw the carrots in with some butter I had sitting on the counter. The maple syrup was a last-minute addition because I spotted it in the fridge door and thought, why not? What came out of that skillet was nothing like the plan. And it was better.
I mean, let me tell you, I stood there staring at these glistening, caramelized carrots with little thyme leaves clinging to them like they were meant to be there all along. The whole thing took maybe 15 minutes from start to finish. Fifteen minutes for a side dish that looked like I’d spent an hour fussing over it. My neighbor Linda texted me later that week asking for the recipe because her kids actually ate their vegetables for once. Maybe you’ve been there — standing in your kitchen, dinner falling apart, wondering why you even bother. That’s when this recipe found me. It’s become my go-to for those nights when I need something fast that still feels like I tried.
Why You’ll Love This Recipe
Let’s be real for a second. Side dishes can be boring. They’re often an afterthought, something you throw together while focusing on the main event. But these maple glazed carrots? They steal the show every single time. I’ve brought them to potlucks, served them alongside roasted chicken, and even eaten them straight from the skillet when nobody was looking. Here’s why they work so well:
- Quick & Easy: From start to finish, this recipe takes about 15 minutes. No preheating, no complicated techniques — just one skillet and a few ingredients.
- Simple Ingredients: You probably have most of these in your kitchen right now. Carrots, butter, maple syrup, thyme. That’s it. No fancy grocery trips required.
- Perfect for Busy Weeknights: When you’re tired and hungry, the last thing you want is a recipe with 47 steps. This one respects your time and your energy.
- Crowd-Pleaser: I’ve served these to picky kids, vegetable-skeptical adults, and everyone in between. They disappear fast. The sweetness from the maple syrup and the savory thyme creates a combo that’s hard to resist.
- Unbelievably Delicious: The carrots get tender on the inside with these gorgeous caramelized edges. The glaze coats every piece in a sticky, herby coating that makes you want to lick the spoon.
What makes this recipe different from all the other glazed carrot recipes out there? It’s the technique. Instead of boiling the carrots first or roasting them for ages, you cook them directly in the butter-maple mixture. This means they absorb all that flavor from the very beginning. No bland carrots here. Plus, the thyme adds this subtle earthiness that balances the sweetness perfectly. It’s not just another vegetable side — it’s the one people ask for by name.
Honestly, this recipe is comfort food reimagined. It’s faster than takeout, healthier than most sides, and has that soul-soothing satisfaction of something made with care. Whether you’re impressing guests or just trying to get dinner on the table without a meltdown, these carrots deliver.
What Ingredients You Will Need
This recipe uses simple, wholesome ingredients to deliver bold flavor without the fuss. Most of these are pantry staples or easy to find at any grocery store. Let’s break down each one so you know exactly what to look for.
- Carrots (1 pound or about 450g): You can use regular whole carrots or pre-peeled baby carrots. I prefer whole carrots because they’re cheaper and I can cut them into uniform pieces. Look for firm, bright orange carrots without any soft spots. If you’re in a hurry, baby carrots work just fine — they’ll cook a little faster since they’re smaller.
- Unsalted Butter (3 tablespoons or 42g): Butter adds richness and helps the glaze stick to the carrots. I use unsalted so I can control the salt level. If you only have salted butter, just skip the extra salt I mention later. My personal favorite is Kerrygold for its creaminess, but any good butter works.
- Pure Maple Syrup (2 tablespoons or 30ml): This is the star of the show. Real maple syrup, not pancake syrup. The difference is huge — real syrup has this complex, woodsy sweetness that fake stuff just can’t match. Grade A dark amber is great for cooking because its flavor stands up to the butter and thyme. If you’re out of maple syrup, honey works as a substitute, but the flavor will be different.
- Fresh Thyme (1 tablespoon leaves, or about 4-5 sprigs): Fresh thyme is key here. Dried thyme just doesn’t have the same bright, lemony notes. You’ll strip the leaves off the stems and sprinkle them in. If you absolutely can’t find fresh, use 1 teaspoon of dried thyme, but add it earlier so it has time to rehydrate.
- Salt (½ teaspoon or 3g): A little salt enhances all the flavors and balances the sweetness. I use fine sea salt. Start with ½ teaspoon and adjust at the end.
- Black Pepper (¼ teaspoon or 1g, freshly ground): Freshly ground pepper adds a subtle warmth that complements the thyme. Skip the pre-ground stuff if you can — it’s worth the extra few seconds.
- Optional Garnish: Fresh parsley or extra thyme sprigs: This is purely for looks, but a little green on top makes the dish pop. I sometimes add a sprinkle of flaky sea salt at the end for a salty crunch.
One thing I want to mention about the carrots — don’t peel them if you don’t want to. Seriously. If you’re using organic carrots and you scrub them well, the peel is perfectly fine to eat. It adds a bit of texture and saves you a step. On those nights when I’m really short on time, I just give them a good scrub under running water and slice them up. Nobody has ever complained.
For the maple syrup, I recommend buying it from a farmer’s market if you can. The flavor is so much more vibrant. But honestly, the stuff from the grocery store works perfectly fine. Just make sure the label says “pure maple syrup” and not “pancake syrup” or “maple-flavored syrup.” That’s corn syrup with artificial flavoring, and it will not give you the same result.
Equipment Needed
You don’t need a lot of fancy equipment for this recipe, which is part of why I love it so much. Here’s what you’ll need:
- Large Skillet or Frying Pan (10-12 inches): A wide skillet gives the carrots room to cook evenly. I use a stainless steel or cast iron skillet because they create better browning. Nonstick works too, but you won’t get as many caramelized bits. If you don’t have a skillet, a large sauté pan with straight sides will work.
- Sharp Knife and Cutting Board: You’ll need to slice the carrots. A sharp chef’s knife makes this job easy and safe. Dull knives are actually more dangerous — they slip more easily.
- Wooden Spoon or Silicone Spatula: For stirring the carrots as they cook. A wooden spoon is my go-to because it won’t scratch your pan.
- Measuring Spoons: For the maple syrup, salt, and pepper. Eyeballing works for some things, but for this recipe, the balance of sweet and savory matters.
- Vegetable Peeler (optional): Only if you decide to peel your carrots. I often skip this step to save time.
If you don’t have a skillet, you can use a large saucepan. The carrots might take a minute or two longer to cook because they’ll be stacked a bit higher. Just stir them more often so they cook evenly. I’ve also made this in a nonstick pan when I was traveling and staying at a rental house — it worked fine, though the glaze didn’t get quite as sticky and caramelized. Still delicious, though.
A note on the skillet: if you’re using cast iron, make sure it’s well-seasoned. Otherwise, the maple syrup might stick and burn. Stainless steel is more forgiving for this particular recipe. My favorite pan for this is a 12-inch stainless steel skillet I got at a restaurant supply store for like 30 bucks. It’s been going strong for years.
Preparation Method
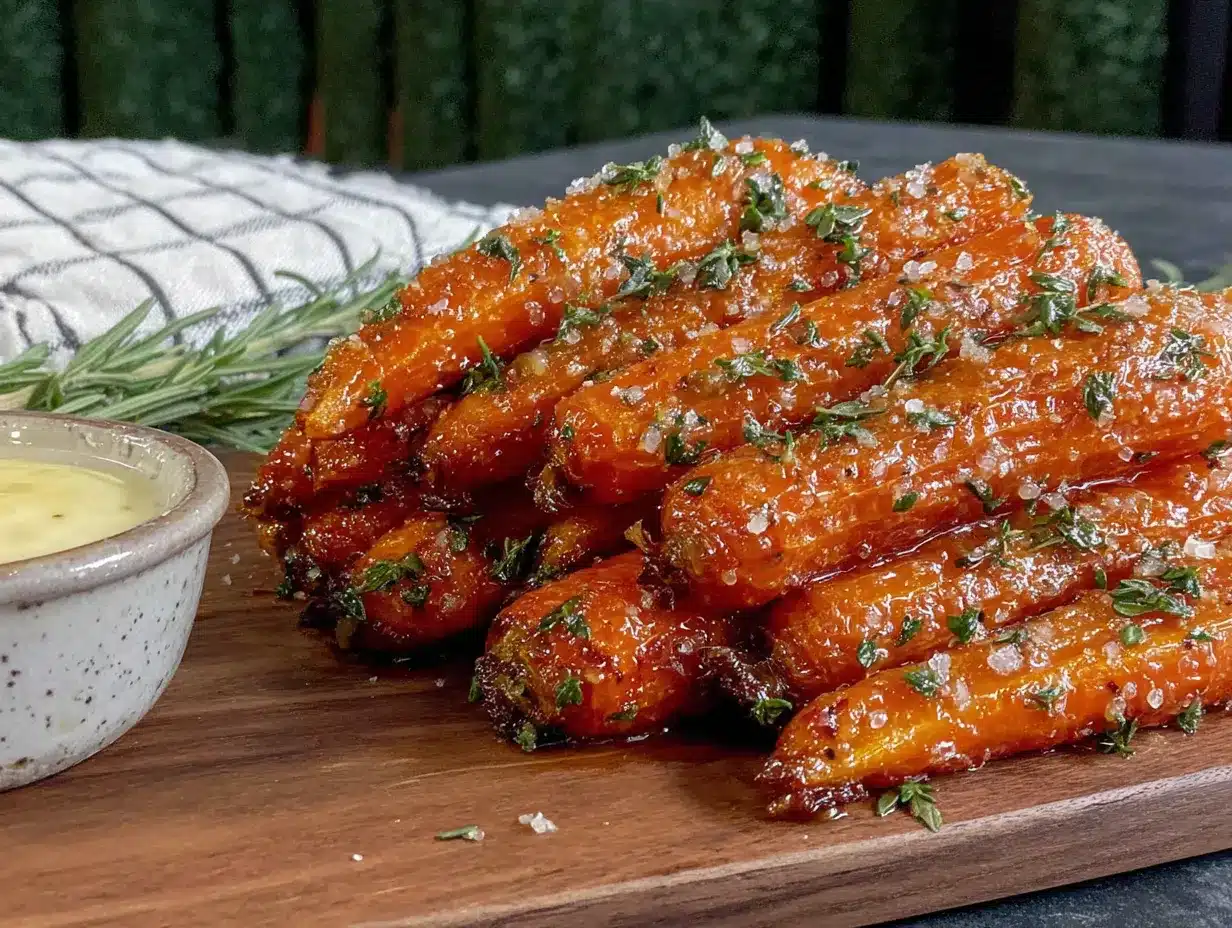
Alright, let’s get cooking. This whole process takes about 15 minutes from the moment you start slicing to the moment you’re serving. I’ll walk you through each step with all the little details I’ve learned from making this dozens of times.
- Prep the carrots (2-3 minutes): Start by washing your carrots thoroughly. If you’re using whole carrots, trim off the tops and the skinny tip. Cut them on a diagonal into pieces about ¼-inch thick. Why diagonal? It exposes more surface area to the pan, which means more caramelization. If you’re using baby carrots, you can leave them whole or cut them in half lengthwise if they’re thick. Try to make the pieces roughly the same size so they cook evenly. I’ve definitely made the mistake of cutting some thick and some thin — the thin ones turn to mush while the thick ones stay crunchy.
- Melt the butter (1 minute): Place your skillet over medium heat and add the butter. Let it melt slowly — you don’t want it to brown. Swirl the pan to coat the bottom. The butter should be fully melted and just starting to bubble. If it starts to turn brown, your heat is too high. Turn it down a notch.
- Add the carrots and season (30 seconds): Toss the sliced carrots into the skillet. Sprinkle with the salt and pepper. Give everything a good stir with your wooden spoon so the carrots are coated in butter. The salt will start drawing out some moisture from the carrots, which helps them cook.
- Cook the carrots (5-6 minutes): Let the carrots cook without stirring for about 2 minutes. This is important — you want them to get some color on the bottom. After 2 minutes, stir them and let them cook another 2 minutes without stirring. Repeat this process. You’re looking for the carrots to become tender but still have a little bite. A fork should slide in with some resistance, not go right through. The carrots will start to look slightly translucent at the edges and develop golden-brown spots.
- Add the maple syrup (1 minute): Drizzle the maple syrup over the carrots. Stir everything together so the syrup coats every piece. The heat will make the syrup bubble and thicken. Let it cook for about 1 minute, stirring constantly. You’ll see the glaze start to cling to the carrots. The kitchen will smell amazing at this point — sweet and buttery with that herbal thyme note coming through.
- Add the thyme (30 seconds): Sprinkle the fresh thyme leaves over the carrots. Stir to distribute. Cook for another 30 seconds, just until the thyme becomes fragrant. Fresh thyme is delicate — if you cook it too long, it can turn bitter. You want to add it at the very end so it stays bright and fresh.
- Check for doneness and adjust seasoning (30 seconds): Taste a carrot. It should be tender but not mushy, with a sweet, buttery glaze. Add more salt or pepper if needed. If the glaze seems too thin, let it cook another 30 seconds. If it’s too thick, add a splash of water or chicken broth and stir.
- Serve immediately (0 minutes): Transfer the carrots to a serving dish. Spoon any remaining glaze from the pan over the top. Garnish with a few extra thyme sprigs or a sprinkle of fresh parsley if you’re feeling fancy. Serve hot.
One thing I’ve learned the hard way — don’t walk away from the pan once you add the maple syrup. That stuff goes from perfectly glazed to burnt in about 30 seconds. I learned this while answering the phone once, and let me tell you, burnt maple syrup smells like regret. Stay close, keep stirring, and you’ll be fine.
Cooking Tips & Techniques
After making these carrots more times than I can count, I’ve picked up a few tricks that make the process smoother and the results better. Let me share what I’ve learned.
Cut your carrots evenly. This is the single most important tip I can give you. When your carrot pieces are all the same size, they cook at the same rate. No mushy pieces, no crunchy pieces. Take the extra 30 seconds to make them uniform. Your future self will thank you.
Don’t crowd the pan. If you’re making a double batch, use two skillets or cook in batches. When the pan is too full, the carrots steam instead of caramelizing. You want them to have direct contact with the hot surface so they develop those beautiful golden-brown edges. Trust me on this — soggy glazed carrots are sad glazed carrots.
Use medium heat, not high. I know you’re in a hurry. I get it. But high heat will burn the butter and the maple syrup before the carrots have a chance to cook through. Medium heat gives you that perfect balance — tender carrots with a glossy, caramelized coating. Patience pays off here.
Let the carrots sit between stirs. This is a technique I learned from making stir-fry. If you constantly move the carrots around, they never get a chance to brown. Let them sit for a couple of minutes, then stir. Let them sit again. Those undisturbed moments are where the magic happens.
Save the thyme for the end. I mentioned this earlier, but it bears repeating. Fresh thyme is delicate. If you add it too early, the heat destroys its flavor and it can turn bitter. Add it in the last 30 seconds of cooking, and you’ll get that bright, herbal note that makes this dish special.
If the glaze is too thin, turn up the heat for 30 seconds. Sometimes, depending on your carrots and how much moisture they release, the glaze can be a bit watery. Just crank the heat to medium-high for 30 seconds while stirring constantly. The excess liquid will evaporate, and the glaze will thicken right up.
I once made the mistake of using salted butter AND adding the full amount of salt. The carrots were so salty they were practically inedible. Now I always use unsalted butter and adjust the salt at the end. Learn from my mistake — you can always add more salt, but you can’t take it out.
Variations & Adaptations
One of the best things about this recipe is how easy it is to adapt. I’ve tried several variations over the years, and they’ve all been delicious in their own way. Here are some of my favorites:
Honey and Rosemary: Swap the maple syrup for honey and the thyme for fresh rosemary. The honey gives a slightly different sweetness — more floral, less woodsy. Rosemary adds a piney, aromatic note that pairs beautifully with the carrots. Use about 1 tablespoon of finely chopped fresh rosemary.
Spicy Maple Glaze: Add a pinch of red pepper flakes or a drizzle of sriracha along with the maple syrup. The heat cuts through the sweetness and adds a nice kick. Start with a small amount — you can always add more, but you can’t take the heat out. I like to add a tiny pinch of cayenne pepper for warmth without visible flakes.
Garlic and Parsley: Add 2-3 minced garlic cloves to the butter about 30 seconds before adding the maple syrup. Cook until fragrant, then proceed with the recipe. Swap the thyme for fresh parsley at the end. The garlic adds a savory depth that makes these carrots feel even more substantial.
Balsamic Glazed Carrots: Replace 1 tablespoon of maple syrup with balsamic vinegar. The acidity balances the sweetness and adds a tangy complexity. This version goes especially well with roasted meats or hearty stews.
Orange and Ginger: Add 1 tablespoon of fresh orange juice and 1 teaspoon of grated ginger along with the maple syrup. The citrus brightens everything up, and the ginger adds a subtle warmth. This is my go-to version in the winter when I need a little sunshine on my plate.
Vegan Version: Substitute the butter with a good-quality vegan butter or coconut oil. I recommend using refined coconut oil so it doesn’t add a coconut flavor. The rest of the recipe stays the same, and it’s just as delicious.
If you’re cooking for someone with a nut allergy, rest assured — this recipe is naturally nut-free. For a lower-sugar option, you can reduce the maple syrup to 1 tablespoon and add a splash of water to help the carrots cook. They won’t be as glazed, but they’ll still be tasty.
Serving & Storage Suggestions
These carrots are best served hot, straight from the skillet. The glaze is at its glossy, sticky best when it’s fresh. But let’s be real — leftovers happen, and they’re still pretty great.
Serving Temperature: Serve these carrots hot or warm. If they cool down too much, the glaze can get thick and sticky. If you need to keep them warm for a dinner party, transfer them to a serving dish and place it in a 200°F oven for up to 30 minutes. Cover loosely with foil so they don’t dry out.
What to Serve With Them: These carrots go with almost everything. I love them alongside roasted chicken, grilled steak, or pan-seared pork chops. They’re also fantastic with holiday meals — Thanksgiving, Easter, Christmas dinner. For a vegetarian meal, serve them with lentil loaf or stuffed acorn squash. They even work as a topping for grain bowls — try them over quinoa with some crumbled feta cheese.
Storage: Store leftover carrots in an airtight container in the refrigerator for up to 4 days. The glaze will thicken as they cool, but that’s okay. To reheat, place them in a skillet over medium heat with a splash of water or chicken broth. Stir until the glaze loosens and the carrots are hot. You can also microwave them in 30-second bursts, but the texture won’t be as nice.
Freezing: I don’t recommend freezing these carrots. The texture of the carrots changes after freezing and thawing — they become watery and mushy. If you absolutely must freeze them, do so in a freezer-safe container for up to 2 months. Thaw in the refrigerator overnight and reheat in a skillet. They won’t be as good as fresh, but they’ll still be edible.
Make-Ahead Tip: You can slice the carrots up to 2 days in advance and store them in a sealed bag in the refrigerator. The actual cooking only takes 15 minutes, so this is a great way to save time on a busy night. You can also make the full recipe a day ahead and reheat gently before serving. The flavors actually meld together nicely overnight.
Nutritional Information & Benefits
Let’s talk about what’s actually in these carrots, beyond the deliciousness. Here’s the approximate nutritional breakdown for one serving (about ⅙ of the recipe):
- Calories: 120
- Total Fat: 6g
- Saturated Fat: 4g
- Carbohydrates: 16g
- Fiber: 3g
- Sugar: 10g
- Protein: 1g
- Sodium: 220mg
- Vitamin A: 380% of the Daily Value
- Vitamin C: 10% of the Daily Value
Carrots are packed with beta-carotene, which your body converts into vitamin A. That’s great for your eyesight, your immune system, and your skin. The butter adds a small amount of vitamin A and healthy fats that help your body absorb the fat-soluble nutrients from the carrots. Maple syrup contains antioxidants and minerals like zinc and manganese, though let’s be honest — you’re eating it for the taste, not the health benefits.
This recipe is naturally gluten-free and nut-free. If you use vegan butter, it’s also dairy-free. The main allergens to watch for are dairy (from the butter) and, if you’re serving it at a gathering, potential cross-contamination from shared utensils.
From a wellness perspective, I love that this recipe makes vegetables feel like a treat. It’s not a health food — it’s a real food that happens to be pretty good for you. The portion control is built in because the carrots are satisfying enough that you don’t need a huge serving.
Conclusion
Look, I’m not going to tell you these maple glazed carrots will change your life. But they might change your mind about side dishes. They’re quick enough for a Tuesday night, fancy enough for a holiday table, and simple enough that you don’t need a culinary degree to pull them off.
What I love most about this recipe is how forgiving it is. You can use baby carrots or whole carrots, fresh thyme or dried (if you’re in a pinch), maple syrup or honey. It adapts to what you have and what you like. That’s the kind of recipe worth keeping in your back pocket.
I’d love to hear how these turn out for you. Did you try a variation? Did your kids actually eat their vegetables? Drop a comment below and let me know. And if you’re looking for another quick side dish, you might enjoy my honey garlic green beans — they use the same skillet technique and are just as fast. Happy cooking, friends!
Frequently Asked Questions
Can I use baby carrots instead of whole carrots?
Absolutely. Baby carrots work great and save you the step of cutting. They might cook a minute or two faster since they’re smaller. Just keep an eye on them and test for doneness early.
Can I make this recipe without butter?
Yes, you can substitute the butter with vegan butter, coconut oil, or even olive oil. Each will give a slightly different flavor. Coconut oil adds a subtle coconut taste, while olive oil makes it more savory.
How do I prevent the maple syrup from burning?
Keep the heat at medium and stir constantly once you add the maple syrup. Don’t walk away from the pan. If you notice the syrup starting to darken too quickly, remove the pan from the heat temporarily.
Can I double this recipe?
You can, but use two skillets or cook in batches. A crowded pan will steam the carrots instead of caramelizing them. If you only have one large skillet, cook the carrots in two batches and combine them at the end.
What can I use instead of fresh thyme?
Dried thyme works in a pinch — use 1 teaspoon instead of 1 tablespoon of fresh. Add it earlier in the cooking process so it has time to rehydrate. Rosemary, oregano, or marjoram are also good substitutes.
Pin This Recipe!
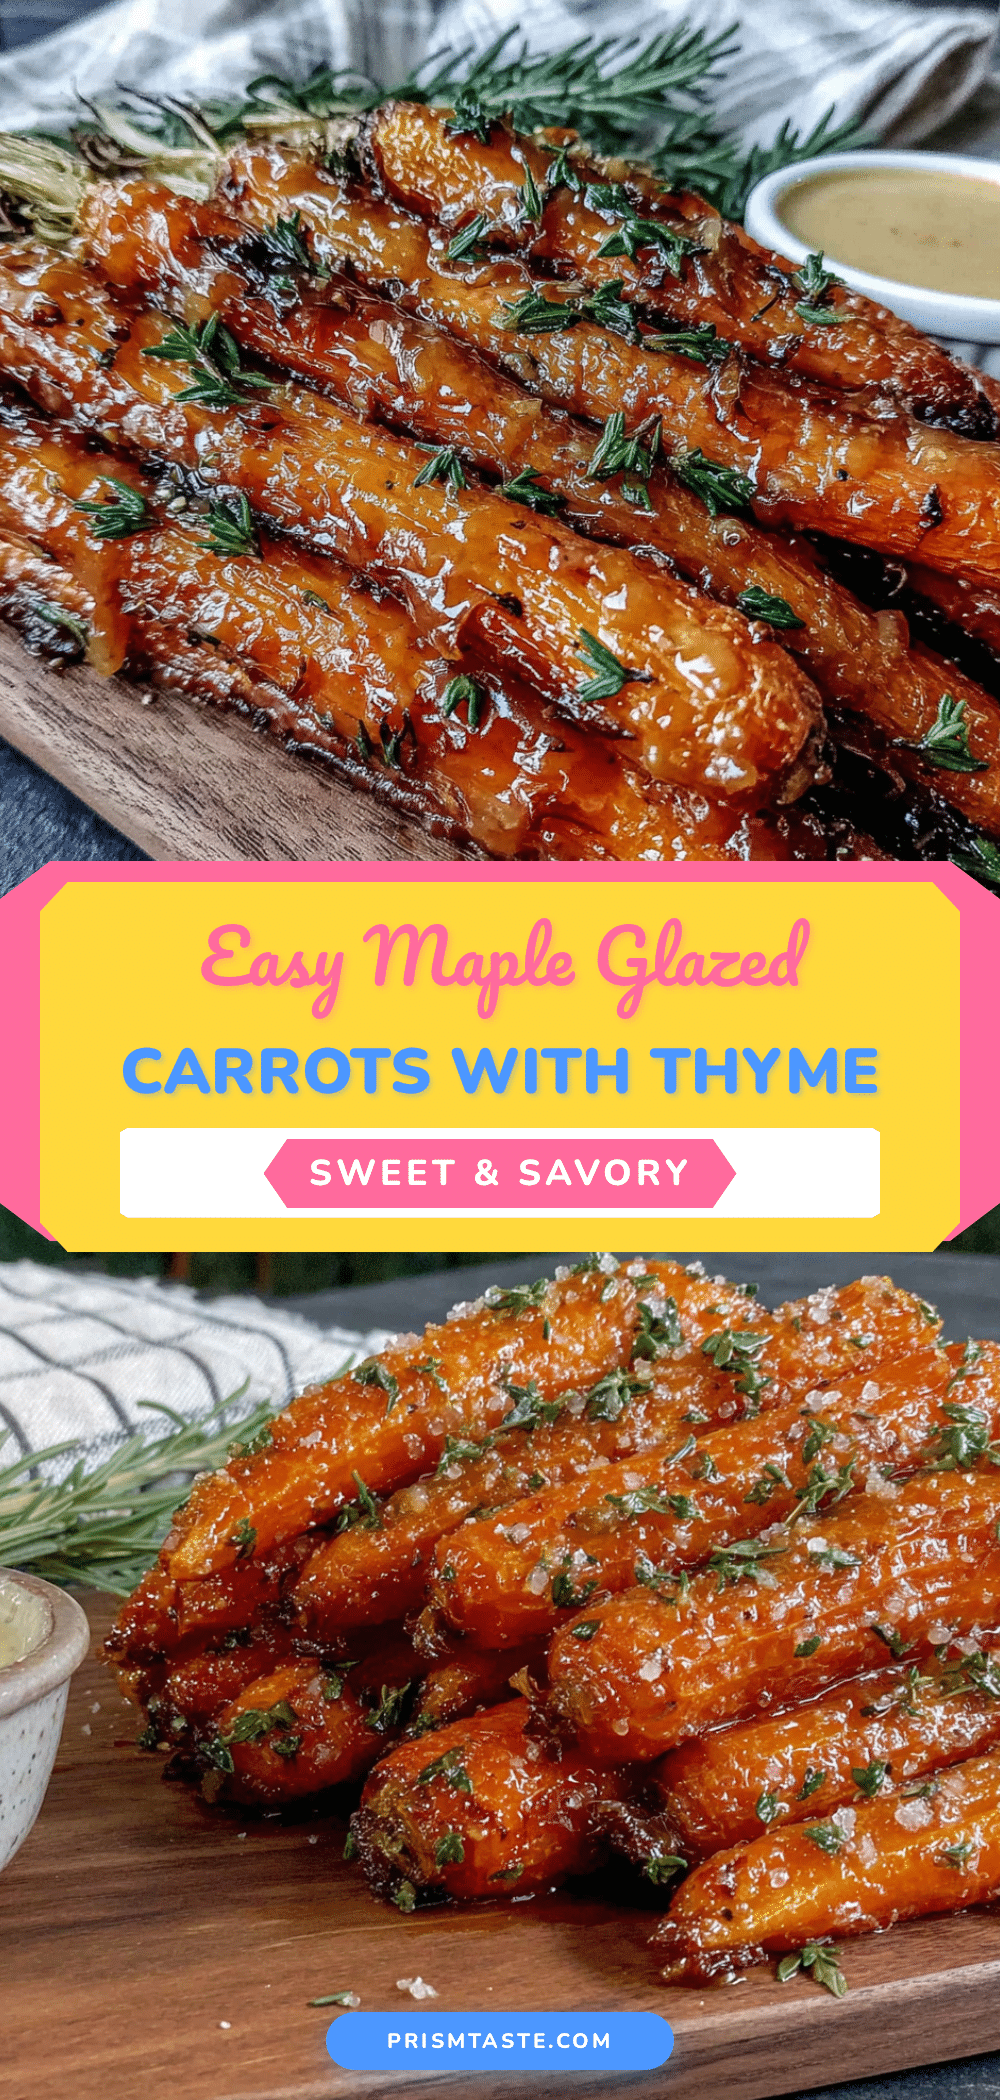
Easy Maple Glazed Carrots with Thyme: Best 15-Minute Side
These maple glazed carrots are a quick and easy side dish that comes together in just 15 minutes. With a sweet and savory glaze made from butter, maple syrup, and fresh thyme, they’re perfect for busy weeknights or holiday dinners.
- Prep Time: 5 minutes
- Cook Time: 10 minutes
- Total Time: 15 minutes
- Yield: 4 servings 1x
- Category: Side Dish
- Cuisine: American
Ingredients
- 1 pound (about 450g) carrots, sliced diagonally ¼-inch thick
- 3 tablespoons (42g) unsalted butter
- 2 tablespoons (30ml) pure maple syrup
- 1 tablespoon fresh thyme leaves (or about 4–5 sprigs)
- ½ teaspoon (3g) fine sea salt
- ¼ teaspoon (1g) freshly ground black pepper
- Optional garnish: fresh parsley or extra thyme sprigs
Instructions
- Prep the carrots: Wash thoroughly. If using whole carrots, trim tops and tips, then cut on a diagonal into ¼-inch thick pieces. If using baby carrots, leave whole or halve lengthwise if thick.
- Melt the butter: Place a large skillet (10-12 inches) over medium heat. Add butter and let it melt slowly without browning. Swirl to coat the pan.
- Add carrots and season: Toss sliced carrots into the skillet. Sprinkle with salt and pepper. Stir to coat in butter.
- Cook the carrots: Let cook without stirring for 2 minutes to develop color. Stir, then cook another 2 minutes without stirring. Repeat until carrots are tender but still have a little bite (about 5-6 minutes total).
- Add maple syrup: Drizzle maple syrup over carrots. Stir to coat. Cook for 1 minute, stirring constantly, until glaze thickens and clings to carrots.
- Add thyme: Sprinkle fresh thyme leaves over carrots. Stir to distribute. Cook for 30 seconds until fragrant.
- Check doneness and adjust seasoning: Taste a carrot. It should be tender but not mushy. Add more salt or pepper if needed. If glaze is too thin, cook 30 seconds more; if too thick, add a splash of water or chicken broth.
- Serve immediately: Transfer to a serving dish. Spoon remaining glaze over top. Garnish with extra thyme sprigs or parsley if desired. Serve hot.
Notes
Don’t walk away from the pan once you add the maple syrup—it can burn quickly. For even cooking, cut carrots into uniform pieces. Use medium heat to prevent burning the butter or syrup. If using salted butter, skip the extra salt and adjust at the end. For a vegan version, substitute butter with vegan butter or refined coconut oil.
Nutrition
- Serving Size: 1 serving (about ⅙ o
- Calories: 120
- Sugar: 10
- Sodium: 220
- Fat: 6
- Saturated Fat: 4
- Carbohydrates: 16
- Fiber: 3
- Protein: 1
Keywords: maple glazed carrots, easy side dish, 15-minute recipe, carrots with thyme, quick vegetable side, holiday side dish, weeknight dinner


