I was at my accountant’s house for a backyard barbecue. Not exactly where you expect to find culinary inspiration, right? I mean, the man wears clip-on ties and files my taxes. But there I was, standing by his grill, watching him flip burgers, when he started talking about cauliflower. “You know,” he said, poking at a charcoal briquette, “the trick is roasting it first. Changes everything.” I honestly thought he was talking about some weird lawn care tip. Turns out, he was describing his famous mashed cauliflower—a dish his wife had begged him to bring to every family gathering for the last fifteen years.
Let me tell you, I was skeptical. Mashed cauliflower has a reputation, you know? It can be watery, bland, and frankly, a little sad. But this accountant—let’s call him Gary—was insistent. He scribbled the recipe on a napkin that still had ketchup on it. “Roast the garlic first,” he said, “and don’t you dare skip the cream cheese.” That napkin sat on my counter for a week before I finally gave in. And honestly? It was the best kitchen decision I made that month.
This Creamy Roasted Garlic Mashed Cauliflower is now my go-to side dish for every dinner party. It’s the dish that makes people stop mid-conversation and ask, “Wait, this is cauliflower?” The roasted garlic gives it this sweet, nutty depth, and the texture is so velvety you’d swear it was loaded with butter and cream. (Spoiler: it’s not.) I’ve brought it to potlucks, Thanksgiving dinners, and casual weeknight dinners where I wanted something comforting without the carb crash. It always steals the show.
Maybe you’ve been there—looking for a side dish that feels indulgent but fits your low-carb lifestyle. Or maybe you’re just tired of the same old steamed vegetables. Either way, this recipe is about to become your new secret weapon. It’s the kind of dish that makes you look like a hero without spending hours in the kitchen. And trust me, once you taste it, you’ll understand why Gary the accountant is now my favorite person to talk to about food.
Why You’ll Love This Recipe
This isn’t just another cauliflower recipe. I’ve tested this version more times than I can count—tweaking roasting times, adjusting garlic ratios, and experimenting with different dairy combinations. What I landed on is, without a doubt, the creamiest, most flavorful mashed cauliflower you’ll ever make. Here’s why it deserves a permanent spot in your hosting rotation:
- Quick & Easy : Comes together in under 45 minutes, with only 15 minutes of active prep. Perfect for those evenings when guests arrive earlier than expected.
- Simple Ingredients : No fancy grocery trips needed. Cauliflower, garlic, cream cheese, butter, and a few pantry staples—that’s it.
- Perfect for Dinner Parties : This dish looks and tastes like you spent hours on it. Your guests will never guess it’s low-carb and gluten-free.
- Crowd-Pleaser : I’ve served this to kids, keto dieters, and picky eaters. Every single person went back for seconds. It’s that good.
- Unbelievably Delicious : The roasted garlic adds a caramelized sweetness that transforms humble cauliflower into something crave-worthy. The texture is so smooth and rich, you’ll forget you’re eating vegetables.
What makes this recipe different from the rest? It’s the technique. Most recipes just boil the cauliflower, which leads to a watery, flavorless mash. By roasting the cauliflower and garlic first, you concentrate the flavors and remove excess moisture. The result is a side dish that’s thick, creamy, and packed with savory depth. Plus, the cream cheese adds a tangy richness that mimics the texture of traditional mashed potatoes without the carbs.
Honestly, this is the kind of recipe that makes you close your eyes after the first bite. It’s comfort food reimagined—healthier, faster, but with the same soul-soothing satisfaction. Perfect for impressing guests without stress, or turning a simple weeknight dinner into something memorable.
What Ingredients You Will Need
This recipe uses simple, wholesome ingredients to deliver bold flavor and satisfying texture without the fuss. Most of these are pantry staples, which makes this dish perfect for last-minute entertaining. Here’s what you’ll need:
- 1 large head of cauliflower (about 2 pounds or 900g), cut into florets. Look for a head that’s firm and white with no brown spots. Fresh cauliflower works best here—frozen tends to release too much water.
- 1 whole head of garlic. Don’t skimp on this! Roasting transforms sharp garlic into sweet, buttery cloves that melt into the cauliflower. I recommend using fresh garlic, not pre-peeled cloves.
- 3 tablespoons olive oil, divided. Use a good-quality extra virgin olive oil for roasting. It adds richness and helps the cauliflower caramelize beautifully.
- 4 ounces cream cheese (113g), softened. Full-fat cream cheese gives the mash its signature creamy texture. I’ve tried low-fat versions, and the texture just isn’t the same. Let it come to room temperature before using.
- 2 tablespoons unsalted butter (28g). Adds richness and a silky finish. You can use salted butter, just adjust the added salt accordingly.
- 1/4 cup heavy cream (60ml), warmed. This helps create that velvety smooth consistency. For a dairy-free version, use full-fat coconut cream.
- 1/2 teaspoon salt, plus more to taste. I prefer fine sea salt for even seasoning.
- 1/4 teaspoon black pepper, freshly ground. Adds a subtle warmth that balances the sweetness of the roasted garlic.
- 2 tablespoons fresh chives, chopped (optional, for garnish). Adds a pop of color and a mild onion flavor that complements the dish.
For the best results, I recommend using Philadelphia cream cheese—it has a consistent texture that blends smoothly. And if you can find it, Kerrygold butter adds an extra layer of richness that makes this dish taste truly indulgent.
Ingredient Selection Tips: When choosing cauliflower, look for a head that feels heavy for its size with tightly packed florets. The leaves should be crisp and green. Avoid any heads with soft spots or yellowing. For the garlic, choose bulbs that are firm with tight, unbroken skins. Avoid bulbs that feel light or have sprouted green shoots.
Substitution Guidance: Need a dairy-free option? Swap the cream cheese for a dairy-free cream cheese alternative, use vegan butter, and replace the heavy cream with full-fat coconut cream. The texture will be slightly different, but still delicious. For a nut-free version, stick with the dairy options listed above. If you’re watching your fat intake, you can use Greek yogurt instead of cream cheese, but the texture will be tangier and less creamy.
Equipment Needed
You don’t need a professional kitchen to make this dish. Here’s what you’ll need:
- Baking sheet (half-sheet size works best). A rimmed baking sheet prevents any garlic oil from dripping into your oven.
- Parchment paper or aluminum foil. Makes cleanup a breeze and prevents the cauliflower from sticking.
- Large pot for boiling the cauliflower. Go for a 5-quart pot or larger to give the florets room to cook evenly.
- Colander for draining. A fine-mesh colander is ideal to catch any small florets.
- Food processor or high-powered blender. A food processor gives you more control over the texture. I prefer my Cuisinart 14-cup food processor for this recipe. If you’re using a blender, work in batches to avoid overfilling.
- Potato masher (optional). If you prefer a chunkier texture, a hand masher works great. Just be prepared for a slightly less creamy result.
- Chef’s knife and cutting board. A sharp knife makes cutting the cauliflower into even florets much easier.
- Garlic roaster or small baking dish. A small ramekin or oven-safe dish works perfectly to hold the garlic while it roasts.
Budget-Friendly Options: If you don’t own a food processor, an immersion blender works well for this recipe. Just be careful not to over-process, or the cauliflower can become gummy. A potato ricer is another excellent option for achieving a silky texture without expensive equipment.
Preparation Method
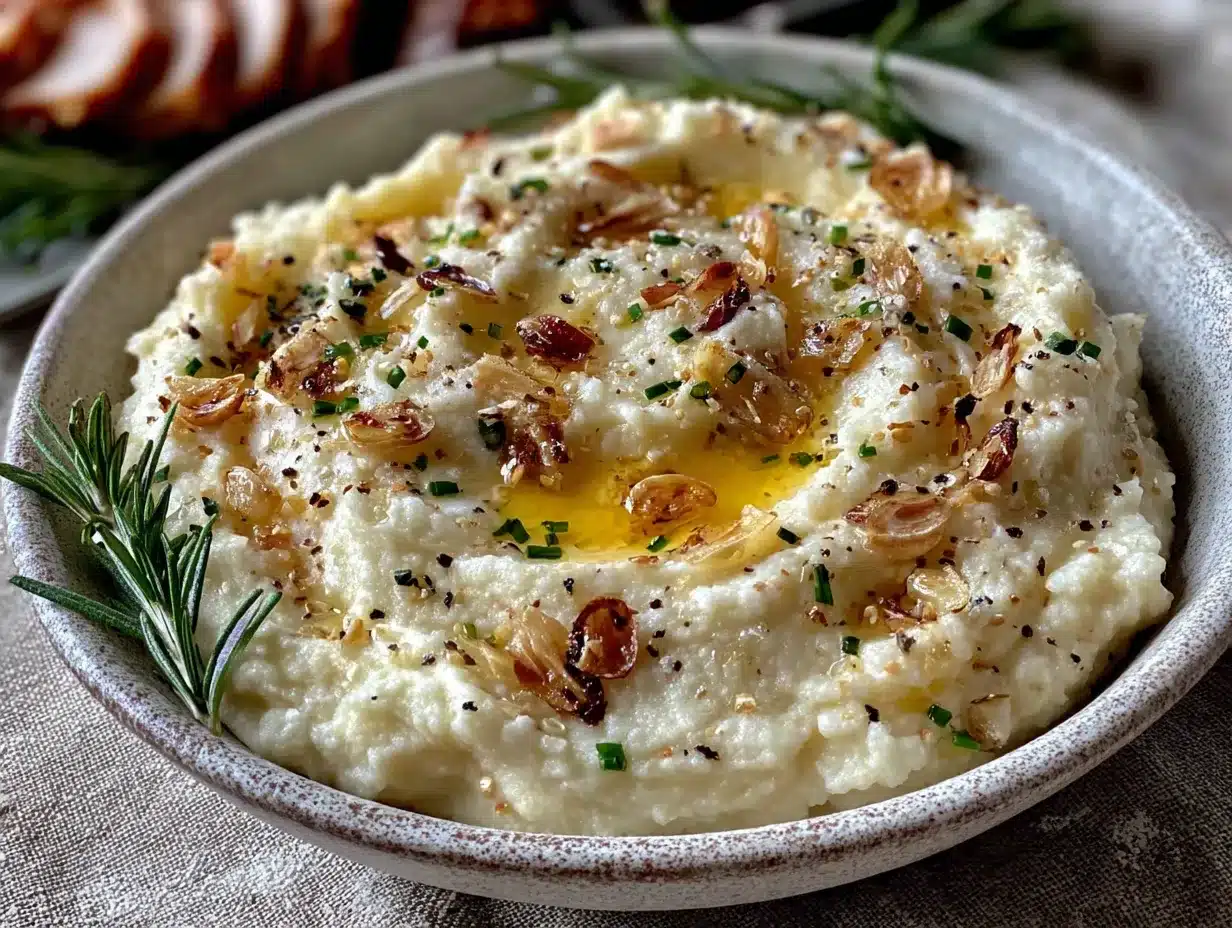
Let me walk you through this step by step. I’ve included all the little details I’ve learned from making this dish more times than I can count.
- Preheat your oven to 400°F (200°C). Line a baking sheet with parchment paper. While the oven heats, prepare the cauliflower and garlic.
- Prepare the garlic. Cut off the top of the garlic head to expose the cloves. Drizzle with 1 tablespoon of olive oil, wrap tightly in aluminum foil, and place on the baking sheet. This will take about 40 minutes to become soft and golden.
- Roast the cauliflower. In a large bowl, toss the cauliflower florets with the remaining 2 tablespoons of olive oil, 1/4 teaspoon of salt, and 1/8 teaspoon of black pepper. Spread them in a single layer on the same baking sheet (around the garlic packet). Roast for 25-30 minutes, flipping halfway through, until the florets are golden brown and tender when pierced with a fork. The edges should be slightly caramelized—that’s where the flavor lives.
- Boil the cauliflower. While the cauliflower roasts, bring a large pot of salted water to a boil. Once the roasted cauliflower is done, transfer it to the boiling water and cook for 5-7 minutes. This step ensures the cauliflower is completely tender and breaks down easily. Don’t skip this—roasting alone won’t make it soft enough for a creamy mash.
- Drain thoroughly. Pour the cauliflower into a colander and let it drain for at least 2 minutes. Here’s a tip I learned the hard way: press down gently with a spatula to remove as much water as possible. Excess moisture is the enemy of creamy mashed cauliflower.
- Squeeze out the roasted garlic. Once the garlic is cool enough to handle, squeeze the cloves out of their skins. They should slide out easily. Discard the skins and place the soft, golden cloves in the bowl of your food processor.
- Blend the base. Add the drained cauliflower, softened cream cheese, butter, and warmed heavy cream to the food processor. Pulse a few times to break everything down, then process continuously for 30-45 seconds. Scrape down the sides with a spatula, then process again until the mixture is completely smooth and creamy. Taste and adjust seasoning with the remaining salt and pepper.
- Finish and serve. Transfer the mashed cauliflower to a serving bowl. Garnish with fresh chives and an extra pat of butter if you’re feeling fancy. Serve immediately while warm.
Pro tip for hosting: You can prepare this dish up to step 7, then transfer the mixture to a slow cooker on the “warm” setting. This keeps it hot and creamy for up to 2 hours while you focus on your guests.
Cooking Tips & Techniques
Over the years, I’ve made every mistake in the book with this recipe. Here’s what I’ve learned so you don’t have to repeat my failures:
The biggest mistake? Not drying the cauliflower enough. I once made a batch that looked perfect but turned into a watery mess after sitting for 10 minutes. Now I always press the cauliflower in the colander with a clean kitchen towel. It makes all the difference.
Don’t over-process. If you blend the cauliflower for too long, it can become gummy and gluey. Process just until smooth, then stop. If you’re using a potato masher, expect a chunkier texture—which some people actually prefer!
Temperature matters. Make sure your cream cheese and butter are at room temperature before blending. Cold dairy won’t incorporate smoothly and can leave lumps in your mash. I take them out of the fridge about 30 minutes before I start cooking.
Multitasking strategy: While the cauliflower and garlic roast, set out your cream cheese and butter to soften. While they boil, warm your heavy cream in the microwave. This way, everything comes together at the perfect temperature.
Season generously. Cauliflower can be bland if under-seasoned. Don’t be shy with the salt and pepper. I always taste and adjust at the end—sometimes adding an extra pinch of salt makes all the difference.
One more thing: If your mash seems too thick after blending, add a splash of warm heavy cream or chicken broth. If it’s too thin, return it to the pot and cook over low heat, stirring constantly, until it thickens. This rarely happens if you’ve drained the cauliflower well, but it’s good to know the fix.
Variations & Adaptations
This recipe is incredibly versatile. Here are some of my favorite ways to switch it up:
- Cheesy Roasted Garlic Mashed Cauliflower: Add 1/2 cup of shredded sharp cheddar or Parmesan cheese during the blending stage. The cheese adds a savory depth that pairs beautifully with the roasted garlic. I’ve made this for Thanksgiving, and it disappeared before the turkey.
- Herb-Infused Version: Add 2 tablespoons of fresh rosemary or thyme leaves to the food processor along with the cauliflower. The herbs infuse the mash with an earthy, aromatic flavor that’s perfect for fall dinners.
- Spicy Kick: Add 1/4 teaspoon of red pepper flakes or a pinch of cayenne pepper during blending. The heat cuts through the richness and adds an unexpected layer of complexity. Great for serving alongside grilled meats.
- Dairy-Free Adaptation: Use vegan cream cheese, plant-based butter, and full-fat coconut cream. The coconut cream adds a subtle sweetness that works surprisingly well with the roasted garlic. Just be sure to warm it before blending.
- Loaded Baked Cauliflower Style: Top the finished mash with crispy bacon bits, shredded cheddar, and a dollop of sour cream. It’s everything you love about loaded baked potatoes, minus the carbs.
I once made a batch with smoked paprika and a dash of liquid smoke for a barbecue-themed dinner party. It was a hit—people couldn’t stop asking what I’d done to make it taste so “meaty.” Don’t be afraid to experiment!
Serving & Storage Suggestions
Serving Temperature: This dish is best served warm, straight from the food processor. If you’re hosting, transfer it to a preheated serving bowl to keep it hot for longer. I like to top it with a pat of butter and a sprinkle of fresh chives right before serving—it looks gorgeous on the table.
What to Serve Alongside: This mashed cauliflower is incredibly versatile. It pairs beautifully with roasted chicken, grilled steak, pan-seared salmon, or even a hearty mushroom stroganoff. For a dinner party, I often serve it alongside my honey glazed carrots and a simple green salad. The sweetness of the carrots complements the savory garlic notes perfectly.
Storage Instructions: Store leftovers in an airtight container in the refrigerator for up to 5 days. The flavors actually deepen and meld together overnight, making it even more delicious the next day.
Reheating Methods: To reheat, warm the mashed cauliflower in a saucepan over low heat, stirring occasionally. Add a splash of heavy cream or chicken broth if it seems dry. You can also microwave it in 30-second bursts, stirring between each. Avoid high heat, as it can cause the dairy to separate.
Freezer Tips: This dish freezes surprisingly well. Let it cool completely, then transfer to a freezer-safe container. It will keep for up to 3 months. To thaw, place it in the refrigerator overnight, then reheat gently on the stovetop. You may need to add a little extra cream to restore the creamy texture.
Flavor Development: I’ve noticed that this dish tastes even better the next day. The roasted garlic flavor mellows and spreads throughout the mash, creating a more uniform, savory taste. I sometimes make it a day ahead on purpose!
Nutritional Information & Benefits
Here’s the nutritional breakdown per serving (based on 6 servings):
| Nutrient | Amount per Serving |
|---|---|
| Calories | 185 |
| Total Fat | 16g |
| Saturated Fat | 8g |
| Cholesterol | 35mg |
| Sodium | 320mg |
| Total Carbohydrates | 9g |
| Dietary Fiber | 3g |
| Sugars | 3g |
| Protein | 4g |
| Net Carbs | 6g |
Health Benefits: Cauliflower is a nutritional powerhouse. It’s packed with vitamin C, vitamin K, and folate, and it’s an excellent source of antioxidants. The fiber content supports digestive health, while the low carbohydrate count makes it ideal for keto, low-carb, and diabetic-friendly diets. Roasted garlic adds allicin, a compound known for its anti-inflammatory and immune-boosting properties.
Dietary Considerations: This recipe is naturally gluten-free, low-carb, and vegetarian. It can easily be made dairy-free and vegan with the substitutions mentioned above. It’s also nut-free and egg-free, making it suitable for a wide range of dietary needs.
Personal Wellness Perspective: I love that this dish lets me enjoy the comfort of creamy mashed potatoes without the blood sugar spike. It’s a reminder that eating well doesn’t mean sacrificing flavor or satisfaction.
Conclusion
This Creamy Roasted Garlic Mashed Cauliflower has become a staple in my kitchen for good reason. It’s the side dish that makes people forget they’re eating vegetables, the low-carb option that doesn’t feel like a compromise, and the recipe that proves simple ingredients can create something truly special. Whether you’re hosting a dinner party, bringing a dish to a potluck, or just want a comforting side for a weeknight meal, this recipe delivers every single time.
Don’t be afraid to make it your own. Add extra garlic, throw in some cheese, or top it with crispy bacon—the possibilities are endless. And when you make it, I’d love to hear how it turned out. Drop a comment below and let me know what variations you tried, or share a photo of your creation. Your feedback helps me keep creating recipes you’ll love.
So go ahead—give Gary the accountant’s recipe a try. I promise you won’t regret it. And who knows? Maybe you’ll find yourself scribbling recipes on napkins at the most unexpected moments, too. Happy cooking!
Frequently Asked Questions
Can I use frozen cauliflower instead of fresh?
I don’t recommend it. Frozen cauliflower contains a lot of water, which makes it difficult to achieve a creamy texture. Fresh cauliflower gives you much better control over moisture content and flavor.
How do I prevent my mashed cauliflower from being watery?
The key is to drain the cauliflower thoroughly after boiling. I press it in a colander with a spatula, then let it sit for a few minutes. You can also spread it on a clean kitchen towel and pat it dry before blending.
Can I make this recipe ahead of time for a party?
Absolutely! You can prepare the mashed cauliflower up to 2 days in advance. Store it in an airtight container in the refrigerator, then reheat gently on the stovetop or in a slow cooker. Add a splash of cream if needed to restore the creamy texture.
What’s the best way to reheat leftovers?
Reheat in a saucepan over low heat, stirring frequently. Add a tablespoon of heavy cream or chicken broth if the mash seems dry. You can also microwave it in 30-second intervals, stirring between each. Avoid high heat to prevent the dairy from separating.
Is this recipe keto-friendly?
Yes! With only 6g of net carbs per serving, this mashed cauliflower is an excellent low-carb and keto-friendly alternative to mashed potatoes. The healthy fats from the cream cheese and butter also fit well within a ketogenic diet.
Pin This Recipe!
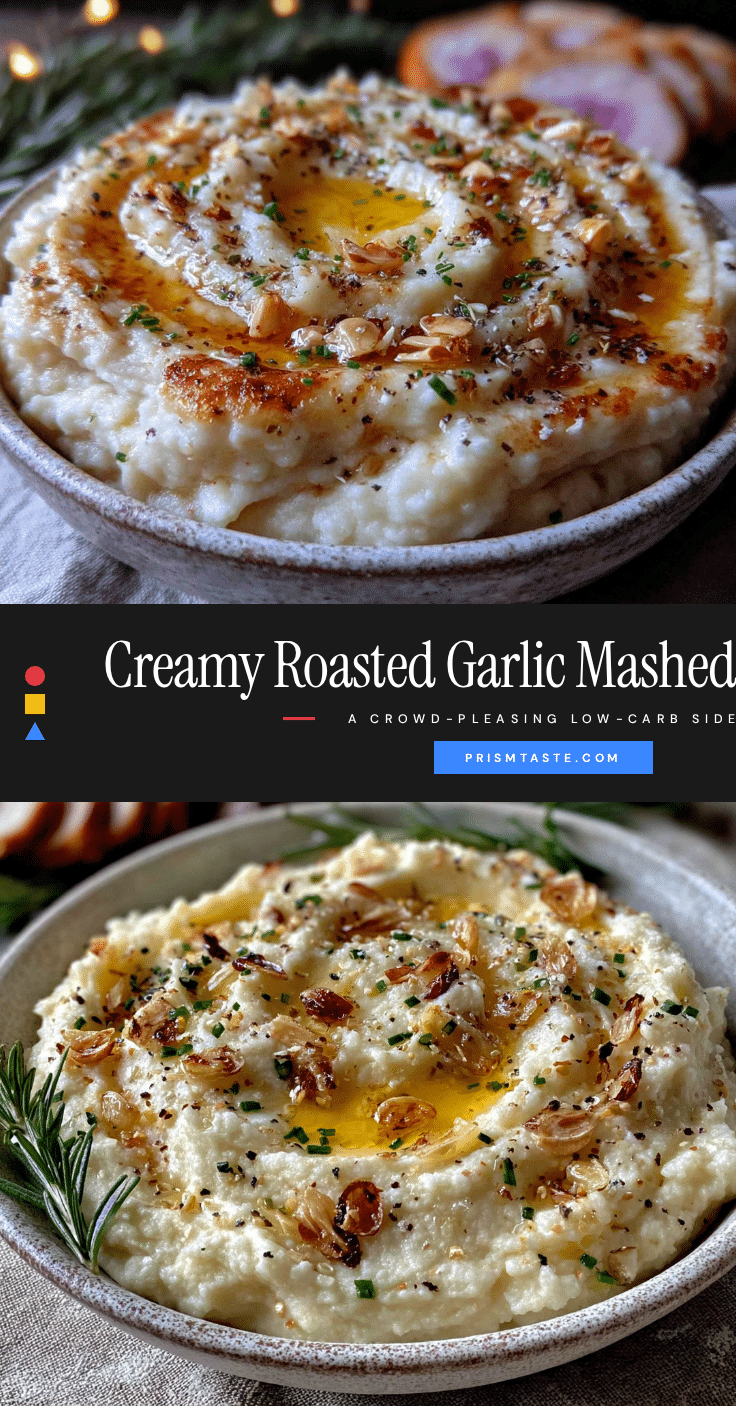
Creamy Roasted Garlic Mashed Cauliflower

This creamy roasted garlic mashed cauliflower is a low-carb side dish that’s velvety smooth and packed with sweet, nutty roasted garlic flavor. It’s quick, easy, and perfect for dinner parties or weeknight meals.
- Prep Time: 15 minutes
- Cook Time: 30 minutes
- Total Time: 45 minutes
- Yield: 6 servings 1x
- Category: Side Dish
- Cuisine: American
Ingredients
- 1 large head of cauliflower (about 2 pounds or 900g), cut into florets
- 1 whole head of garlic
- 3 tablespoons olive oil, divided
- 4 ounces cream cheese (113g), softened
- 2 tablespoons unsalted butter (28g)
- 1/4 cup heavy cream (60ml), warmed
- 1/2 teaspoon salt, plus more to taste
- 1/4 teaspoon black pepper, freshly ground
- 2 tablespoons fresh chives, chopped (optional, for garnish)
Instructions
- Preheat your oven to 400°F (200°C). Line a baking sheet with parchment paper.
- Prepare the garlic: Cut off the top of the garlic head to expose the cloves. Drizzle with 1 tablespoon of olive oil, wrap tightly in aluminum foil, and place on the baking sheet.
- Roast the cauliflower: In a large bowl, toss the cauliflower florets with the remaining 2 tablespoons of olive oil, 1/4 teaspoon of salt, and 1/8 teaspoon of black pepper. Spread them in a single layer on the same baking sheet (around the garlic packet). Roast for 25-30 minutes, flipping halfway through, until golden brown and tender.
- Boil the cauliflower: While the cauliflower roasts, bring a large pot of salted water to a boil. Once the roasted cauliflower is done, transfer it to the boiling water and cook for 5-7 minutes.
- Drain thoroughly: Pour the cauliflower into a colander and let it drain for at least 2 minutes. Press down gently with a spatula to remove as much water as possible.
- Squeeze out the roasted garlic: Once the garlic is cool enough to handle, squeeze the cloves out of their skins. Discard the skins and place the soft, golden cloves in the bowl of your food processor.
- Blend the base: Add the drained cauliflower, softened cream cheese, butter, and warmed heavy cream to the food processor. Pulse a few times, then process continuously for 30-45 seconds. Scrape down the sides, then process again until completely smooth and creamy. Taste and adjust seasoning with the remaining salt and pepper.
- Finish and serve: Transfer the mashed cauliflower to a serving bowl. Garnish with fresh chives and an extra pat of butter if desired. Serve immediately while warm.
Notes
For the best texture, drain the cauliflower thoroughly after boiling. Press it in a colander with a spatula or pat dry with a clean kitchen towel. Make sure cream cheese and butter are at room temperature before blending. If the mash is too thick, add a splash of warm heavy cream or chicken broth. If too thin, cook over low heat, stirring constantly, until thickened. This dish can be made ahead and reheated gently.
Nutrition
- Serving Size: 1 serving
- Calories: 185
- Sugar: 3
- Sodium: 320
- Fat: 16
- Saturated Fat: 8
- Carbohydrates: 9
- Fiber: 3
- Protein: 4
Keywords: mashed cauliflower, roasted garlic, low-carb, keto, gluten-free, side dish, creamy cauliflower


