The fall bake sale was in twelve hours and I’d completely forgotten. I mean, completely. I was standing in my kitchen at nine o’clock on a Tuesday night, staring into the fridge like it might magically produce a three-tiered cake. Everyone else would be bringing those gorgeous, elaborate pies with the lattice crusts and the perfectly crimped edges. The kind that take all day and look like they belong on a magazine cover. I had a block of cream cheese, a can of pumpkin puree, and a box of graham crackers that was about to expire. Not exactly award-winning material.
Honestly, I almost gave up and grabbed a store-bought pie on the way. But then I remembered a trick my neighbor, Carol, had mentioned months ago about combining cheesecake and pumpkin into one easy bar. She’d made it sound so simple I’d scribbled it on a napkin. I found that crumpled napkin in my junk drawer, and let me tell you, it was a moment of pure desperation. I threw everything together, hoping for the best, and slid the pan into the oven. I didn’t even bother to clean up the mess—I just collapsed on the couch.
The next morning, I walked into that bake sale with a pan of slightly lopsided bars, feeling like a fraud. I put them on the table next to a towering apple pie and tried to hide. But by the end of the first hour? My little pan was empty. People were coming up to me, asking for the recipe. One woman actually said they were the best thing at the whole sale. I just stood there, sheepish and a little shocked. That’s the thing about these Easy Pumpkin Pie Cheesecake Bars—they look like you spent all day, but they’re really just a happy accident waiting to happen. Maybe you’ve been there, scrambling at the last minute for something that actually works? This is that recipe.
Why You’ll Love This Recipe
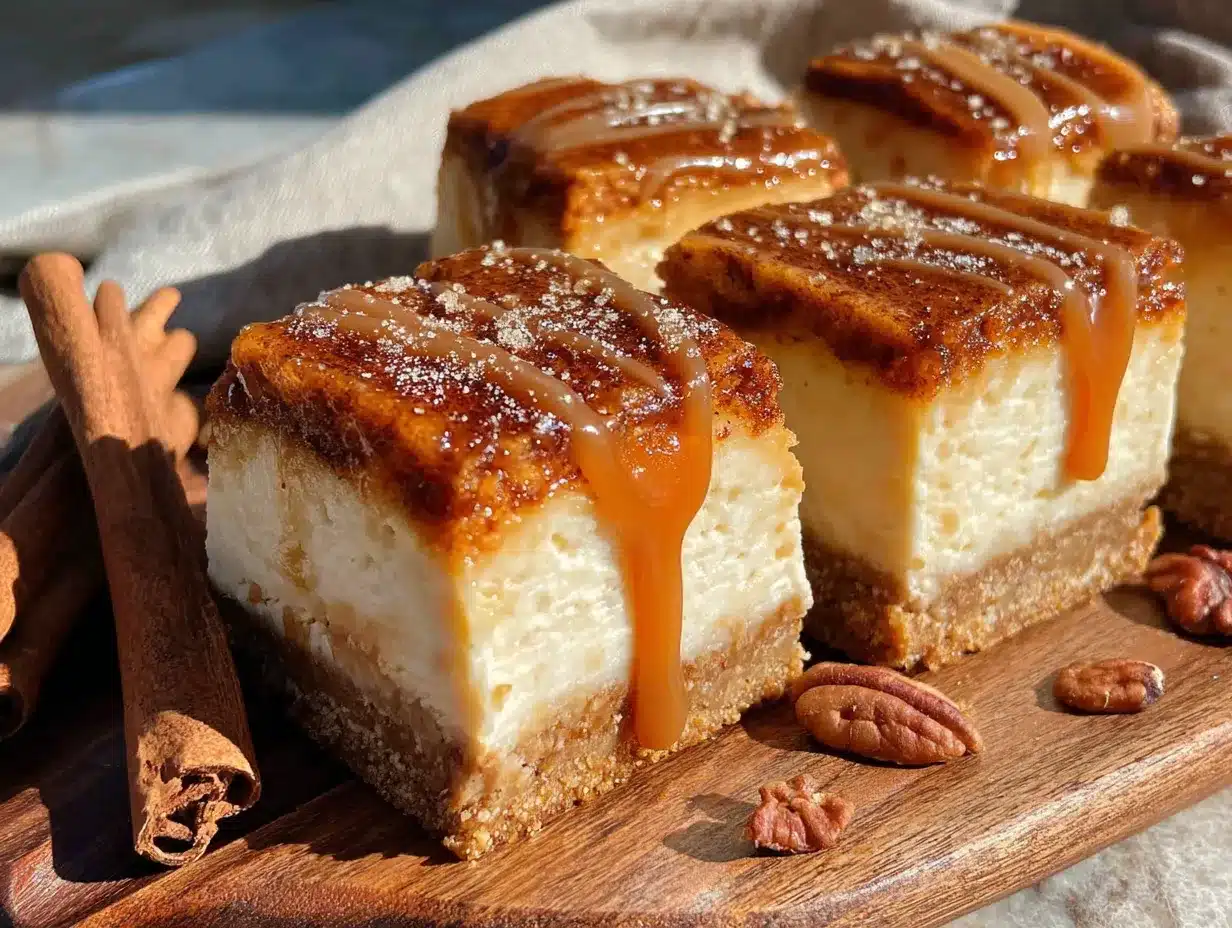
These aren’t just another pumpkin dessert. They’re the perfect marriage of two classic treats, and they come together with minimal fuss. I’ve tested this recipe more times than I can count, tweaking the ratios until the texture was just right—a creamy, tangy cheesecake layer sitting on a buttery graham cracker crust, all topped with a spiced pumpkin layer that tastes like pure fall. It’s the kind of recipe that makes you look like a hero without the stress.
- Quick & Easy: From start to finish, you’re looking at about 45 minutes of active time. Most of the work is just waiting for it to chill in the fridge. Perfect for a busy weeknight when you need a dessert for tomorrow’s school event or a last-minute dinner party.
- Simple Ingredients: You probably have most of these in your pantry right now. No hunting for obscure spices or expensive extracts. Just good, honest ingredients that work together beautifully.
- Perfect for Fall Gatherings: Whether it’s a Thanksgiving potluck, a Halloween party, or just a cozy Sunday dessert, these bars fit right in. They’re portable, easy to slice, and everyone loves them.
- Crowd-Pleaser: I’ve served these to kids, adults, and even my picky aunt who “doesn’t do pumpkin.” They disappear every single time. The cheesecake layer mellows out the pumpkin flavor, making it approachable for everyone.
- Unbelievably Delicious: The texture is what gets me. The creamy cheesecake, the smooth pumpkin, the crunchy crust—it’s a textural dream. And the flavor? It’s like a hug in dessert form.
What makes these bars different from the rest? It’s the technique. Most recipes just swirl the two layers together, but I’ve found that keeping them distinct gives you a much better experience. You get a clean bite of tangy cheesecake, followed by the warm spice of the pumpkin. It’s not just another version—it’s the best version.
Ingredients You Will Need
This recipe uses simple, wholesome ingredients to deliver bold flavor and satisfying texture without the fuss. Most of these are pantry staples, especially during the fall season, so you can whip these up on a whim.
For the Crust
- 1 ½ cups graham cracker crumbs (about 12 full sheets, crushed finely)
- ¼ cup granulated sugar
- 6 tablespoons unsalted butter, melted (use salted butter and skip the salt if that’s all you have)
- Pinch of salt (if using unsalted butter)
For the Cheesecake Layer
- 16 ounces cream cheese, softened (full-fat is best for texture, but low-fat works in a pinch)
- ½ cup granulated sugar
- 2 large eggs, room temperature (cold eggs can make the batter lumpy)
- 1 teaspoon vanilla extract
For the Pumpkin Layer
- 1 can (15 ounces) pumpkin puree (not pumpkin pie filling—make sure it’s 100% pure pumpkin)
- ½ cup granulated sugar
- ¼ cup packed light brown sugar
- 2 large eggs, room temperature
- 1 teaspoon vanilla extract
- 1 ½ teaspoons pumpkin pie spice (I like the McCormick brand for consistency)
- ½ teaspoon ground cinnamon
- ¼ teaspoon salt
Ingredient Tip: For the graham cracker crumbs, you can buy them pre-crushed, but I prefer to crush my own. I put the crackers in a zip-top bag and go at it with a rolling pin. It’s oddly satisfying and gives you a better texture. Also, make sure your cream cheese is truly softened—leave it on the counter for at least 30 minutes. Cold cream cheese leads to a lumpy cheesecake layer, and nobody wants that.
Equipment Needed
You don’t need a fancy kitchen to make these bars. Here’s what you’ll need:
- 9×9-inch baking pan (an 8×8 works too, but the bars will be slightly thicker and may need a few extra minutes of baking)
- Mixing bowls (at least two medium-sized ones)
- Electric hand mixer or stand mixer (a whisk and some elbow grease works, but a mixer makes it much easier to get that smooth, creamy texture)
- Parchment paper (for easy removal—this is non-negotiable in my book)
- Measuring cups and spoons
- Spatula (for spreading the layers evenly)
- Rolling pin or food processor (for crushing the graham crackers)
Personal Note: I’ve made this recipe with a cheap hand mixer I got from a discount store, and it worked perfectly. Don’t feel like you need to invest in a high-end stand mixer. Also, if you don’t have a 9×9 pan, a disposable aluminum pan from the grocery store works great for bake sales—no cleanup required!
Preparation Method
- Preheat and Prep: Preheat your oven to 350°F (175°C). Line your 9×9-inch baking pan with parchment paper, leaving some overhang on two opposite sides. This creates “handles” that make lifting the bars out a breeze later. Lightly spray the parchment with non-stick spray just to be safe.
- Make the Crust: In a medium bowl, combine the graham cracker crumbs, ¼ cup sugar, and a pinch of salt. Pour the melted butter over the mixture and stir with a fork until everything is moistened and looks like wet sand. Press this mixture firmly into the bottom of your prepared pan. Use the bottom of a measuring cup to really pack it down—this prevents a crumbly crust later. Bake for 10 minutes, then set aside to cool slightly while you make the fillings.
- Make the Cheesecake Layer: In a large bowl, beat the softened cream cheese with ½ cup sugar until smooth and creamy. Scrape down the sides of the bowl. Add the eggs one at a time, beating well after each addition. Stir in the vanilla extract. The mixture should be silky and lump-free. Set aside.
- Make the Pumpkin Layer: In a separate bowl, whisk together the pumpkin puree, ½ cup granulated sugar, and ¼ cup brown sugar until smooth. Add the eggs, vanilla, pumpkin pie spice, cinnamon, and salt. Whisk until everything is well combined and the mixture is glossy. It will be thinner than the cheesecake batter—that’s normal.
- Assemble the Layers: Pour the cheesecake mixture over the pre-baked crust and spread it into an even layer with a spatula. Then, carefully spoon the pumpkin mixture over the cheesecake layer. Don’t pour it all in one spot—dollop it around so it doesn’t disturb the cheesecake layer too much. Gently spread the pumpkin layer to cover the cheesecake. You can swirl them together with a knife if you want a marbled look, but I prefer to keep them distinct. Your call!
- Bake: Place the pan in the preheated oven and bake for 35-40 minutes. The edges should be set and slightly puffed, but the center will still jiggle slightly when you gently shake the pan. That’s okay—it will set as it cools. Overbaking leads to cracks, so err on the side of underdone.
- Cool and Chill: Let the bars cool completely on a wire rack. This takes about an hour. Then, cover the pan with plastic wrap and refrigerate for at least 4 hours, preferably overnight. This step is crucial. The bars need time to firm up so you can get clean slices. I know it’s hard to wait, but trust me on this.
- Slice and Serve: Once fully chilled, use the parchment paper handles to lift the entire block out of the pan. Place it on a cutting board and use a sharp knife to slice into 16 squares. For the cleanest cuts, wipe the knife clean between each slice. Serve cold or at room temperature.
Troubleshooting Tip: If your cheesecake layer cracks, don’t panic. It happens to the best of us. You can cover it with a dollop of whipped cream and nobody will ever know. Also, if you’re short on time, you can speed up the chilling process by popping the pan in the freezer for 2 hours. Just make sure it’s completely cool first.
Cooking Tips & Techniques
I’ve made these bars at least a dozen times, and I’ve learned a few things the hard way. Here are my best tips for success:
- Room Temperature Ingredients are Key: I cannot stress this enough. Cold eggs and cream cheese will give you a lumpy, curdled-looking batter. Set them out on the counter for 30-45 minutes before you start. If you forget, you can place the eggs in a bowl of warm water for 5 minutes, and microwave the cream cheese in 10-second bursts until it’s soft (but not melted).
- Don’t Overmix the Cheesecake Batter: Once you add the eggs, mix just until they’re incorporated. Overmixing incorporates too much air, which can cause the cheesecake to puff up and then crack as it cools. We want dense and creamy, not airy.
- Use the Water Bath Hack: I don’t always use a water bath for these bars because they’re pretty forgiving, but if you’re worried about cracking, place the baking pan inside a larger roasting pan and pour hot water halfway up the sides of the smaller pan. This creates a humid environment that prevents the top from drying out. Just make sure your pan is wrapped in foil so water doesn’t seep in.
- Check for Doneness: The center should still have a slight jiggle when you shake the pan. If it’s completely firm, it’s overbaked. The residual heat will finish cooking the center as it cools.
- Patience with Chilling: I once tried to slice these after only two hours in the fridge, and it was a mess. The layers squished together, and the crust crumbled everywhere. Give them the full four hours. Your future self will thank you.
My Biggest Failure: The first time I made these, I used pumpkin pie filling instead of pure pumpkin. The bars were cloyingly sweet and had a weird, gelatinous texture. It was a total waste. So, double-check that can! It’s a rookie mistake, but one you only make once.
Variations & Adaptations
This recipe is incredibly versatile. Here are a few ways to make it your own:
- Gluten-Free Option: Swap the graham cracker crumbs for gluten-free graham crackers or use crushed gluten-free shortbread cookies. The texture will be slightly different, but just as delicious.
- Dairy-Free Adaptation: Use a dairy-free cream cheese alternative (like Kite Hill or Violife) and a vegan butter stick for the crust. The flavor will be a bit tangier, but it still works beautifully.
- Spice It Up: If you love a bold pumpkin flavor, add an extra teaspoon of pumpkin pie spice to the pumpkin layer. You can also add a pinch of ground ginger or nutmeg for warmth.
- Chocolate Twist: Drizzle melted dark chocolate over the top after the bars have chilled. The bitterness of the chocolate pairs perfectly with the sweet, spiced pumpkin and tangy cheesecake.
- Individual Servings: Make these in a muffin tin for perfectly portioned bars. Line a 12-cup muffin tin with paper liners, press the crust into the bottom, and fill with the cheesecake and pumpkin layers. Bake for 18-20 minutes. They’re adorable and great for parties.
My Personal Favorite: I once added a layer of salted caramel between the cheesecake and pumpkin. It was a bit messy, but the salty-sweet combo was out of this world. Just drizzle about ¼ cup of caramel sauce over the cheesecake layer before adding the pumpkin. Highly recommend.
Serving & Storage Suggestions
These bars are best served cold, straight from the fridge. The texture is firm and creamy, and the flavors are more pronounced. If you prefer them at room temperature, let them sit out for 15-20 minutes before serving.
Serving Ideas:
- Top each bar with a dollop of whipped cream and a sprinkle of cinnamon or nutmeg.
- Drizzle with caramel sauce for extra decadence.
- Serve alongside a hot cup of coffee or a spiced chai latte. The warmth of the drink contrasts beautifully with the cold, creamy bars.
- For a Thanksgiving dessert board, arrange these bars with slices of apple pie, pumpkin pie, and chocolate truffles.
Storage Instructions:
- Refrigerator: Store the bars in an airtight container in the fridge for up to 5 days. Place a layer of parchment paper between stacked bars to prevent sticking.
- Freezer: These bars freeze like a dream. Wrap individual bars tightly in plastic wrap, then place them in a freezer-safe bag or container. Freeze for up to 3 months. To thaw, transfer a bar to the fridge overnight, or let it sit at room temperature for about 30 minutes.
- Reheating: I don’t recommend reheating these bars. They’re meant to be served cold. But if you want a warm dessert, you can microwave a single bar for 10-15 seconds. It will soften the cheesecake and make it almost pudding-like. Not my preference, but to each their own!
Flavor Development: Honestly, these bars taste even better on day two. The flavors have time to meld together, and the texture becomes perfectly creamy. So don’t be afraid to make them a day ahead. Your future self (and your guests) will thank you.
Nutritional Information & Benefits
Here’s an estimated nutritional breakdown for one bar (based on 16 servings):
| Nutrient | Amount per Bar |
|---|---|
| Calories | 285 |
| Total Fat | 17g |
| Saturated Fat | 10g |
| Cholesterol | 85mg |
| Sodium | 220mg |
| Total Carbohydrates | 30g |
| Dietary Fiber | 1g |
| Sugars | 22g |
| Protein | 5g |
Health Benefits: Pumpkin is packed with vitamin A, which is great for eye health and immune function. It’s also a good source of fiber and antioxidants. The cream cheese provides a decent amount of calcium and protein, though let’s be real—this is a treat, not a health food. But it’s nice to know there’s a little bit of goodness in every bite!
Dietary Considerations: This recipe contains gluten, dairy, and eggs. For a gluten-free version, use gluten-free graham crackers. For a dairy-free version, use vegan cream cheese and butter. The bars are naturally nut-free if you use standard graham crackers.
Conclusion
These Easy Pumpkin Pie Cheesecake Bars are the kind of recipe that saves the day—whether you’re scrambling for a bake sale contribution or just craving a taste of fall without the fuss. They’re simple enough for a weeknight, impressive enough for a holiday table, and so delicious that people will think you spent hours on them. I love that they let me enjoy the flavors of pumpkin pie and cheesecake without the stress of making two separate desserts. It’s a win-win in my book.
Now it’s your turn. Give these bars a try, and don’t be afraid to make them your own. Swap the spices, add a swirl of caramel, or double the batch—they’re forgiving and fun. And when you do, I’d love to hear about it. Drop a comment below and let me know how they turned out. Share a photo on Pinterest or tag me on social media. Your feedback and adaptations inspire me to keep experimenting in the kitchen. Happy baking, friend—you’ve got this!
Frequently Asked Questions
Can I use a different crust?
Absolutely. A shortbread cookie crust or a gingersnap crust would be incredible. Use the same measurements—1 ½ cups crumbs, ¼ cup sugar, and 6 tablespoons melted butter. Gingersnaps add an extra layer of warm spice that pairs beautifully with the pumpkin.
Why did my cheesecake layer crack?
Cracks usually happen from overbaking or a sudden temperature change. Make sure you don’t bake the bars until the center is completely firm—a slight jiggle is fine. Also, let them cool gradually on the counter before moving them to the fridge. If they do crack, just cover them with whipped cream or a dusting of powdered sugar.
Can I make these bars ahead of time?
Yes! In fact, I recommend it. These bars need at least 4 hours to chill, but they’re even better after 24 hours. You can make them up to 2 days in advance and store them in the fridge. They also freeze well for up to 3 months.
Can I use a different pan size?
You can use an 8×8-inch pan, but the bars will be thicker and may need an extra 5-10 minutes of baking time. If you use a 9×13-inch pan, the bars will be thinner and will bake faster—check them at 25 minutes. Adjust the baking time accordingly and always look for the jiggle test.
How do I get clean slices?
Use a sharp knife and wipe it clean between each cut. For the cleanest slices, chill the bars for the full 4 hours (or overnight). You can also run the knife under hot water and dry it off before slicing—the heat helps the knife glide through the layers without dragging.
Pin This Recipe!
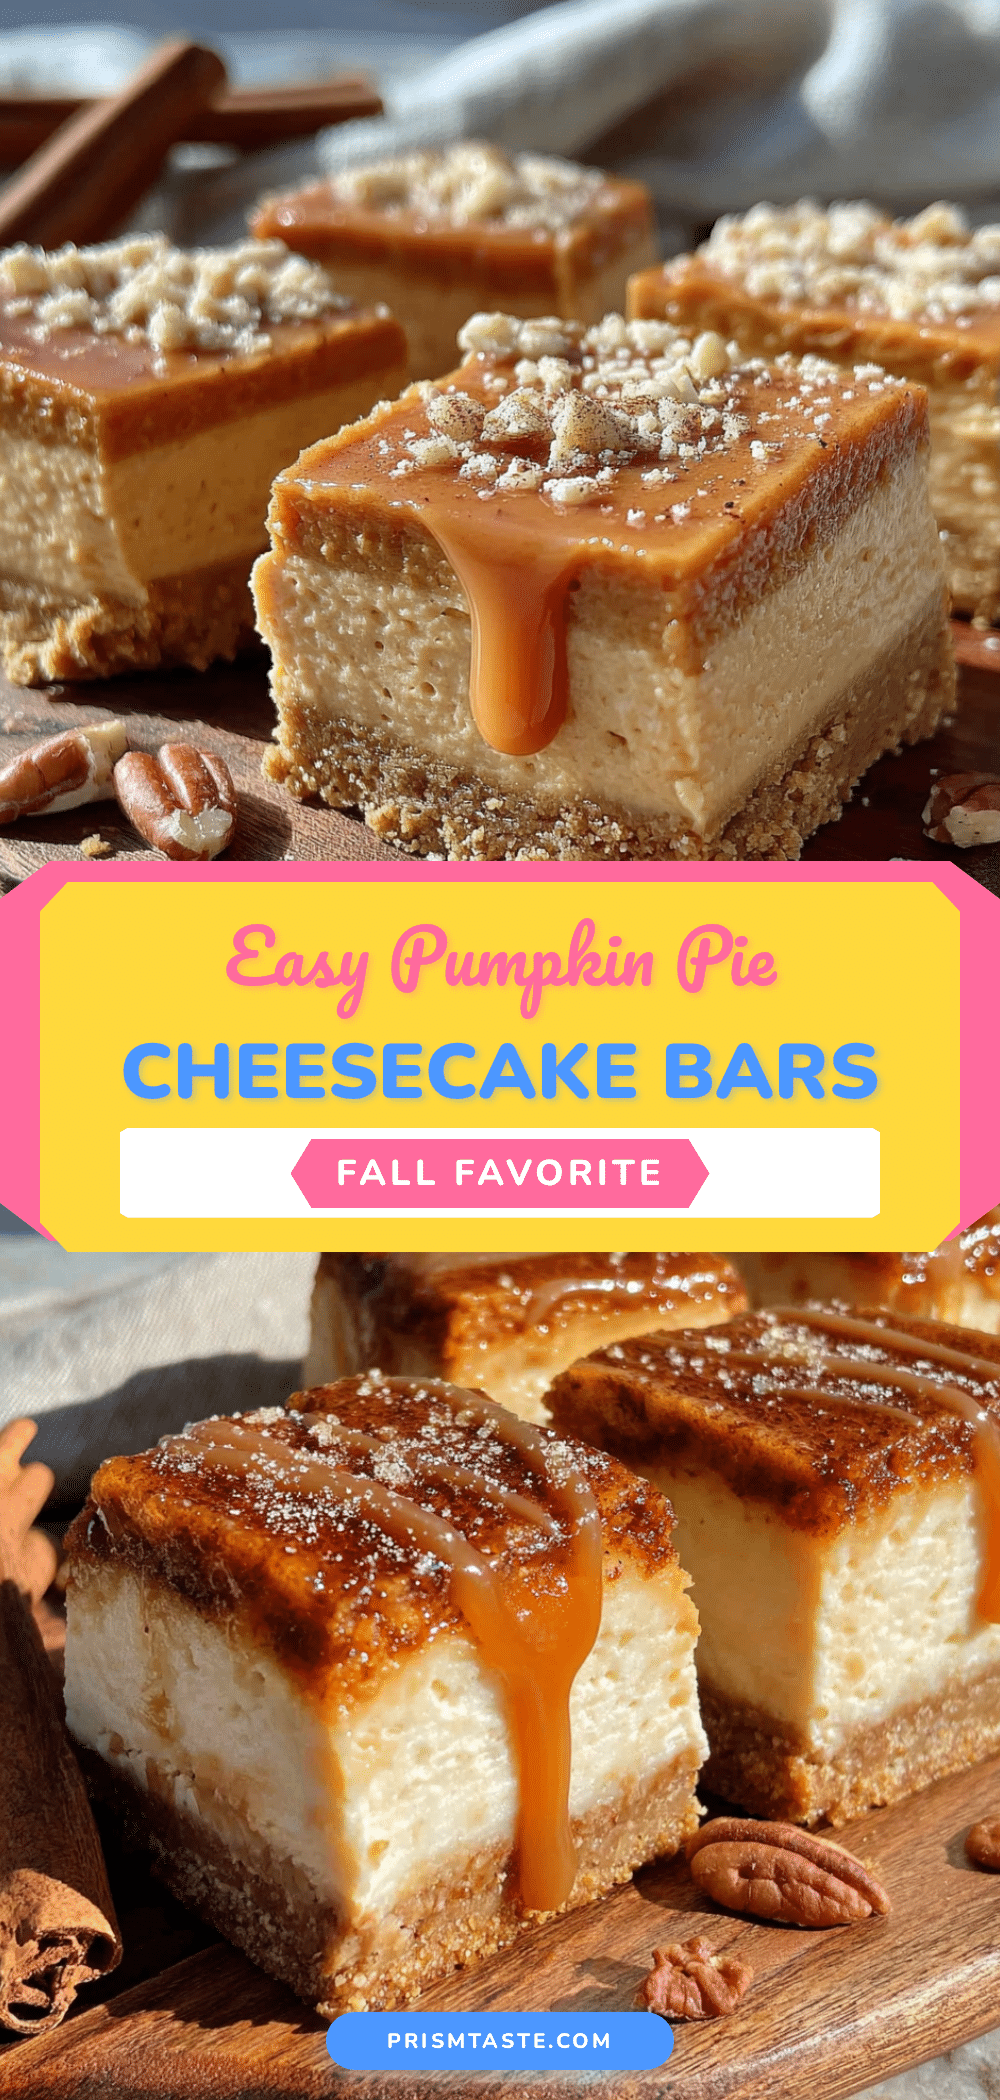
Easy Pumpkin Pie Cheesecake Bars: Best Fall Dessert
These Easy Pumpkin Pie Cheesecake Bars combine a creamy cheesecake layer with a spiced pumpkin topping on a buttery graham cracker crust. They’re simple enough for a weeknight, impressive enough for a holiday table, and so delicious that people will think you spent hours on them.
- Prep Time: 45 minutes
- Cook Time: 35-40 minutes
- Total Time: 5 hours 25 minutes (including chilling)
- Yield: 16 servings 1x
- Category: Dessert
- Cuisine: American
Ingredients
- 1 ½ cups graham cracker crumbs (about 12 full sheets, crushed finely)
- ¼ cup granulated sugar
- 6 tablespoons unsalted butter, melted
- Pinch of salt (if using unsalted butter)
- 16 ounces cream cheese, softened
- ½ cup granulated sugar
- 2 large eggs, room temperature
- 1 teaspoon vanilla extract
- 1 can (15 ounces) pumpkin puree (not pumpkin pie filling)
- ½ cup granulated sugar
- ¼ cup packed light brown sugar
- 2 large eggs, room temperature
- 1 teaspoon vanilla extract
- 1 ½ teaspoons pumpkin pie spice
- ½ teaspoon ground cinnamon
- ¼ teaspoon salt
Instructions
- Preheat your oven to 350°F (175°C). Line your 9×9-inch baking pan with parchment paper, leaving some overhang on two opposite sides. Lightly spray the parchment with non-stick spray.
- In a medium bowl, combine the graham cracker crumbs, ¼ cup sugar, and a pinch of salt. Pour the melted butter over the mixture and stir with a fork until everything is moistened and looks like wet sand. Press this mixture firmly into the bottom of your prepared pan. Bake for 10 minutes, then set aside to cool slightly.
- In a large bowl, beat the softened cream cheese with ½ cup sugar until smooth and creamy. Scrape down the sides of the bowl. Add the eggs one at a time, beating well after each addition. Stir in the vanilla extract. Set aside.
- In a separate bowl, whisk together the pumpkin puree, ½ cup granulated sugar, and ¼ cup brown sugar until smooth. Add the eggs, vanilla, pumpkin pie spice, cinnamon, and salt. Whisk until everything is well combined and the mixture is glossy.
- Pour the cheesecake mixture over the pre-baked crust and spread it into an even layer with a spatula. Then, carefully spoon the pumpkin mixture over the cheesecake layer. Gently spread the pumpkin layer to cover the cheesecake.
- Place the pan in the preheated oven and bake for 35-40 minutes. The edges should be set and slightly puffed, but the center will still jiggle slightly when you gently shake the pan.
- Let the bars cool completely on a wire rack (about an hour). Then, cover the pan with plastic wrap and refrigerate for at least 4 hours, preferably overnight.
- Once fully chilled, use the parchment paper handles to lift the entire block out of the pan. Place it on a cutting board and use a sharp knife to slice into 16 squares. Serve cold or at room temperature.
Notes
Make sure your cream cheese is truly softened—leave it on the counter for at least 30 minutes. Cold cream cheese leads to a lumpy cheesecake layer. For the cleanest slices, chill the bars for the full 4 hours (or overnight). You can also run the knife under hot water and dry it off before slicing. If your cheesecake layer cracks, cover it with a dollop of whipped cream.
Nutrition
- Serving Size: 1 bar
- Calories: 285
- Sugar: 22
- Sodium: 220
- Fat: 17
- Saturated Fat: 10
- Carbohydrates: 30
- Fiber: 1
- Protein: 5
Keywords: pumpkin cheesecake bars, easy fall dessert, pumpkin dessert, cheesecake bars, Thanksgiving dessert, bake sale recipe


