The office potluck was in six hours and I’d completely forgotten. Everyone else would be bringing their grandmother’s famous pies, elaborate layered cakes, or those perfectly decorated cookies that look like they belong in a bakery window. I had a half-empty jar of caramel sauce, two slightly bruised apples, and a cast iron skillet I’d bought on a whim last month. Honestly, I almost just grabbed a bag of chips on the way out the door. But something about the challenge got to me—maybe it was the competitive streak I pretend I don’t have.
I threw together what I had. No time for a crust, no energy for a complicated topping. Just apples, a quick crumble, and that lonely caramel. I slid it into the oven, crossed my fingers, and prayed it wouldn’t be a total disaster. When I pulled it out, the kitchen smelled like a fall candle had exploded—warm, sweet, and impossibly cozy. I walked into that potluck feeling like I was bringing a last-minute science project.
It won. Not just a polite “oh, that’s nice” win—it actually won the whole thing. People were asking for the recipe before I could even set down the skillet. And the best part? I didn’t have to tell them it was lightened-up. They just thought it was delicious. That’s the thing about this Lightened-Up Caramel Apple Crisp for Two—it tastes like a splurge, but it’s not. Maybe you’ve been there, staring into your fridge with nothing “impressive” and needing a miracle. This recipe is that miracle. It’s the dessert that makes you look like you planned it all along.
Why You’ll Love This Recipe
I’ve tested this recipe more times than I care to admit, and every single time, it delivers. Here’s why this little cast iron apple crisp has become my secret weapon for everything from quiet Tuesday nights to showing up at events where I need to impress without the stress.
- Quick & Easy: From fridge to table in under 40 minutes. That’s faster than ordering delivery—and way more satisfying.
- Simple Ingredients: You probably have most of this in your kitchen right now. No fancy grocery runs, no obscure ingredients you’ll never use again.
- Perfect for Two: No leftover guilt. No giant pan staring at you from the fridge for a week. It’s just enough for a cozy night in.
- Crowd-Pleaser: I’ve served this to kids, picky eaters, and serious foodies. It gets the same reaction every time—that little pause after the first bite.
- Unbelievably Delicious: The apples get tender and jammy, the topping stays crunchy, and that caramel? It seeps into everything. You won’t miss the butter or the sugar one bit.
What makes this version different from the rest? It’s the technique. I swapped heavy cream for a splash of oat milk in the caramel, and I use a touch of coconut sugar in the topping for that deep, almost nutty sweetness without the sugar crash. The cast iron skillet does the heavy lifting—it creates that perfect caramelized edge on the apples that you just can’t get in a regular baking dish. This isn’t just another apple crisp. It’s your new go-to.
There’s something about pulling a hot skillet out of the oven, setting it on the table, and watching the caramel bubble up around the edges. It feels special. It feels like a real dessert. And honestly? It feels good knowing it’s lightened up without tasting like a compromise.
What Ingredients You Will Need
This recipe uses simple, wholesome ingredients to deliver that cozy, indulgent flavor without the fuss. Most of these are pantry staples—you might already have everything you need.
- 2 medium apples (Honeycrisp or Granny Smith work best—Honeycrisp for sweetness, Granny Smith for that tart kick that balances the caramel)
- 1 tablespoon fresh lemon juice (keeps the apples from browning and adds a little brightness)
- 1 tablespoon coconut sugar (or brown sugar if that’s what you have—I’ve used both and they’re both great)
- 1/2 teaspoon ground cinnamon (I prefer Saigon cinnamon—it’s warmer and more fragrant)
- 1/4 teaspoon ground nutmeg (freshly grated if you’re feeling fancy)
- Pinch of salt (don’t skip this—it makes the caramel pop)
For the topping:
- 1/4 cup rolled oats (not quick oats—they get mushy. Rolled oats give that perfect chewy-crunchy texture)
- 2 tablespoons almond flour (adds richness without the gluten—you can use regular flour too)
- 2 tablespoons coconut sugar (or brown sugar)
- 2 tablespoons cold butter (cut into small cubes—I use salted because I like the contrast)
- 1/4 teaspoon cinnamon
For the lightened-up caramel:
- 1/4 cup coconut sugar (or brown sugar)
- 2 tablespoons oat milk (any milk works—I’ve used almond and regular dairy too)
- 1 tablespoon butter (unsalted is ideal here so you control the salt)
- 1/2 teaspoon vanilla extract
- Pinch of sea salt
A few notes from my kitchen to yours: I always use Honeycrisp apples when I can find them—they hold their shape beautifully and don’t turn into applesauce. If you’re dairy-free, use a vegan butter stick (not the spreadable kind—it has too much water). For the oat milk, any unsweetened milk alternative works. I’ve even used canned coconut milk in a pinch, and it gave the caramel a lovely richness. Just don’t use sweetened vanilla milk—it throws off the balance.
Equipment Needed
You don’t need a fancy kitchen for this recipe. Here’s what I use every time:
- 6-inch cast iron skillet (the star of the show—if you don’t have one, a small oven-safe baking dish works, but the cast iron gives you that gorgeous caramelized edge)
- Small mixing bowl (for the topping)
- Medium mixing bowl (for the apples)
- Small saucepan (for the caramel—I use a 1-quart size)
- Sharp knife and cutting board
- Measuring spoons and cups
- Spatula or wooden spoon
I bought my 6-inch cast iron skillet at a thrift store for five dollars. It was rusty and looked terrible. A little scrubbing and some seasoning later, it’s my most-used pan. If you’re buying new, Lodge makes an affordable one that lasts forever. Just don’t skip the cast iron if you can help it—it really does make a difference in how the apples caramelize.
Preparation Method
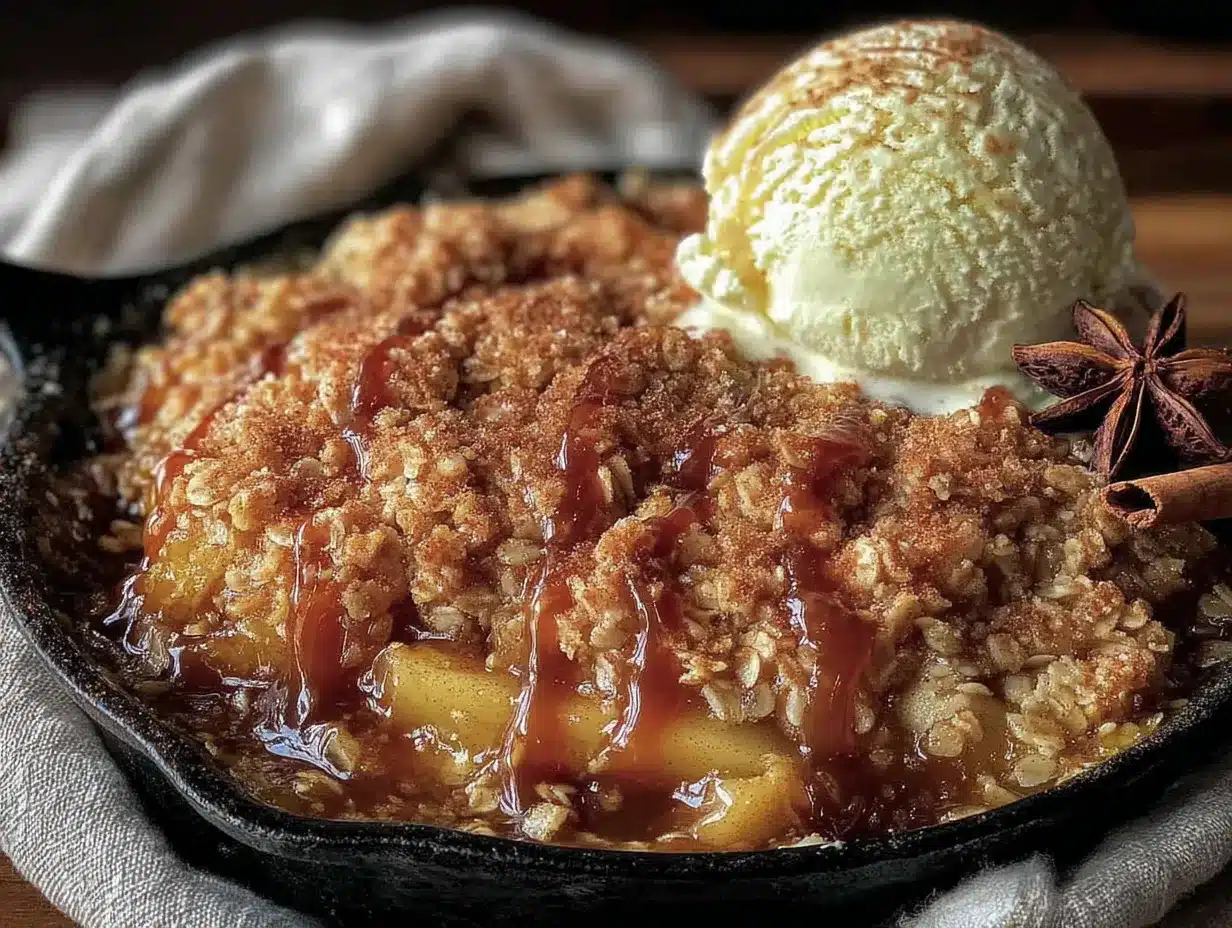
Let’s get cooking. This comes together fast, so I like to have everything measured and ready before I start. Trust me on this one—it makes the whole process smoother.
- Preheat your oven to 375°F (190°C). Place your cast iron skillet inside while it heats up. This step is key—the hot skillet gives the apples that beautiful sear on the bottom.
- Make the lightened-up caramel. In a small saucepan over medium heat, combine the coconut sugar, oat milk, and butter. Stir constantly until the butter melts and the sugar dissolves—about 2-3 minutes. Let it simmer gently for another minute until it thickens slightly. It should coat the back of a spoon. Remove from heat and stir in the vanilla and a pinch of sea salt. Set aside. Don’t walk away from this—caramel can burn fast if you get distracted.
- Prepare the apples. While the caramel cools slightly, peel and core your apples. Cut them into 1/2-inch slices—not too thin, or they’ll turn to mush, and not too thick, or they won’t get tender in time. Toss the slices in a medium bowl with the lemon juice, coconut sugar, cinnamon, nutmeg, and a pinch of salt. Let them sit for 5 minutes. This draws out a little moisture and helps the flavors meld.
- Make the topping. In a small bowl, combine the rolled oats, almond flour, coconut sugar, and cinnamon. Add the cold butter cubes. Use your fingers to work the butter into the dry ingredients until it looks like coarse crumbs with some pea-sized butter pieces still visible. Don’t overmix—those little butter chunks create the crispy bits everyone fights over.
- Assemble the crisp. Carefully remove the hot skillet from the oven (use an oven mitt—it’s hot!). Arrange the apple slices in the skillet, overlapping them slightly. Pour about half the caramel over the apples—save the rest for drizzling later. Sprinkle the oat topping evenly over the apples.
- Bake. Place the skillet in the oven and bake for 22-25 minutes, until the topping is golden brown and the apples are tender when pierced with a fork. The caramel should be bubbling around the edges. If the topping is browning too fast, tent loosely with foil for the last 5 minutes.
- Rest and serve. Let the crisp cool for 5 minutes in the skillet. Drizzle with the remaining caramel. Serve warm—preferably with a scoop of vanilla ice cream or a dollop of Greek yogurt if you’re keeping it light.
A few things I’ve learned the hard way: Don’t skip the resting time. The caramel needs a minute to set up, and the apples finish cooking from the residual heat. And if your topping looks a little pale at 20 minutes, give it another 3-5 minutes. You want it deeply golden—that’s where the flavor lives.
Cooking Tips & Techniques
I’ve made this recipe at least a dozen times, and I’ve messed it up in almost every way possible. Here’s what I’ve learned so you don’t have to make the same mistakes.
Don’t overcrowd the skillet. I know it’s tempting to pile in the apples, but they need a little breathing room to caramelize properly. If they’re stacked too high, they’ll steam instead of getting that lovely golden edge. A single layer with slight overlap is perfect.
Watch your caramel like a hawk. The first time I made this, I walked away to answer a text. Thirty seconds later, my caramel had gone from golden to burnt. It happens fast. Keep the heat at medium and stir constantly. When it starts to smell nutty and turns a deep amber, it’s done.
Use cold butter for the topping. This is non-negotiable. If your butter is even slightly soft, the topping will turn into paste instead of those beautiful, craggy crumbs. Pop your butter in the freezer for 5 minutes if it’s warm in your kitchen.
Let the skillet do the work. The cast iron retains heat like nothing else. That’s why preheating it matters—it gives the apples a head start on caramelizing. I’ve made this in a ceramic dish before, and it was good. But the cast iron version? It’s next level.
Test for doneness with a fork, not your eyes. The topping might look done at 18 minutes, but the apples could still be firm. Slide a fork into the center—if it meets resistance, give it more time. Soft apples are happy apples in a crisp.
Multitask smartly. While the caramel simmers, toss the apples. While the apples sit, make the topping. While the crisp bakes, clean up. This recipe comes together in under 40 minutes, but with a little planning, it feels effortless.
Variations & Adaptations
One of the things I love about this recipe is how flexible it is. I’ve played around with it more than I’d like to admit, and here are some of my favorite variations.
Vegan version: Use vegan butter sticks (not spreadable) and coconut cream instead of oat milk in the caramel. The texture is slightly richer, and honestly, I sometimes make it this way even when I’m not cooking for anyone vegan.
Gluten-free option: This recipe is already gluten-free if you use certified gluten-free oats and almond flour. I’ve tested it with oat flour too, and it works beautifully—just add an extra tablespoon of butter to keep the topping from drying out.
Seasonal swaps: In the fall, I use a mix of Honeycrisp and Granny Smith apples. In the summer, I swap in peaches or nectarines—just reduce the sugar by half since they’re sweeter. In winter, pears are incredible with a little ginger added to the topping.
Spice it up: Add a pinch of cardamom to the apple mixture for a warm, almost floral note. Or try a dash of cayenne in the caramel for a sweet-heat combo that’s surprisingly addictive. I did this once on a whim, and my husband still talks about it.
Nut-free version: Replace the almond flour with an equal amount of oat flour or all-purpose flour. The texture changes slightly—it’s a little less tender—but it’s still delicious.
Single serving: Halve the recipe and bake it in a 4-inch cast iron skillet or a small ramekin. Reduce the baking time to 15-18 minutes. Perfect for those nights when you don’t want to share.
Serving & Storage Suggestions
This crisp is best served warm, straight from the skillet. The contrast between the hot, jammy apples and the cold ice cream or yogurt is what makes it unforgettable.
Serving temperature: Let it rest for exactly 5 minutes after baking. Any less and the caramel is too runny; any more and the topping starts to soften. Five minutes is the sweet spot.
What to serve with it: A scoop of vanilla bean ice cream is the classic choice, but I’m partial to a dollop of Greek yogurt with a drizzle of honey. For something different, try a spoonful of mascarpone or a splash of cold heavy cream poured right over the top.
Drink pairings: A hot cup of coffee or chai latte is perfect. For something boozy, a small glass of bourbon or calvados (apple brandy) complements the caramel beautifully.
Storage: If you have leftovers (rare in my house), cover the skillet with foil or transfer the crisp to an airtight container. It keeps in the refrigerator for up to 3 days. The topping will soften, but it’s still delicious.
Reheating: The best way to reheat is in the oven at 350°F for 10 minutes. The microwave works in a pinch, but the topping won’t be as crispy. If using the microwave, heat in 30-second bursts and eat immediately.
Flavor development: Honestly, this crisp is even better the next day. The caramel seeps into the apples overnight, and the flavors meld together. I’ve been known to make it just for the leftovers.
Nutritional Information & Benefits
I’m not a nutritionist, but I’ve done my homework on this recipe. Here’s the breakdown for one serving (half the recipe):
| Nutrient | Amount |
|---|---|
| Calories | 285 |
| Total Fat | 12g |
| Saturated Fat | 6g |
| Carbohydrates | 44g |
| Fiber | 5g |
| Sugar | 28g |
| Protein | 4g |
The apples provide a solid dose of fiber and vitamin C, while the oats add slow-burning energy and beta-glucan, which is great for heart health. Coconut sugar has a lower glycemic index than regular sugar, so you get sweetness without the blood sugar spike. And the almond flour brings healthy fats and vitamin E to the party.
This recipe is naturally gluten-free (with certified oats), vegetarian, and can easily be made vegan. It’s also lower in sugar than traditional apple crisp recipes—I’ve cut the sugar by about 40% compared to my grandmother’s version, and honestly, I don’t miss it. The caramel does the heavy lifting.
Conclusion
This Lightened-Up Caramel Apple Crisp for Two has become more than just a recipe in my kitchen. It’s my go-to for those moments when I want something special without the fuss. It’s the dessert I make when I’m tired, when I’m celebrating, or when I just need a little comfort in a cast iron skillet.
I love that it’s forgiving. I love that it’s fast. And I really love that it makes me look like I spent hours in the kitchen when I actually spent about 15 minutes of active time. That’s the kind of magic we all need sometimes.
Try it this week. Use whatever apples you have, make the caramel your own, and don’t be afraid to eat it straight from the skillet. If you make it, I’d love to hear how it turned out—drop a comment below or tag me in your photos. And if you have a variation that blew your mind, please share it. We’re all in this together, figuring out how to eat well without sacrificing the good stuff.
Now go preheat that skillet. Your future self will thank you.
Frequently Asked Questions
Can I use a different type of apple?
Absolutely. Honeycrisp and Granny Smith are my favorites, but Fuji, Braeburn, or Pink Lady all work well. Avoid Red Delicious—they get too mushy and don’t have enough flavor.
Can I make this ahead of time?
Yes! Assemble the crisp (without baking), cover it, and refrigerate for up to 24 hours. Add 5 minutes to the baking time since you’re starting from cold. You can also make the caramel ahead and store it in the fridge for up to a week.
What if I don’t have a cast iron skillet?
No problem. Use a 6-inch oven-safe baking dish or even a small ramekin. The crisp won’t have quite the same caramelized edges, but it will still be delicious. Just reduce the baking time by a few minutes if using a ceramic dish.
Is this recipe really lightened up?
It really is. Compared to traditional apple crisp, this version has about 40% less sugar and uses oat milk instead of heavy cream in the caramel. The almond flour adds healthy fats and protein. It’s indulgent without being over the top.
Can I double this recipe?
Yes, but use a 10-inch skillet and increase the baking time to 30-35 minutes. Keep an eye on the topping—if it’s browning too fast, tent it with foil. The leftovers are amazing the next day.
Pin This Recipe!
Lightened-Up Caramel Apple Crisp for Two – Easy Cast Iron Dessert

A quick and easy apple crisp for two made in a cast iron skillet with a lightened-up caramel sauce. It tastes like a splurge but uses wholesome ingredients and comes together in under 40 minutes.
- Prep Time: 15 minutes
- Cook Time: 25 minutes
- Total Time: 40 minutes
- Yield: 2 servings 1x
- Category: Dessert
- Cuisine: American
Ingredients
- 2 medium apples (Honeycrisp or Granny Smith)
- 1 tablespoon fresh lemon juice
- 1 tablespoon coconut sugar (or brown sugar)
- 1/2 teaspoon ground cinnamon (preferably Saigon)
- 1/4 teaspoon ground nutmeg
- Pinch of salt
- 1/4 cup rolled oats (not quick oats)
- 2 tablespoons almond flour (or regular flour)
- 2 tablespoons coconut sugar (or brown sugar)
- 2 tablespoons cold butter (salted, cut into small cubes)
- 1/4 teaspoon cinnamon
- 1/4 cup coconut sugar (or brown sugar)
- 2 tablespoons oat milk (or any milk)
- 1 tablespoon butter (unsalted)
- 1/2 teaspoon vanilla extract
- Pinch of sea salt
Instructions
- Preheat your oven to 375°F (190°C). Place your cast iron skillet inside while it heats up.
- Make the lightened-up caramel: In a small saucepan over medium heat, combine the coconut sugar, oat milk, and butter. Stir constantly until the butter melts and the sugar dissolves—about 2-3 minutes. Let it simmer gently for another minute until it thickens slightly. Remove from heat and stir in the vanilla and a pinch of sea salt. Set aside.
- Prepare the apples: Peel and core your apples. Cut them into 1/2-inch slices. Toss the slices in a medium bowl with the lemon juice, coconut sugar, cinnamon, nutmeg, and a pinch of salt. Let them sit for 5 minutes.
- Make the topping: In a small bowl, combine the rolled oats, almond flour, coconut sugar, and cinnamon. Add the cold butter cubes. Use your fingers to work the butter into the dry ingredients until it looks like coarse crumbs with some pea-sized butter pieces still visible.
- Assemble the crisp: Carefully remove the hot skillet from the oven. Arrange the apple slices in the skillet, overlapping them slightly. Pour about half the caramel over the apples. Sprinkle the oat topping evenly over the apples.
- Bake: Place the skillet in the oven and bake for 22-25 minutes, until the topping is golden brown and the apples are tender when pierced with a fork. If the topping is browning too fast, tent loosely with foil for the last 5 minutes.
- Rest and serve: Let the crisp cool for 5 minutes in the skillet. Drizzle with the remaining caramel. Serve warm.
Notes
Don’t skip the resting time. The caramel needs a minute to set up, and the apples finish cooking from the residual heat. If your topping looks a little pale at 20 minutes, give it another 3-5 minutes. You want it deeply golden. Use cold butter for the topping. Preheat the skillet for better caramelization.
Nutrition
- Serving Size: 1/2 of recipe
- Calories: 285
- Sugar: 28
- Fat: 12
- Saturated Fat: 6
- Carbohydrates: 44
- Fiber: 5
- Protein: 4
Keywords: apple crisp, caramel apple crisp, cast iron dessert, easy dessert, lightened-up dessert, apple dessert for two, healthy apple crisp


