My neighbor Karen wasn’t trying to impress anyone. I’d stopped by to borrow a ladder — ours had mysteriously vanished after the garage sale — and this electric green glow coming from her kitchen stopped me cold before I even made it past the porch. The smell hit me next, like a haunted candy shop mixed with something tropical and mysterious. She was just standing there, casually pouring this bubbling, neon-green concoction into a punch bowl shaped like a cauldron, humming along to some Halloween playlist on her phone.
“Oh, that?” she said when she caught me staring. “It’s just the punch for the block party. Nothing fancy.” Nothing fancy, she says! I mean, honest to goodness, the thing looked like it had been brewed by a friendly witch who also happened to have a degree in mixology. The way the dry ice swirled around the top of that bowl, sending ghostly wisps over the rim — I was completely transfixed. And she was acting like she’d just made Kool-Aid.
Maybe you’ve been there, right? That moment when you see someone pull off something that looks genuinely spectacular, and they just shrug like it’s no big deal. It’s almost annoying, honestly. But also inspiring. I stood in her kitchen for a good twenty minutes, asking questions while she finished up, and she walked me through the whole thing like it was the simplest recipe in the world. She was right — it is simple. But the way it looks? That’s pure Halloween magic. I’ve been making this crowd-pleasing witches’ brew green punch for every spooky gathering since that day, and let me tell you, it never fails to steal the show.
Why You’ll Love This Recipe
This isn’t just another Halloween punch recipe. This is the one that makes people stop mid-conversation and ask, “What IS that?” I’ve brought this to costume parties, trunk-or-treat events, and family Halloween dinners, and every single time, someone corners me for the recipe. Here’s what makes it so special:
- Unbelievably Easy : You’re looking at about 10 minutes of actual prep time. Seriously. The hardest part is deciding which creepy garnishes to use.
- Kid-Friendly & Fully Non-Alcoholic : Everyone can enjoy this — from the littlest ghost to the oldest goblin at the party. No worrying about who’s driving home.
- Visually Stunning : That electric green color with the dry ice fog effect? It’s pure theater. Your punch bowl becomes the centerpiece of the whole party.
- Totally Crowd-Pleasing : The sweet-tart flavor is universally loved. I’ve never seen a single person take a sip and make a face. It’s always, “Oh, that’s GOOD.”
- Perfect for Hosting : You can prep everything hours ahead and just add the carbonated elements right before guests arrive. Less stress, more impact.
What makes this version different from all the other green punches out there? It’s the balance. I’ve tested a dozen variations — some are too sweet, some taste like pure lime juice (ouch), and some just look sad and murky. This one hits that perfect sweet-tart spot, and the color stays brilliant and bright even after the ice starts melting. It’s the kind of punch that makes you close your eyes after the first sip, then immediately reach for a refill. Perfect for the host who wants to impress without spending all night in the kitchen.
What Ingredients You Will Need
This recipe uses simple, everyday ingredients that come together to create something genuinely spectacular. Most of these are probably already in your pantry or available at any grocery store without a special trip.
For the Punch Base:
- 1 (64-ounce) bottle limeade concentrate, thawed (I prefer Minute Maid for consistent flavor, but store brands work fine too)
- 1 (46-ounce) can pineapple juice (unsweetened is best — it lets the limeade shine)
- 2 liters lemon-lime soda, chilled (7-Up or Sprite both work perfectly)
- 1 (2-liter) bottle ginger ale, chilled (Canada Dry is my go-to, but any brand works)
- 4 cups cold water (filtered water makes a difference if your tap water has a strong taste)
For the Spooky Effect:
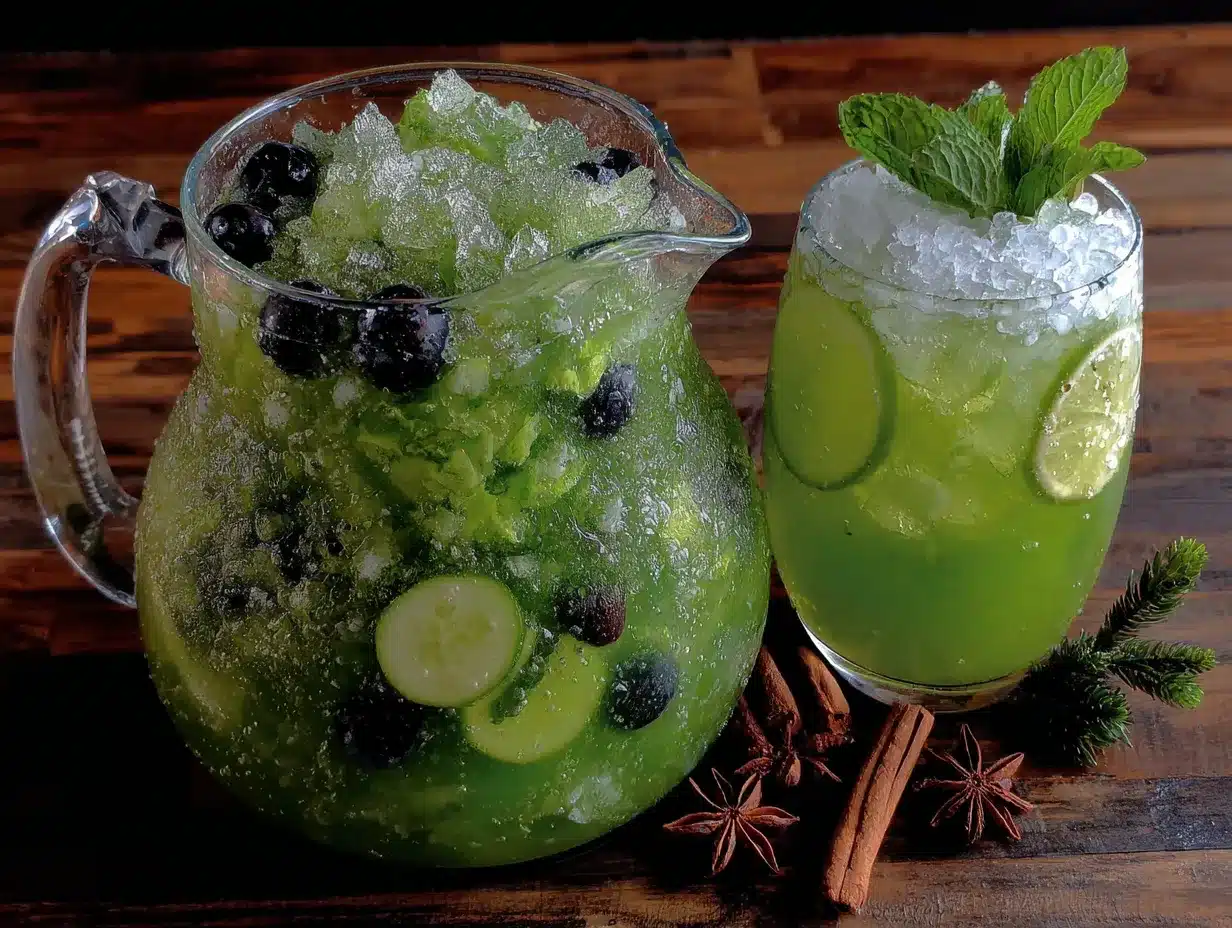
- 1 small block dry ice (available at most grocery stores — call ahead to check availability)
- Food-grade rubber gloves (for handling dry ice safely — never touch it with bare hands!)
For Garnish (Optional but Highly Recommended):
- 1 cup frozen gummy worms (they look like creepy crawlies floating in the punch!)
- 1 cup frozen lychee fruits (optional — they look like eyeballs when you add a single blueberry in the center)
- Fresh mint sprigs (for a witchy, herbal touch)
- Ice ring or large ice block (keeps the punch cold without diluting it as fast as regular cubes)
A quick note on ingredient selection: For the most vibrant green color, look for limeade concentrate that’s a bright, artificial green rather than a pale, natural one. I know that sounds counterintuitive, but for Halloween punch, that electric hue is exactly what you want. If you’re serving this at a party where some guests avoid artificial colors, you can use a natural green food coloring or even a bit of spirulina powder mixed into the limeade — but honestly, the color won’t be quite as dramatic. For a spooky twist, try adding a few drops of black food coloring to the punch base before adding the carbonated drinks. It creates a deep, swampy green that looks incredible with the dry ice fog.
Equipment Needed
You don’t need anything fancy for this recipe, but having the right tools makes the process smoother and safer, especially when working with dry ice.
- Large punch bowl (at least 2-gallon capacity — glass or clear plastic shows off the color best)
- Large pitcher or mixing container (for combining the base ingredients before pouring into the punch bowl)
- Tongs (for handling dry ice — never use your hands!)
- Small hammer or mallet (for breaking the dry ice into smaller pieces)
- Thick kitchen towel (to wrap the dry ice while breaking it)
- Measuring cups (for accurate liquid measurements)
- Large spoon or ladle (for stirring and serving)
- Punch cups or small glasses (clear cups let guests see the spooky garnishes)
If you don’t have a punch bowl, a large clear plastic storage container works in a pinch — just make sure it’s food-safe. I’ve also used a clean plastic cauldron from the Halloween store, and it looked amazing. For the dry ice, most grocery stores sell it, but you can also check with local ice companies. Just remember to bring a cooler to transport it, and don’t seal it airtight — the expanding gas needs somewhere to go.
Preparation Method
This recipe comes together in minutes, which is perfect when you’re juggling a dozen other hosting tasks before the party starts. Here’s the step-by-step process:
- Make the punch base (up to 24 hours ahead): In your large pitcher or mixing container, combine the thawed limeade concentrate, pineapple juice, and cold water. Stir until the limeade is completely dissolved and the mixture is smooth. This concentrated base can be refrigerated until you’re ready to serve. I like to do this step the night before — one less thing to worry about on party day.
- Prepare your ice ring (at least 4 hours ahead): Fill a ring mold or Bundt pan about halfway with water. Add a few gummy worms, mint sprigs, or even small plastic spiders (make sure they’re food-safe!) and freeze until solid. Add a little more water to fill the mold completely and freeze again. This creates a gorgeous, spooky ice ring that chills the punch without watering it down too quickly.
- Chill everything: Make sure your lemon-lime soda and ginger ale are thoroughly chilled before you start. Warm soda goes flat immediately and loses all that wonderful fizz. I usually stick them in the fridge the night before, or at least 4 hours ahead.
- Combine the punch (just before serving): Pour your chilled base into the punch bowl. Gently add the lemon-lime soda and ginger ale. Stir very gently to combine — you want to keep as much carbonation as possible. The mixture should turn a brilliant, glowing green. If the color isn’t vibrant enough for your taste, add a few drops of green food coloring and stir gently.
- Add the ice ring: Carefully unmold your ice ring and float it in the punch. The gummy worms and mint will look like they’re trapped in a frozen swamp — perfect for Halloween!
- Add the dry ice (right before guests arrive): Put on your food-grade rubber gloves. Wrap the dry ice block in a thick kitchen towel and use the hammer to break it into smaller pieces — about 2 to 3 inches each. Using tongs, carefully add 2 to 3 pieces of dry ice to the punch bowl. Do NOT let the dry ice touch the sides of the bowl if it’s glass — the extreme cold can crack it. Never, ever put dry ice in anyone’s cup. It’s for visual effect only.
- Garnish and serve: Scatter a few extra gummy worms around the edges of the punch bowl. Add lychee “eyeballs” if you’re using them. The dry ice will create a low, rolling fog effect that looks absolutely magical. Place the ladle in the bowl and let guests serve themselves.
Important safety note: The dry ice effect usually lasts about 30 to 45 minutes. You can add more pieces as needed, but always use tongs and gloves. The fog is safe to breathe in a well-ventilated area, but don’t lean directly over the bowl and inhale deeply. Also, make sure the dry ice has completely sublimated (evaporated) before you try to clean the bowl or pour leftover punch down the drain.
Cooking Tips & Techniques
Over the years, I’ve learned a few tricks that make this punch even better. Let me share what I’ve discovered through trial and error — and yes, a few spectacular failures.
The color secret: The first time I made this, the punch came out a pale, sickly green that looked more like dishwater than witches’ brew. Total disappointment. The trick is to use limeade concentrate that’s already a bright green — some brands are paler than others. If yours looks dull, add a few drops of neon green food coloring. I know it’s artificial, but for Halloween, it’s part of the fun. A single drop of blue food coloring can also deepen the green into a more mysterious, swampy shade.
Keep it cold without diluting it: Regular ice cubes melt fast and turn your punch into watery sadness. The ice ring is your best friend here, but even better is a block of frozen punch. Freeze some of the base mixture (before adding carbonated drinks) in a small bowl or container. Float that block in the punch — it chills the drink without diluting it because it’s made of the same stuff.
The dry ice timing: I once added the dry ice too early, and by the time guests arrived, the fog effect was long gone. Add it right before people start arriving, or even better, wait until the first guests are there and let them see you add it. The “wow” factor is real. If you’re serving over several hours, keep a small cooler with extra dry ice pieces nearby and refresh the bowl every 30 to 45 minutes.
One mistake I’ll never make again: I once made the mistake of using a glass punch bowl that wasn’t tempered. The dry ice cracked it right down the middle. Green punch went everywhere — all over the tablecloth, the floor, my shoes. It looked like a crime scene from a horror movie. Learn from my pain: use a thick glass, acrylic, or plastic punch bowl. And always put a towel or trivet underneath in case of condensation or accidents.
Variations & Adaptations
One of the best things about this recipe is how easily it adapts to different tastes and dietary needs. Here are some variations I’ve tried and loved:
The “Swamp Water” Version
Add a few drops of black food coloring to the base before adding the carbonated drinks. The result is a deep, murky green that looks like it was scooped straight from a haunted bog. It’s darker and moodier than the bright green version, and it looks incredible with the dry ice fog rolling over the top. My nephew called it “dinosaur punch,” and honestly, I think that’s a pretty accurate description.
The Berry Witches’ Brew
Replace the limeade concentrate with an equal amount of berry-flavored punch concentrate (like Hawaiian Punch Berry Blue Typhoon). The color turns a deep, mysterious purple-green that shifts depending on the lighting. Add frozen raspberries and blackberries instead of gummy worms for a more natural look. The flavor is sweeter and more fruity, with less tartness than the original.
The Sugar-Free Version
Use sugar-free limeade concentrate, diet lemon-lime soda, and diet ginger ale. The flavor is slightly less sweet, but still delicious. I’ve served this at parties where half the guests were watching their sugar intake, and no one complained. You can also add a splash of stevia or monk fruit sweetener if you want to boost the sweetness without adding sugar.
The Tropical Twist
Add 2 cups of coconut water to the base mixture, and replace the ginger ale with club soda for a lighter fizz. Garnish with fresh pineapple wedges and edible orchids. The coconut flavor pairs beautifully with the pineapple juice and limeade. This version feels less Halloween-specific and more like a tropical party punch — perfect for a summer costume party or a luau-themed event.
Serving & Storage Suggestions
This punch is best served immediately after adding the carbonated drinks and dry ice, but with a little planning, you can make your hosting life much easier.
Serving temperature: Serve the punch very cold, but not icy. The ice ring will keep it chilled for about an hour. If you’re serving outdoors on a warm evening, consider placing the punch bowl in a larger bowl filled with ice to keep it cold longer. The dry ice also helps maintain a cold temperature, but remember it’s mainly for show.
What to serve alongside: This punch pairs beautifully with savory appetizers — the sweet-tart flavor cuts through rich, salty foods. Think mini sliders, loaded nachos, stuffed mushrooms, or a cheese board with sharp cheddar and spicy crackers. For a full Halloween spread, serve it alongside mummy hot dogs, spiderweb dip, and pumpkin-shaped cookies. The bright green color also looks amazing next to orange and black decorations.
Storage: Leftover punch (without dry ice) can be refrigerated for up to 24 hours. The carbonation will fade, but the flavor will still be good. Store it in a sealed container to prevent it from absorbing other fridge odors. If you want to revive it, add a splash of fresh lemon-lime soda before serving again. Do NOT store punch that has had dry ice in it — wait until the dry ice has completely sublimated, then pour the punch into a storage container.
Flavor development: Honestly, the punch actually tastes better after it’s sat for a few hours. The flavors meld together, and the sweetness becomes more balanced. If you’re making this for a party, I recommend mixing the base (limeade, pineapple juice, and water) the night before. The carbonated drinks should only be added right before serving, but the base gets better with time.
Nutritional Information & Benefits
Let’s be real — this is a treat, not a health drink. But here’s what you should know if you’re keeping track:
| Nutrient | Per 8 oz serving |
|---|---|
| Calories | 180-220 |
| Total Carbohydrates | 45-55g |
| Sugars | 40-50g |
| Vitamin C | 25-30% DV |
| Sodium | 15-25mg |
The pineapple juice provides a decent amount of vitamin C, and the limeade adds a bit more. If you’re using the sugar-free version, you can cut the calories and carbs significantly — down to about 20-30 calories per serving. The main ingredients are all gluten-free, so this punch works for guests with celiac disease or gluten sensitivity. Just double-check that your specific brands are certified gluten-free, as some soda manufacturers use wheat-derived ingredients in their flavorings.
For those watching their caffeine intake, this punch is completely caffeine-free — perfect for an evening party where kids and adults alike will be drinking it. And since it’s non-alcoholic, it’s safe for designated drivers, pregnant guests, and anyone who prefers to skip the booze. I personally love that this punch brings everyone together — no one feels left out because they can’t drink what’s being served.
Conclusion
This crowd-pleasing witches’ brew green punch has become my go-to Halloween recipe for one simple reason: it works. Every single time. The color is dramatic, the fog effect is mesmerizing, and the flavor is genuinely delicious. It’s the kind of recipe that makes people think you spent hours creating something complicated, when really, you just mixed a few things together and added some dry ice. And honestly? That’s the best kind of recipe to have in your hosting arsenal.
I love that this punch brings people together. There’s something about that bubbling green cauldron that makes everyone gather around, cups in hand, ready to be delighted. It breaks the ice at parties, gets conversations started, and adds that little bit of magic that makes Halloween gatherings special. Whether you’re hosting a costume party, a trunk-or-treat event, or just a small family dinner, this punch will steal the show.
So go ahead — make your own version. Add your own creepy garnishes. Experiment with different flavors. And when someone asks you for the recipe, just shrug and say, “Oh, it’s nothing fancy.” Then watch their face when they take that first sip.
I’d love to hear how yours turns out! Drop a comment below and tell me what garnishes you used, or tag me in your photos on social media. Did you add lychee eyeballs? Gummy worms? Something even creepier? Let me know — and happy haunting!
Frequently Asked Questions
Can I make this punch ahead of time?
You can prepare the base (limeade concentrate, pineapple juice, and water) up to 24 hours in advance and store it in the refrigerator. However, wait to add the carbonated drinks and dry ice until just before serving to maintain maximum fizz and the best fog effect.
Is dry ice safe to use in a punch bowl?
Yes, as long as you follow safety guidelines. Always wear gloves and use tongs when handling dry ice. Never put dry ice directly into someone’s cup, and make sure the punch bowl is not made of thin glass that could crack from the extreme cold. Keep the area well-ventilated, and never seal the punch bowl airtight.
Can I make this punch without dry ice?
Absolutely! The punch is still delicious and visually striking without the dry ice. For a similar fog effect without the safety concerns, you can use a punch bowl with a built-in mister or add a few drops of food-grade fog machine liquid to the punch. The green color and spooky garnishes will still look fantastic.
How do I clean the punch bowl after using dry ice?
Wait until the dry ice has completely sublimated (evaporated) — this usually takes about 30-45 minutes after the last piece is added. Then wash the bowl with warm, soapy water as usual. The dry ice leaves no residue, so cleaning is straightforward. Just make sure no small pieces of dry ice remain before you start washing.
Can I use this recipe for a non-Halloween party?
Definitely! Change up the color and garnishes to match your theme. Use red or purple food coloring for a Valentine’s Day party, or blue for a winter wonderland event. Skip the gummy worms and use fresh fruit or edible flowers instead. The basic recipe is versatile enough to work for any occasion.
Pin This Recipe!
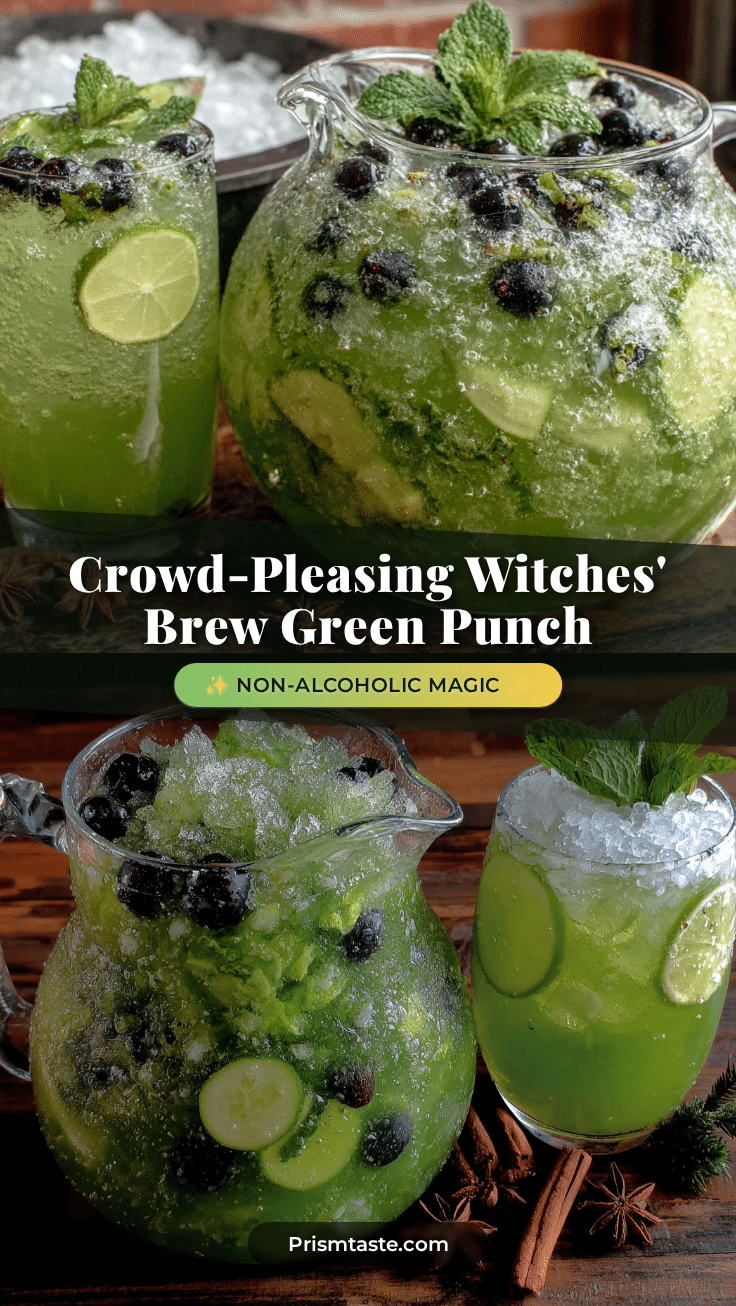
Crowd-Pleasing Witches Brew Punch – Easy Non-Alcoholic Recipe
This electric green punch with dry ice fog is the ultimate Halloween party centerpiece. It’s incredibly easy to make, kid-friendly, and universally loved for its sweet-tart flavor.
- Prep Time: 10 minutes
- Cook Time: 0 minutes
- Total Time: 10 minutes
- Yield: 16 servings 1x
- Category: Beverage
- Cuisine: American
Ingredients
- 1 (64-ounce) bottle limeade concentrate, thawed
- 1 (46-ounce) can unsweetened pineapple juice
- 2 liters lemon-lime soda, chilled
- 1 (2-liter) bottle ginger ale, chilled
- 4 cups cold water
- 1 small block dry ice
- Food-grade rubber gloves
- 1 cup frozen gummy worms (optional)
- 1 cup frozen lychee fruits (optional)
- Fresh mint sprigs (optional)
- Ice ring or large ice block (optional)
Instructions
- Make the punch base (up to 24 hours ahead): In a large pitcher or mixing container, combine the thawed limeade concentrate, pineapple juice, and cold water. Stir until the limeade is completely dissolved and the mixture is smooth. Refrigerate until ready to serve.
- Prepare your ice ring (at least 4 hours ahead): Fill a ring mold or Bundt pan about halfway with water. Add a few gummy worms, mint sprigs, or small plastic spiders (food-safe). Freeze until solid. Add more water to fill the mold completely and freeze again.
- Chill everything: Ensure the lemon-lime soda and ginger ale are thoroughly chilled before starting.
- Combine the punch (just before serving): Pour the chilled base into the punch bowl. Gently add the lemon-lime soda and ginger ale. Stir very gently to combine. The mixture should turn a brilliant green. If needed, add a few drops of green food coloring.
- Add the ice ring: Carefully unmold the ice ring and float it in the punch.
- Add the dry ice (right before guests arrive): Put on food-grade rubber gloves. Wrap the dry ice block in a thick kitchen towel and use a hammer to break it into 2-3 inch pieces. Using tongs, carefully add 2-3 pieces of dry ice to the punch bowl. Do not let dry ice touch the sides of a glass bowl.
- Garnish and serve: Scatter extra gummy worms around the edges of the punch bowl. Add lychee ‘eyeballs’ if using. Place the ladle in the bowl and let guests serve themselves.
Notes
For the most vibrant green color, use limeade concentrate that is bright green. Add dry ice right before guests arrive for the best fog effect. Never handle dry ice with bare hands. Use a thick glass, acrylic, or plastic punch bowl to avoid cracking. The dry ice effect lasts about 30-45 minutes; you can add more pieces as needed. Leftover punch (without dry ice) can be refrigerated for up to 24 hours.
Nutrition
- Serving Size: 8 oz
- Calories: 200
- Sugar: 45
- Sodium: 20
- Carbohydrates: 50
Keywords: Halloween punch, witches brew, non-alcoholic punch, green punch, party punch, dry ice punch, kid-friendly punch


