My neighbor Carol watched me hauling grocery bags up the front steps one chilly October afternoon. She didn’t say anything at first, just stood there with her gardening gloves on, holding a trowel. Then she disappeared inside her house and came back holding a foil-covered pan that was still warm to the touch. “These aren’t fancy,” she said, pushing the pan into my hands. “But they taste like October should taste.”
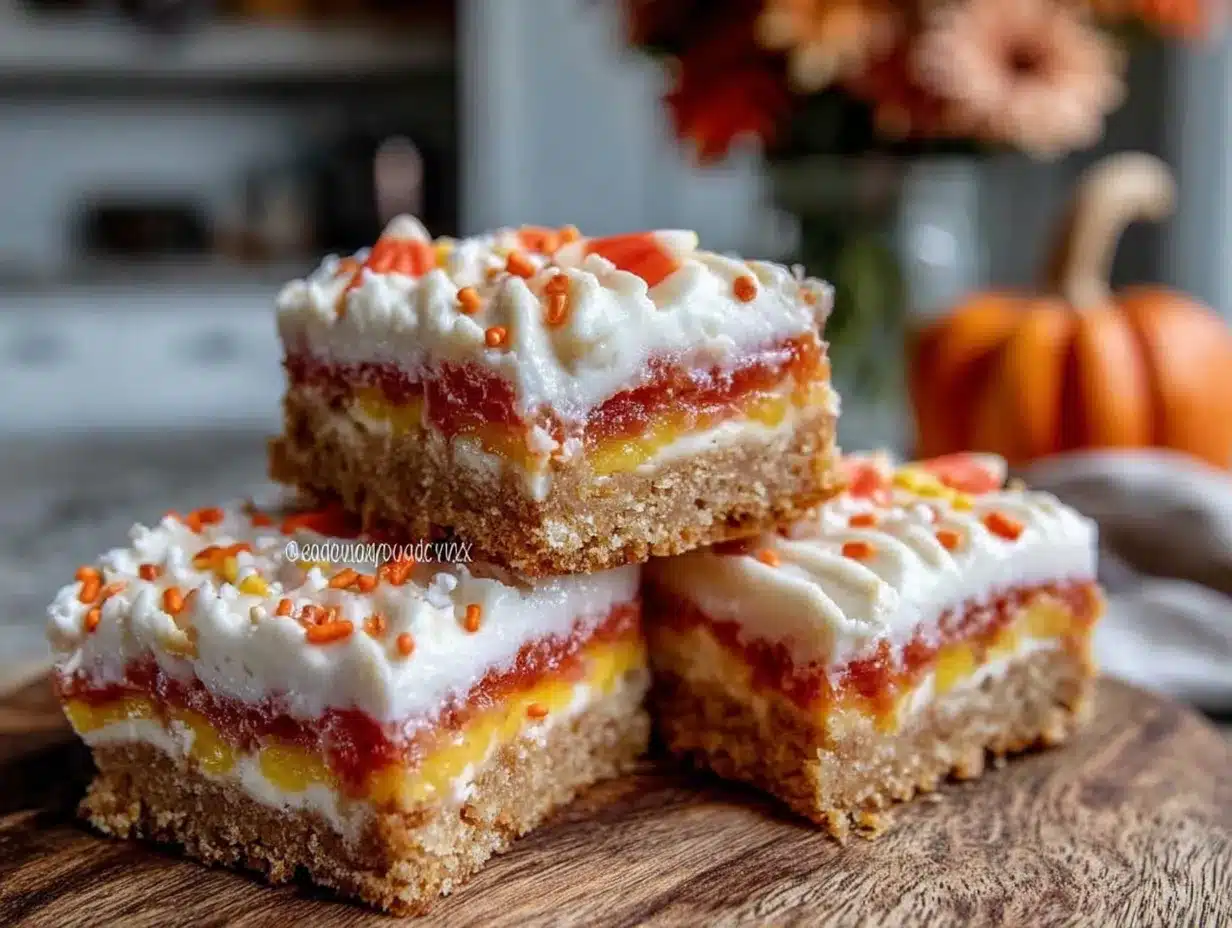
I unwrapped the foil right there on my front porch, steam curling up into the crisp air, and saw these funny little tricolored bars staring back at me. Yellow, orange, and white layers stacked like the candy corn I hadn’t eaten since I was a kid. One bite and I honestly forgot about my cold hands and the bags still sitting by my feet. The buttery sugar cookie base, the subtle vanilla warmth, the way the colors melted together—it was like someone had baked a whole season into a 9×13 pan.
Carol told me later that her grandmother used to make these every fall, back when candy corn was something you actually looked forward to finding in your Halloween bucket. She adapted the recipe over the years, tweaking the layers until the colors stayed bright without tasting like food coloring. I’ve made them four times since that afternoon. Maybe you’ve been there—you get a recipe from someone and it just clicks, like it was always meant to end up in your kitchen.
These cozy candy corn sugar cookie bars have become my go-to for everything fall. They’re the thing I bring to potlucks, the thing I bake when the first real chill hits the air, the thing I make just because. And honestly? They’re impossible to eat without smiling.
Why You’ll Love This Recipe
I’ve tested these bars more times than I care to admit. The first batch came out too dry. The second batch had layers that bled into each other like a watercolor painting gone wrong. But by batch number four, I had it figured out. These cozy candy corn sugar cookie bars are the result of real kitchen trial and error, not some theoretical recipe I found online and copied.
- Quick & Easy: From start to finish, these come together in about 45 minutes. No chilling dough, no rolling pins, no complicated techniques. Just mix, layer, and bake.
- Simple Ingredients: You probably have most of this in your pantry right now. Butter, sugar, eggs, flour, vanilla. The only special thing is food coloring, and you can find that anywhere.
- Perfect for Fall: These are made for Halloween parties, Thanksgiving dessert tables, or just a random Tuesday when you need something cozy.
- Crowd-Pleaser: Kids love the candy corn look. Adults love the nostalgic sugar cookie taste. Everyone wins.
- Unbelievably Delicious: The texture is soft and chewy in the middle with slightly crisp edges. The vanilla flavor is warm and familiar. It’s comfort food in bar form.
What makes these different from every other sugar cookie bar recipe out there is the layering technique. I spent a lot of time figuring out how to keep the colors separate without them getting muddy. The trick is in how you add the food coloring and how you layer the dough. It’s not complicated, but it makes all the difference.
These bars are the kind of dessert that makes people close their eyes after the first bite. I’ve seen it happen. They take a bite, pause, and then just sit there for a second. That’s the power of a really good sugar cookie bar done right. It’s familiar but somehow better than you remembered.
What Ingredients You Will Need
This recipe uses simple, wholesome ingredients that come together to create something genuinely special. Most of these are pantry staples, which means you can make these cozy candy corn sugar cookie bars on a whim without a trip to the store.
For the Sugar Cookie Base
- Unsalted butter, softened – 1 cup (2 sticks or 226 grams). I use Land O’Lakes because it’s consistent and widely available. Make sure it’s really softened, not melted. You want it to be room temperature so it creams properly with the sugar.
- Granulated sugar – 1 ½ cups (300 grams). Regular white sugar works perfectly here. Don’t substitute with brown sugar—it will change the color and texture.
- Large eggs – 2, room temperature. If you forget to take them out ahead of time, place them in a bowl of warm water for 5 minutes.
- Vanilla extract – 2 teaspoons. Pure vanilla extract makes a difference here. I’ve tried imitation and the flavor is just flat. Get the real stuff if you can.
- All-purpose flour – 3 cups (360 grams). Spoon and level your flour. Don’t scoop directly from the bag or you’ll end up with too much and dry bars.
- Baking powder – 1 teaspoon. Make sure it’s fresh. If it’s been sitting in your cabinet for two years, buy a new can.
- Salt – ½ teaspoon. Fine sea salt or table salt works. It balances the sweetness.
For the Coloring and Layering
- Yellow food coloring – About 15-20 drops, gel preferred. I use Americolor brand because the colors are vibrant without being artificial tasting. Liquid food coloring works but you’ll need more drops to get the same intensity.
- Orange food coloring – About 10-15 drops, or mix red and yellow. If you don’t have orange, you can mix 3 parts yellow to 1 part red.
- White layer – No coloring needed. Just leave one third of the dough plain.
The food coloring situation is important. Gel food coloring gives you bright, true colors without thinning out your dough. Liquid food coloring works but it can make the dough a bit sticky if you use too much. I learned this the hard way when my first batch turned out more pastel than vibrant. If you’re using liquid, add it drop by drop and stop when you like the shade.
For the orange layer, you can absolutely buy orange food coloring, but I prefer mixing my own from yellow and red. It gives a warmer, more natural orange that looks less artificial. That’s a tip Carol shared with me, and I haven’t bought orange coloring since.
Equipment Needed
You don’t need anything fancy for these cozy candy corn sugar cookie bars. Here’s what you’ll need:
- 9×13 inch baking pan – Metal or glass both work. I prefer metal because it gives slightly crisper edges. If you use glass, reduce the oven temperature by 25 degrees.
- Parchment paper – This is non-negotiable. It makes lifting the bars out so much easier. I’ve tried greasing the pan and it’s just not the same.
- Electric mixer – Hand mixer or stand mixer with paddle attachment. You can do this by hand with a wooden spoon, but your arm will get tired.
- Mixing bowls – At least 3 medium bowls for dividing the dough.
- Rubber spatula – For scraping down the sides and spreading the dough evenly.
- Measuring cups and spoons – Accurate measurements matter in baking.
- Kitchen scale – Optional but recommended for the flour. It’s more accurate than measuring cups.
- Cooling rack – For cooling the bars completely before cutting.
I bought my 9×13 pan from a restaurant supply store for about twelve dollars and it’s still going strong after five years. You don’t need expensive equipment for good results. Just make sure everything is clean and ready to go before you start.
Preparation Method
Let me walk you through this step by step. I’ve made these cozy candy corn sugar cookie bars enough times to know exactly where things can go wrong, so I’ll point those spots out as we go.
- Preheat your oven to 350°F (175°C). Line your 9×13 pan with parchment paper, leaving some overhang on the long sides. This creates handles for lifting the bars out later. Lightly spray the parchment with non-stick spray just to be safe.
- Cream the butter and sugar. In a large bowl, beat the softened butter and granulated sugar together until light and fluffy. This takes about 3-4 minutes with an electric mixer on medium speed. You want it to look pale and almost doubled in volume. Scrape down the sides of the bowl halfway through. Don’t rush this step—proper creaming gives your bars a tender texture.
- Add the eggs and vanilla. Beat in the eggs one at a time, mixing well after each addition. Add the vanilla extract and mix until combined. The mixture might look a little separated at this point. That’s normal.
- Mix the dry ingredients. In a separate bowl, whisk together the flour, baking powder, and salt. This ensures the baking powder is evenly distributed so your bars rise evenly.
- Combine wet and dry. Gradually add the dry ingredients to the wet mixture, mixing on low speed just until combined. Stop when you no longer see streaks of flour. Overmixing will make your bars tough. I speak from experience—my third batch was a bit too chewy because I kept mixing.
- Divide the dough. Weigh or estimate the dough and divide it into three equal portions. You can eyeball this. Put each portion into a separate bowl.
- Color the dough. To one portion, add the yellow food coloring and mix until evenly distributed. To another portion, add the orange food coloring. Leave the third portion plain (white). Use a spatula or your hands to work the color in. Gel coloring works best because it doesn’t add extra liquid.
- Layer the dough. This is the fun part. Start with the orange dough. Using clean hands or a spatula, press it evenly into the bottom of your prepared pan. Make sure it’s level. Next, carefully press the yellow dough on top of the orange layer. Try to spread it evenly without mixing the colors. Finally, press the white dough on top. The layers will be thick, and that’s exactly what you want.
- Bake. Place the pan in the preheated oven and bake for 20-25 minutes. The edges should be lightly golden and the center should look set but still soft. A toothpick inserted in the center should come out with a few moist crumbs, not wet batter. Every oven is different, so start checking at 18 minutes.
- Cool completely. Place the pan on a cooling rack and let the bars cool for at least 30 minutes. Then use the parchment handles to lift them out of the pan and transfer to the cooling rack to cool completely. This is important—if you cut them while they’re still warm, they’ll crumble and the layers might separate.
- Cut and serve. Once completely cool, use a sharp knife to cut into bars. A bench scraper works great for clean cuts. Wipe the blade clean between cuts for the neatest edges.
A few things I’ve learned the hard way: If the dough feels too sticky to press into the pan, lightly wet your hands with water. If the layers start to blend together when you’re pressing them, chill the dough portions in the fridge for 10 minutes before layering. And if your bars come out a little pale on top, that’s okay—they’re supposed to look soft and inviting, not dark and crispy.
Cooking Tips & Techniques
I’ve made plenty of mistakes with these bars so you don’t have to. Here’s what I’ve learned:
Room temperature ingredients matter. Cold butter won’t cream properly, and cold eggs can make the batter seize up. Take everything out of the fridge 30 minutes before you start. I forgot once and tried to microwave the butter to soften it. It partially melted and the bars spread too much in the oven. Learn from my impatience.
Don’t overmix the dough. Once you add the flour, mix just until it disappears. Overmixing develops gluten, which makes the bars tough and dense instead of tender and soft. You want to see the last few streaks of flour disappear and then stop immediately.
Press the layers gently. When you’re layering the dough, use a gentle pressing motion. If you press too hard, the colors will bleed into each other. If you press too softly, the layers won’t stick together and you’ll end up with separate slabs instead of one cohesive bar. It’s a Goldilocks situation—just right pressure.
Check for doneness early. Ovens run hot and cold. My friend’s oven bakes everything five minutes faster than mine. Start checking at 18 minutes. The edges should be set and just barely golden. The center will look slightly underdone, but it will continue cooking from residual heat after you pull it out.
Cool completely before cutting. I cannot stress this enough. I cut into a warm batch once because I couldn’t wait, and the layers slid apart like a failed science experiment. Patience pays off. Let them cool completely, then use a sharp knife and wipe it clean between cuts.
Variations & Adaptations
These cozy candy corn sugar cookie bars are surprisingly flexible. Here are some ways I’ve adapted them:
Gluten-Free Version: Substitute the all-purpose flour with a 1:1 gluten-free baking flour blend. I’ve used Bob’s Red Mill and King Arthur brands with good results. The texture will be slightly more tender, but the flavor is still spot on. Add ¼ teaspoon of xanthan gum if your blend doesn’t already include it.
Different Color Themes: These don’t have to be candy corn colors. I made a batch for a baby shower using pink, lavender, and white layers. For Christmas, try red, green, and white. For a gender reveal, go with pink and blue. The technique stays the same—just swap the colors.
Add Mix-Ins: Sprinkle mini chocolate chips between the layers for a chocolate surprise. Or add a thin layer of caramel sauce between the orange and yellow layers. I tried this once and it was messy but delicious. You can also press a few candy corn pieces into the top before baking for extra decoration.
Lemon Variation: Add 1 tablespoon of lemon zest to the dough along with the vanilla. The citrus brightens the sweetness and adds a nice contrast. I made this version for a spring brunch and it was a hit.
Dairy-Free Option: Use vegan butter sticks (not the spreadable kind in a tub) and your favorite dairy-free milk alternative. The texture will be slightly different but still very good. I’ve used Miyoko’s vegan butter with great results.
My personal favorite variation is the lemon version. Something about the bright citrus paired with the soft sugar cookie texture feels like sunshine in bar form. It’s not traditional, but it’s become my springtime go-to.
Serving & Storage Suggestions
These bars are best served at room temperature. The texture is soft and chewy, and the flavors are most pronounced when they’re not straight from the fridge. If you’re serving them at a party, arrange them on a platter and let them sit out for about 15 minutes first.
For presentation, I like to cut them into small squares—about 2 inches each. They’re rich enough that a little piece goes a long way. You can also cut them into rectangles that mimic the shape of actual candy corn for a fun visual. Arrange them on a white platter so the colors pop.
These pair beautifully with a hot cup of coffee or a glass of cold milk. For a fall dessert spread, serve them alongside apple cider or a warm pumpkin spice latte. They also work great on a Halloween dessert table with other treats like brownies and cookies.
Storage Instructions: Store leftover bars in an airtight container at room temperature for up to 4 days. If you stack them, place a sheet of parchment paper between layers to prevent sticking. They’ll stay soft and chewy for the first 2 days, then start to firm up slightly.
Freezer Instructions: These bars freeze beautifully. Wrap individual bars tightly in plastic wrap, then place them in a freezer-safe bag or container. They’ll keep for up to 3 months. To thaw, let them sit at room temperature for about 30 minutes. Don’t microwave them—it makes the texture gummy.
The flavors actually develop a bit over time. Day-old bars taste even more buttery and vanilla-forward than fresh ones. I’ve been known to hide a few in the freezer just for myself. No judgment here.
Nutritional Information & Benefits
Let’s be real—these are a treat, not a health food. But that doesn’t mean they can’t fit into a balanced life. Here’s the estimated nutrition per bar (based on 24 bars):
| Nutrient | Amount Per Bar |
|---|---|
| Calories | 185 |
| Total Fat | 9g |
| Saturated Fat | 5g |
| Cholesterol | 35mg |
| Sodium | 95mg |
| Total Carbohydrates | 25g |
| Sugars | 14g |
| Protein | 2g |
These numbers are estimates and will vary based on the specific brands you use and how you cut the bars. If you’re looking to reduce the sugar, you can cut back to 1 cup of sugar, but the texture will be slightly less tender.
On the positive side, butter contains fat-soluble vitamins A, D, E, and K. Eggs provide high-quality protein and choline. And honestly? Sometimes the biggest benefit is the joy of eating something that makes you happy. I firmly believe that treats made with love and shared with people you care about are good for the soul.
These bars are not gluten-free, dairy-free, or vegan in their standard form, but the variations section above has options for most dietary needs.
Conclusion
These cozy candy corn sugar cookie bars are more than just a pretty dessert. They’re the recipe that my neighbor Carol handed me on a chilly October afternoon, the one that tasted like October should taste. They’re the bars I’ve made for Halloween parties, for friends who needed cheering up, and for quiet evenings when I wanted something sweet and familiar.
What I love most about this recipe is how approachable it is. You don’t need fancy equipment or professional baking skills. You just need butter, sugar, flour, a little patience, and the willingness to get food coloring on your fingers. The layers might not be perfectly even the first time, and that’s okay. Mine weren’t either.
I hope you make these bars and they become part of your fall traditions too. Maybe you’ll tweak the colors for a holiday party or add lemon zest for a spring brunch. Maybe you’ll make them exactly as written and fall in love with the classic candy corn look. However you make them, I’d love to hear about it.
Drop a comment below and tell me how your batch turned out. Did you try a variation? Did your kids help with the layering? Did you eat three in one sitting like I definitely did? Share your photos and tag me so I can see your beautiful layers. Happy baking, friend!
Frequently Asked Questions
Can I use a different size pan?
Yes, but the baking time will change. For an 8×8 pan, double the recipe and bake for 30-35 minutes. For a jelly roll pan (10×15), the bars will be thinner and bake in about 15-18 minutes. Keep an eye on them and check for doneness early.
Why did my layers blend together?
This usually happens when the dough is too warm or you press too hard. Try chilling each portion of dough in the fridge for 10-15 minutes before layering. Also, use a gentle pressing motion—you want to compact the dough just enough to eliminate air pockets, not squish the colors together.
Can I make these ahead of time?
Absolutely. These bars actually taste better the next day. Bake them, cool completely, and store in an airtight container at room temperature for up to 4 days. You can also freeze them for up to 3 months. Just wrap individual bars tightly in plastic wrap before freezing.
What if I don’t have gel food coloring?
Liquid food coloring works fine, but you’ll need more drops to get vibrant colors. Start with 20-25 drops and add more if needed. Be aware that liquid coloring can make the dough slightly stickier. If that happens, chill the dough for 10 minutes before layering.
Can I add frosting or glaze?
Sure, but keep it simple. A light vanilla glaze (powdered sugar mixed with milk and vanilla) drizzled on top adds extra sweetness and a pretty finish. Just wait until the bars are completely cool before adding any glaze. I wouldn’t recommend a thick buttercream—it might overwhelm the delicate sugar cookie flavor.
Pin This Recipe!
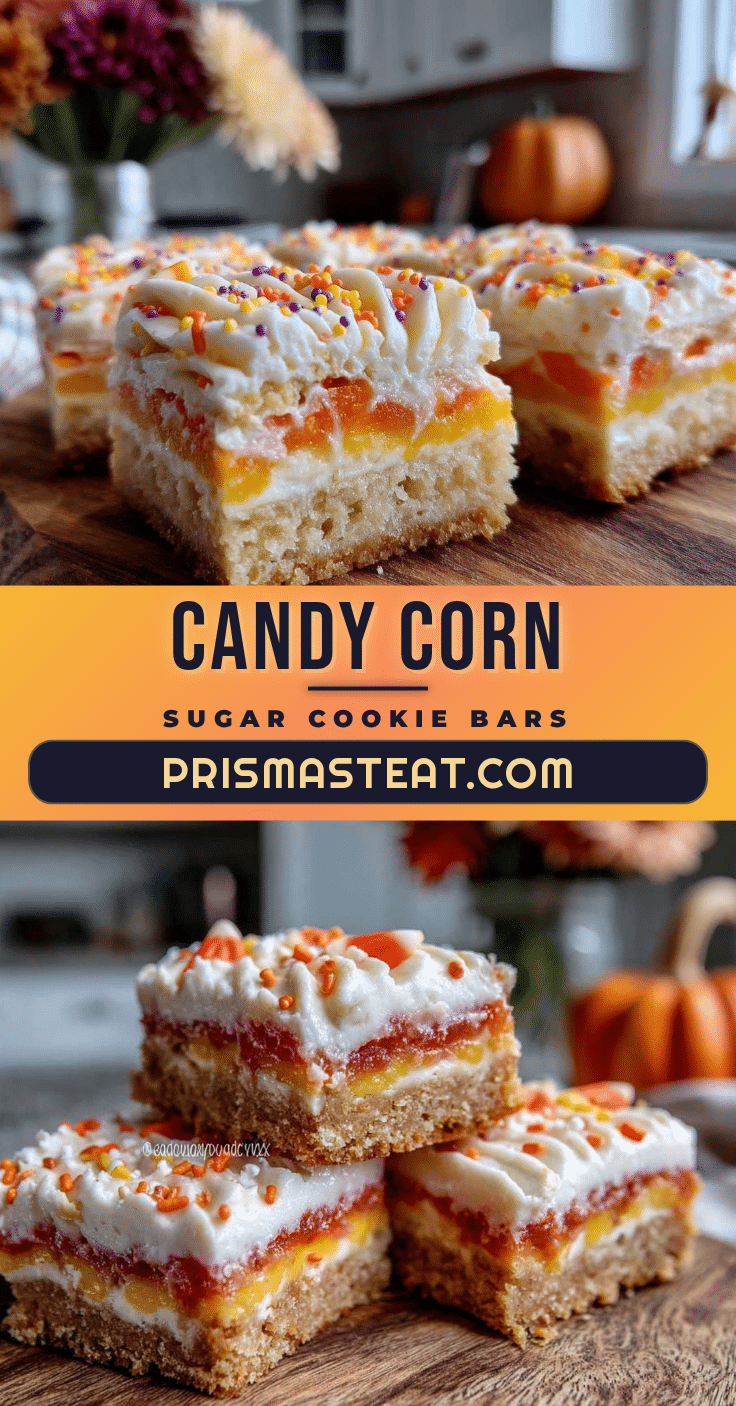
Cozy Candy Corn Sugar Cookie Bars: Easy Fall Dessert
These buttery, tri-colored sugar cookie bars capture the nostalgic taste of candy corn in a soft, chewy bar form. Perfect for fall gatherings, they’re easy to make with simple ingredients and a clever layering technique.
- Prep Time: 15 minutes
- Cook Time: 25 minutes
- Total Time: 45 minutes
- Yield: 24 bars 1x
- Category: Dessert
- Cuisine: American
Ingredients
- 1 cup (2 sticks or 226 grams) unsalted butter, softened
- 1 ½ cups (300 grams) granulated sugar
- 2 large eggs, room temperature
- 2 teaspoons vanilla extract
- 3 cups (360 grams) all-purpose flour
- 1 teaspoon baking powder
- ½ teaspoon salt
- 15–20 drops yellow food coloring (gel preferred)
- 10–15 drops orange food coloring (or mix 3 parts yellow to 1 part red)
Instructions
- Preheat oven to 350°F (175°C). Line a 9×13-inch baking pan with parchment paper, leaving overhang on the long sides. Lightly spray parchment with non-stick spray.
- In a large bowl, beat softened butter and granulated sugar together until light and fluffy, about 3-4 minutes with an electric mixer on medium speed. Scrape down sides halfway through.
- Beat in eggs one at a time, mixing well after each addition. Add vanilla extract and mix until combined.
- In a separate bowl, whisk together flour, baking powder, and salt.
- Gradually add dry ingredients to wet mixture, mixing on low speed just until combined. Do not overmix.
- Divide dough into three equal portions. Place each portion in a separate bowl.
- Add yellow food coloring to one portion and mix until evenly distributed. Add orange food coloring to another portion. Leave the third portion plain (white).
- Press orange dough evenly into the bottom of the prepared pan. Carefully press yellow dough on top of orange layer. Finally, press white dough on top. Layers should be thick and even.
- Bake for 20-25 minutes, until edges are lightly golden and center is set but still soft. A toothpick inserted in center should come out with a few moist crumbs.
- Cool in pan on a cooling rack for at least 30 minutes. Use parchment handles to lift bars out and transfer to rack to cool completely.
- Once completely cool, cut into bars using a sharp knife. Wipe blade clean between cuts for neat edges.
Notes
For best results, use room temperature ingredients. Gel food coloring gives vibrant colors without thinning dough. If layers start to blend, chill dough portions for 10 minutes before layering. Cool completely before cutting to prevent crumbling. Bars can be stored at room temperature for up to 4 days or frozen for up to 3 months.
Nutrition
- Serving Size: 1 bar
- Calories: 185
- Sugar: 14
- Sodium: 95
- Fat: 9
- Saturated Fat: 5
- Carbohydrates: 25
- Protein: 2
Keywords: candy corn, sugar cookie bars, fall dessert, Halloween, easy, layered bars, cookie bars


