My husband had claimed to hate funfetti cake for our entire marriage. Ten years. He said it was “just vanilla cake with dots” and that the boxed mix tasted like artificial sadness. Then last spring, I needed a test cake for my niece’s upcoming birthday party, and I decided to make this version from scratch — just for myself, honestly, because I had a bag of rainbow sprinkles I needed to use up. I baked the three layers, let them cool, and went to answer the phone. When I came back fifteen minutes later, there he was — standing at the kitchen counter, eating a corner piece with his fingers, crumbs all over his shirt. He didn’t even hear me walk in. He just froze, looked at me with frosting on his upper lip, and said, “Okay, this is different.” That was the moment I knew I had cracked the code. This isn’t just another funfetti cake — it’s the one that makes skeptics shut up and grab another slice. Maybe you’ve got a funfetti hater in your house too. I promise this recipe changes things.
Why You’ll Love This Recipe
This isn’t just another birthday cake recipe — it’s the result of ten test bakes, three ruined batches of buttercream, and one very patient family who didn’t mind eating cake for breakfast. I’ve spent years perfecting the balance between tender crumb and sturdy structure, because a birthday cake needs to hold up to stacking, frosting, and the inevitable enthusiastic singing.
- Perfectly Moist for Days : The buttermilk and oil combo keeps this cake soft even on day three. Leftovers (if you have any) taste just as good as fresh-baked.
- Real Buttercream, Not Shortening : No greasy mouthfeel here. This buttercream uses real butter and a secret trick for silky-smooth texture that pipes like a dream.
- Better Than Box Mix : Let’s face it — boxed funfetti is nostalgic, but it’s also dry and artificial. This version tastes like a bakery cake without the bakery price tag.
- Kid-Approved, Parent-Endorsed : My kids helped me test every single batch. They voted this one the winner, and they’re brutally honest critics.
- Freezer-Friendly Layers : Bake the cake layers ahead of time, freeze them, and frost the day of the party. Total lifesaver for busy parents.
What makes this recipe different is the technique. I use room-temperature ingredients (non-negotiable, I learned the hard way), a reverse-creaming method that gives you a velvety texture, and a specific sprinkle-folding trick that stops the colors from bleeding into the batter. No gray streaks, no sinking sprinkles — just beautiful confetti dots throughout every slice.
This is the kind of cake that makes you close your eyes after the first bite. It’s birthday magic in three layers, and honestly, it’s the recipe I’m proudest of in my entire collection.
What Ingredients You Will Need
This recipe uses simple, everyday ingredients to create something truly special. Most of these are pantry staples, but a few key choices make all the difference in texture and flavor. I’ve tested this with different brands and substitutions, so I’ll share what works best.
For the Cake Layers
- 3 cups (360g) all-purpose flour — I prefer Gold Medal or King Arthur for consistent results. Spoon and level your flour; don’t scoop straight from the bag.
- 2 cups (400g) granulated sugar — Regular white sugar works perfectly. No need for superfine or baker’s sugar here.
- 1 tablespoon baking powder — Make sure it’s fresh. Test it by dropping a bit in hot water; if it fizzes, you’re good.
- 1 teaspoon salt — Fine sea salt or table salt both work. Salt balances the sweetness and enhances the vanilla flavor.
- 1 cup (226g) unsalted butter, softened — Let it sit on the counter for at least an hour. Cold butter won’t cream properly and will leave you with dense, flat layers.
- 1 ½ cups (360ml) buttermilk, room temperature — This is the secret to a tender crumb. If you don’t have buttermilk, add 1 tablespoon lemon juice to regular milk and let it sit for 5 minutes.
- 4 large eggs, room temperature — Cold eggs seize the butter. Place them in warm water for 5 minutes if you forgot to take them out ahead of time.
- 2 teaspoons vanilla extract — Pure vanilla extract, not imitation. I’ve tried both, and the real stuff makes a noticeable difference.
- ½ cup (120ml) vegetable oil — This keeps the cake moist for days. You can use canola or avocado oil too.
- ¾ cup (120g) rainbow jimmies sprinkles — Not nonpareils (the tiny round ones) — they bleed color into the batter. Jimmies hold their shape and color. I recommend Betty Crocker or Wilton brand.
For the Vanilla Buttercream
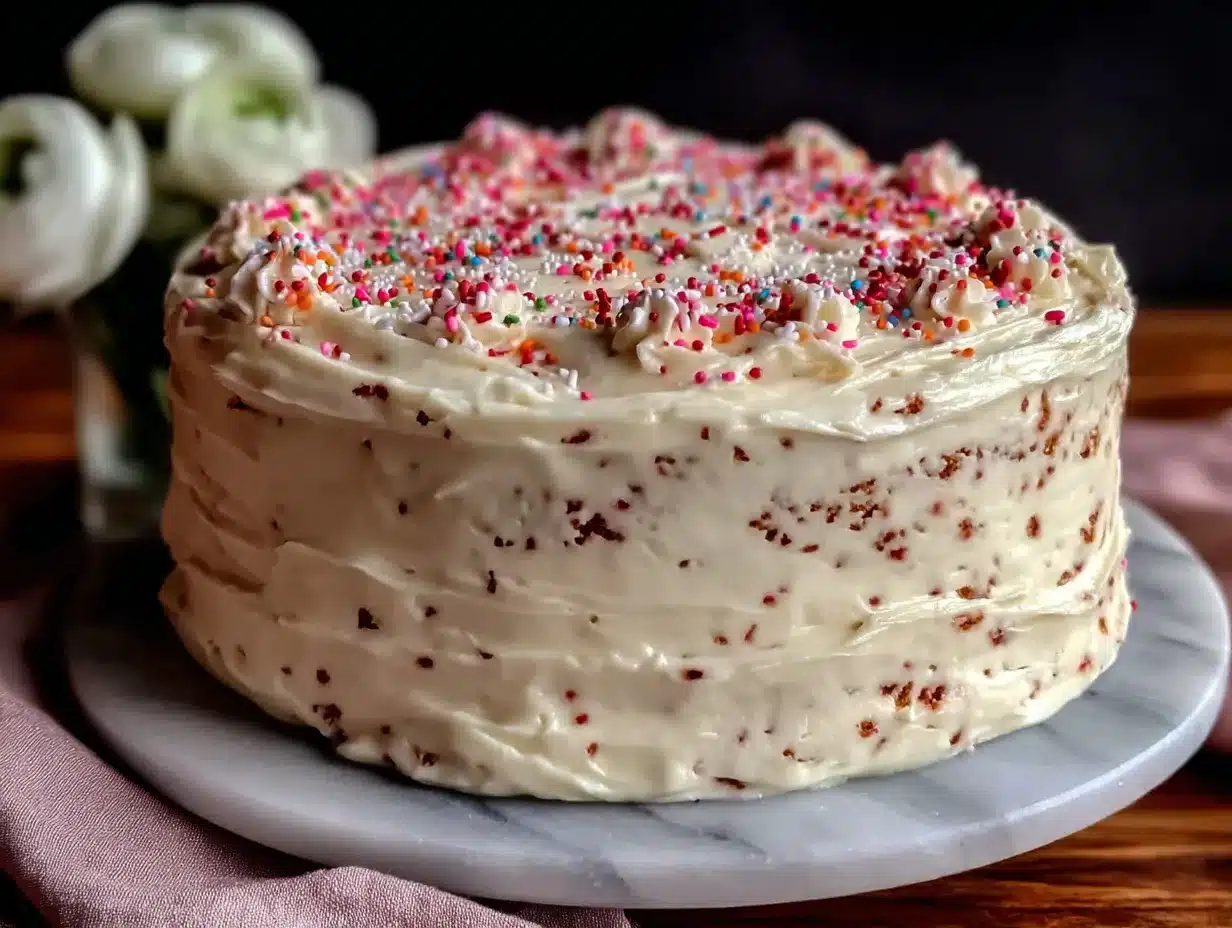
- 2 cups (452g) unsalted butter, softened — Yes, it’s a lot. But this is a birthday cake, and we’re not counting calories today.
- 6 cups (720g) powdered sugar — Sift it if it’s lumpy. Nobody wants lumpy frosting.
- ¼ cup (60ml) heavy cream — This gives the buttercream a silky texture. Whole milk works in a pinch.
- 2 teaspoons vanilla extract — Again, pure vanilla. Trust me on this.
- ¼ teaspoon salt — Just enough to cut the sweetness.
- Additional rainbow jimmies for decoration — About ¼ cup for pressing into the sides.
Equipment Needed
You don’t need a professional bakery setup for this cake, but a few specific tools make the process much smoother. I’ve learned through trial and error what’s worth investing in and what you can absolutely improvise.
- Three 8-inch round cake pans — I use Fat Daddio’s anodized aluminum pans. They conduct heat evenly and don’t rust. If you only have two pans, bake the layers in batches and let the pans cool completely between uses.
- Stand mixer or hand mixer — A stand mixer makes creaming butter effortless, but a hand mixer works fine. Just be prepared to hold it for a while during the buttercream.
- Parchment paper — Cut circles for the bottom of each pan. This is non-negotiable unless you enjoy scraping cake off pan bottoms.
- Cooling racks — Wire racks let air circulate around the cakes so they cool evenly. No racks? Invert the pans onto a clean kitchen towel for a few minutes.
- Offset spatula — The long, angled kind. It’s the best tool for smooth frosting application. A butter knife works but takes more patience.
- Cake turntable — This is a game-changer for frosting. I bought mine for $15 at a craft store, and it’s worth every penny. A lazy Susan works too.
- Bench scraper — For those perfectly smooth sides. I use an acrylic scraper, but a metal one works just as well.
Preparation Method
Take your time with this. Rushing leads to sinking sprinkles and lopsided layers. I’ve made every mistake in the book so you don’t have to.
- Preheat and prepare your pans. Set your oven to 350°F (175°C). Grease three 8-inch round pans with butter or non-stick spray, line the bottoms with parchment paper circles, then grease the parchment too. Dust with flour and tap out the excess. This double-prevention method guarantees your cakes release cleanly.
- Combine dry ingredients. In a large bowl, whisk together the flour, sugar, baking powder, and salt. Whisk for about 30 seconds to aerate everything evenly. This step matters more than you think — it distributes the leavening agent so you don’t get pockets of baking powder in your cake.
- Add the butter. Cut your room-temperature butter into small cubes and drop them into the flour mixture. Using your mixer on low speed, beat the butter into the flour until the mixture looks like coarse sand with some pea-sized butter bits remaining. This is the reverse-creaming method, and it coats the flour particles in fat, which limits gluten development and gives you a tender, velvety crumb.
- Combine wet ingredients. In a separate bowl or large liquid measuring cup, whisk together the buttermilk, eggs, vanilla extract, and vegetable oil. Whisk until the eggs are fully incorporated and the mixture looks uniform. Don’t worry if it seems thin — that’s correct.
- Add wet to dry. Pour the wet mixture into the flour-butter mixture. Mix on medium-low speed for about 2 minutes, scraping down the sides and bottom of the bowl halfway through. The batter will look thick and silky. Stop mixing as soon as it comes together — overmixing develops gluten and makes the cake tough.
- Fold in the sprinkles. This is the critical moment. Add the rainbow jimmies to the batter and fold them in gently with a rubber spatula. No more than 10 folds. Overmixing at this stage causes the sprinkles to bleed their color into the batter, turning it a muddy gray. You want distinct specks of color, not a tie-dye mess.
- Divide and bake. Divide the batter evenly among the three prepared pans. I use a kitchen scale for accuracy — each pan should get about 580 grams of batter. Smooth the tops with a spatula. Bake for 25-30 minutes, rotating the pans halfway through. The cakes are done when a toothpick inserted in the center comes out clean or with a few moist crumbs. The edges should pull away slightly from the pan.
- Cool completely. Let the cakes cool in their pans for 10 minutes on a wire rack. Then run a thin knife around the edges, invert the pans, peel off the parchment, and let the layers cool completely on the rack. This takes about 1-2 hours. Do not frost warm cakes — the buttercream will melt into a greasy mess. I learned this the hard way at my son’s third birthday party.
- Make the buttercream. In a clean mixer bowl, beat the softened butter on medium speed for 5 minutes until pale and fluffy. Scrape the bowl. Add the powdered sugar one cup at a time, mixing on low to avoid a sugar cloud. Add the heavy cream, vanilla, and salt. Beat on medium-high for 3-4 minutes until light and airy. If the frosting seems too stiff, add another tablespoon of cream. Too soft? Add a half cup more powdered sugar.
- Level the cakes. Use a serrated knife to trim the domed tops off each cake layer. This gives you flat, stackable layers and exposes the moist interior. Save the trimmings for cake pops or just eat them — I won’t judge.
- Assemble the cake. Place one layer on your cake board or serving plate. Add a generous scoop of buttercream (about ¾ cup) and spread it evenly to the edges. Repeat with the second layer. Top with the third layer, flat side up. Apply a thin crumb coat — a thin layer of frosting that traps any loose crumbs. Refrigerate for 30 minutes until the crumb coat is firm.
- Frost and decorate. Apply the final layer of buttercream, using your offset spatula and bench scraper for smooth sides. Press rainbow jimmies into the bottom edge of the cake for a festive border. Pipe rosettes or swirls on top if you’re feeling fancy. Or just spread it rustic-style — it’s a birthday cake, not a museum piece.
Cooking Tips & Techniques
I’ve made this cake more times than I can count, and I’ve collected a few tricks that make the difference between good and unforgettable. Let me share what I’ve learned through trial, error, and more than a few tears.
Room temperature ingredients are not optional. I know it’s tempting to use cold eggs straight from the fridge, but cold ingredients don’t emulsify properly. The batter will look curdled, and the cake will bake up dense and uneven. Take everything out of the fridge an hour before you start. Set a timer if you have to — I’ve forgotten and regretted it every time.
The sprinkle situation is serious. I mentioned this before, but it bears repeating: use jimmies, not nonpareils. Nonpareils are those tiny round sprinkles that look pretty on top of cookies but turn your cake batter gray. Jimmies — the long, rod-shaped sprinkles — hold their color and shape through baking. I tested both side by side, and the difference was stark. The nonpareil batch looked like a sad, muddy mess.
Don’t overmix at any stage. Overmixing develops gluten, which makes your cake tough and rubbery. Mix just until the ingredients come together, then stop. When you add the sprinkles, fold gently with a spatula. Ten folds, max. I promise the sprinkles will distribute evenly without aggressive stirring.
Use a kitchen scale for consistent layers. Volume measurements are fine for everyday cooking, but for cake layers that stack evenly, weight is your friend. A simple kitchen scale costs about $15 and ensures each pan gets exactly the same amount of batter. No more lopsided cakes.
Chill between frosting steps. The crumb coat needs to set before you add the final layer of buttercream. Thirty minutes in the fridge is enough. This prevents crumbs from ruining your smooth finish and keeps the layers from sliding around during assembly.
Variations & Adaptations
One of the best things about this cake is how adaptable it is. I’ve experimented with different flavors and dietary needs, and here are my favorite variations.
Chocolate Funfetti Cake: Replace ½ cup of the flour with ½ cup of unsweetened cocoa powder. Use chocolate jimmies instead of rainbow. The chocolate version is rich and decadent — my husband’s favorite, actually, after he got over his funfetti prejudice.
Gluten-Free Version: Substitute the all-purpose flour with a 1:1 gluten-free baking flour blend that contains xanthan gum. I’ve had great results with King Arthur Measure for Measure. The texture is slightly more delicate, so handle the layers gently. Everything else stays the same.
Dairy-Free Adaptation: Use vegan butter (I like Miyoko’s) and replace the buttermilk with almond milk mixed with 1 tablespoon apple cider vinegar. For the buttercream, use vegan butter and canned coconut cream instead of heavy cream. The flavor is slightly different but still delicious — my dairy-sensitive niece devoured this version.
Mini Cupcakes Version: Divide the batter into mini cupcake tins and bake for 10-12 minutes. You’ll get about 48 mini cupcakes. Top with a swirl of buttercream and extra sprinkles. These are perfect for classroom parties or lunchbox surprises.
Lemon Funfetti Twist: Add 2 tablespoons of lemon zest to the sugar before creaming, and replace ¼ cup of the buttermilk with fresh lemon juice. The bright citrus flavor cuts through the sweetness beautifully. I made this for a spring birthday, and it was gone in twenty minutes.
Serving & Storage Suggestions
This cake is best served at room temperature. Cold buttercream loses its silky texture and tastes more like cold butter than frosting. Take the cake out of the fridge about 30-45 minutes before serving. Let it sit on the counter, covered with a cake dome or overturned bowl to protect it.
For presentation, I like to add a few extra sprinkles on top and around the plate. It’s a small touch that makes the cake feel festive. If you’re serving it at a party, slice it with a sharp, thin-bladed knife dipped in hot water and wiped clean between cuts. This gives you clean slices with minimal frosting drag.
This cake pairs beautifully with a cold glass of milk, a scoop of vanilla ice cream, or a cup of coffee for the adults. For a birthday brunch, serve it alongside fresh fruit and whipped cream.
Storage: Leftover cake keeps well in an airtight container at room temperature for up to 3 days. If your kitchen runs warm, store it in the fridge but let slices come to room temperature before eating. The cake also freezes beautifully — wrap individual slices or the whole frosted cake in plastic wrap, then foil, and freeze for up to 3 months. Thaw overnight in the fridge.
Make-Ahead Tips: Bake the cake layers up to 2 days ahead, wrap them tightly in plastic wrap while still slightly warm (this locks in moisture), and store at room temperature. You can also freeze unfrosted layers for up to 3 months. The buttercream can be made 3 days ahead and stored in the fridge; bring it to room temperature and rewhip before using.
Nutritional Information & Benefits
Let’s be honest — this is a birthday cake, not a health food. But I do believe in knowing what’s on your plate, and there are a few bright spots worth mentioning.
Estimated per slice (1/12 of cake): Calories: 520 | Fat: 28g | Carbohydrates: 67g | Protein: 5g | Sugar: 48g | Fiber: 1g
This cake contains dairy, eggs, and gluten. For allergen-friendly alternatives, check the variations section above.
Ingredient Benefits: The buttermilk adds calcium and probiotics (in small amounts). Real butter provides vitamin A and healthy fats. The eggs contribute high-quality protein. And honestly? There’s a mental health benefit to celebrating with a beautiful cake. Food is about joy too, not just nutrients.
I’m not here to pretend this is a health food, but I do believe in balance. Serve this cake as part of a celebration, not an everyday treat. Enjoy it fully, without guilt, and then get back to your regular routine. That’s my philosophy, anyway.
Conclusion
This funfetti birthday cake has become the official birthday cake in our house, and I’m not exaggerating when I say it’s changed minds. My husband went from hating funfetti to requesting this cake for his own birthday. My kids fight over the corner pieces with the most frosting. Even my mother-in-law, who is notoriously picky about desserts, asked for the recipe.
What I love most about this cake is how it brings people together. There’s something about a tall, sprinkle-studded layer cake that makes any occasion feel special. It doesn’t have to be a milestone birthday — sometimes a Tuesday feels like a good reason to bake.
I hope you’ll try this recipe and make it your own. Add extra sprinkles, experiment with the frosting, or try one of the variations I mentioned. And when you do, I’d love to hear about it. Drop a comment below, tag me in your photos, or tell me about the birthday party where this cake made an appearance. Happy baking, friends — here’s to more celebrations and fewer skeptics.
Frequently Asked Questions
Can I use store-bought frosting instead of making buttercream?
You absolutely can, and I won’t judge. Store-bought frosting is convenient and works in a pinch. But homemade buttercream really does taste better and gives you a smoother, more stable finish. If you’re short on time, try doctoring up canned frosting by beating it with ¼ cup of softened butter — it improves the texture significantly.
Why did my cake layers sink in the middle?
This usually happens for one of three reasons: your oven temperature was too low, you opened the oven door too often during baking, or your baking powder is expired. Check your oven with an oven thermometer (mine runs 25 degrees cooler than the display says), resist the urge to peek, and make sure your baking powder is fresh.
How do I prevent my sprinkles from bleeding into the batter?
Use jimmies (the long, rod-shaped sprinkles) instead of nonpareils (the tiny round ones). Also, fold the sprinkles in gently and minimally — overmixing causes the color to leach out. If you’re still having trouble, toss the sprinkles in a tablespoon of flour before adding them to the batter. This creates a barrier that helps prevent bleeding.
Can I make this cake in a 9×13 pan instead of round layers?
Yes! Grease a 9×13 pan and pour in all the batter. Bake at 350°F for 35-40 minutes. The baking time will be longer since the batter is deeper in one pan. Check for doneness with a toothpick. You can frost it right in the pan for a casual, sheet-cake presentation.
How far in advance can I make this cake?
You have options. Bake the cake layers up to 2 days ahead and store them wrapped tightly at room temperature. Or freeze the unfrosted layers for up to 3 months. The buttercream can be made 3 days ahead and refrigerated. I don’t recommend frosting the cake more than 24 hours before serving, as the cake can absorb moisture from the frosting and become soggy.
Pin This Recipe!
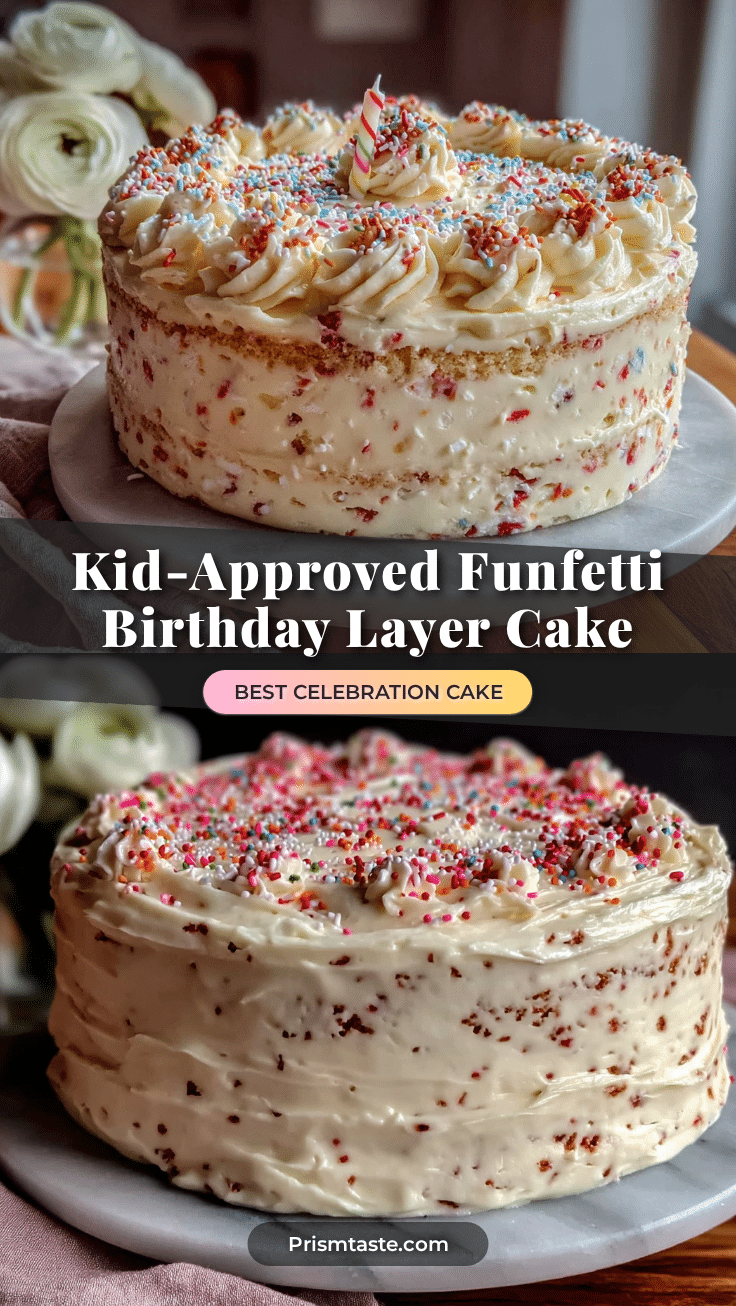
Perfect 3-Layer Funfetti Birthday Cake Recipe
This isn’t just another funfetti cake — it’s the one that makes skeptics shut up and grab another slice. With a tender crumb, real buttercream, and a secret sprinkle-folding trick, this three-layer birthday cake is bakery-quality without the bakery price tag.
- Prep Time: 30 minutes
- Cook Time: 30 minutes
- Total Time: 2 hours 30 minutes
- Yield: 12 servings 1x
- Category: Dessert
- Cuisine: American
Ingredients
- 3 cups (360g) all-purpose flour
- 2 cups (400g) granulated sugar
- 1 tablespoon baking powder
- 1 teaspoon salt
- 1 cup (226g) unsalted butter, softened
- 1 ½ cups (360ml) buttermilk, room temperature
- 4 large eggs, room temperature
- 2 teaspoons vanilla extract
- ½ cup (120ml) vegetable oil
- ¾ cup (120g) rainbow jimmies sprinkles
- 2 cups (452g) unsalted butter, softened (for buttercream)
- 6 cups (720g) powdered sugar
- ¼ cup (60ml) heavy cream
- 2 teaspoons vanilla extract (for buttercream)
- ¼ teaspoon salt (for buttercream)
- ¼ cup rainbow jimmies for decoration
Instructions
- Preheat oven to 350°F (175°C). Grease three 8-inch round pans, line bottoms with parchment paper, grease parchment, and dust with flour.
- In a large bowl, whisk together flour, sugar, baking powder, and salt for 30 seconds.
- Cut softened butter into small cubes and beat into flour mixture on low speed until coarse sand texture with some pea-sized butter bits remains.
- In a separate bowl, whisk together buttermilk, eggs, vanilla extract, and vegetable oil until uniform.
- Pour wet mixture into flour-butter mixture. Mix on medium-low speed for about 2 minutes, scraping bowl halfway through, until thick and silky.
- Gently fold in rainbow jimmies with a rubber spatula using no more than 10 folds.
- Divide batter evenly among prepared pans (about 580g each). Smooth tops. Bake for 25-30 minutes, rotating pans halfway through, until toothpick comes out clean.
- Cool cakes in pans for 10 minutes on wire rack. Run knife around edges, invert, peel off parchment, and cool completely on rack (1-2 hours).
- For buttercream: Beat softened butter on medium speed for 5 minutes until pale and fluffy. Add powdered sugar one cup at a time on low. Add heavy cream, vanilla, and salt. Beat on medium-high for 3-4 minutes until light and airy.
- Level cake tops with a serrated knife.
- Place one layer on cake board. Spread about ¾ cup buttercream evenly. Repeat with second layer. Top with third layer, flat side up. Apply thin crumb coat. Refrigerate 30 minutes.
- Apply final layer of buttercream, smooth sides with offset spatula and bench scraper. Press rainbow jimmies into bottom edge. Pipe decorations if desired.
Notes
Room temperature ingredients are non-negotiable. Use jimmies, not nonpareils, to prevent color bleeding. Don’t overmix at any stage. Chill between frosting steps for best results. Cake layers can be baked up to 2 days ahead and stored wrapped at room temperature, or frozen for up to 3 months. Buttercream can be made 3 days ahead and refrigerated; bring to room temperature and rewhip before using.
Nutrition
- Serving Size: 1 slice (1/12 of cak
- Calories: 520
- Sugar: 48
- Sodium: 320
- Fat: 28
- Saturated Fat: 16
- Carbohydrates: 67
- Fiber: 1
- Protein: 5
Keywords: funfetti cake, birthday cake, sprinkle cake, vanilla cake, layer cake, homemade cake, buttercream


