The neighborhood Halloween block party was in six hours and I’d completely forgotten I was supposed to bring a treat. Everyone else would be showing up with elaborate graveyard cakes, cupcake tombstones with hand-piped epitaphs, and those creepy-crawly dirt desserts with gummy worms wriggling out. I had a half-empty bag of sugar, three egg whites sitting in the fridge, and honestly? A growing sense of panic that felt way too familiar.
I rummaged through my pantry like a woman possessed, muttering to myself about how I always do this. My kitchen looked like a tiny disaster zone—flour dust on the counter, a whisk I’d dropped on the floor, and let’s not talk about the splash of vanilla extract I somehow got on my shirt. But then I spotted the cream of tartar hiding behind the baking soda, and something clicked. Meringue cookies. They’re light, they’re airy, and if you pipe them into little ghost shapes? They’re the most adorable, low-stress Halloween treat you’ve ever seen.
I’ll be honest with you—I wasn’t aiming for perfection. I was aiming for “please don’t let me show up empty-handed.” But here’s the thing about these spooky ghost meringue cookies. They’re forgiving. They’re fast. And when I walked into that party with a platter of little white ghosts with tiny chocolate chip eyes, people actually gasped. Not kidding. One neighbor asked if I’d spent all day on them. I just smiled and said, “Oh, you know, just a little something.” Let them wonder.
Maybe you’ve been there—staring at a calendar, realizing you’ve got nothing to bring, and feeling that familiar knot in your stomach. Trust me, I get it. That’s exactly why this recipe became my go-to. It’s the kind of thing that makes you look like you planned ahead when you absolutely, positively did not.
Why You’ll Love This Recipe
These spooky ghost meringue cookies aren’t just another Halloween dessert. They’re the kind of recipe that makes you feel like a kitchen genius with almost zero effort. I’ve tested this batch more times than I care to admit, tweaking the sugar ratio and the baking temperature until the ghosts came out perfectly crisp on the outside with that melt-in-your-mouth center.
- Quick & Easy: From start to finish, you’re looking at about an hour and a half—but most of that is hands-off baking time. The actual prep takes maybe 15 minutes.
- Simple Ingredients: You probably have everything already. Eggs, sugar, vanilla, cream of tartar. That’s it. No weird specialty items that cost a fortune.
- Perfect for Halloween: These little guys are the star of any party, classroom treat, or spooky movie night. Kids go absolutely wild for them.
- Crowd-Pleaser: They’re gluten-free, dairy-free, and basically fat-free. Everyone can eat them, which means no one feels left out.
- Unbelievably Delicious: Light, crispy, sweet, and just a little bit vanilla-y. They dissolve on your tongue like a tiny cloud of happiness.
What makes these different from every other meringue recipe out there? It’s the technique. I whip the egg whites just until they hold a stiff peak—not a second longer—and I add the sugar slowly, one spoonful at a time. This gives you a stable meringue that doesn’t crack or weep in the oven. Trust me, I learned this the hard way after a batch that looked more like sad, flat pancakes than ghostly apparitions.
This recipe isn’t just good. It’s the kind that makes you close your eyes after the first bite and let out a little “mmm.” It’s Halloween comfort food reimagined—lighter, faster, but with the same soul-soothing satisfaction. Perfect for impressing guests without stress, or turning a simple Tuesday night into something memorable.
What Ingredients You Will Need
This recipe uses simple, wholesome ingredients to deliver that signature light-as-air texture and sweet vanilla flavor. The magic is all in how you handle them, not in what you buy. Here’s your shopping list—short, sweet, and probably already in your kitchen.
- 3 large egg whites, room temperature (separate them carefully—no yolk allowed! Even a tiny speck can ruin the meringue)
- 3/4 cup (150g) granulated sugar (I prefer organic cane sugar for a cleaner sweetness, but regular white sugar works perfectly)
- 1/2 teaspoon cream of tartar (this stabilizes the egg whites and helps them hold their shape—don’t skip it)
- 1 teaspoon vanilla extract (pure vanilla extract, not imitation, for the best flavor)
- 1/4 cup mini chocolate chips (for the ghost eyes—use dairy-free chips if needed)
Ingredient Tips I’ve Learned the Hard Way:
Room temperature eggs are non-negotiable here. Cold egg whites won’t whip up to their full volume, and you’ll end up with denser, sadder ghosts. I usually take my eggs out of the fridge about 30 minutes before I start. If you’re in a hurry—and let’s face it, I usually am—place the eggs in a bowl of warm water for 5 minutes. Works like a charm.
For the sugar, I really do recommend granulated. Powdered sugar contains cornstarch, which can mess with the meringue structure. And superfine sugar dissolves faster, but regular granulated is totally fine if you give it enough time to incorporate. Just make sure you add it slowly.
I’ve tried this recipe with different extracts—peppermint for a wintery twist, almond for a nutty undertone—but vanilla is the classic for a reason. It’s subtle enough that the sweetness shines through, but distinct enough that you know exactly what you’re eating.
If you’re making these for someone with dietary restrictions, rest easy. This recipe is naturally gluten-free, dairy-free, and nut-free. The only potential allergen is eggs, so keep that in mind if you’re bringing them to a school or party where allergies might be a concern.
Equipment Needed
You don’t need a professional pastry kitchen for these spooky ghost meringue cookies. In fact, you probably have most of this stuff already. Here’s what you’ll need:
- Electric mixer (stand mixer or hand mixer—either works. I’ve used both, and honestly, a hand mixer is fine. You’ll just need to hold it for a few minutes longer.)
- Large mixing bowl (make sure it’s spotless—any grease can prevent the egg whites from whipping up properly)
- Piping bag with a round tip (I use a Wilton #12 tip, but a large round tip works. In a pinch, you can snip the corner off a zip-top bag)
- Baking sheet lined with parchment paper (silicone mats work too, but parchment is easier to clean up)
- Rubber spatula for folding
- Small offset spatula (optional, but helpful for scooping the meringue into the piping bag without making a mess)
If you don’t have a piping bag, don’t panic. I’ve made these ghosts using a zip-top bag with the corner snipped off, and they turned out just fine. The shapes might be a little less uniform, but ghosts are supposed to look a little wonky anyway. It adds to the spooky charm.
One thing I’ve learned: glass or metal bowls are better than plastic for whipping egg whites. Plastic can hold onto grease residue even after washing, and that grease is the enemy of fluffy meringue. I keep a dedicated metal bowl just for this purpose.
Preparation Method
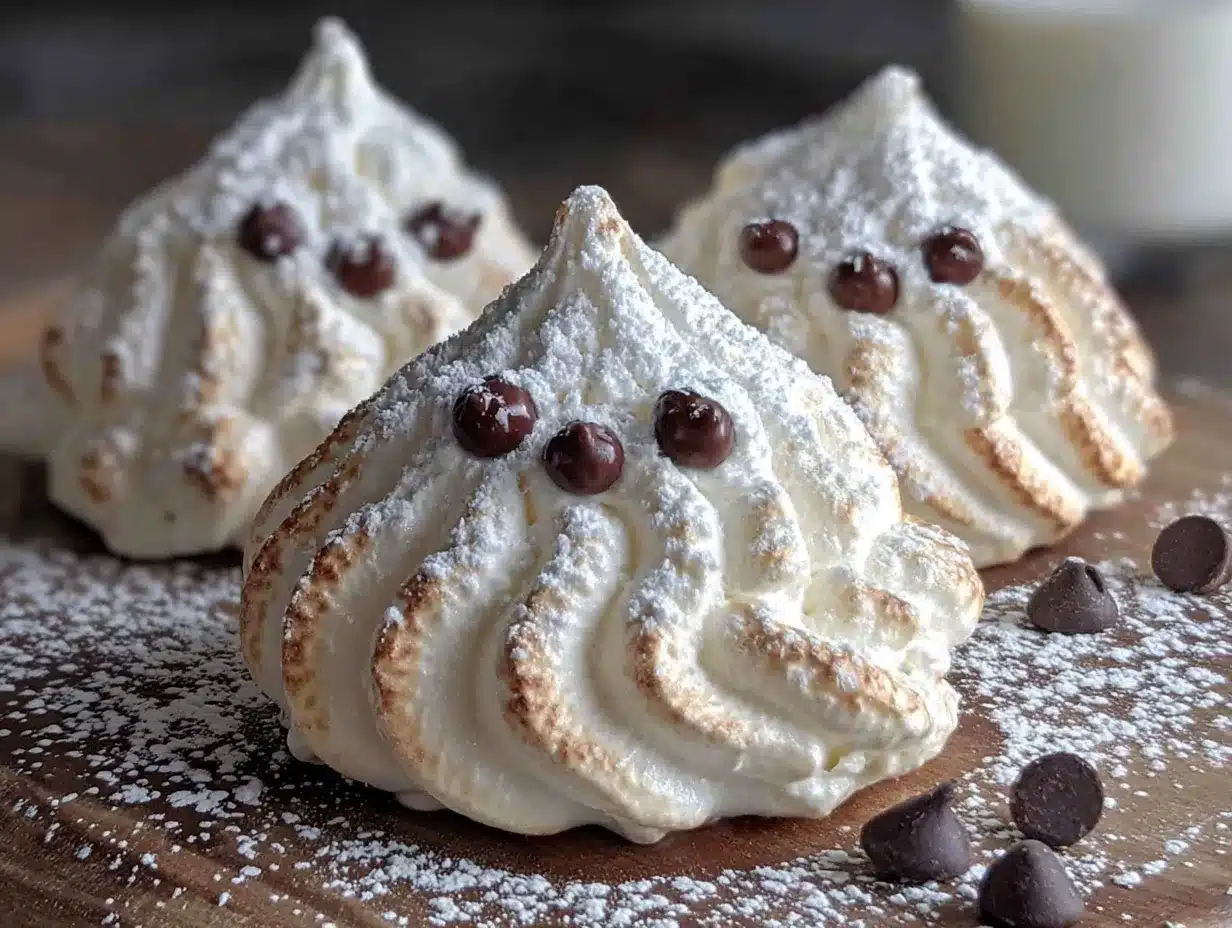
Let me walk you through this step by step. I’ve made these spooky ghost meringue cookies more times than I can count, and I’ve figured out all the little tricks that make them come out perfect every time.
- Preheat your oven to 200°F (93°C). Yes, this is low and slow. That’s the secret to meringues—you’re drying them out, not baking them. Line a baking sheet with parchment paper and set it aside.
- Separate your eggs carefully. Crack each egg and let the white fall into a small bowl, passing the yolk back and forth between the shell halves. If any yolk breaks into the white, start over. I cannot stress this enough. One speck of yolk and your meringue won’t whip up properly. Transfer each successfully separated white to your large mixing bowl.
- Add the cream of tartar. Sprinkle it over the egg whites before you start whipping. This little ingredient is a game-changer—it stabilizes the egg whites and helps them hold their shape.
- Start whipping on medium speed. Let the mixer run for about 2 minutes until the egg whites become frothy and start to look like soap bubbles. Then increase to medium-high speed.
- Add the sugar slowly. Here’s the trick: add it one tablespoon at a time, letting each spoonful dissolve before adding the next. This should take about 2-3 minutes total. If you dump all the sugar in at once, your meringue will be grainy and sad.
- Whip until stiff peaks form. This is the moment of truth. Stop the mixer and lift the beater—the meringue should stand up in a sharp peak that doesn’t droop. If it flops over, keep whipping. Add the vanilla extract in the last 30 seconds of whipping.
- Test the meringue. Rub a tiny bit between your fingers. If it feels gritty, keep whipping. It should feel completely smooth—that means the sugar has dissolved. This step is crucial and easy to overlook.
- Transfer to a piping bag. Fit your bag with a round tip and fold the top edge down over your hand. Use a spatula to scoop the meringue in, being careful not to deflate it. Twist the top closed.
- Pipe the ghosts. Hold the bag straight up and down about 1/2 inch above the baking sheet. Squeeze gently to create a round base, then lift the bag straight up while continuing to squeeze. As you pull away, you’ll get a little peak on top—that’s the ghost’s head. Space them about 2 inches apart. They don’t spread much, but they need a little breathing room.
- Add the eyes. Gently press two mini chocolate chips into each ghost for eyes. Do this right after piping, before the meringue starts to form a skin. If you wait too long, the chips won’t stick.
- Bake for 60-75 minutes. The ghosts are done when they’re dry to the touch and lift easily off the parchment paper. They should be pale white or just barely golden on the bottom. Turn off the oven and let them cool inside with the door cracked open for another 30 minutes.
One thing I always do: I leave the ghosts in the oven overnight if I’m making them ahead. The residual heat continues to dry them out, and they stay perfectly crisp. Just make sure the oven is completely off before you go to bed!
Cooking Tips & Techniques
I’ve made plenty of mistakes with meringue over the years, and I’m sharing them all so you don’t have to repeat my failures. Here’s what I’ve learned:
Humidity is your enemy. Meringue is basically sugar and egg whites, and sugar loves to absorb moisture from the air. If it’s a rainy or humid day, your ghosts might turn out chewy instead of crisp. Wait for a dry day, or run a dehumidifier in your kitchen if you have one. I learned this the hard way when I made a batch during a summer thunderstorm and ended up with ghostly gummy bears.
Don’t over-whip. There’s a fine line between stiff peaks and over-whipped meringue. If you go too far, the mixture will look grainy and separated, and you’ll see liquid pooling at the bottom of the bowl. At that point, there’s no saving it—you have to start over. Stop whipping as soon as the peaks are stiff and glossy.
Pipe with confidence. Hesitation leads to lumpy ghosts. Hold the piping bag steady, squeeze with even pressure, and pull up smoothly. Your first few might look a little rough, but that’s okay. I always tell myself that imperfect ghosts are more authentic anyway.
Multitask wisely. While the ghosts are baking, you can clean up your kitchen or prep other Halloween treats. Just don’t open the oven door to check on them too often—the temperature fluctuation can cause cracking. Trust the timer.
For consistent results, weigh your ingredients. I know it seems fussy, but egg whites vary in size, and sugar by volume can be inconsistent. A kitchen scale takes the guesswork out. 150 grams of sugar and about 90 grams of egg whites (from 3 large eggs) is your sweet spot.
Variations & Adaptations
These spooky ghost meringue cookies are endlessly customizable. Here are some of my favorite twists:
Chocolate Ghosts: Sift 1 tablespoon of cocoa powder into the sugar before adding it to the egg whites. You’ll get pale brown ghosts that look like they’ve been playing in the mud. My kids love these.
Peppermint Specters: Replace the vanilla extract with 1/2 teaspoon peppermint extract. Crush a candy cane and sprinkle the pieces over the ghosts before baking. They look like little snow ghosts, perfect for a winter-themed party.
Vegan Version: You can actually make meringue with aquafaba—the liquid from a can of chickpeas. Use 3 tablespoons of aquafaba in place of each egg white. The texture is slightly different, but the ghosts still come out light and airy. Just be sure to whip the aquafaba a little longer than you would egg whites.
Spooky Colors: Add a drop of gel food coloring after the stiff peaks form. Fold it in gently with a spatula to create swirls. Purple, green, or orange ghosts are a fun twist for Halloween. Just don’t use liquid food coloring—it can deflate the meringue.
Filled Ghosts: Pipe a small dollop of jam or Nutella onto the baking sheet, then cover it with piped meringue. The filling stays soft and gooey inside while the outside bakes up crisp. It’s like a little surprise in every bite.
Serving & Storage Suggestions
These spooky ghost meringue cookies are best served at room temperature. They’re perfectly crisp and light right out of the oven, but they also keep beautifully for days if stored properly.
Presentation Ideas: Arrange the ghosts on a platter lined with black parchment paper for maximum Halloween vibes. You can also stand them upright in a small jar or vase for a centerpiece that doubles as a snack. Dust them with a little powdered sugar for a “snowy” effect, or arrange them on a bed of crushed chocolate cookies to look like they’re rising from dirt.
Storage: Store your ghosts in an airtight container at room temperature. I like to layer them between sheets of parchment paper so they don’t stick together. They’ll stay fresh for up to two weeks—if they last that long. Do not refrigerate them, as the moisture will make them sticky and soft.
Freezing: You can freeze these ghosts for up to three months. Place them in a single layer in a freezer-safe container with parchment between layers. Thaw at room temperature for about 30 minutes before serving. The texture holds up surprisingly well.
Reheating: If your ghosts have softened slightly (maybe from humidity), pop them back into a 200°F oven for 10-15 minutes. They’ll crisp right back up. Just keep an eye on them so they don’t brown.
One thing I love about these cookies: the flavor actually improves after a day or two. The vanilla mellows out and the sweetness becomes more balanced. So if you can resist eating them all immediately, they’re even better the next day.
Nutritional Information & Benefits
Here’s the good news: these spooky ghost meringue cookies are surprisingly light. Each ghost (without chocolate chips) has about 25-30 calories, 0 grams of fat, and 6 grams of sugar. They’re basically a guilt-free treat, which is rare for Halloween desserts.
| Per Ghost (approx.) | Value |
|---|---|
| Calories | 28 |
| Total Fat | 0g |
| Carbohydrates | 7g |
| Sugar | 6g |
| Protein | 1g |
Egg whites are a great source of protein without the fat and cholesterol of the yolk. They’re also rich in selenium, which supports thyroid function, and riboflavin, which helps your body convert food into energy. Not bad for a Halloween treat, right?
These cookies are naturally gluten-free, dairy-free, and nut-free, making them a safe option for many common dietary restrictions. The only allergen to watch out for is eggs, so if you’re serving a crowd, just make sure to label them clearly.
From a wellness perspective, I love that these ghosts let me indulge without the heavy feeling you get from butter-laden cookies or cream-filled cupcakes. They satisfy my sweet tooth without derailing my healthy habits. And honestly? That makes them feel like a win-win.
Conclusion
These spooky ghost meringue cookies are proof that you don’t need fancy ingredients or hours in the kitchen to create something truly magical. They’re simple, they’re adorable, and they taste like little clouds of vanilla sweetness. Whether you’re bringing them to a Halloween party, making them with your kids, or just treating yourself to something fun, they never disappoint.
I love that this recipe has become my secret weapon for last-minute occasions. It’s the one I pull out when I’ve forgotten about a party, when I want to impress without stress, or when I just need a little creative outlet in the kitchen. Every time I pipe those little ghost shapes, I smile. And every time someone takes a bite and their eyes light up, I remember why I keep coming back to it.
Now it’s your turn. Give these ghosts a try, and don’t be afraid to make them your own. Add different flavors, experiment with colors, or just stick with the classic version. Whatever you do, I’d love to hear about it. Drop a comment below and tell me how your ghosts turned out—or share a photo of your spooky creations. And if you loved this recipe, pass it along to a friend who needs a little Halloween magic in their life. Happy haunting!
Frequently Asked Questions
Can I make these ghost meringue cookies ahead of time?
Absolutely! These cookies store beautifully for up to two weeks in an airtight container at room temperature. They’re actually a great make-ahead treat for Halloween parties because they don’t lose any quality over time.
Why did my meringue turn out flat?
Flat meringue usually means there was a trace of fat in your bowl or on your beaters. Make sure everything is spotlessly clean. It could also mean your egg whites weren’t whipped enough or that humidity was too high. Try again on a dry day with squeaky-clean equipment.
Can I use liquid egg whites from a carton?
You can, but I don’t recommend it. Carton egg whites are pasteurized at high temperatures, which can affect their ability to whip up properly. Fresh egg whites from whole eggs give you much better volume and stability.
How do I know when the meringues are done baking?
The ghosts should be dry to the touch and lift easily off the parchment paper. They should not be sticky or soft in the center. If they feel tacky, give them another 10-15 minutes in the oven. The low temperature means it’s hard to overbake them.
Can I double this recipe?
Yes, but I recommend making two separate batches rather than doubling in one bowl. A stand mixer can handle up to 6 egg whites, but the meringue is more stable when you work in smaller batches. Plus, you’ll have more control over the whipping process.
Pin This Recipe!
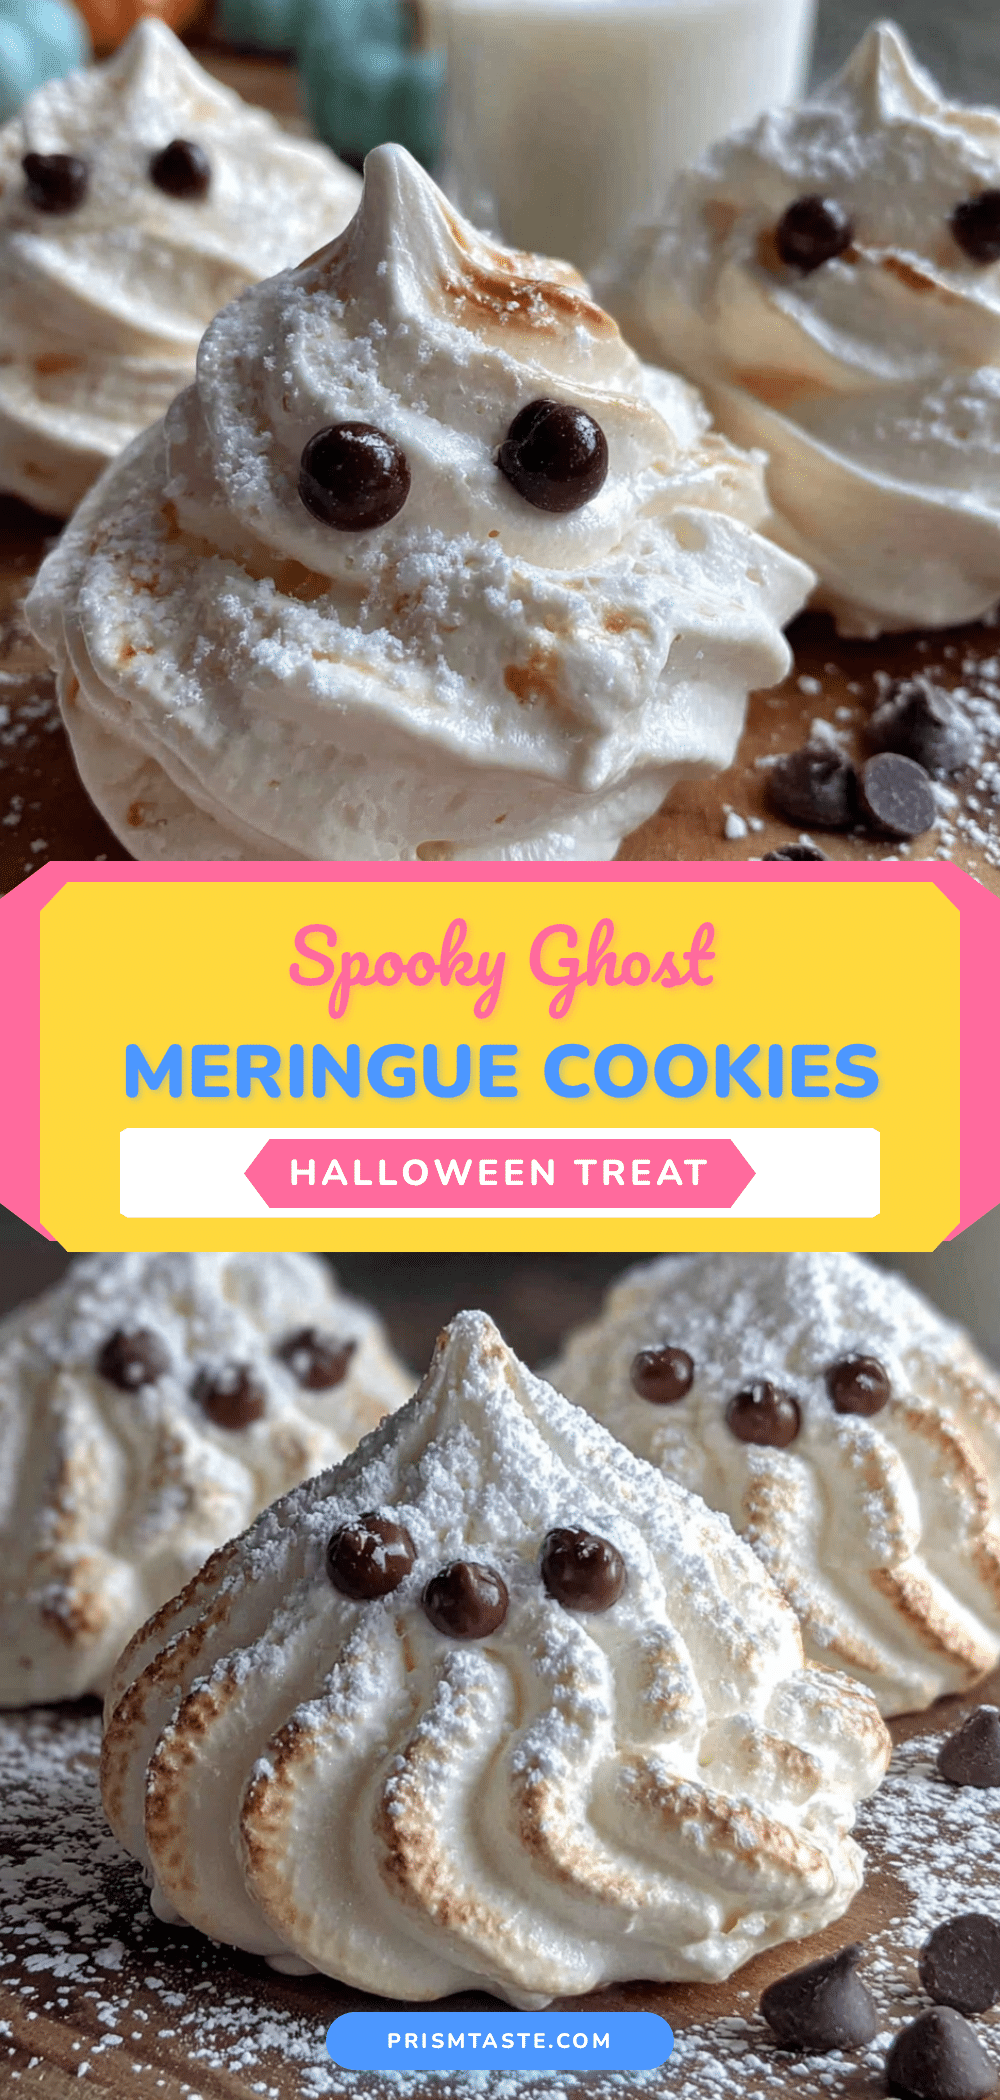
Spooky Ghost Meringue Cookies: Easy Halloween Treats
These spooky ghost meringue cookies are light, airy, and adorable—perfect for Halloween parties or last-minute treats. With simple ingredients and a quick prep, they look like you spent all day but come together in no time.
- Prep Time: 15 minutes
- Cook Time: 60-75 minutes
- Total Time: 1 hour 30 minutes
- Yield: 24 servings 1x
- Category: Dessert
- Cuisine: American
Ingredients
- 3 large egg whites, room temperature
- 3/4 cup (150g) granulated sugar
- 1/2 teaspoon cream of tartar
- 1 teaspoon vanilla extract
- 1/4 cup mini chocolate chips
Instructions
- Preheat your oven to 200°F (93°C). Line a baking sheet with parchment paper.
- Separate your eggs carefully, ensuring no yolk gets into the whites. Transfer each white to a large mixing bowl.
- Add the cream of tartar to the egg whites.
- Start whipping on medium speed for about 2 minutes until frothy, then increase to medium-high speed.
- Add the sugar slowly, one tablespoon at a time, letting each spoonful dissolve before adding the next (about 2-3 minutes total).
- Whip until stiff peaks form—the meringue should stand up in a sharp peak that doesn’t droop. Add vanilla extract in the last 30 seconds of whipping.
- Test the meringue by rubbing a tiny bit between your fingers; it should feel completely smooth, not gritty.
- Transfer the meringue to a piping bag fitted with a round tip.
- Pipe ghosts onto the prepared baking sheet: hold the bag straight up, squeeze gently to create a round base, then lift straight up while continuing to squeeze to form a peak.
- Gently press two mini chocolate chips into each ghost for eyes immediately after piping.
- Bake for 60-75 minutes until dry to the touch and easily lifted off the parchment. Turn off the oven and let cool inside with the door cracked open for 30 minutes.
Notes
Room temperature eggs are essential for proper volume. Avoid making meringues on humid days as sugar absorbs moisture. Do not over-whip; stop as soon as stiff peaks form. For best results, weigh ingredients: 150g sugar and about 90g egg whites. Store in an airtight container at room temperature for up to two weeks. Do not refrigerate.
Nutrition
- Serving Size: 1 ghost cookie
- Calories: 28
- Sugar: 6
- Sodium: 10
- Carbohydrates: 7
- Protein: 1
Keywords: Halloween cookies, meringue cookies, ghost cookies, easy Halloween treats, gluten-free cookies, dairy-free cookies, low-fat cookies


