I wasn’t supposed to be there that long. I’d stopped by my sister-in-law’s place to grab a cutting board I’d borrowed, and the smell hit me before I even got through the back door. Something warm and sweet, but not in a bakery way. More like… coffee, but better. She was standing at the counter, shaking a mason jar like it owed her money, completely unfazed by the fact that she was creating what would become my entire summer obsession.
“Oh, that?” she said when I asked, barely looking up. “It’s just coffee.” Just coffee. I mean, let me tell you, it was anything but. She poured it over ice, splashed in some oat milk, and handed me a glass without a second thought. One sip and I was hooked. It was that brown sugar shaken espresso from the coffee chain we all know, except she’d made it lighter somehow. Less sweet, but still rich. Less fussy, but still felt special.
I stood there, holding that cold glass, watching her toss the empty oat milk carton in the recycling. She had no idea she’d just changed my morning routine forever. That’s the thing about the best recipes, right? They don’t come from a carefully planned kitchen experiment. They come from someone who’s just… making something good without trying to impress anyone. Maybe you’ve been there, standing in someone else’s kitchen, realizing you’re about to ask for a recipe before you’ve even finished the first sip.
So I asked. And she shrugged and told me exactly what she did. It was so simple I almost laughed. But that’s the beauty of this Lighter Copycat Starbucks Brown Sugar Oat Milk Shaken Espresso. It’s not complicated. It’s just right. And honestly, I’ve been making it ever since, tweaking it just a little to make it even lighter without losing that cozy, caramel-like warmth that makes you close your eyes after the first sip.
Why You’ll Love This Recipe
This isn’t just another coffee recipe. This is the one that makes you stop spending five bucks at the drive-thru. I’ve tested this version more times than I care to admit, and I can tell you with confidence — it hits every single note of the original, but without the sugar crash or the calorie guilt.
- Quick & Easy: We’re talking five minutes, maybe less if you’ve got your espresso ready. Perfect for those mornings when you need coffee now.
- Simple Ingredients: No weird syrups or fancy equipment. Brown sugar, oat milk, espresso, and ice. That’s it. You probably have most of this already.
- Perfect for Everyday Indulgence: It feels like a treat, but it’s light enough to fit into a balanced day. Great for a morning pick-me-up or an afternoon break that doesn’t derail your goals.
- Crowd-Pleaser: I’ve made this for friends who swear they “don’t like oat milk” and they’ve asked for seconds. It’s that good.
- Unbelievably Delicious: The brown sugar melts into the hot espresso, the shaking creates this beautiful froth, and the oat milk makes it creamy without being heavy. It’s comfort in a glass.
What makes this different from every other copycat recipe out there? It’s the balance. I’ve cut the sugar by about a third compared to the original, and I use a specific shaking technique that gives you that gorgeous foam without needing a fancy espresso machine. It’s not just another version — it’s the version that tastes indulgent but feels good. The kind of drink that makes you wonder why you ever waited in line for it.
What Ingredients You Will Need
This recipe uses simple, wholesome ingredients to deliver that signature bold flavor and creamy texture without any of the fuss. Most of these are pantry staples or easy to find at any grocery store.
- Espresso or Strong Brewed Coffee: 2 shots (about 2 ounces) of freshly brewed espresso. If you don’t have an espresso machine, use 1/4 cup of strong brewed coffee or a concentrated cold brew. I personally like using a Moka pot for a rich, bold base.
- Brown Sugar: 1 1/2 tablespoons, packed. I use light brown sugar for that classic caramel-like sweetness. Dark brown sugar works too, but it will give a deeper, almost molasses flavor. (Adds richness without being heavy.)
- Oat Milk: 3/4 cup, unsweetened. Barista blends are great for extra creaminess, but any unsweetened oat milk works. I recommend Oatly or Califia Farms for the best texture.
- Ice: A generous handful. Use large cubes if you can — they melt slower and keep your drink from getting watery.
- Pinch of Salt: Optional, but trust me on this. A tiny pinch balances the sweetness and makes the brown sugar flavor pop. (Use flaky sea salt if you have it.)
- Vanilla Extract: 1/4 teaspoon. Optional, but it adds a lovely warmth that complements the brown sugar beautifully. (Use pure vanilla if possible.)
Ingredient Tips & Sourcing: Look for a medium-roast espresso bean for the best balance of boldness and sweetness. If you’re using pre-ground coffee, make sure it’s labeled for espresso. For the oat milk, avoid the refrigerated cartons labeled “barista blend” if you want to keep it lighter — they often have added oils. The shelf-stable unsweetened versions are usually cleaner.
Substitution Guidance: Need it dairy-free? Oat milk is already vegan. Want it lower in sugar? Use a sugar-free brown sugar substitute like Swerve Brown, but note that it won’t dissolve quite as smoothly. If you’re avoiding caffeine, use decaf espresso or a strong chicory coffee blend. For a nuttier flavor, try almond milk instead of oat milk — just know it won’t be as creamy.
Equipment Needed
You don’t need a fancy coffee bar setup for this. Here’s what you’ll actually use:
- Espresso Machine, Moka Pot, or AeroPress: For brewing your concentrated coffee. I’ve used all three, and honestly, my favorite is the AeroPress for cleanup. It’s quick and makes a clean, strong shot.
- Airtight Jar or Cocktail Shaker: This is key for that signature foam. A 16-ounce mason jar works perfectly. I’ve also used a protein shaker bottle in a pinch — just make sure the lid is secure.
- Measuring Spoons: For the brown sugar and vanilla. Eyeballing the sugar can make your drink too sweet or not sweet enough.
- Tall Glass: A 12- to 16-ounce glass works best. I like using a clear glass so you can see the beautiful layers.
- Long Spoon or Straw: For stirring after you pour. A reusable metal straw is my go-to.
Budget-Friendly Tip: If you don’t have a jar, use a plastic water bottle with a tight lid. Just make sure it’s clean and dry. I’ve done this while camping and it worked surprisingly well.
Preparation Method

- Brew your espresso: Start by brewing 2 shots (about 2 ounces) of hot espresso. If you’re using a Moka pot, fill the base with water just below the valve, add finely ground coffee to the basket without tamping, and screw on the top. Heat on medium until you hear a gentle gurgle. Remove from heat immediately. If using an AeroPress, use the inverted method for a stronger concentrate.
- Combine sugar and espresso: While the espresso is still hot, add 1 1/2 tablespoons of packed brown sugar to your jar or shaker. Pour the hot espresso over the sugar. Stir briefly with a spoon to help the sugar start dissolving. The heat is crucial here — cold espresso won’t dissolve the sugar properly, and you’ll end up with gritty bits at the bottom of your glass.
- Add the vanilla and salt: If you’re using the vanilla extract and a pinch of salt, add them now. Stir once more. The salt might sound strange, but it really does make the brown sugar flavor sing. I forgot it once and the drink felt flat — never again.
- Shake it like you mean it: Secure the lid tightly on your jar. Shake vigorously for about 15 to 20 seconds. You want to hear the ice rattling around. This aerates the espresso and creates that gorgeous foam on top. I usually count to 15 in my head — any less and the foam isn’t thick enough, any more and the ice starts to dilute things too much.
- Fill your glass with ice: While you’re shaking, fill your serving glass with a generous handful of ice. Large cubes are best here because they melt slower.
- Pour the shaken espresso over the ice: Open the jar and pour the entire contents — foam and all — over the ice. You’ll see the dark espresso settle at the bottom while the foam rises to the top. Don’t stir yet.
- Add the oat milk: Slowly pour 3/4 cup of unsweetened oat milk over the back of a spoon into the glass. This helps it layer nicely without disturbing the foam too much. You’ll get a beautiful gradient — dark at the bottom, creamy in the middle, foamy on top.
- Stir and enjoy: Give it a gentle stir with a long spoon or straw to combine everything. Taste it. If it’s too strong, add a splash more oat milk. If you want it sweeter, add a tiny pinch more brown sugar. And that’s it — you’ve just made a Lighter Copycat Starbucks Brown Sugar Oat Milk Shaken Espresso in your own kitchen.
Sensory Cue: When you shake the jar, listen for the sound of the ice breaking up the espresso. You should hear a consistent rattle, not a slosh. The foam should be thick enough to leave a trail on the side of the jar when you pour it out.
Cooking Tips & Techniques
I’ve made this drink at least fifty times now, and I’ve learned a few things the hard way. Here’s what I wish I knew from the start.
Don’t skip the hot espresso step. I tried making this with cold brew once because I was impatient, and the brown sugar just sat at the bottom of the jar like a sad little pile of sand. You need that heat to melt the sugar into the coffee. If you’re using cold brew, heat it up for about 20 seconds in the microwave first.
The shaking technique matters. You’re not just mixing — you’re aerating. Shake with confidence. Use both hands if you have to. I’ve found that shaking in a vertical motion (up and down) creates more foam than a side-to-side shake. And don’t open the jar immediately after shaking — wait about five seconds for the pressure to settle, or you might get a little coffee geyser.
Watch your ice-to-coffee ratio. Too much ice and your drink is watery before you finish it. Too little and it’s warm and sad. I use about 6 to 8 standard cubes for a 12-ounce glass. If you’re using crushed ice, use less — it melts faster.
Common mistake: Over-shaking. I did this once because I got distracted talking to my neighbor. The ice completely dissolved, and I ended up with lukewarm, watery coffee. Stick to 15 to 20 seconds. Set a timer if you need to.
Multitasking tip: While your espresso is brewing, measure your brown sugar and get your jar ready. By the time the espresso is done, you can have everything assembled in under a minute. Perfect for those rushed mornings when you can’t afford to waste a single second.
Variations & Adaptations
This recipe is incredibly forgiving, and I’ve played around with it more than I’d like to admit. Here are some of my favorite twists.
- Vanilla Brown Sugar Version: Add 1/2 teaspoon of vanilla extract to the espresso before shaking. It adds a warmth that makes the drink feel even more indulgent. I do this when I want a dessert-like treat without the sugar.
- Iced Brown Sugar Latte (No Shake): If you don’t have a jar or shaker, just stir the hot espresso and brown sugar together in a glass, pour over ice, and add oat milk. You won’t get the foam, but the flavor is still spot on. Great for when you’re in a hurry.
- Dairy-Free & Vegan: This recipe is already vegan if you use plant-based milk. For an extra creamy version, try coconut creamer or cashew milk. Just watch the sweetness — some creamers are already sweetened.
- Low-Sugar Adaptation: Use 1 tablespoon of brown sugar instead of 1 1/2, or swap in a monk fruit brown sugar blend. The texture will be slightly different, but the flavor is still lovely. I’ve also used a sugar-free vanilla syrup and skipped the brown sugar entirely — it works, but it’s not quite the same.
- Seasonal Twist: In the fall, add a pinch of cinnamon and a tiny dash of nutmeg to the espresso before shaking. It gives it a cozy, almost chai-like warmth that pairs beautifully with the brown sugar.
Serving & Storage Suggestions
This drink is best enjoyed immediately, while the foam is still thick and the ice is still cold. I like to serve it in a tall clear glass so you can see the beautiful layers — dark espresso at the bottom, creamy oat milk in the middle, and a foamy crown on top. It’s almost too pretty to drink. Almost.
What to serve with it: This espresso pairs beautifully with something simple. A slice of banana bread, a buttery croissant, or even a handful of almonds. The sweetness of the drink complements savory or nutty flavors really well. I’ve also had it alongside a simple egg scramble for a quick breakfast that feels fancy.
Storage: Honestly, this isn’t a make-ahead drink. The magic is in the fresh foam and the cold ice. But if you have leftover shaken espresso (without the milk), you can store it in the fridge for up to 24 hours. Just give it a quick shake before pouring over fresh ice and adding oat milk. It won’t be as foamy, but the flavor will still be good.
Reheating: Don’t. Just don’t. Cold espresso doesn’t reheat well. If you want a hot version, brew fresh espresso, stir in brown sugar, and top with warm oat milk. It’s a completely different drink, but it’s delicious in its own right.
How flavors develop: If you let the shaken espresso sit in the fridge for an hour or two, the brown sugar flavor actually deepens and becomes more rounded. It’s a nice trick if you want to prep the base ahead of time for a party or brunch.
Nutritional Information & Benefits
Here’s the thing I love most about this Lighter Copycat Starbucks Brown Sugar Oat Milk Shaken Espresso — it feels like a treat, but it’s actually pretty balanced. Compared to the store-bought version, you’re saving about 60 calories and 10 grams of sugar per serving. That adds up fast if you’re a daily drinker like me.
- Estimated per serving (12 ounces): Approximately 120 calories, 3g fat, 20g carbohydrates, 2g fiber, 12g sugar, 2g protein.
- Key ingredient benefits: Oat milk is naturally creamy and contains beta-glucans, which are good for heart health. Brown sugar provides a quick source of energy, and espresso is rich in antioxidants. The small amount of salt helps with electrolyte balance.
- Dietary considerations: This recipe is naturally dairy-free, vegan, and vegetarian. It can be made gluten-free by ensuring your oat milk is certified gluten-free (some brands process oats with wheat). It’s also nut-free if you use oat milk.
- Potential allergens: Oats are naturally gluten-free but often cross-contaminated. If you have celiac disease, look for certified gluten-free oat milk. No major allergens otherwise.
- My personal perspective: I don’t believe in cutting out everything you love. This drink lets me have that coffee shop experience without the sugar hangover. It’s about balance, not deprivation. And honestly, knowing exactly what’s in my coffee makes me enjoy it even more.
FAQs
Can I use regular milk instead of oat milk?
Absolutely. Whole milk or 2% will work just fine, though the texture will be slightly different. Oat milk is creamier and naturally a little sweet, which complements the brown sugar. If you use regular milk, you might want to add an extra splash to get the same richness.
Why is my brown sugar not dissolving?
This usually happens if your espresso isn’t hot enough. Make sure you pour the espresso over the sugar while it’s still steaming hot. If you’re using cold brew or iced coffee, heat it up for 20 to 30 seconds in the microwave first. You can also stir the sugar into the hot espresso before adding ice.
Can I make this without an espresso machine?
Yes! Use a Moka pot, an AeroPress, or even strong brewed coffee. Just make sure it’s concentrated — about twice as strong as your usual cup. I’ve used a French press with extra coffee grounds and it worked beautifully.
How do I get more foam?
Shake harder and longer. Use a jar with a tight-fitting lid, and shake for a full 20 seconds. Make sure your espresso is hot when you shake it — the heat helps create more foam. Also, using a barista blend oat milk can give you a thicker, more stable foam.
Is this really healthier than Starbucks?
Yes, by a good margin. A grande Starbucks Brown Sugar Oat Milk Shaken Espresso has about 140 calories and 20 grams of sugar. This version clocks in around 120 calories and 12 grams of sugar. Plus, you control the ingredients — no preservatives, no artificial flavors, and you can adjust the sweetness to your liking.
Conclusion
This Lighter Copycat Starbucks Brown Sugar Oat Milk Shaken Espresso is more than just a coffee recipe. It’s a small daily ritual that makes you feel like you’ve treated yourself, even when you’re just standing in your own kitchen in your pajamas. It’s the kind of drink that turns a regular Tuesday into something a little more special.
I love that it’s flexible — you can make it sweeter, stronger, creamier, or lighter depending on your mood. I love that it saves me money and time. But mostly, I love that first sip. That moment when the brown sugar, espresso, and oat milk come together just right. It reminds me of that afternoon at my sister-in-law’s house, watching her shake a mason jar like it was nothing, not realizing she was handing me a recipe I’d make for years.
Now it’s your turn. Try it out, tweak it to your liking, and let me know how it goes. Did you add cinnamon? Use a different milk? Forget the salt and regret it? I’d honestly love to hear. Drop a comment below or tag me in your photos — nothing makes my day like seeing someone else fall in love with this drink the way I did. Happy sipping!
Pin This Recipe!
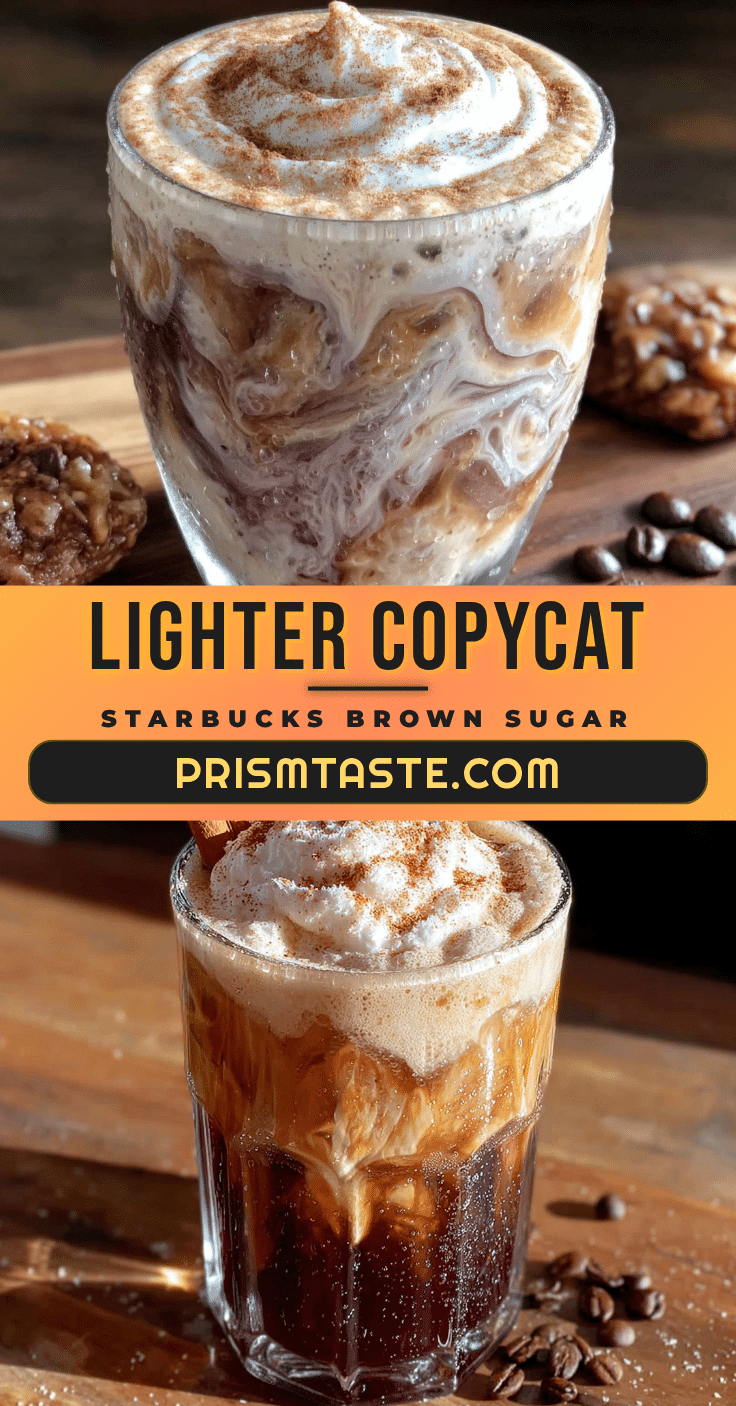
Lighter Copycat Starbucks Brown Sugar Oat Milk Shaken Espresso
A lighter, homemade version of the popular Starbucks brown sugar oat milk shaken espresso. This easy recipe cuts the sugar by about a third, uses simple ingredients, and creates a beautiful foam without a fancy espresso machine.
- Prep Time: 5 minutes
- Cook Time: 0 minutes
- Total Time: 5 minutes
- Yield: 1 serving 1x
- Category: Beverage
- Cuisine: American
Ingredients
- 2 shots (about 2 ounces) freshly brewed espresso or 1/4 cup strong brewed coffee
- 1 1/2 tablespoons packed light brown sugar
- 3/4 cup unsweetened oat milk (barista blend or shelf-stable)
- 1 generous handful ice cubes (about 6–8 standard cubes)
- 1 pinch salt (optional, flaky sea salt preferred)
- 1/4 teaspoon vanilla extract (optional)
Instructions
- Brew 2 shots (about 2 ounces) of hot espresso using an espresso machine, Moka pot, or AeroPress.
- While the espresso is still hot, add 1 1/2 tablespoons of packed brown sugar to a 16-ounce airtight jar or cocktail shaker. Pour the hot espresso over the sugar and stir briefly to help dissolve.
- If using, add 1/4 teaspoon vanilla extract and a pinch of salt. Stir once more.
- Secure the lid tightly and shake vigorously for 15 to 20 seconds until the espresso is frothy.
- Fill a tall 12- to 16-ounce glass with a generous handful of ice cubes.
- Pour the shaken espresso (including foam) over the ice.
- Slowly pour 3/4 cup of unsweetened oat milk over the back of a spoon into the glass to create layers.
- Stir gently with a long spoon or straw to combine. Taste and adjust sweetness or strength as desired. Serve immediately.
Notes
For best results, use hot espresso to dissolve the brown sugar. Shake in a vertical motion for more foam. If using cold brew, heat it for 20 seconds in the microwave first. For a low-sugar version, use 1 tablespoon brown sugar or a monk fruit brown sugar blend. Store leftover shaken espresso (without milk) in the fridge for up to 24 hours; shake again before serving over fresh ice.
Nutrition
- Serving Size: 12 ounces
- Calories: 120
- Sugar: 12
- Sodium: 100
- Fat: 3
- Saturated Fat: 0.5
- Carbohydrates: 20
- Fiber: 2
- Protein: 2
Keywords: brown sugar shaken espresso, copycat Starbucks, oat milk espresso, homemade iced coffee, lighter coffee drink, easy espresso recipe


