I was wrestling a particularly stubborn butternut squash on my countertop last October when my neighbor, an older woman named Clara whose garden I had been admiring all summer, appeared at my kitchen door. She didn’t knock at first, just stood there holding a small, beat-up tin. “You’re working too hard,” she said, nodding at the squash. She set the tin on my table and told me, quite simply, that pumpkin cookies were the answer to autumn—not the fussy kind, but the soft, pillowy ones that taste like a hug. She’d learned them from her mother-in-law, who had come over from a small town where every fall meant baking with whatever squash was on hand. Clara didn’t give me a formal lesson. She just talked while I made coffee, mentioning that the secret was not to overmix the batter and that real maple syrup was non-negotiable. She left the tin, which held a single cookie wrapped in wax paper, and I ate it standing up. Honestly, I didn’t even sit down. That cookie was so soft, so perfectly spiced, with a tangy-sweet icing that I couldn’t stop thinking about. I spent the next week trying to recreate it, and maybe you’ve been there—chasing a flavor from someone else’s kitchen. I finally called Clara to confess I’d added a pinch more cinnamon and swapped her cream cheese frosting for one with maple. She laughed and said, “Good. That’s how recipes stay alive.” These cozy pumpkin cookies with maple cream cheese icing are the result of that conversation. They’re the kind of cookie you make when you want the house to smell like fall and your family to hover around the cooling rack, waiting.
Why You’ll Love This Recipe
Let me be honest with you. I have made a lot of pumpkin cookies in my time, and most of them are either too cakey or too dry. These are neither. They hit that perfect middle ground—soft, tender, with a slight chew at the edges that makes them feel substantial. After testing this recipe about six times (my family was not complaining), I landed on a method that works every single time, even for beginner bakers.
- Quick & Easy: From start to finish, these cookies take about 30 minutes. The dough comes together in one bowl, no stand mixer required, and the icing sets in just a few minutes. Perfect for a Tuesday afternoon when you need something sweet but don’t want to spend hours in the kitchen.
- Simple Ingredients: You probably have most of these in your pantry right now. Canned pumpkin puree, basic spices, butter, flour. The only “special” ingredient is real maple syrup for the icing, but I promise it’s worth the small splurge.
- Perfect for Fall Gatherings: These cookies are the first thing to disappear at potlucks, Thanksgiving dinners, and cozy family nights. They travel well, they look beautiful on a plate, and they make everyone feel like you fussed—even though you didn’t.
- Crowd-Pleaser: My kids, who usually pick around anything with a “healthy” reputation, devour these. My husband takes them to work and comes home with empty containers. Even my mother-in-law, who is famously picky about baked goods, asked for the recipe.
- Unbelievably Delicious: The combination of warm pumpkin spice and cool, tangy maple cream cheese icing is honestly next-level. It’s like fall on a plate, but better because you can eat it with your hands.
What makes this recipe different from the rest? It’s the texture. I use a technique where you cream the butter and sugar for a full three minutes—no shortcuts—which creates a structure that stays soft for days. And the icing? It’s not just sweet. The maple adds a depth that regular powdered sugar icing just can’t touch. This isn’t another pumpkin cookie recipe. It’s the one you’ll come back to every year.
What Ingredients You Will Need
This recipe uses simple, honest ingredients to create something that feels special. Most of these are pantry staples, especially if you bake during the fall. Let’s walk through what you’ll need and why each one matters.
For the Pumpkin Cookies
- All-purpose flour, 2 cups (240g): Spoon and level your flour—don’t scoop directly from the bag. Too much flour makes dense cookies, and nobody wants that.
- Baking powder, 1 teaspoon: This gives the cookies their lift. Make sure yours is fresh; old baking powder is the number one reason cookies don’t spread properly.
- Baking soda, 1/2 teaspoon: Works with the pumpkin’s acidity to keep the cookies tender.
- Ground cinnamon, 1 1/2 teaspoons: I use a good-quality cinnamon here, like Saigon or Ceylon. It makes a difference.
- Ground nutmeg, 1/2 teaspoon: Freshly grated if you have it, but pre-ground works fine.
- Ground ginger, 1/2 teaspoon: Adds a little warmth without being overpowering.
- Salt, 1/2 teaspoon: Don’t skip this. Salt balances the sweetness and brings out the pumpkin flavor.
- Unsalted butter, 1/2 cup (113g), softened: Let it sit on the counter for at least 30 minutes. Cold butter won’t cream properly.
- Granulated sugar, 1 cup (200g): Regular white sugar gives the cookies structure and a slight crispness at the edges.
- Pumpkin puree, 3/4 cup (170g): Use canned pumpkin puree, not pumpkin pie filling. Libby’s is my go-to brand because it’s consistently thick and not watery.
- Large egg, 1: Room temperature is best. If you forgot to take it out, place it in a bowl of warm water for 5 minutes.
- Vanilla extract, 1 teaspoon: Pure vanilla, not imitation. It adds warmth that blends beautifully with the spices.
For the Maple Cream Cheese Icing
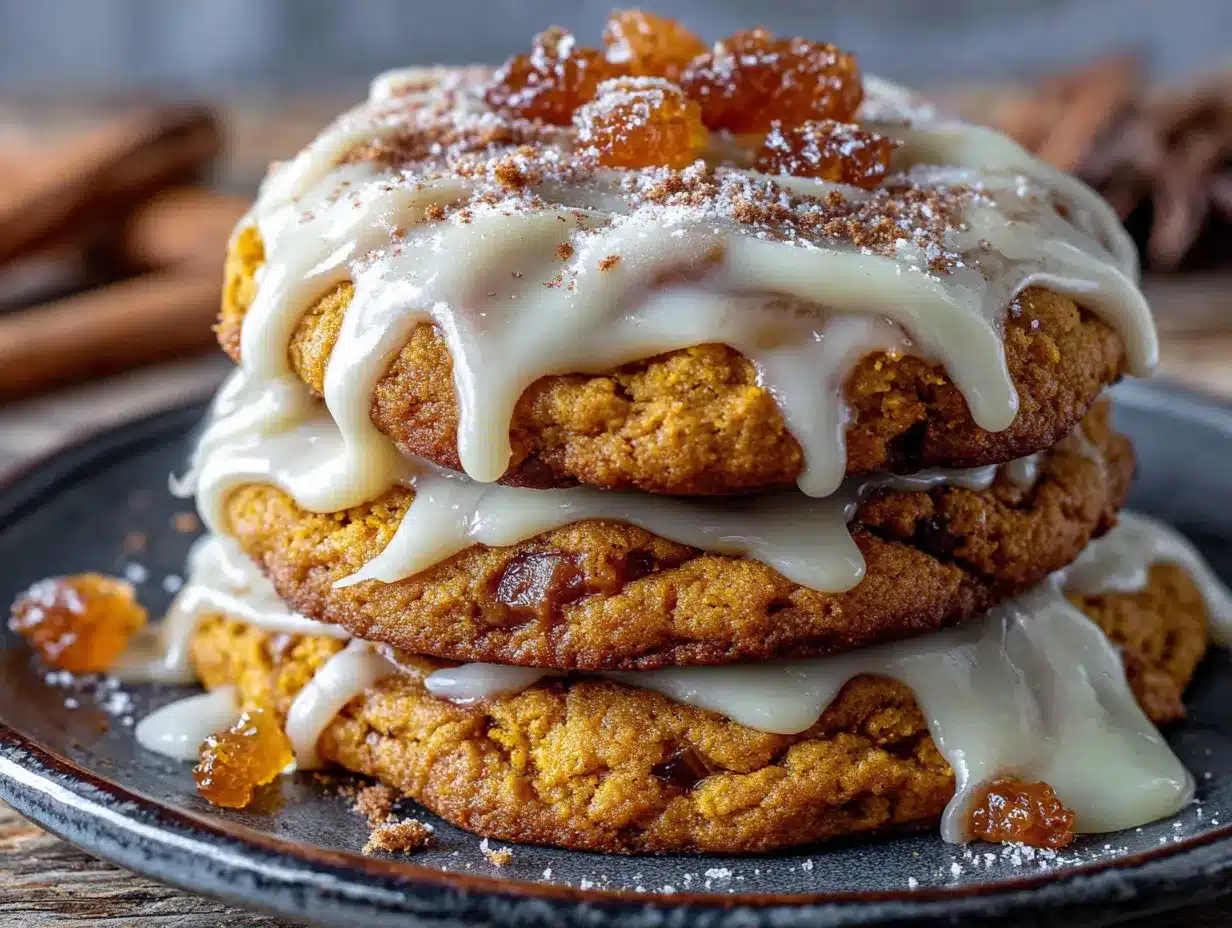
- Cream cheese, 4 ounces (113g), softened: Full-fat cream cheese gives the best texture. Low-fat can make the icing runny.
- Unsalted butter, 2 tablespoons (28g), softened: Adds richness and helps the icing hold its shape.
- Powdered sugar, 1 cup (120g): Sift it if you want an extra-smooth icing, but I usually skip this step and it’s fine.
- Pure maple syrup, 2 tablespoons: This is non-negotiable. Use real maple syrup, not pancake syrup. The flavor is entirely different, and the fake stuff will ruin the icing. I like Grade A Dark Amber for a more pronounced maple taste.
- Vanilla extract, 1/2 teaspoon: Just a touch to round out the flavors.
Ingredient Swap: If you’re dairy-free, you can use a plant-based cream cheese and butter. Just make sure they’re the block style, not the spreadable kind, which has too much water. For a gluten-free version, substitute a 1:1 gluten-free flour blend that contains xanthan gum.
Equipment Needed
You don’t need a fancy kitchen to make these cookies. Here’s what you’ll actually use:
- Large mixing bowl: Any bowl will do, but a wide one makes it easier to cream the butter and sugar without splattering.
- Hand mixer or stand mixer: You can do this by hand with a wooden spoon, but your arm will get tired. I use a hand mixer for the creaming step and switch to a spatula for folding.
- Measuring cups and spoons: For accuracy, especially with the flour and spices. I have a set of metal measuring cups that have lasted me years.
- Baking sheets: Two standard 13×18 inch sheets work well. If you only have one, let it cool completely between batches.
- Parchment paper or silicone baking mat: Parchment paper is cheap and makes cleanup a breeze. Silicone mats work great too, but they can make cookies spread a tiny bit more.
- Wire cooling rack: Essential for letting the cookies cool evenly before icing. I once tried icing warm cookies, and it was a sticky mess.
- Small offset spatula or butter knife: For spreading the icing. An offset spatula gives you more control, but a butter knife works fine.
Budget-Friendly Tip: If you don’t have a cooling rack, you can cool cookies on a clean kitchen towel. Just make sure it’s not terry cloth, which can leave fuzz on the cookies.
Preparation Method
Let’s make these cookies. I’ve broken this down step by step, and I’ve included the little details that make the difference between a good cookie and a great one.
- Preheat your oven to 350°F (175°C). Line two baking sheets with parchment paper. This is important—don’t skip the parchment, or the cookies may stick. While the oven heats, take your cream cheese and butter for the icing out of the fridge so they can soften.
- Whisk the dry ingredients together. In a medium bowl, combine 2 cups (240g) all-purpose flour, 1 teaspoon baking powder, 1/2 teaspoon baking soda, 1 1/2 teaspoons cinnamon, 1/2 teaspoon nutmeg, 1/2 teaspoon ginger, and 1/2 teaspoon salt. Whisk until everything is evenly distributed. Set aside.
- Cream the butter and sugar. In a large mixing bowl, beat 1/2 cup (113g) softened unsalted butter with 1 cup (200g) granulated sugar. Beat on medium speed for a full 3 minutes. I set a timer for this. The mixture should look light, fluffy, and almost pale. Scrape down the sides of the bowl halfway through. This step is crucial—don’t rush it.
- Add the wet ingredients. Beat in 1 large egg and 1 teaspoon vanilla extract until combined. The mixture might look slightly curdled at this point, and that’s okay. Add 3/4 cup (170g) pumpkin puree and beat on low speed until just combined. The batter will look a little lumpy and that’s fine.
- Fold in the dry ingredients. Add the flour mixture to the wet ingredients in two additions, mixing on low speed after each until just combined. Stop as soon as you don’t see any more streaks of flour. Overmixing at this stage will make the cookies tough. Use a spatula to give the dough a final stir from the bottom up, making sure no flour is hiding at the bottom of the bowl.
- Scoop the dough. Use a cookie scoop or a tablespoon to drop rounded tablespoons of dough onto the prepared baking sheets, spacing them about 2 inches apart. I use a #40 cookie scoop, which gives me about 24 cookies. If you don’t have a scoop, just use two spoons—one to scoop, one to push the dough onto the sheet.
- Bake the cookies. Bake one sheet at a time in the center of the oven for 10-12 minutes. The edges should look set and lightly golden, but the centers will still look slightly soft and puffy. Don’t overbake—they continue to set on the hot baking sheet after you take them out. I usually pull mine at 11 minutes.
- Cool the cookies. Let the cookies rest on the baking sheet for 5 minutes. This is important because they’re fragile when hot. After 5 minutes, transfer them to a wire cooling rack to cool completely. Don’t even think about icing them until they’re fully cool, or the icing will melt into a puddle.
- Make the maple cream cheese icing. While the cookies cool, make the icing. In a medium bowl, beat 4 ounces (113g) softened cream cheese and 2 tablespoons (28g) softened unsalted butter together until smooth and creamy, about 2 minutes. Add 1 cup (120g) powdered sugar, 2 tablespoons pure maple syrup, and 1/2 teaspoon vanilla extract. Beat on low speed until combined, then increase to medium speed and beat for 1 minute until smooth and fluffy.
- Ice the cookies. Once the cookies are completely cool, spread a generous teaspoon of icing on each one. I like to leave a little border of cookie showing around the edges—it looks more rustic and homemade. If you want to get fancy, you can drizzle a little extra maple syrup on top or sprinkle with a pinch of cinnamon.
Troubleshooting Note: If your dough seems too sticky to scoop, chill it in the fridge for 15 minutes. This usually happens if your pumpkin puree was on the watery side. If your icing is too thin, add a tablespoon more powdered sugar. If it’s too thick, add a teaspoon of milk or more maple syrup.
Cooking Tips & Techniques
I’ve made these cookies enough times to know exactly where things can go wrong. Here are the lessons I learned the hard way, so you don’t have to.
The Creaming Mistake I Made Twice: The first time I made these, I was in a hurry and only creamed the butter and sugar for about a minute. The cookies came out flat and dense. The second time, I creamed for the full three minutes, and the difference was night and day. That extra time incorporates air, which gives the cookies their soft, pillowy texture. Set a timer. Don’t cheat it.
Pumpkin Puree Matters: Not all canned pumpkin is created equal. Some brands are thinner and more watery, which can make your dough too wet. If you open your can and see liquid pooling on top, spoon the pumpkin into a paper towel-lined bowl and let it sit for 5 minutes to absorb some of the excess moisture. I learned this after a batch of cookies spread into one giant cookie sheet.
Don’t Overmix After Adding Flour: I know I said this already, but it’s worth repeating. Once flour touches liquid, gluten starts developing. The more you mix, the more gluten you get, and the tougher your cookies become. Mix until the flour just disappears, then stop. A few streaks are better than tough cookies.
Baking Sheet Rotation: If your oven runs hot on one side (most do), rotate the baking sheet halfway through baking. I usually rotate at the 6-minute mark. This ensures even browning across all the cookies.
Make-Ahead Strategy: You can make the cookie dough up to 3 days in advance and keep it in the fridge. Let it sit at room temperature for 10 minutes before scooping, because cold dough is harder to scoop. You can also freeze the baked, un-iced cookies for up to 3 months. Just thaw them at room temperature and ice them fresh.
Variations & Adaptations
One of the best things about this recipe is how flexible it is. Here are a few ways I’ve adapted it over the years, depending on who I’m baking for.
Spiced Maple Pecan: Add 1/2 cup of toasted, chopped pecans to the cookie dough and sprinkle a few more on top of the icing. The crunch is a lovely contrast to the soft cookie. I made this version for a Thanksgiving potluck, and it was the first plate to empty.
Chocolate Pumpkin Dream: Fold 1/2 cup of semi-sweet chocolate chips into the dough. The chocolate and pumpkin spice combination is surprisingly good—like a pumpkin spice latte in cookie form. My kids go crazy for this version.
Vegan Adaptation: Replace the butter with a plant-based butter (I like Earth Balance), use a flax egg (1 tablespoon ground flaxseed mixed with 3 tablespoons water, let sit for 5 minutes), and use vegan cream cheese for the icing. The texture is slightly less tender, but the flavor is still fantastic. I tested this for a friend who’s vegan, and she asked for the recipe immediately.
Gluten-Free Version: Substitute the all-purpose flour with a 1:1 gluten-free flour blend that contains xanthan gum. I’ve used Bob’s Red Mill 1:1 Baking Flour with great results. The cookies might spread a tiny bit more, so chill the dough for 20 minutes before baking.
Pumpkin Cookie Sandwiches: Instead of icing each cookie individually, pair them up with a thicker layer of icing in the middle. These are a bit more indulgent, but they make a show-stopping dessert for parties. Just make sure the cookies are completely cool before assembling.
Serving & Storage Suggestions
These cookies are best served at room temperature, with the icing fully set. I usually let the iced cookies sit on the counter for about 30 minutes before serving, which gives the icing time to firm up slightly. If you’re serving them at a gathering, arrange them on a platter in a single layer—stacking them can smudge the icing.
What to Serve With Them: A cold glass of milk is the classic pairing, but these cookies also go beautifully with a hot cup of coffee or chai tea. For a fall-themed dessert board, arrange them alongside apple slices, a small bowl of caramel sauce, and some spiced nuts. I’ve also been known to crumble one over vanilla ice cream for an impromptu sundae.
Storage: Store the iced cookies in an airtight container in the refrigerator for up to 5 days. The icing contains cream cheese, so it needs to be refrigerated. Let them sit at room temperature for about 10 minutes before eating—they’re much softer and more flavorful that way. If you’re storing un-iced cookies, they can stay at room temperature in an airtight container for up to a week.
Freezing: You can freeze the baked, un-iced cookies for up to 3 months. Place them in a single layer in a freezer-safe bag or container, with parchment paper between layers. When you’re ready to serve, thaw them at room temperature, then make the icing fresh. I do this every fall—bake a double batch, freeze half, and pull them out when unexpected guests show up.
Reheating: If you want that just-baked warmth, pop an un-iced cookie in the microwave for 10 seconds. Don’t do this with iced cookies unless you want a puddle of icing. For iced cookies, just let them come to room temperature naturally.
Nutritional Information & Benefits
Let’s be real—these are cookies, not health food. But they do have some redeeming qualities, especially compared to store-bought versions.
Estimated Nutritional Values (per cookie, based on 24 cookies):
- Calories: 145
- Fat: 7g
- Saturated Fat: 4g
- Carbohydrates: 20g
- Sugar: 13g
- Protein: 2g
- Fiber: 1g
Health Highlights: Pumpkin is rich in vitamin A and fiber, which supports eye health and digestion. Cinnamon has anti-inflammatory properties and can help regulate blood sugar. The cream cheese icing provides a small amount of calcium. I’m not saying these are a health food, but they’re certainly better for you than a lot of packaged cookies, and they’re made with real ingredients you can pronounce.
Dietary Considerations: This recipe contains gluten, dairy, and eggs. For gluten-free and vegan options, see the variations section above. If you’re watching your sugar intake, you can reduce the sugar in the cookie dough to 3/4 cup, but I wouldn’t go lower than that—the texture and spread will be affected.
Frequently Asked Questions
Can I use fresh pumpkin instead of canned?
You can, but you need to make sure it’s very dry. Fresh pumpkin has a lot more water than canned. After roasting and pureeing, place the puree in a cheesecloth-lined strainer over a bowl and let it drain for at least an hour. Squeeze out as much liquid as you can. Honestly, canned pumpkin is more consistent and easier, and I use it 99% of the time.
Why did my cookies spread too much?
This usually happens for one of three reasons: your butter was too soft (almost melted), your pumpkin puree was too watery, or you didn’t cream the butter and sugar long enough. Make sure your butter is softened but still cool to the touch, and blot your pumpkin puree if it looks wet. Chilling the dough for 20 minutes before baking can also help.
Can I make the icing ahead of time?
Yes, you can make the icing up to 3 days in advance. Store it in an airtight container in the refrigerator. When you’re ready to use it, let it sit at room temperature for 30 minutes, then beat it with a spoon or mixer until smooth again. You might need to add a teaspoon of milk if it seems too thick.
Can I use pumpkin pie spice instead of individual spices?
Absolutely. Use 2 1/2 teaspoons of pumpkin pie spice in place of the cinnamon, nutmeg, and ginger. The flavor will be slightly different—most pumpkin pie spice blends also include allspice and cloves—but it will still be delicious. I do this when I’m in a hurry and don’t want to measure out three separate spices.
How do I get perfectly round cookies?
If you want bakery-perfect round cookies, use a cookie scoop for even-sized dough balls. Right after they come out of the oven, while they’re still hot, place a round cookie cutter slightly larger than the cookie over it and gently swirl it in a circular motion. This nudges the edges into a perfect circle. It’s a little extra work, but it makes them look gorgeous on a platter.
Conclusion
These cozy pumpkin cookies with maple cream cheese icing are exactly what fall baking should be—simple, forgiving, and full of flavor. They’re the cookies you make when you want the house to smell like cinnamon and nutmeg, when you want your family to gather in the kitchen without being asked, when you want to feel like you’ve made something special without spending all day doing it. I’ve made them for neighbors, for school bake sales, for lazy Sunday afternoons with a cup of tea, and they’ve never let me down.
I hope you make these your own. Maybe you’ll add extra cinnamon like I do, or maybe you’ll discover that a pinch of cardamom is your secret ingredient. That’s the beauty of a good recipe—it gives you a foundation, and you build your own story on top of it. If you make these cookies, I’d love to hear about it. Leave a comment below and tell me how they turned out, or share a photo of your baking adventure. And if you have a variation that works beautifully, please share that too. Happy baking, friends. May your kitchen be warm and your cookies be soft.
Pin This Recipe!
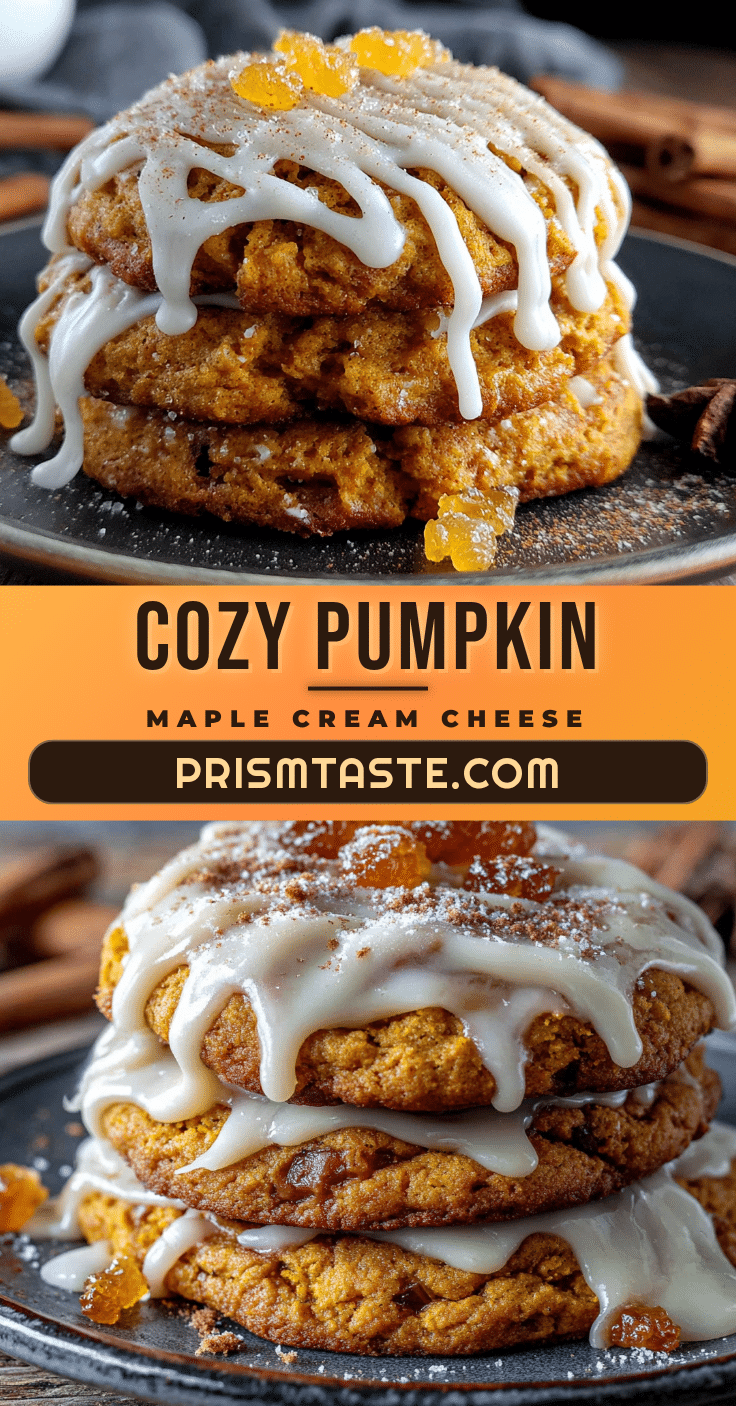
Cozy Pumpkin Cookies with Perfect Maple Cream Cheese Icing
Soft, pillowy pumpkin cookies with a tangy-sweet maple cream cheese icing. These easy, one-bowl cookies are perfect for fall gatherings and taste like a hug.
- Prep Time: 15 minutes
- Cook Time: 12 minutes
- Total Time: 30 minutes
- Yield: 24 cookies 1x
- Category: Dessert
- Cuisine: American
Ingredients
- 2 cups (240g) all-purpose flour
- 1 teaspoon baking powder
- 1/2 teaspoon baking soda
- 1 1/2 teaspoons ground cinnamon
- 1/2 teaspoon ground nutmeg
- 1/2 teaspoon ground ginger
- 1/2 teaspoon salt
- 1/2 cup (113g) unsalted butter, softened
- 1 cup (200g) granulated sugar
- 3/4 cup (170g) pumpkin puree (not pumpkin pie filling)
- 1 large egg, room temperature
- 1 teaspoon vanilla extract
- 4 ounces (113g) cream cheese, softened
- 2 tablespoons (28g) unsalted butter, softened
- 1 cup (120g) powdered sugar
- 2 tablespoons pure maple syrup
- 1/2 teaspoon vanilla extract
Instructions
- Preheat oven to 350°F (175°C). Line two baking sheets with parchment paper. Take cream cheese and butter for icing out of fridge to soften.
- In a medium bowl, whisk together flour, baking powder, baking soda, cinnamon, nutmeg, ginger, and salt. Set aside.
- In a large mixing bowl, beat softened butter and granulated sugar on medium speed for 3 minutes until light and fluffy. Scrape down sides halfway through.
- Beat in egg and 1 teaspoon vanilla until combined. Add pumpkin puree and beat on low until just combined. Batter may look slightly lumpy.
- Add flour mixture in two additions, mixing on low after each until just combined. Do not overmix. Use a spatula to fold from bottom to ensure no flour remains.
- Drop rounded tablespoons of dough (using a #40 cookie scoop or two spoons) onto prepared baking sheets, spacing 2 inches apart.
- Bake one sheet at a time in center of oven for 10-12 minutes, until edges are set and lightly golden but centers still soft. Rotate sheet halfway if needed.
- Let cookies rest on baking sheet for 5 minutes, then transfer to a wire rack to cool completely before icing.
- For icing: Beat softened cream cheese and butter together until smooth, about 2 minutes. Add powdered sugar, maple syrup, and 1/2 teaspoon vanilla. Beat on low until combined, then medium for 1 minute until fluffy.
- Once cookies are completely cool, spread a generous teaspoon of icing on each, leaving a small border. Let icing set for about 30 minutes before serving.
Notes
For best texture, cream butter and sugar for a full 3 minutes. If dough is too sticky, chill 15 minutes. If icing is too thin, add more powdered sugar; if too thick, add a teaspoon of milk or maple syrup. Cookies can be stored in an airtight container in the refrigerator for up to 5 days. Un-iced cookies can be frozen for up to 3 months.
Nutrition
- Serving Size: 1 cookie
- Calories: 145
- Sugar: 13
- Sodium: 120
- Fat: 7
- Saturated Fat: 4
- Carbohydrates: 20
- Fiber: 1
- Protein: 2
Keywords: pumpkin cookies, maple cream cheese icing, fall cookies, pumpkin spice, easy pumpkin cookies, soft pumpkin cookies


