My nephew Leo showed up at my door at 4 PM on a Saturday, already in his werewolf costume, asking if we could make something for his class Halloween party the next morning. I opened the fridge and found leftover chocolate cake from his birthday last week, a bag of candy eyeballs I’d bought on a whim, and some white chocolate chips that were probably past their prime. The panic was real—I had nothing planned, and Leo was already bouncing off the walls with excitement.
I grabbed the cake, crumbled it into a bowl, and started mixing in frosting to make cake pops. Then I looked at those candy eyeballs and thought, “What if we made them look like actual monster eyeballs?” Leo’s eyes went wide (pun intended), and we got to work. Two hours later, we had a tray of the most ridiculous, hilarious, and surprisingly delicious spooky monster eyeball chocolate cake pops you’ve ever seen. They were bumpy, veiny, and staring at us with those creepy candy eyes.
The best part? Leo’s teacher texted me the next day saying the cake pops were the first thing gone from the treat table. The kids loved them, the parents took photos, and my nephew told everyone his aunt was a “Halloween cake pop genius.” Honestly, that’s the kind of reputation I’ll take any day. These aren’t just cute—they’re the kind of treat that makes people stop and smile, which is exactly what Halloween should be about.
So if you need a last-minute Halloween dessert that looks impressive but is secretly simple, these monster eyeball cake pops are your answer. They’re creepy, they’re fun, and they taste like pure chocolatey goodness. Let me show you how to make them.
Why You’ll Love This Recipe
I’ve tested these spooky monster eyeball chocolate cake pops about four times now (Leo was a very willing taste tester), and here’s why they keep winning over everyone who tries them:
- Quick & Easy: From start to finish, you’re looking at about 45 minutes of active time. The rest is just chilling in the fridge. Perfect for those “oh no, I forgot the school party is tomorrow” moments.
- Simple Ingredients: You probably have most of this stuff already. Leftover cake, canned frosting, chocolate melts—no fancy grocery runs required. Even the candy eyeballs are easy to find at any craft store or grocery store around Halloween.
- Perfect for Halloween Parties: Whether it’s a classroom celebration, a neighborhood potluck, or your own spooky gathering, these cake pops are guaranteed conversation starters. They’re also great for party appetizer spreads where you want something sweet and playful.
- Crowd-Pleaser: Kids absolutely lose their minds over these. Adults too, honestly. There’s something about a cake pop that looks like a disembodied eyeball that brings out the kid in everyone.
- Unbelievably Delicious: The texture is amazing—creamy on the inside from the frosting, crunchy on the outside from the chocolate shell. And that rich chocolate flavor? It’s comfort food at its finest, just with a creepy twist.
What makes these different from regular cake pops is the attention to detail. The red veining, the slightly irregular shape that makes each one look unique, the way the candy eyeball sits just right to create that “staring into your soul” effect. It’s not just another cake pop recipe—it’s my best version after trial and error. And trust me, I learned from some very ugly first attempts.
These cake pops are the kind of treat that makes you close your eyes after the first bite. It’s comfort food reimagined—faster, simpler, but with the same soul-soothing satisfaction. Perfect for impressing guests without stress, or turning a simple dessert into something memorable.
What Ingredients You Will Need
This recipe uses simple, mostly pantry-stable ingredients to deliver maximum creepiness with minimum fuss. Here’s what you’ll need:
For the Cake Pop Base:
- 3 cups crumbled chocolate cake (day-old or leftover works perfectly; you can also bake a box mix and let it cool completely)
- 1/2 cup chocolate frosting (store-bought is fine; I prefer Duncan Hines or Pillsbury for consistent texture)
- 1/4 teaspoon vanilla extract (optional, but adds a nice depth)
For the Coating:
- 12 ounces white candy melts or white chocolate chips (I recommend Wilton candy melts—they melt smoother and set harder than regular white chocolate)
- 1 tablespoon coconut oil or vegetable shortening (helps thin the coating for easier dipping)
- Red gel food coloring (for the veining effect; liquid food coloring won’t work as well)
- Black gel food coloring (optional, for extra creepy details)
For the Decorations:
- 40-50 candy eyeballs (the ones with the flat backs work best; you can find them at Michaels, Joann, or Amazon)
- Red luster dust (optional, for a bloody sheen effect)
For Assembly:
- 20-25 lollipop sticks (6-inch size is standard)
- 1 block of styrofoam or a cake pop stand (for drying)
Ingredient selection tip: Look for candy melts that are specifically labeled for cake pops or candy making. They’re designed to set with a nice snap and won’t bloom or streak like regular chocolate chips. If you’re using white chocolate chips, add an extra teaspoon of coconut oil to help them melt smoothly.
Substitution note: You can use vanilla cake instead of chocolate for a different look—the white cake base gives a more “eyeball” effect under the coating. Also, if you’re gluten-free, use a gluten-free cake mix and frosting. The rest of the ingredients are naturally gluten-free.
Equipment Needed
You don’t need a lot of fancy gear for these spooky monster eyeball chocolate cake pops. Here’s what I use:
- Large mixing bowl – For crumbling the cake and mixing in the frosting
- Baking sheet – Lined with parchment paper for placing the dipped cake pops
- Microwave-safe bowl – For melting the candy coating (glass works best)
- Lollipop sticks – 6-inch size, available at craft stores or online
- Styrofoam block – For drying the cake pops upright; you can also use a cardboard box with holes poked in it
- Small piping bag or zip-top bag – For the red veining details
- Toothpicks – Helpful for adjusting candy eyeballs and cleaning up drips
Budget-friendly tip: If you don’t have a styrofoam block, flip a colander upside down and poke the sticks through the holes. It works surprisingly well. I’ve also used a cardboard box with a knife poked through—ghetto fabulous, but it gets the job done.
Personal note: Don’t skip the parchment paper. I tried using wax paper once and the cake pops stuck like crazy. Parchment paper is non-negotiable for clean release.
Preparation Method
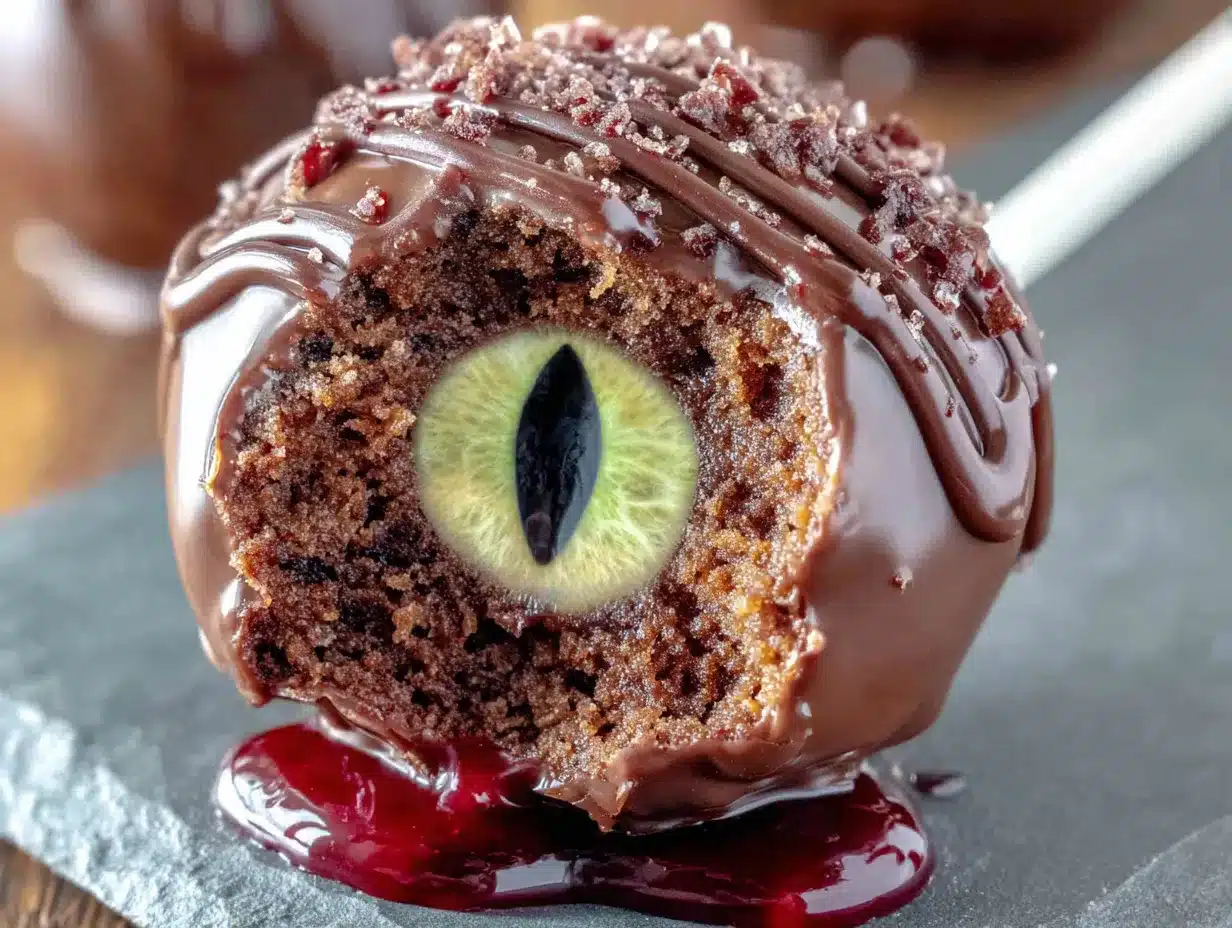
Let’s make some monster eyeballs! Here’s the step-by-step process that I’ve refined through multiple batches (and a few disasters).
Step 1: Make the Cake Pop Dough (10 minutes)
Start by crumbling your chocolate cake into a large bowl. You want fine crumbs—no big chunks bigger than a pea. I use my hands for this because it’s faster and I can feel if there are any dense spots. Add the chocolate frosting and vanilla extract, then mix everything together with a spatula or your hands until it forms a dough-like consistency. It should hold together when pressed between your fingers. If it’s too dry, add a tablespoon more frosting. Too wet? Add a bit more cake crumbs.
Step 2: Shape the Eyeballs (15 minutes)
Scoop out about 1.5 tablespoons of the cake mixture and roll it into a ball. Here’s the trick: don’t make them perfectly round. Monster eyeballs should be slightly irregular—some oval, some lumpy, some with a little point on one side. This makes them look more organic and creepy. Place each shaped ball on the parchment-lined baking sheet. You should get about 20-25 balls depending on size. Pop them in the freezer for 15 minutes. This is crucial—cold cake pops hold their shape when dipped.
Step 3: Melt the Coating (5 minutes)
While the cake balls chill, melt the white candy melts in a microwave-safe bowl. Heat in 30-second intervals at 50% power, stirring between each interval. Add the coconut oil and stir until completely smooth. The mixture should be thin enough to coat a spoon but not watery. If it’s too thick, add a few more drops of coconut oil.
Step 4: Dip the Sticks (5 minutes)
Take the cake balls out of the freezer. Dip the tip of each lollipop stick into the melted candy coating, then insert it about halfway into a cake ball. This “glue” step is non-negotiable—it keeps the cake pop from sliding off the stick later. Return the sticks to the freezer for another 10 minutes.
Step 5: Dip the Cake Pops (20 minutes)
Now the fun part. Hold each cake pop by the stick and dip it into the melted coating, fully submerging the cake ball. Lift it out and gently tap the stick on the edge of the bowl to let excess coating drip off. Don’t tap too hard or the cake ball might fall off—speaking from experience here. Gently rotate the cake pop as you lift it to encourage even coverage. Place it upright in the styrofoam block to set.
Step 6: Add the Eyeballs (10 minutes)
While the coating is still wet (this is important—if it sets, the candy eyeballs won’t stick), press a candy eyeball onto each cake pop. I like to place them slightly off-center for maximum creepiness. Some should be looking straight ahead, some sideways, some slightly downward. Give each one its own personality. Let them set completely, about 15 minutes at room temperature or 5 minutes in the fridge.
Step 7: Create the Veins (10 minutes)
Take a small amount of the remaining white coating and mix in red gel food coloring until you get a deep blood-red color. Transfer this to a small piping bag or zip-top bag with a tiny corner snipped off. Pipe thin, wiggly lines across the surface of each cake pop, mimicking bloodshot veins. Don’t overthink it—messy is actually better here. Some veins should cross the eyeball, some should radiate outward. Let the red coating set for 10 minutes.
Step 8: Final Details (5 minutes)
If you want extra creepiness, use a dry food-safe brush to dust a tiny bit of red luster dust over the veins for a slightly wet, bloody sheen. This step is optional but takes these from “fun Halloween treat” to “genuinely unsettling deliciousness.”
Sensory cue: When you bite into one, you should hear a clean snap from the coating, then feel the soft, fudgy interior. The candy eyeball adds a little chewy sweetness—it’s a textural party in your mouth.
Cooking Tips & Techniques
I’ve made about six batches of these spooky monster eyeball chocolate cake pops, and I’ve learned some things the hard way. Let me save you the trouble.
The Temperature Trap: Your cake balls absolutely must be cold when you dip them. Room temperature cake pops will fall apart in the warm coating. But don’t freeze them solid either—if they’re rock hard, the coating will crack as they warm up. Fifteen minutes in the freezer is the sweet spot.
The Coating Consistency: If your candy coating is too thick, it will create clumpy, uneven cake pops. If it’s too thin, it will run off and leave bare spots. The perfect consistency is like warm honey—it coats the back of a spoon but drips off in a steady stream. Add coconut oil a few drops at a time until you get there.
The Drip Dance: When you lift a dipped cake pop, gravity is not your friend. Gently rotate the stick as you lift it—this helps the coating self-level. If you see a drip forming at the bottom, touch it with your finger (carefully!) or use a toothpick to swirl it into the coating.
My Biggest Fail: The first time I made these, I used liquid red food coloring for the veins. It made the coating seize up and turn into a grainy mess. Gel food coloring is non-negotiable here. Also, I once tried to speed up the setting process by putting the cake pops in the freezer while the coating was still wet. The coating cracked and looked like a spiderweb—which actually looked kind of cool, but not what I was going for.
Multitasking Strategy: While the cake balls are chilling, melt your coating and set up your dipping station. While the dipped cake pops are setting, mix your red veining coating. This keeps the whole process moving without downtime.
Variations & Adaptations
One of the best things about this recipe is how easy it is to customize. Here are some variations I’ve tried and loved:
Dietary Adaptations: Use a gluten-free chocolate cake mix and frosting for a gluten-free version. For dairy-free, use dairy-free cake, dairy-free frosting, and dairy-free white chocolate chips (Enjoy Life makes a good one). Vegan? Use a vegan cake mix and vegan frosting—the rest is already plant-based.
Flavor Twists: Swap the chocolate cake for red velvet cake for an even bloodier look. Or use vanilla cake with strawberry frosting for a pinkish eyeball effect. I once made a batch with chocolate cake and mint frosting—they tasted like Thin Mints and looked terrifying. My personal favorite variation is using chocolate chip pumpkin bread as the base for a fall-themed monster eyeball. The pumpkin adds moisture and the chocolate chips look like freckles.
Color Changes: Instead of white coating, use green candy melts for alien eyeballs, or orange for pumpkin monsters. You can even do a gradient effect by dipping half in white and half in green. The possibilities are endless.
Different Candy Eyes: Use googly eyes (the ones with the moving pupils) for an extra creepy effect. Or use different sizes—some big, some small—for a more varied look. I found some iridescent candy eyeballs at a craft store that gave the cake pops a truly otherworldly appearance.
Serving & Storage Suggestions
These spooky monster eyeball chocolate cake pops are best served at room temperature. Take them out of the fridge about 15 minutes before serving to let the coating soften slightly—it makes them easier to bite into and the flavor is more pronounced.
Presentation Ideas: Arrange them upright in a styrofoam block decorated with fake spiderwebs and plastic spiders. Or place them on a platter with the sticks pointing outward like a creepy bouquet. For a truly dramatic effect, arrange them in a circle on a black platter with a small LED candle in the center—it looks like they’re having a ritual.
Complementary Treats: These pair beautifully with pumpkin cheesecake muffins for a Halloween dessert spread. The creamy, tangy pumpkin flavor balances the rich chocolate perfectly. You could also serve them alongside a pumpkin chai latte for a cozy autumn treat.
Storage Instructions: Store cake pops in an airtight container in the refrigerator for up to 5 days. Place them in a single layer with parchment paper between layers to prevent sticking. Do not stack them too high or the sticks might break.
Freezing Tips: You can freeze undecorated cake pops (without the coating) for up to 2 months. Wrap them tightly in plastic wrap and place in a freezer bag. When ready to use, thaw in the refrigerator overnight, then dip and decorate as directed. Fully decorated cake pops can also be frozen for up to 1 month—just place them in a single layer in a freezer-safe container with parchment between layers.
Reheating: These are meant to be served cold or at room temperature, so no reheating needed. If they’ve been in the fridge too long and the coating looks dull, let them sit at room temperature for 20 minutes—the coating will regain its shine.
Flavor development note: These actually taste better on day two. The flavors meld together overnight, and the cake becomes even more fudgy and moist. So don’t feel like you have to serve them immediately—making them a day ahead is actually ideal.
Nutritional Information & Benefits
Let’s be real—these are a treat, not a health food. But here’s the breakdown so you know what you’re working with:
Estimated per cake pop (based on 20 servings):
- Calories: 185
- Fat: 9g
- Carbohydrates: 24g
- Sugar: 18g
- Protein: 2g
- Fiber: 1g
Health Highlights: The chocolate cake provides a small amount of antioxidants from cocoa, while the white chocolate coating offers calcium. The coconut oil adds healthy medium-chain triglycerides (MCTs) that can provide quick energy. Of course, the sugar content means these should be enjoyed in moderation.
Dietary Considerations: This recipe can be made gluten-free, dairy-free, and vegan with simple substitutions. It contains dairy (white chocolate, frosting), gluten (cake), and soy (may be present in candy melts). Always check labels if you’re serving to someone with allergies.
My Take: Look, Halloween is one night a year. These cake pops are about joy, creativity, and making memories with the people you love. One treat isn’t going to derail anyone’s health goals. So go ahead, make a batch, and enjoy every creepy, delicious bite.
Conclusion
These spooky monster eyeball chocolate cake pops are more than just a Halloween dessert—they’re an experience. They’re the treat that makes kids squeal with delight, the one that gets photographed and shared, the one that people remember long after the candy wrappers are in the trash. And honestly? They’re just really, really good.
I love how customizable they are. You can make them as creepy or as cute as you want. You can use different cake flavors, different coatings, different candy eyes. Each batch can be completely unique. That’s what makes this recipe so special—it’s a canvas for your Halloween creativity.
So here’s my challenge to you: make a batch of these for your next Halloween gathering. Don’t stress about perfection—the imperfect ones are actually the creepiest. Let the kids help, make a mess, have fun. And when everyone asks for the recipe (and they will), send them my way.
I’d love to see your creations! Leave a comment below telling me how yours turned out, or share a photo of your monster eyeballs. Did you try a different color combination? A new flavor twist? I want to hear all about it. Happy Halloween, and happy baking!
Frequently Asked Questions
Can I use store-bought cake instead of homemade?
Absolutely! In fact, I often use a boxed chocolate cake mix because it’s consistent and saves time. Just bake it according to package directions, let it cool completely, and crumble it up. Day-old cake from the bakery section works great too.
Why are my cake pops falling off the sticks?
This usually happens for two reasons: the cake balls aren’t cold enough when you dip them, or you didn’t “glue” the stick with melted coating before inserting it. Make sure your cake balls are chilled for at least 15 minutes in the freezer, and always dip the stick tip in melted coating before inserting it into the cake ball.
Can I make these ahead of time?
Yes! Fully decorated cake pops can be stored in an airtight container in the refrigerator for up to 5 days. They actually taste better on day two because the flavors meld together. You can also freeze undecorated cake balls for up to 2 months.
My candy coating is too thick/thin. What do I do?
If it’s too thick, add more coconut oil or vegetable shortening, a few drops at a time, and stir until smooth. If it’s too thin, let it cool for a few minutes—it will thicken as it cools. You can also add a few more candy melts to thicken it up.
Can I use different types of candy eyes?
Definitely! Googly eyes (with moving pupils) are super creepy. You can also use different sizes for variety, or even draw your own pupils with black gel food coloring on white candy melts. Just make sure whatever you use is food-safe.
Pin This Recipe!
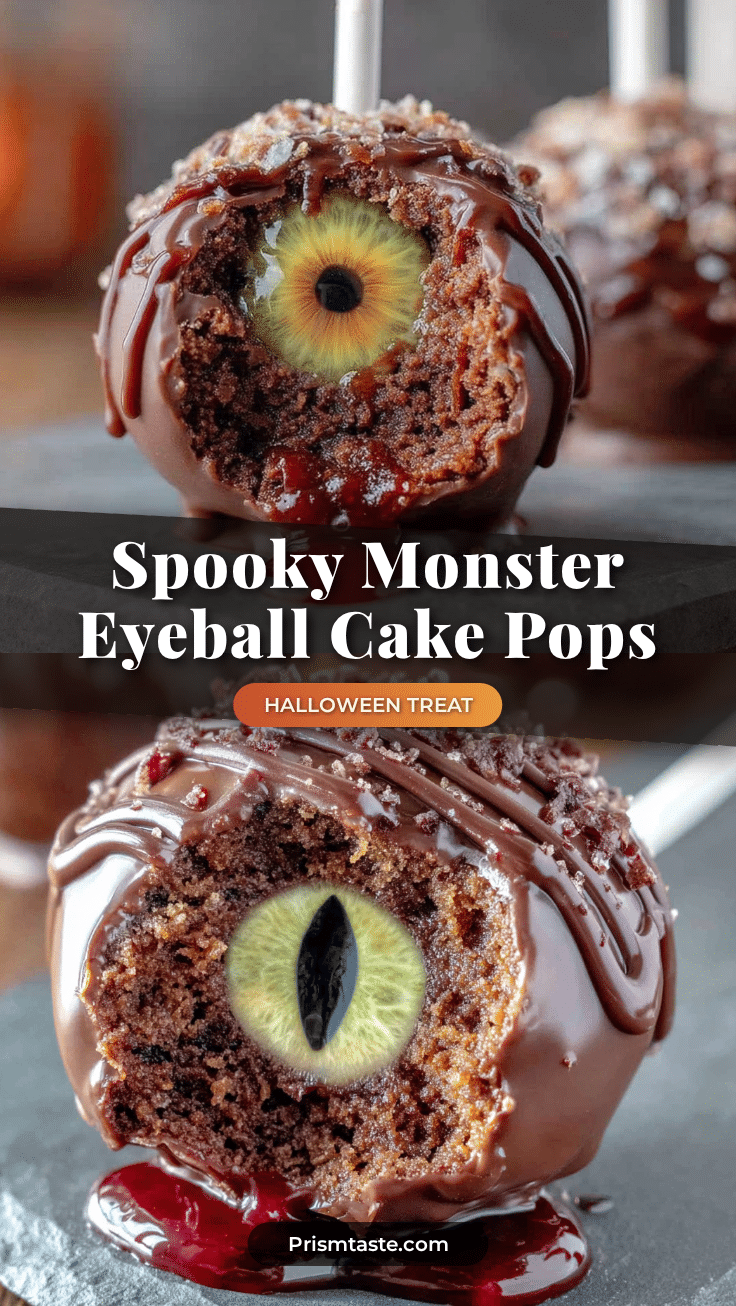
Spooky Monster Eyeball Cake Pops: Easy Halloween Treats
These spooky monster eyeball cake pops are a fun and easy Halloween treat made with leftover chocolate cake, candy eyeballs, and white chocolate coating. Perfect for parties, they’re creepy, delicious, and sure to be a hit with kids and adults alike.
- Prep Time: 45 minutes
- Cook Time: 0 minutes
- Total Time: 1 hour 30 minutes (includes chilling and setting time)
- Yield: 20-25 cake pops 1x
- Category: Dessert
- Cuisine: American
Ingredients
- 3 cups crumbled chocolate cake (day-old or leftover)
- 1/2 cup chocolate frosting (store-bought, e.g., Duncan Hines or Pillsbury)
- 1/4 teaspoon vanilla extract (optional)
- 12 ounces white candy melts or white chocolate chips (e.g., Wilton candy melts)
- 1 tablespoon coconut oil or vegetable shortening
- Red gel food coloring
- Black gel food coloring (optional)
- 40–50 candy eyeballs (flat back preferred)
- Red luster dust (optional)
- 20–25 lollipop sticks (6-inch size)
- 1 block of styrofoam or a cake pop stand
Instructions
- Crumble the chocolate cake into a large bowl until no chunks larger than a pea remain. Add the chocolate frosting and vanilla extract, then mix with a spatula or your hands until a dough-like consistency forms. If too dry, add more frosting; if too wet, add more cake crumbs.
- Scoop about 1.5 tablespoons of the cake mixture and roll into a ball. Make them slightly irregular (oval, lumpy, or with a point) for a monster look. Place on a parchment-lined baking sheet. Freeze for 15 minutes.
- While the cake balls chill, melt the white candy melts in a microwave-safe bowl in 30-second intervals at 50% power, stirring between each. Add the coconut oil and stir until smooth. The mixture should be thin enough to coat a spoon but not watery.
- Remove cake balls from freezer. Dip the tip of each lollipop stick into the melted coating, then insert it about halfway into a cake ball. Return to the freezer for 10 minutes.
- Hold each cake pop by the stick and dip it into the melted coating, fully submerging the cake ball. Lift and gently tap the stick on the bowl edge to remove excess coating. Rotate as you lift for even coverage. Place upright in the styrofoam block to set.
- While the coating is still wet, press a candy eyeball onto each cake pop, placing them slightly off-center for maximum creepiness. Let set for 15 minutes at room temperature or 5 minutes in the fridge.
- Mix a small amount of remaining white coating with red gel food coloring to get a deep blood-red color. Transfer to a small piping bag or zip-top bag with a tiny corner snipped off. Pipe thin, wiggly lines across each cake pop to mimic bloodshot veins. Let set for 10 minutes.
- Optional: Use a dry food-safe brush to dust a tiny bit of red luster dust over the veins for a wet, bloody sheen.
Notes
Cake balls must be cold but not frozen solid when dipped. Use gel food coloring for veins, not liquid. For best results, make a day ahead as flavors meld overnight. Store in an airtight container in the refrigerator for up to 5 days.
Nutrition
- Serving Size: 1 cake pop
- Calories: 185
- Sugar: 18
- Fat: 9
- Carbohydrates: 24
- Fiber: 1
- Protein: 2
Keywords: Halloween cake pops, monster eyeball cake pops, spooky cake pops, easy Halloween treats, chocolate cake pops, candy eyeballs, white chocolate coating, party dessert, kid-friendly Halloween


