The last jello shot disappeared from the tray before I even made it back to the kitchen. Someone actually texted me the next morning asking for the recipe. That never happens with jello shots. But these candy corn jello shots for Halloween are different. They look like the real candy, they taste dangerously good, and they vanish fast.
I wasn’t even planning to make them. I was staring at a bag of candy corn I’d bought for decoration and thought, what if I could turn that layered look into something for grown-ups? The first attempt was a mess. The layers bled into each other, the colors looked muddy, and honestly, I almost gave up. But I kept tweaking, and somewhere around the third batch, it clicked. The trick is patience with the setting time and the right combination of flavors.
Now these are my go-to Halloween party trick. They’re the thing people stop and stare at before they even take a sip. And the best part? They’re easier than they look. You just need a little time and a steady hand. I promise the payoff is worth it.
So if you want to show up to your Halloween gathering with something that actually gets people talking, these candy corn jello shots are the move.
Why You’ll Love This Recipe
These aren’t your average jello shots. They look like a party trick, but they come together with simple ingredients and a bit of planning. Here’s why they work so well.
- Looks Impressive, Actually Easy: The three-layer candy corn look takes a little time, but the technique is simple. Anyone can do it.
- Perfect Halloween Party Food: They fit right in at any Halloween gathering. They’re festive, fun, and instantly recognizable.
- Customizable Flavors: You can switch up the jello flavors to match your taste. I use pineapple and orange for the yellow and orange layers, but there’s room to play.
- Always a Crowd-Pleaser: People love them. They’re nostalgic and surprising at the same time. I’ve seen guests take a photo before they even take a sip.
- Make-Ahead Friendly: You can prep these a day or two in advance. That’s a lifesaver when you’re already juggling a costume and a pumpkin carving session.
If you’re planning a full Halloween spread, these jello shots pair perfectly with other easy party bites. They’d be right at home next to a plate of loaded football deviled eggs or some buffalo chicken sliders for a full spread that doesn’t keep you stuck in the kitchen.
What Ingredients You Will Need
This recipe uses simple, grocery-store ingredients. The magic is in how you layer them. You don’t need anything fancy, just a few boxes of jello and some cream.
- For the White Layer (Bottom):
- 1 (3 oz) box of unflavored gelatin (like Knox)
- 1 (14 oz) can of sweetened condensed milk
- 1 cup of boiling water
- 1/2 cup of cold water
- 1 teaspoon of vanilla extract (optional, but adds a nice sweetness)
- For the Orange Layer (Middle):
- 1 (3 oz) box of orange jello (I use Jell-O brand)
- 1 cup of boiling water
- 1/2 cup of cold water
- 1/2 cup of vodka or your preferred spirit (see notes on substitutions)
- For the Yellow Layer (Top):
- 1 (3 oz) box of lemon or pineapple jello (pineapple gives a truer yellow)
- 1 cup of boiling water
- 1/2 cup of cold water
- 1/2 cup of vodka or your preferred spirit
Ingredient Tips & Substitutions:
- Gelatin: I use Knox unflavored gelatin for the white layer. It sets firmly but stays creamy. Don’t swap this for flavored jello or the texture will be off.
- Sweetened Condensed Milk: This gives the white layer its rich, opaque look. Don’t use evaporated milk or regular milk. It won’t set the same way and the color won’t be as bright.
- Alcohol: Vodka is my go-to because it’s neutral. You can use white rum or even a citrus-flavored vodka for extra punch. For a non-alcoholic version, just replace the alcohol with cold water.
- Jello Flavors: I use orange and pineapple because they taste great together. You can use lemon for the yellow layer, but pineapple gives a warmer, truer yellow that matches candy corn better.
Equipment Needed
You don’t need a lot of fancy tools for this recipe. A few basics will get the job done.
- 2-cup Liquid Measuring Cup: I use a Pyrex one. It’s heat-safe for boiling water and has a spout for easy pouring.
- Small Bowls: One for each jello flavor and one for the cream layer.
- Whisk: For stirring the gelatin until it’s fully dissolved.
- Plastic Shot Cups with Lids: The 2-ounce size works best. You can find them at party supply stores or online. The lids are essential for storing them without spills.
- A Baking Sheet or Tray: To hold the cups while you pour. This makes moving them to the fridge much easier.
- A Small Pitcher or Measuring Cup with a Spout: For pouring the jello into the cups. A spout gives you control and reduces mess.
- Refrigerator Space: You’ll need a flat, clear spot in your fridge for at least 4-6 hours. Plan ahead.
Budget-Friendly Tip: You don’t need expensive tools. A clean ketchup bottle with a narrow tip works great for pouring the jello layers. I’ve done it in a pinch and it worked perfectly.
Preparation Method
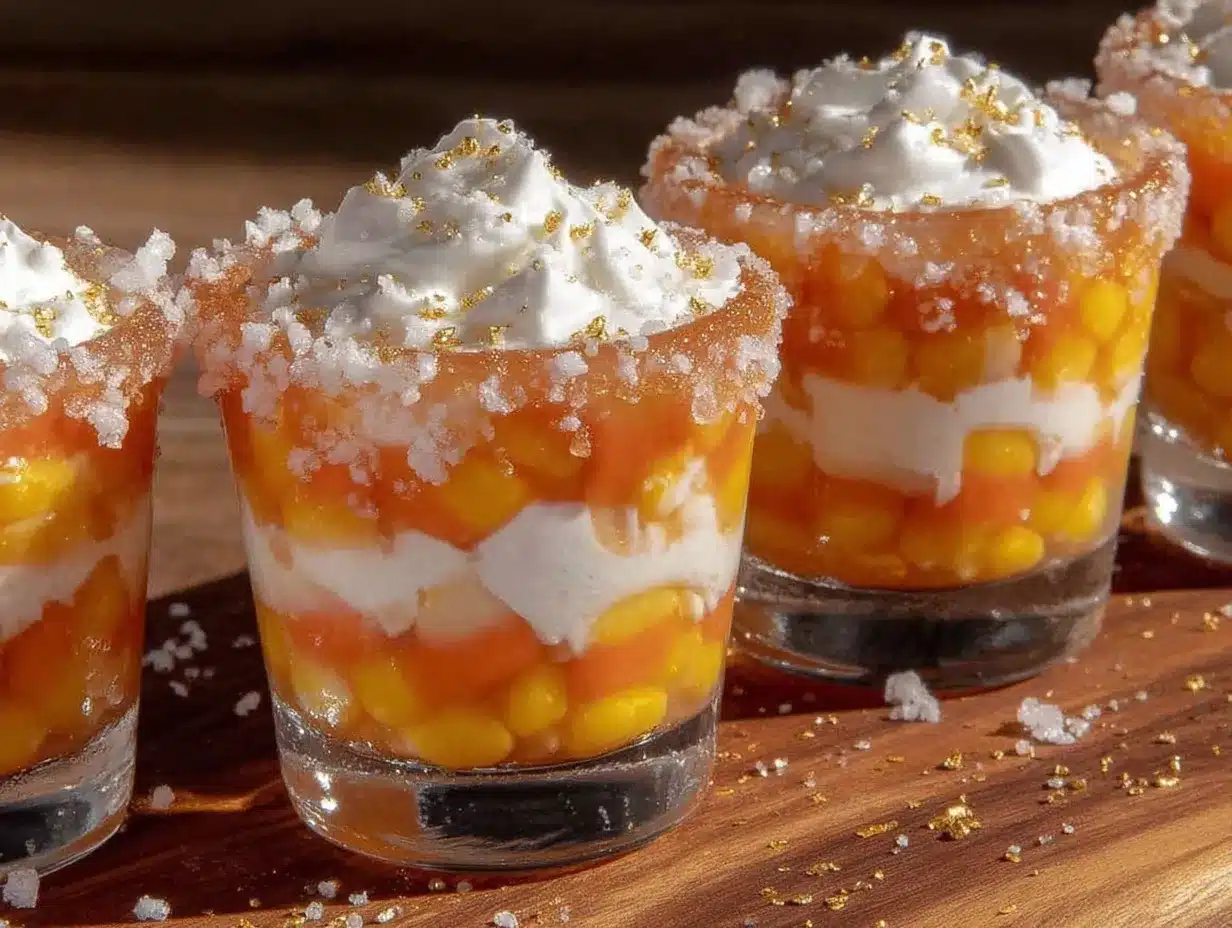
This is where patience pays off. The key to clean layers is letting each one set completely before adding the next. Don’t rush this part.
- Prepare the White Cream Layer: In a small bowl, sprinkle the unflavored gelatin over 1/2 cup of cold water. Let it sit for 2 minutes. Then add 1 cup of boiling water and stir until the gelatin is completely dissolved. Whisk in the can of sweetened condensed milk and the vanilla extract. Stir until smooth. Set aside to cool slightly. It should be warm, not hot, when you pour it.
- Fill the Cups (First Layer): Arrange your shot cups on a baking sheet. Pour the white cream mixture into each cup, filling them about one-third of the way full. I use a small measuring cup with a spout for this. Work quickly but carefully. Place the tray in the refrigerator and let the white layer set for at least 1.5 to 2 hours. It should be firm to the touch, not jiggly.
- Prepare the Orange Layer: While the white layer sets, make the orange jello. In a bowl, combine the orange jello powder with 1 cup of boiling water. Stir for 2 minutes until the powder is fully dissolved. Add 1/2 cup of cold water and 1/2 cup of vodka. Stir to combine. Let it cool to room temperature. Don’t pour hot jello over the set cream layer. It will melt it and ruin the separation.
- Add the Orange Layer: Once the white layer is fully set, take the tray out of the fridge. Gently pour the cooled orange jello mixture into each cup, filling it another one-third of the way. Pour slowly against the side of the cup to avoid disturbing the white layer. Return the tray to the fridge and let the orange layer set for another 1.5 to 2 hours. It should be firm and not sticky.
- Prepare the Yellow Layer: Repeat the process with the yellow jello. Combine the powder with 1 cup of boiling water, stir until dissolved, then add 1/2 cup of cold water and 1/2 cup of vodka. Let it cool to room temperature.
- Add the Yellow Layer: When the orange layer is set, gently pour the cooled yellow jello mixture into each cup. Fill to the top. Return the tray to the fridge and let the final layer set for at least 2 hours, or overnight for best results.
- Serve: Once all layers are fully set, put the lids on the cups. Store them in the fridge until you’re ready to serve. They’re best within 24-48 hours.
Sensory Cues: The white layer should feel firm and slightly bouncy, like a firm pudding. The orange and yellow layers should be clear and jiggly, not cloudy. If they look cloudy, you might have poured them while they were still too warm.
Cooking Tips & Techniques
I learned these through trial and error. Trust me, I made the mistakes so you don’t have to.
- Patience is Non-Negotiable: The biggest mistake is rushing the layers. If you pour a new layer before the previous one is fully set, they’ll bleed into each other and you’ll end up with a muddy mess. Wait the full time. Set a timer if you have to.
- Cool the Jello Before Pouring: Hot jello will melt the set layer beneath it. Always let your jello mixture cool to room temperature before you pour. I usually let it sit on the counter for 10-15 minutes while I check the fridge.
- Pour Gently: Use a spouted measuring cup or a small pitcher. Pour the jello slowly against the inside wall of the cup. Don’t pour it directly onto the center of the set layer. That will create a hole and ruin the separation.
- Use a Steady Hand: If you’re nervous, practice on a few cups first. You’ll get the hang of it after the first row. I always pour a test cup to check the temperature and consistency before I do the whole batch.
- Keep Them Covered: Once the layers are set, put the lids on. Uncovered jello shots can dry out or absorb odors from the fridge. Nobody wants a jello shot that tastes like last night’s garlic dip.
- Plan Your Fridge Space: These need to sit flat for several hours. Clear a shelf before you start. I learned this the hard way when I had to juggle a tray of jello shots around a leftover casserole.
Variations & Adaptations
This recipe is a great base. Once you master the layering technique, you can play with it.
- Non-Alcoholic Version: Simply replace the vodka with cold water. The jello will set just fine. This is perfect for parties where kids are around or for anyone who wants the fun without the buzz.
- Different Flavor Combos: Try strawberry for the red layer and lemon for the yellow. Or go with a tropical vibe using mango and passion fruit. The technique stays the same, just swap the jello flavors.
- Creamy Coconut Layer: Swap the sweetened condensed milk for coconut cream. It gives a different flavor and a slightly different texture. It’s still creamy and opaque, but with a tropical twist.
- Spiced Version: Add a pinch of cinnamon or pumpkin pie spice to the cream layer. It gives a warm, fall flavor that fits perfectly with Halloween. I tried this last year and it was a hit with people who aren’t big on candy corn.
- Layer Order: You can reverse the order if you want. Start with the yellow layer at the bottom and work up to the white. The look changes, but the method is the same. Just make sure you let each layer set fully.
If you’re in the mood for more festive treats, these jello shots would pair beautifully with a batch of soft pumpkin snickerdoodle cookies for a Halloween dessert table that covers all the bases.
Serving & Storage Suggestions
These jello shots are best served cold. Take them out of the fridge just before you’re ready to serve. They hold up well at room temperature for about 30-45 minutes, but I wouldn’t leave them out longer than that.
- Serving Temperature: Serve them straight from the fridge. The cold temperature keeps the layers firm and the texture clean. If they get too warm, the layers can start to soften and blend together.
- Presentation: Arrange them on a tray or a platter. You can line them up in rows or create a pattern. I like to group them by color or arrange them in a candy corn shape on the tray. It makes for a great photo.
- Storage: Keep the lids on and store them in the refrigerator. They will stay fresh for up to 5 days. The flavor is best within the first 2-3 days. After that, the jello can start to weep a little and the texture changes.
- Freezing: I don’t recommend freezing these. The texture will be ruined. The water in the jello will form ice crystals and the layers will break apart when thawed. Stick to the fridge.
- Flavor Development: The flavors actually meld together a bit after a day in the fridge. The alcohol becomes less sharp and the jello flavors blend. I actually prefer them the day after I make them.
Nutritional Information & Benefits
Let’s be honest. These are a treat. They’re not health food. But here’s a rough idea of what you’re working with per shot.
| Nutrient | Amount per Shot (approx.) |
|---|---|
| Calories | 90-110 |
| Total Fat | 2g |
| Sugar | 14g |
| Carbohydrates | 16g |
| Protein | 2g |
Dietary Considerations: These are gluten-free as long as you check your jello brand. Most standard jello is gluten-free. They are not dairy-free due to the sweetened condensed milk in the white layer. For a dairy-free version, try the coconut cream variation mentioned above.
Health Perspective: I make these for parties and special occasions. They’re a fun, festive treat, not an everyday thing. The sugar content is high, so enjoy them in moderation. The gelatin does provide a small amount of protein and is good for your joints, but honestly, that’s not why you’re eating these. You’re eating them because they look amazing and taste even better.
Conclusion
These candy corn jello shots are the kind of recipe that makes people stop and ask, “Wait, how did you do that?” They look like a complicated project, but once you understand the layering process, they’re surprisingly simple. The trick is just patience and a little planning.
I love making these for Halloween because they bring out the kid in everyone. Adults get excited about the candy corn look, and the jello shot twist makes it feel like a grown-up treat. It’s the best of both worlds.
I want to hear how yours turn out. Did you try a different flavor combination? Did you manage to get perfect layers on your first try? Drop a comment below and let me know. And if you share a photo on social media, tag me. I love seeing your creations.
Happy Halloween, and happy layering!
Frequently Asked Questions
How long does it take for each layer to set?
Each layer needs at least 1.5 to 2 hours in the refrigerator. I recommend giving the white cream layer the full 2 hours since it’s thicker. The orange and yellow layers can be ready in about 1.5 hours if your fridge is cold enough. Always check by touching the surface. It should be firm and not sticky.
Can I use a different type of alcohol?
Absolutely. Vodka is my go-to because it’s neutral and doesn’t overpower the jello flavors. But you can use white rum, citrus vodka, or even a flavored gin. Just avoid dark spirits like whiskey or bourbon. They will muddy the colors and ruin the candy corn look.
Why did my layers bleed into each other?
This happens for two reasons. Either you poured the next layer while the previous one was still too soft, or you poured the jello while it was still too warm. Always let the jello mixture cool to room temperature before pouring. And always wait until the previous layer is fully set. Patience is the secret ingredient here.
Can I make these non-alcoholic?
Yes. Simply replace the vodka with an equal amount of cold water. The jello will set perfectly fine. The texture will be slightly firmer, but the look will be the same. This is a great option for parties where kids are present or for anyone who prefers a non-alcoholic treat.
How far in advance can I make these?
I recommend making them no more than 2-3 days before your party. They are best within the first 48 hours. The layers stay clean and the texture is perfect. After 3-4 days, the jello can start to weep a little and the layers may begin to soften. Store them in the fridge with the lids on until you’re ready to serve.
Pin This Recipe!
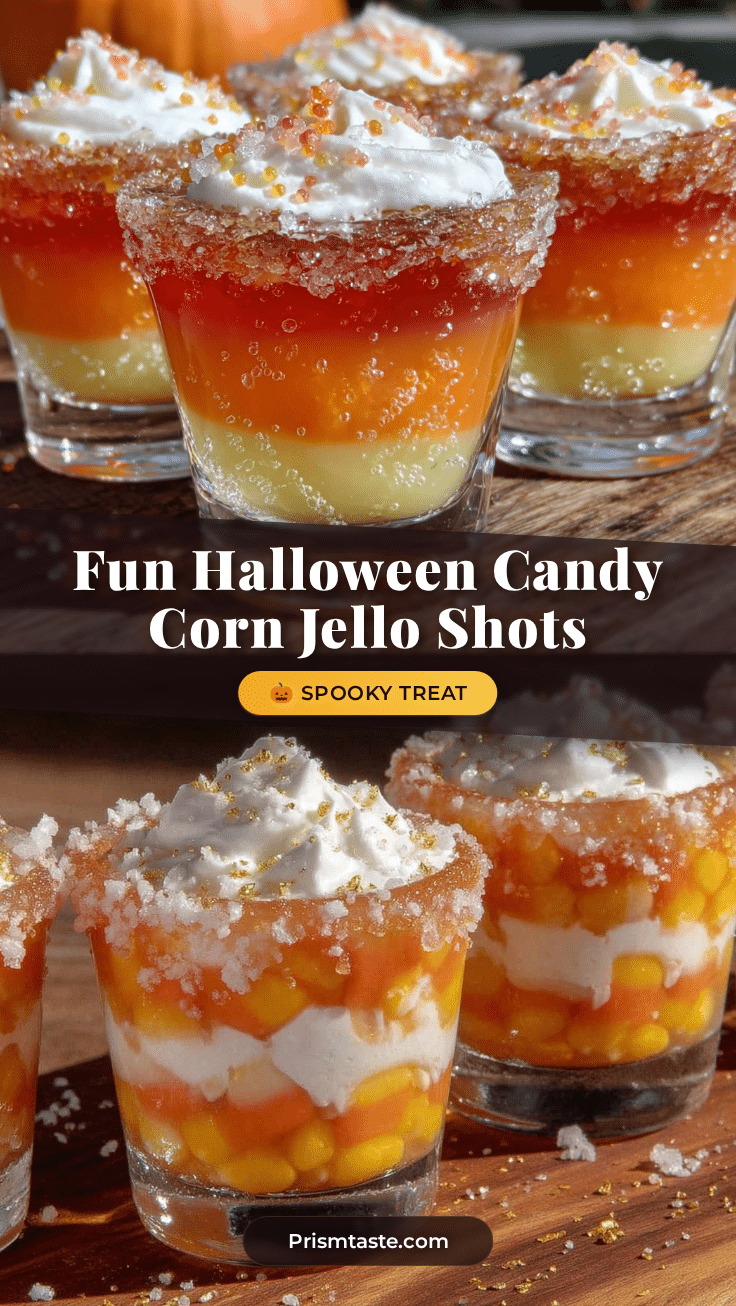
Best Candy Corn Jello Shots: Easy Halloween Recipe
These candy corn jello shots for Halloween look like the real candy, taste dangerously good, and vanish fast. They’re easier than they look with a little time and a steady hand.
- Prep Time: 15 minutes
- Cook Time: 0 minutes
- Total Time: 6 hours 15 minutes (including setting time)
- Yield: 12 servings 1x
- Category: Dessert
- Cuisine: American
Ingredients
- 1 (3 oz) box of unflavored gelatin (like Knox)
- 1 (14 oz) can of sweetened condensed milk
- 1 cup of boiling water
- 1/2 cup of cold water
- 1 teaspoon of vanilla extract (optional)
- 1 (3 oz) box of orange jello (I use Jell-O brand)
- 1 cup of boiling water
- 1/2 cup of cold water
- 1/2 cup of vodka or your preferred spirit
- 1 (3 oz) box of lemon or pineapple jello (pineapple gives a truer yellow)
- 1 cup of boiling water
- 1/2 cup of cold water
- 1/2 cup of vodka or your preferred spirit
Instructions
- Prepare the White Cream Layer: In a small bowl, sprinkle the unflavored gelatin over 1/2 cup of cold water. Let it sit for 2 minutes. Then add 1 cup of boiling water and stir until the gelatin is completely dissolved. Whisk in the can of sweetened condensed milk and the vanilla extract. Stir until smooth. Set aside to cool slightly. It should be warm, not hot, when you pour it.
- Fill the Cups (First Layer): Arrange your shot cups on a baking sheet. Pour the white cream mixture into each cup, filling them about one-third of the way full. I use a small measuring cup with a spout for this. Work quickly but carefully. Place the tray in the refrigerator and let the white layer set for at least 1.5 to 2 hours. It should be firm to the touch, not jiggly.
- Prepare the Orange Layer: While the white layer sets, make the orange jello. In a bowl, combine the orange jello powder with 1 cup of boiling water. Stir for 2 minutes until the powder is fully dissolved. Add 1/2 cup of cold water and 1/2 cup of vodka. Stir to combine. Let it cool to room temperature. Don’t pour hot jello over the set cream layer. It will melt it and ruin the separation.
- Add the Orange Layer: Once the white layer is fully set, take the tray out of the fridge. Gently pour the cooled orange jello mixture into each cup, filling it another one-third of the way. Pour slowly against the side of the cup to avoid disturbing the white layer. Return the tray to the fridge and let the orange layer set for another 1.5 to 2 hours. It should be firm and not sticky.
- Prepare the Yellow Layer: Repeat the process with the yellow jello. Combine the powder with 1 cup of boiling water, stir until dissolved, then add 1/2 cup of cold water and 1/2 cup of vodka. Let it cool to room temperature.
- Add the Yellow Layer: When the orange layer is set, gently pour the cooled yellow jello mixture into each cup. Fill to the top. Return the tray to the fridge and let the final layer set for at least 2 hours, or overnight for best results.
- Serve: Once all layers are fully set, put the lids on the cups. Store them in the fridge until you’re ready to serve. They’re best within 24-48 hours.
Notes
Patience is key. Let each layer set fully before adding the next. Cool the jello mixture to room temperature before pouring to avoid melting the previous layer. Pour gently against the side of the cup. Store with lids on in the refrigerator for up to 5 days, best within 2-3 days. Do not freeze.
Nutrition
- Serving Size: 1 shot
- Calories: 100
- Sugar: 14
- Sodium: 50
- Fat: 2
- Saturated Fat: 1
- Carbohydrates: 16
- Protein: 2
Keywords: candy corn jello shots, Halloween jello shots, layered jello shots, Halloween party shots, easy jello shots recipe


