I ruined three batches of these cookies before I figured out what I was doing wrong.
The first batch came out flat as pancakes. The second tasted more like cardboard than apple cider. The third—well, let’s not talk about the third. It was somewhere between a science experiment and a tragedy. I was so frustrated I almost gave up on the whole idea. But I couldn’t shake the vision of a soft, pillowy cookie that tasted like a crisp autumn afternoon. So I went back to the kitchen, took notes like I was studying for a final, and finally cracked the code.
Turns out, apple cider is a tricky ingredient. It’s mostly water, and water changes everything about how a cookie bakes. You can’t just swap it in and hope for the best. You have to reduce it, concentrate it, and treat it with respect. That first bite of the successful batch? I actually closed my eyes. It tasted like the best parts of fall—sweet, tangy, warm, and a little bit nostalgic. The maple icing on top isn’t just decoration. It’s the thing that makes these cookies feel special, like something you’d find in a bakery case but better because you made them yourself.
These soft apple cider cookies with maple icing are the kind of cookie you make when you want to impress someone without trying too hard. They’re not complicated, but they taste like you spent all day in the kitchen. And honestly, after my three failed attempts, I’m glad I stuck with it. Some recipes just need a little patience before they show you what they can do.
Why You’ll Love This Recipe
I’ve tested this recipe more times than I care to admit, and every single time, the same thing happens. People take one bite, pause, and then reach for another. There’s something about the combination of reduced apple cider and maple icing that just works. It’s not too sweet, not too heavy, and the texture is exactly what you want from a soft cookie—tender, chewy, and melt-in-your-mouth good.
- Quick & Easy: From start to finish, these cookies take about 30 minutes. The hardest part is waiting for the cider to reduce, and that’s mostly hands-off time.
- Simple Ingredients: You probably have most of these in your pantry already. No weird extracts or hard-to-find flours. Just real, honest ingredients.
- Perfect for Fall Baking: Whether you’re making them for a Halloween party, Thanksgiving dessert, or just a cozy Sunday afternoon, these cookies scream autumn.
- Crowd-Pleaser: I’ve brought these to potlucks, cookie swaps, and family dinners. Adults love them. Kids love them. Even my friend who “doesn’t really like cookies” ate three.
- Unbelievably Delicious: The secret is reducing the apple cider until it’s almost syrupy. That concentrated flavor makes all the difference. It’s what gives these cookies their deep, fruity taste without making the dough too wet.
What sets this recipe apart from other apple cider cookies is the technique. Most recipes just dump in regular cider and hope for the best. Not here. By reducing the cider first, you get all the flavor without the excess liquid that ruins the texture. And the maple icing? It’s not just a drizzle. It’s a thick, creamy layer that complements the apple flavor perfectly. Think of it as the finishing touch that turns a good cookie into a great one.
What Ingredients You Will Need
This recipe relies on simple, wholesome ingredients that work together to create something special. The star of the show is the apple cider, but every component plays an important role. Here’s what you’ll need:
For the Cookies
- Apple Cider (1 cup / 240 ml) — This gets reduced to about 1/4 cup, so don’t skip this step. Use fresh, unfiltered cider if you can find it. The flavor is brighter and more authentic. I like Martinelli’s or a local orchard brand when they’re in season.
- Unsalted Butter (1/2 cup / 113 g, softened) — Make sure it’s at room temperature. Cold butter won’t cream properly with the sugar, and melted butter will change the texture entirely.
- Granulated Sugar (1/2 cup / 100 g) — Regular white sugar adds sweetness and helps with browning.
- Light Brown Sugar (1/2 cup / 100 g, packed) — Brown sugar adds moisture and a hint of molasses that pairs beautifully with apple and maple.
- Large Egg (1, room temperature) — A room-temperature egg incorporates more easily into the butter-sugar mixture, creating a smoother dough.
- Vanilla Extract (1 teaspoon) — Pure vanilla extract is worth the splurge here. It rounds out the flavors without overpowering them.
- All-Purpose Flour (2 cups / 240 g) — Regular AP flour works perfectly. No need for specialty flours unless you’re adapting the recipe.
- Baking Soda (1 teaspoon) — This helps the cookies spread just enough while staying soft in the center.
- Baking Powder (1/2 teaspoon) — Adds a little extra lift for a tender crumb.
- Ground Cinnamon (1 teaspoon) — The classic fall spice. It ties the apple and maple flavors together.
- Ground Nutmeg (1/4 teaspoon) — Just a pinch. Nutmeg can be overpowering, so go easy.
- Salt (1/2 teaspoon) — Salt enhances sweetness and balances the flavors. Don’t skip it.
For the Maple Icing
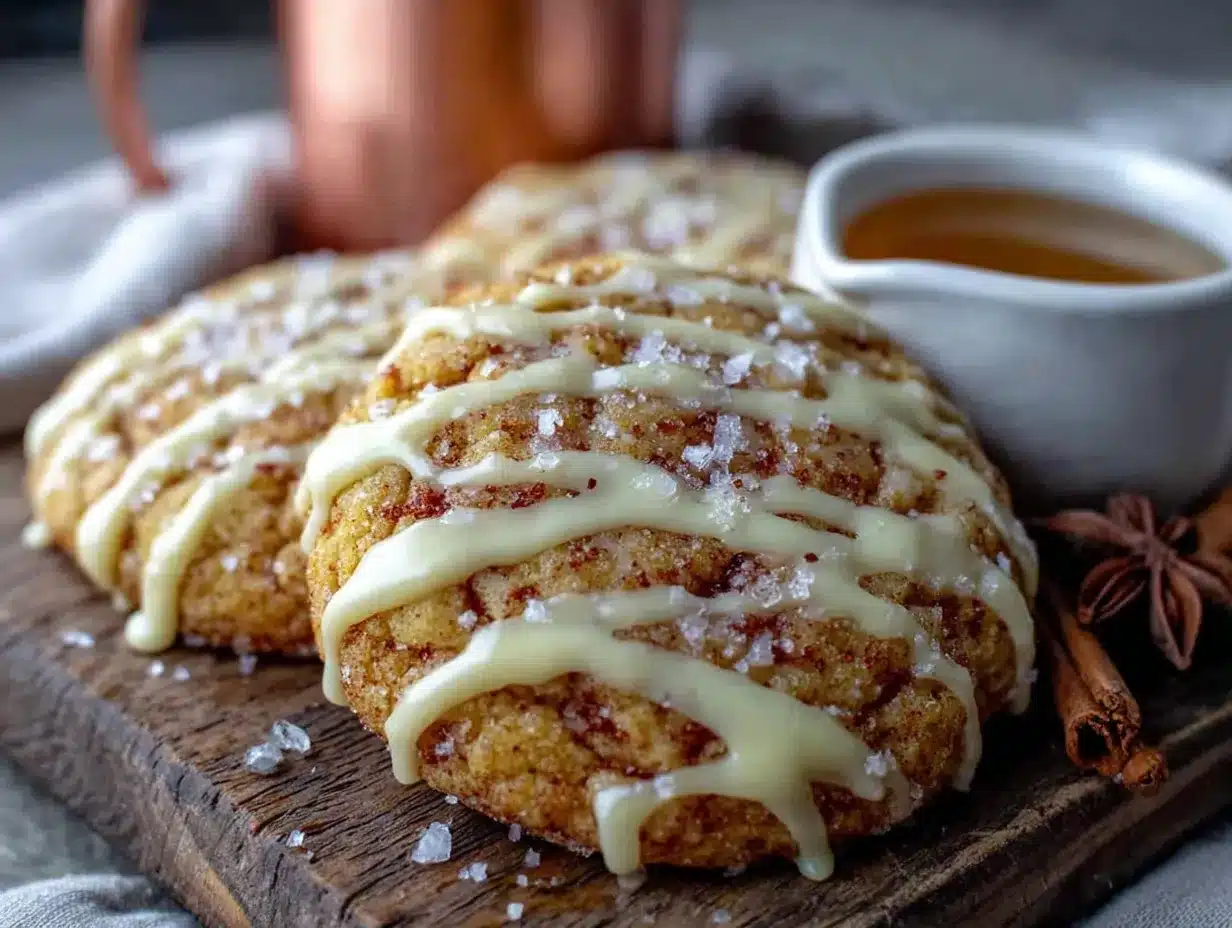
- Powdered Sugar (1 cup / 120 g) — Sift it first to avoid lumps. Nobody wants lumpy icing.
- Pure Maple Syrup (2 tablespoons) — Not pancake syrup. Real maple syrup makes a noticeable difference in flavor. Grade A or B both work, but Grade B has a stronger maple taste.
- Heavy Cream or Milk (1-2 tablespoons) — Heavy cream makes a richer, thicker icing. Milk works if that’s what you have, but the consistency will be slightly thinner.
- Vanilla Extract (1/2 teaspoon) — A little extra vanilla never hurts.
Substitution Notes: If you’re dairy-free, use plant-based butter and coconut cream in place of heavy cream. For a gluten-free version, swap the all-purpose flour with a 1:1 gluten-free baking blend. I’ve tested both, and they work well, though the texture is slightly different. The gluten-free version is a bit more delicate, so handle the dough gently.
Equipment Needed
You don’t need a fancy kitchen to make these cookies. Here’s what you’ll need:
- Small Saucepan — For reducing the apple cider. A 1-quart saucepan works perfectly.
- Mixing Bowls — One large bowl for the wet ingredients and one medium bowl for the dry ingredients.
- Electric Mixer or Whisk — A hand mixer makes creaming butter and sugar much easier, but a sturdy whisk and some elbow grease will also get the job done.
- Baking Sheets — Two standard baking sheets. Line them with parchment paper or silicone baking mats for easy cleanup.
- Cookie Scoop — A 1.5-tablespoon scoop ensures uniform cookies that bake evenly. If you don’t have one, use two spoons to portion the dough.
- Cooling Rack — Essential for letting the cookies cool properly before icing. I learned the hard way that icing on warm cookies just turns into a puddle.
- Whisk or Fork — For mixing the icing. A small whisk works best, but a fork is fine in a pinch.
I’ve made these cookies with both a cheap hand mixer and a fancy stand mixer, and honestly, the results were the same. The key is not the equipment but the technique. My old hand mixer finally gave out last year, and I used a whisk for a while. It took a little longer, but the cookies turned out just as good.
Preparation Method
Let’s get to the fun part. Follow these steps carefully, and you’ll have the softest, most flavorful apple cider cookies you’ve ever tasted.
- Reduce the Apple Cider — Pour 1 cup of apple cider into a small saucepan. Bring it to a boil over medium-high heat, then reduce the heat to medium-low and let it simmer. Stir occasionally. You want it to reduce to about 1/4 cup, which should take 12-15 minutes. The cider will thicken slightly and smell intensely of apples. Watch it carefully toward the end—it can burn quickly. Once reduced, remove it from the heat and let it cool completely. (Pro tip: Set a timer and check every few minutes. I’ve burned more batches than I’d like to admit because I got distracted.)
- Preheat and Prep — Preheat your oven to 350°F (175°C). Line two baking sheets with parchment paper or silicone baking mats. This step is non-negotiable. The cookies will stick without it.
- Cream Butter and Sugars — In a large mixing bowl, beat the softened butter, granulated sugar, and brown sugar together until light and fluffy. This takes about 2-3 minutes with an electric mixer. You’re looking for a pale, creamy mixture that holds its shape. Scrape down the sides of the bowl halfway through.
- Add Wet Ingredients — Beat in the egg, vanilla extract, and the cooled reduced apple cider. Mix until just combined. The batter might look a little curdled at this point, but that’s normal. Don’t panic.
- Combine Dry Ingredients — In a separate bowl, whisk together the flour, baking soda, baking powder, cinnamon, nutmeg, and salt. Make sure there are no lumps. The spices should be evenly distributed throughout the flour.
- Mix Dry into Wet — Gradually add the dry ingredients to the wet mixture, mixing on low speed or folding with a spatula. Stop as soon as the flour disappears. Overmixing will make the cookies tough. The dough should be soft and slightly sticky but not wet.
- Chill the Dough (Optional but Recommended) — For the best texture, cover the bowl and refrigerate the dough for 20-30 minutes. This firms up the butter and prevents the cookies from spreading too much. If you’re short on time, you can skip this step, but the cookies will be flatter.
- Scoop and Shape — Use a 1.5-tablespoon cookie scoop to portion the dough. Place the dough balls on the prepared baking sheets, spacing them about 2 inches apart. They will spread, so give them room.
- Bake — Bake for 10-12 minutes, or until the edges are set and lightly golden. The centers will look slightly underdone—that’s what you want. They’ll continue to set as they cool. Overbaking leads to dry cookies, so err on the side of underdone.
- Cool — Let the cookies rest on the baking sheets for 5 minutes. This allows them to firm up enough to transfer without breaking. Then move them to a cooling rack to cool completely before icing.
- Make the Icing — While the cookies cool, whisk together the powdered sugar, maple syrup, vanilla extract, and 1 tablespoon of heavy cream. Add more cream, 1 teaspoon at a time, until the icing is thick but drizzle-able. It should hold its shape for a few seconds before melting back into itself.
- Ice the Cookies — Once the cookies are completely cool, drizzle the icing over the tops using a spoon or a piping bag with a small tip. Let the icing set for about 10 minutes before serving. If you’re impatient like me, you can eat them right away, but the icing will be messy.
Cooking Tips & Techniques
After making these cookies more times than I can count, I’ve learned a few things that make a real difference. Here are my best tips:
Don’t skip reducing the cider. I know it’s an extra step, but it’s the secret to these cookies. Regular apple cider has too much water, and water makes cookies spread and turn out flat. Reducing it concentrates the flavor and removes the excess moisture. The result is a cookie that tastes intensely of apples without being a sad, flat disc.
Watch the cider like a hawk. The first time I reduced cider, I walked away to answer a text and came back to a burnt, sticky mess. The second time, I under-reduced it. The third time was the charm. Set a timer, stay nearby, and stir every few minutes. The cider will go from perfect to burnt in about 30 seconds.
Use room temperature ingredients. Cold butter doesn’t cream properly. Cold egg doesn’t incorporate evenly. If you forget to take them out of the fridge ahead of time, cut the butter into small cubes and let it sit for 15 minutes. Put the egg in a bowl of warm water for 5 minutes. Problem solved.
Measure flour correctly. Scooping flour directly from the bag compacts it, and you’ll end up with too much. Use the spoon-and-level method: spoon flour into your measuring cup, then level it off with a knife. This one change made my cookies consistently better.
Bake one sheet at a time. If you put both sheets in the oven at once, the heat circulates unevenly, and one batch might burn while the other underbakes. If you’re in a hurry, place one sheet on the top rack and one on the bottom, then swap them halfway through. But honestly, baking one at a time is easier and more reliable.
Let the cookies cool completely before icing. I know it’s tempting to ice them while they’re still warm, but the icing will melt into a sticky puddle. Patience pays off here. Give them a full 20 minutes on the cooling rack.
Variations & Adaptations
One of the best things about this recipe is how adaptable it is. Here are some variations I’ve tried and loved:
Apple Cider Cookies with Caramel Drizzle — Skip the maple icing and drizzle with homemade or store-bought caramel sauce instead. The combination of apple and caramel is a classic for a reason. I made this version for a fall party, and people went crazy over it.
Gluten-Free Apple Cider Cookies — Swap the all-purpose flour with a 1:1 gluten-free baking blend. I’ve used King Arthur’s Measure for Measure blend with great results. The cookies are slightly more tender, so handle them gently. Add an extra tablespoon of flour if the dough seems too sticky.
Vegan Apple Cider Cookies — Use plant-based butter and a flax egg (1 tablespoon ground flaxseed mixed with 3 tablespoons water, let sit for 5 minutes). For the icing, use coconut cream instead of heavy cream. The texture is a bit different—slightly more cake-like—but still delicious.
Spiced Apple Cider Cookies — Add 1/2 teaspoon of ground ginger and 1/4 teaspoon of ground cloves to the dry ingredients. The extra warmth makes these cookies perfect for chilly evenings. I made this version for a cookie swap, and they were the first to disappear.
Apple Cider Cookies with Dried Apples — Fold in 1/2 cup of finely chopped dried apples after mixing the dough. The chewy bits of apple add texture and intensify the apple flavor. Just make sure the dried apples are chopped small enough that they don’t interfere with the cookie’s structure.
If you love fall baking as much as I do, you might also enjoy this cozy apple cider donut bread with cinnamon sugar for another way to use up that apple cider. And if you’re in the mood for more cookie inspiration, these cozy pumpkin snickerdoodle cookies with cinnamon sugar are a must-try.
Serving & Storage Suggestions
These cookies are best served at room temperature with a tall glass of cold milk or a warm cup of chai. The maple icing sets into a slightly firm layer that cracks beautifully when you bite into it. If you’re serving them at a party, arrange them on a platter and dust with a little extra cinnamon for a pretty presentation.
For storage, place the cookies in an airtight container at room temperature. They’ll stay soft and fresh for up to 5 days. I recommend layering them with parchment paper between each layer to prevent the icing from sticking. If you live in a humid climate, the icing might get slightly tacky after a day or two, but they’ll still taste great.
To freeze: You can freeze the baked cookies (without icing) for up to 3 months. Wrap them tightly in plastic wrap, then place them in a freezer-safe bag. When you’re ready to serve, thaw them at room temperature, then make the icing fresh. I’ve also frozen the unbaked dough balls. Just scoop them onto a baking sheet, freeze until solid, then transfer to a freezer bag. Bake straight from frozen, adding 1-2 minutes to the baking time.
For reheating, pop a cookie in the microwave for 10-15 seconds. It’ll come out warm and soft, almost like it just came out of the oven. Just don’t microwave them with the icing if you want it to stay pretty—warm the cookie first, then add the icing.
Nutritional Information & Benefits
Here’s the estimated nutritional breakdown per cookie (based on 24 cookies):
| Nutrient | Amount Per Cookie |
|---|---|
| Calories | 145 |
| Total Fat | 6g |
| Saturated Fat | 3.5g |
| Cholesterol | 20mg |
| Sodium | 85mg |
| Total Carbohydrates | 22g |
| Dietary Fiber | 0.5g |
| Sugars | 14g |
| Protein | 2g |
While these cookies are definitely a treat, they do offer some nutritional benefits. Apples are rich in antioxidants and fiber, and cinnamon has anti-inflammatory properties. The maple syrup in the icing contains trace amounts of minerals like zinc and manganese. Of course, the butter and sugar balance that out, so enjoy these in moderation. They’re perfect for special occasions or as a weekend baking project.
These cookies are not suitable for those with celiac disease unless you use the gluten-free adaptation. They contain dairy and eggs, so they’re not vegan or dairy-free in their original form. But as I mentioned, both adaptations work well.
Conclusion
These soft apple cider cookies with maple icing are everything I want in a fall dessert. They’re tender, flavorful, and just sweet enough without being overwhelming. The reduced apple cider gives them a depth of flavor that you just can’t get from any other ingredient. And that maple icing? It’s the kind of thing you’ll want to put on everything.
I love this recipe because it’s forgiving. Even my early, imperfect batches were still pretty good. But once you nail the technique—reducing the cider, measuring the flour correctly, not overbaking—these cookies become something special. They’re the kind of cookie that makes people ask for the recipe, and you’ll be proud to share it.
If you make these, I’d love to hear how they turn out. Leave a comment below and let me know what variations you tried. Did you add extra spices? Swap the icing for caramel? Did your family fight over the last one? (Mine did.) Happy baking, and enjoy every single bite of these little autumn treasures.
Frequently Asked Questions
Can I use apple juice instead of apple cider?
Technically yes, but the flavor won’t be as rich. Apple cider is unfiltered and has a deeper, more complex taste. Apple juice is sweeter and more one-dimensional. If you’re in a pinch, go ahead and use apple juice, but reduce it the same way. The cookies will still be good, just not as intensely apple-flavored.
Why did my cookies turn out flat?
Flat cookies usually mean one of three things: the butter was too soft, the dough wasn’t chilled, or the apple cider wasn’t reduced enough. Make sure your butter is softened but not melted, chill the dough for at least 20 minutes, and reduce the cider to exactly 1/4 cup. Also, check that your baking soda is fresh—old baking soda loses its leavening power.
Can I make the dough ahead of time?
Absolutely. You can refrigerate the dough for up to 3 days. Just wrap it tightly in plastic wrap or store it in an airtight container. When you’re ready to bake, let it sit at room temperature for 10 minutes to soften slightly, then scoop and bake as directed. You might need to add 1-2 minutes to the baking time if the dough is still cold.
How do I get the icing to look pretty?
Use a piping bag with a small round tip, or snip the corner off a zip-top bag. Drizzle the icing in a back-and-forth motion over the cookies. If you want a thicker layer, let the first drizzle set for a few minutes, then add another layer. For a rustic look, just spoon the icing on and let it spread naturally.
Can I double this recipe?
Yes! This recipe doubles beautifully. Just make sure you have enough baking sheets and cooling racks. When doubling, reduce the apple cider in two batches rather than trying to reduce 2 cups at once. It takes about the same amount of time and gives you more control. Store any extra cookies in the freezer—they’re great to have on hand for unexpected guests.
Pin This Recipe!

Best Soft Apple Cider Cookies with Maple Icing
These soft apple cider cookies with maple icing are tender, flavorful, and just sweet enough. The secret is reducing the apple cider to concentrate its flavor, resulting in a cookie that tastes like a crisp autumn afternoon.
- Prep Time: 15 minutes
- Cook Time: 12 minutes
- Total Time: 30 minutes
- Yield: 24 cookies 1x
- Category: Dessert
- Cuisine: American
Ingredients
- 1 cup (240 ml) apple cider
- 1/2 cup (113 g) unsalted butter, softened
- 1/2 cup (100 g) granulated sugar
- 1/2 cup (100 g) light brown sugar, packed
- 1 large egg, room temperature
- 1 teaspoon vanilla extract
- 2 cups (240 g) all-purpose flour
- 1 teaspoon baking soda
- 1/2 teaspoon baking powder
- 1 teaspoon ground cinnamon
- 1/4 teaspoon ground nutmeg
- 1/2 teaspoon salt
- 1 cup (120 g) powdered sugar
- 2 tablespoons pure maple syrup
- 1–2 tablespoons heavy cream or milk
- 1/2 teaspoon vanilla extract
Instructions
- Reduce the apple cider: Pour 1 cup of apple cider into a small saucepan. Bring to a boil over medium-high heat, then reduce heat to medium-low and simmer until reduced to about 1/4 cup, about 12-15 minutes. Stir occasionally. Remove from heat and let cool completely.
- Preheat oven to 350°F (175°C). Line two baking sheets with parchment paper or silicone baking mats.
- In a large mixing bowl, beat the softened butter, granulated sugar, and brown sugar together until light and fluffy, about 2-3 minutes.
- Beat in the egg, vanilla extract, and cooled reduced apple cider until just combined.
- In a separate bowl, whisk together the flour, baking soda, baking powder, cinnamon, nutmeg, and salt.
- Gradually add the dry ingredients to the wet mixture, mixing on low speed or folding with a spatula until just combined. Do not overmix.
- For best texture, cover the bowl and refrigerate the dough for 20-30 minutes (optional but recommended).
- Using a 1.5-tablespoon cookie scoop, portion the dough and place on prepared baking sheets, spacing about 2 inches apart.
- Bake for 10-12 minutes, until edges are set and lightly golden. Centers will look slightly underdone.
- Let cookies rest on baking sheets for 5 minutes, then transfer to a cooling rack to cool completely.
- Make the icing: Whisk together powdered sugar, maple syrup, vanilla extract, and 1 tablespoon of heavy cream. Add more cream, 1 teaspoon at a time, until thick but drizzle-able.
- Once cookies are completely cool, drizzle icing over tops. Let icing set for about 10 minutes before serving.
Notes
Don’t skip reducing the cider; it concentrates flavor and removes excess moisture. Watch the cider carefully to avoid burning. Use room temperature ingredients for best results. Measure flour using the spoon-and-level method. Bake one sheet at a time for even baking. Let cookies cool completely before icing.
Nutrition
- Serving Size: 1 cookie
- Calories: 145
- Sugar: 14
- Sodium: 85
- Fat: 6
- Saturated Fat: 3.5
- Carbohydrates: 22
- Fiber: 0.5
- Protein: 2
Keywords: apple cider cookies, maple icing, fall cookies, soft cookies, apple cookies


