My friend Jenna swore by meal-prep Sundays. She’d show up to our weekly coffee catch-ups with this perfectly organized container of teriyaki chicken and rice, and I’d nod along while secretly thinking, “That looks dry and sad.” Honestly, I had a whole list of reasons why meal-prepping was not for me. The texture always seemed off by day three. The rice turned into a brick. The chicken got that weird, reheated rubberiness. I was fully convinced that fresh-cooked food was the only way to go, and I wore that badge of stubbornness with pride.
Then came a particularly brutal work week. I mean the kind where you forget to eat lunch until 3 PM and then inhale a sad vending machine granola bar. By Wednesday, I was desperate. I texted Jenna for her recipe, fully expecting a complicated list of ingredients I’d never have. She sent me a picture of a sticky note with six ingredients scribbled on it. Six. I had all of them. That night, I made a batch of these Easy Meal-Prep Teriyaki Chicken and Rice Bowls, and I’ll be honest—I was prepared to be underwhelmed.
The first bite, straight from the fridge the next day, changed my mind. The chicken was still tender, the sauce had soaked into the rice just enough, and the broccoli had this perfect slight crunch. It wasn’t just okay. It was genuinely good. I ate that bowl for four days straight and didn’t get bored once. That’s when I realized meal prep didn’t have to mean sacrificing flavor or texture. It just needed the right recipe. And this one? It’s the one that finally made me a believer.
Why You’ll Love This Recipe
Let me tell you why this particular bowl stands out from every other meal-prep recipe I’ve tried. First off, the sauce situation is different here. Most teriyaki recipes use cornstarch to thicken, which gets gloopy and weird when reheated. This version uses a clever trick—a little bit of honey and a longer simmer—that keeps the sauce glossy and clingy without turning into a weird jelly. I tested this over the course of a week (yes, I ate teriyaki chicken for five days straight) and the sauce stayed perfect.
- Quick & Easy : From start to finish, you’re looking at about 30 minutes of active cooking time. The oven does most of the work while you get other stuff done.
- Simple Ingredients : Soy sauce, honey, rice vinegar, garlic, ginger, and chicken thighs. That’s it. No weird specialty bottles taking up space in your pantry.
- Perfect for Busy Weeks : Make it Sunday night and you’ve got lunch sorted through Thursday. No more midweek “what’s for lunch” panic.
- Crowd-Pleaser : I’ve brought these to work and had colleagues who swore they hated meal prep ask for the recipe. It’s that good.
- Unbelievably Delicious : The chicken comes out juicy every single time, the rice absorbs all that savory-sweet flavor, and the broccoli gets slightly charred edges that taste almost caramelized.
What makes this different from every other teriyaki bowl recipe out there is the double-bake method. You roast the chicken with half the sauce, then toss it with the remaining sauce at the end. This keeps the chicken from drying out while still giving you that thick, sticky glaze. I learned this trick after ruining three batches of chicken that came out tough and stringy. Trust me, this method works.
What Ingredients You Will Need
This recipe relies on pantry staples and a few fresh ingredients to create something that tastes way more complex than it actually is. Here’s what you’ll need and why each ingredient matters.
- Chicken Thighs (boneless, skinless) – 1.5 lbs (680g) – Thighs are non-negotiable here. Chicken breasts dry out too quickly during meal prep. Thighs stay juicy even after three days in the fridge. Look for thighs that are roughly the same size so they cook evenly. I prefer organic when I can find them on sale, but conventional works just fine.
- Soy Sauce (low-sodium) – ½ cup (120ml) – Regular soy sauce makes this way too salty, especially since it reduces during cooking. Low-sodium lets you control the salt level. Tamari or coconut aminos work great if you need gluten-free.
- Honey – ⅓ cup (110g) – This is what gives the sauce that perfect sticky-sweet finish without needing cornstarch. Local honey adds a nice floral note, but any honey works. Maple syrup is a good substitute if you’re out.
- Rice Vinegar – 3 tablespoons (45ml) – The acidity cuts through the richness and keeps the sauce from being cloying. Apple cider vinegar works in a pinch, but rice vinegar is milder and more authentic.
- Fresh Garlic – 4 cloves, minced – Please don’t use the jarred stuff here. Fresh garlic makes a huge difference in the sauce’s depth. You can use a microplane to grate it if you hate chopping.
- Fresh Ginger – 1-inch piece, grated – Ginger and garlic are best friends in this recipe. Grate it on a microplane for the best texture. Frozen ginger cubes work if that’s what you have.
- Sesame Oil (toasted) – 1 tablespoon (15ml) – This adds that nutty, toasty flavor that makes teriyaki taste like teriyaki. Don’t skip it. Regular sesame oil is fine but toasted gives more flavor.
- Broccoli Florets – 3 cups (about 1 large head) – Cut them into bite-sized pieces so they roast evenly. The stems are great too—just peel them and slice thin.
- Cooked White Rice – 4 cups (about 1.5 cups dry) – Day-old rice works best because it’s slightly drier and won’t get mushy. Brown rice or quinoa work great too.
- Sesame Seeds – 2 tablespoons, for garnish – Optional but highly recommended. They add a nice crunch and make the bowls look professional.
- Green Onions – 3-4, sliced – For freshness and color. They brighten up the whole bowl.
I like to use Kikkoman soy sauce and Eden Foods rice vinegar—they’re reliable and widely available. For the honey, any local brand works beautifully. If you’re watching your sugar intake, you can reduce the honey to ¼ cup, but the sauce won’t be quite as sticky.
Equipment Needed
You don’t need a fancy kitchen to make these bowls. Here’s what you’ll actually use:
- Baking Sheet (rimmed) – 1 large – A rimmed sheet prevents sauce from dripping onto your oven floor. Half-sheet pans (18×13 inches) are perfect. Line it with parchment paper for easier cleanup.
- Medium Saucepan – 1 – For simmering the sauce. A 2-quart saucepan works great. Stainless steel or nonstick both work fine.
- Mixing Bowl – 1 medium – For tossing the chicken with sauce. Glass or stainless steel is best.
- Sharp Knife and Cutting Board – A good chef’s knife makes cutting chicken and broccoli much easier. I use a 8-inch Wusthof.
- Microplane or Fine Grater – For grating ginger and garlic. This is a game-changer and costs about $15.
- Measuring Cups and Spoons – Accurate measurements matter here since the sauce ratio is important.
- Meal-Prep Containers (4-5) – Glass containers with tight-fitting lids are best. They don’t stain or hold smells. I use 3-cup containers for perfect portion sizes.
- Rice Cooker or Pot – A rice cooker makes perfect rice with zero effort. If using a pot, a 2-quart saucepan with a tight lid works fine.
If you don’t have a microplane, just mince the garlic and ginger very finely with a knife. It takes a bit longer but works just as well. For budget-friendly options, IKEA’s glass containers are surprisingly good and affordable.
Preparation Method
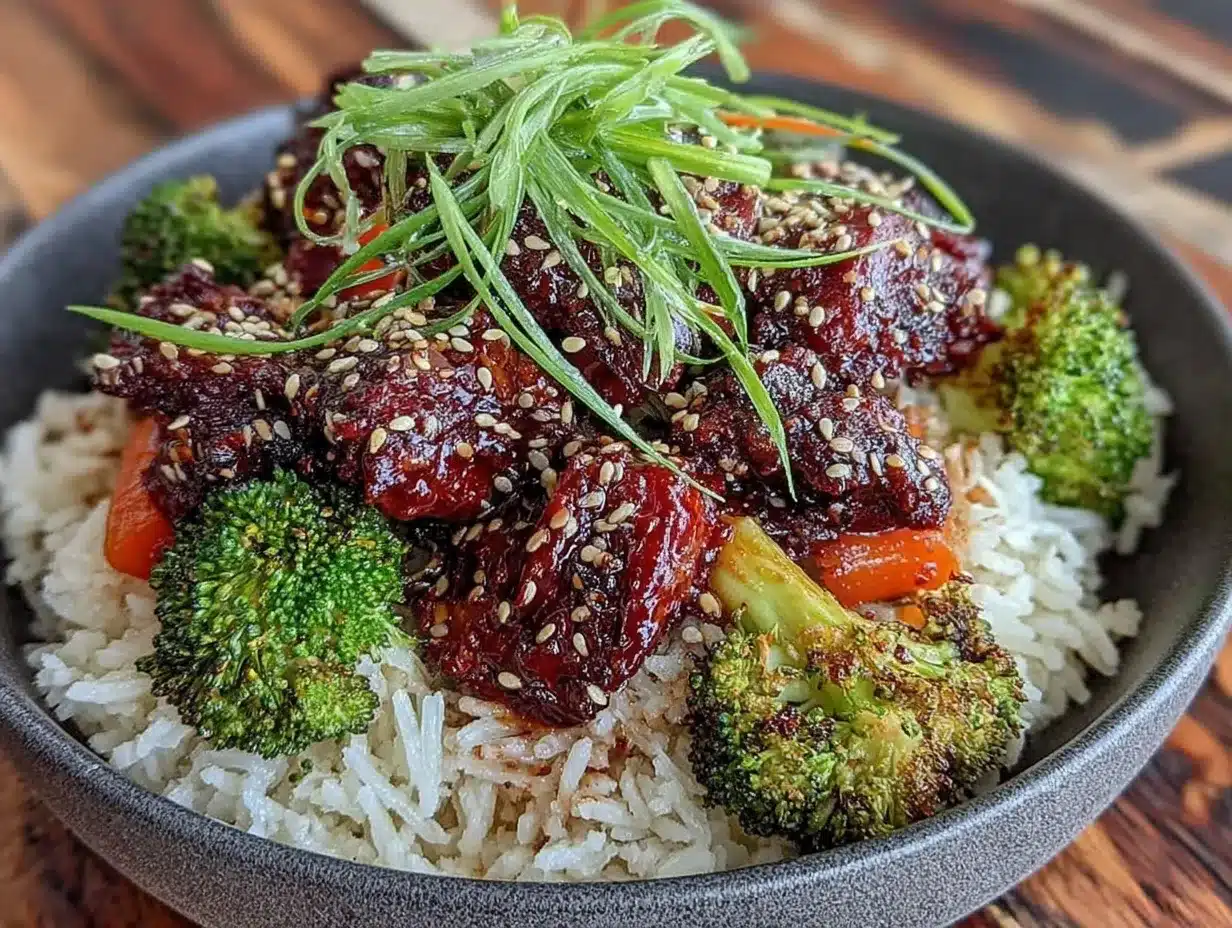
Let’s walk through this step by step. I’ve included all the little details I wish someone had told me the first time I made this.
Step 1: Make the Teriyaki Sauce (5 minutes)
In your medium saucepan, combine ½ cup low-sodium soy sauce, ⅓ cup honey, 3 tablespoons rice vinegar, 4 minced garlic cloves, 1 tablespoon grated ginger, and 1 tablespoon toasted sesame oil. Whisk everything together until the honey dissolves. Bring this to a gentle simmer over medium heat, then reduce the heat to low. Let it bubble softly for 8-10 minutes, stirring occasionally. You’ll know it’s ready when it has thickened slightly and coats the back of a spoon. It should reduce by about a third. Remove from heat and let it cool for 5 minutes. The sauce will continue to thicken as it cools.
Step 2: Prep the Chicken (10 minutes)
While the sauce simmers, pat your chicken thighs dry with paper towels. This is important—wet chicken won’t get that nice caramelized exterior. Trim off any excess fat or weird bits. Cut each thigh into roughly 2-inch chunks. They don’t need to be perfect, but try to keep them similar in size so they cook evenly. Place the chicken pieces in your mixing bowl and pour half of the cooled sauce over them. Toss well to coat every piece. Let this sit while you preheat your oven to 400°F (200°C).
Step 3: Roast the Chicken and Broccoli (20 minutes)
Line your baking sheet with parchment paper. Arrange the marinated chicken pieces in a single layer, leaving a little space between each piece. Don’t crowd them or they’ll steam instead of roast. Scatter your broccoli florets around the chicken. Drizzle the broccoli with a tiny bit of olive oil and a pinch of salt. Roast for 15 minutes, then flip the chicken pieces and stir the broccoli. Roast for another 5-7 minutes until the chicken is cooked through (internal temperature of 165°F/74°C) and the broccoli has charred edges. The kitchen will smell incredible at this point.
Step 4: Glaze the Chicken (2 minutes)
Remove the baking sheet from the oven. Drizzle the remaining sauce over the hot chicken and broccoli. Toss everything gently to coat. The residual heat will warm the sauce and help it cling to everything. Let it rest for 5 minutes—this lets the sauce set up a bit and makes the chicken even more tender.
Step 5: Assemble the Bowls (5 minutes)
Divide your cooked rice evenly among your meal-prep containers. Top each with a generous portion of the teriyaki chicken and broccoli. Sprinkle with sesame seeds and sliced green onions. Let the containers cool completely (about 30 minutes) before putting the lids on and refrigerating. This prevents condensation from making the rice soggy.
Step 6: Reheating Instructions
When you’re ready to eat, remove the lid and microwave for 2-3 minutes, stirring halfway through. The rice will steam back to life, and the chicken will be perfectly tender. If you have time, a quick 30-second blast of heat on the broccoli alone helps it stay crisp.
Cooking Tips & Techniques
I’ve made this recipe at least twenty times now, and I’ve learned a few things the hard way. Here’s what I wish I’d known from the start.
Don’t Overcook the Chicken. Chicken thighs are forgiving, but they can still dry out if you overcook them. Use a meat thermometer if you have one. The second you hit 165°F, pull them out. They’ll continue cooking slightly from residual heat. I once left them in an extra five minutes because I was chopping vegetables, and they came out noticeably tougher.
Toast Your Sesame Seeds. This is a tiny step that makes a huge difference. Throw the sesame seeds in a dry pan over medium heat for about 2 minutes, shaking frequently, until they’re golden and fragrant. It takes almost no time and adds so much more flavor than raw seeds.
Double the Sauce. Seriously. The recipe as written gives you just enough for four bowls, but if you’re like me and love extra sauce to drizzle, make a double batch. It keeps in the fridge for up to two weeks and is amazing on stir-fries, tofu, or even drizzled over roasted vegetables. I always have a jar of this in my fridge now.
Use Day-Old Rice. Freshly cooked rice is too moist for meal prep. It gets mushy and clumpy after a day in the fridge. Make your rice the night before and let it cool completely in the fridge. If you’re in a rush, spread hot rice on a baking sheet and pop it in the freezer for 10 minutes to cool it down quickly.
Don’t Skip the Resting Time. Letting the assembled bowls cool completely before refrigerating is non-negotiable. Hot food in sealed containers creates steam, which turns into water, which makes everything sad and soggy. I learned this the hard way when I ended up with soup-like teriyaki bowls. Not good.
Broccoli Placement Matters. Put the broccoli on the baking sheet in a single layer, not piled on top of each other. Overcrowding leads to steaming, and steamed broccoli gets mushy. You want those charred, crispy edges that make it taste almost caramelized.
Variations & Adaptations
One of the best things about this recipe is how flexible it is. Here are some variations I’ve tried and loved.
Spicy Teriyaki Bowls. Add 1-2 teaspoons of sriracha or red pepper flakes to the sauce while it simmers. The heat balances perfectly with the sweetness. I like using gochujang (Korean chili paste) for a deeper, more complex heat. Just whisk a tablespoon into the sauce after it comes off the heat.
Vegetarian Version. Swap the chicken for extra-firm tofu. Press the tofu for 30 minutes to remove excess moisture, then cut it into cubes and toss with the sauce. Roast at 400°F for 20-25 minutes, flipping halfway. Add more broccoli and maybe some bell peppers or snap peas. I’ve made this for vegetarian friends and they couldn’t stop eating it.
Low-Carb Option. Skip the rice and serve the chicken and broccoli over cauliflower rice. The teriyaki sauce works beautifully with cauliflower rice—just sauté it in a pan with a little oil first to remove excess moisture. You can also use zucchini noodles or just eat the chicken and broccoli on their own.
Different Proteins. This recipe works great with boneless chicken breasts (reduce cooking time to 15-18 minutes), pork tenderloin (cut into cubes, same cooking time), or even salmon fillets (cut into chunks, roast for 12-15 minutes). Each protein brings something different to the bowl.
Seasonal Vegetable Swaps. In summer, use bell peppers, zucchini, and summer squash. In fall, try butternut squash cubes and Brussels sprouts. The roasting method works for almost any vegetable—just adjust cooking times based on density. Root vegetables need a few extra minutes, while tender vegetables like asparagus need less time.
I once made a version with pineapple chunks added during the last 5 minutes of roasting. The pineapple caramelized and added this amazing sweet-tart pop that paired perfectly with the teriyaki sauce. It’s become my summer go-to.
Serving & Storage Suggestions
These bowls are designed to be eaten cold or reheated, but they’re best warm. Here’s how to serve and store them for maximum deliciousness.
Serving Temperature. Microwave the bowls for 2-3 minutes, stirring halfway. The rice should be steaming hot, the chicken warmed through, and the broccoli still slightly firm. If you’re eating them cold (great for hot summer days), let them sit at room temperature for 10 minutes first—cold rice straight from the fridge is never pleasant.
Presentation Ideas. If you’re serving these for guests (they’re great for casual dinner parties), plate them individually with a sprinkle of extra sesame seeds and a drizzle of sriracha mayo. A side of pickled cucumbers or a simple cucumber salad adds freshness and crunch. For a complete meal, serve with a bowl of miso soup or a simple green salad with ginger dressing.
Storage Instructions. Store the assembled bowls in airtight glass containers in the refrigerator for up to 4 days. Do not freeze these bowls—the rice gets mushy and the broccoli turns to mush when thawed. If you want to freeze the chicken separately, you can, but it’s really best fresh.
Reheating Tips. The best way to reheat these is in the microwave, but if you have time, the oven works beautifully too. Transfer the contents to an oven-safe dish, cover with foil, and bake at 350°F for 10-12 minutes. The broccoli stays crispier this way. For the microwave, add a splash of water to the rice before reheating to help it steam back to life.
Flavor Development. Here’s something interesting—these bowls actually taste better on day two. The flavors meld together overnight, and the sauce soaks into the rice just enough to make every bite perfectly seasoned. By day three, the chicken is still tender and the broccoli has softened slightly but still has texture. I’ve never had these last past day four, but I imagine they’d still be good.
Nutritional Information & Benefits
Here’s the nutritional breakdown for one bowl (based on 4 servings, using chicken thighs and white rice):
- Calories: Approximately 520-560 per bowl
- Protein: 38g
- Carbohydrates: 52g
- Fat: 16g
- Fiber: 4g
- Sugar: 18g (from honey and natural sugars)
This bowl is a great source of lean protein from the chicken thighs, which also provide iron and B vitamins. Broccoli is packed with vitamin C, vitamin K, and fiber—plus those cancer-fighting sulforaphane compounds. The ginger in the sauce is anti-inflammatory and great for digestion. If you use brown rice instead of white, you’ll add more fiber and magnesium.
For those watching sodium, using low-sodium soy sauce keeps things reasonable, but you can further reduce it by using coconut aminos. This recipe is naturally dairy-free and can be made gluten-free with tamari. The honey can be reduced or swapped for a sugar-free alternative if needed, though the texture will change slightly.
I personally love that this bowl keeps me full for hours without that heavy, sluggish feeling. The protein and fiber combo is perfect for steady energy throughout the afternoon.
Conclusion
These Easy Meal-Prep Teriyaki Chicken and Rice Bowls genuinely changed how I think about meal prep. They’re not just “good for meal prep”—they’re genuinely good, period. The chicken stays juicy, the sauce stays glossy, and the broccoli keeps its texture. Plus, they come together in about 30 minutes of active time, which leaves you the rest of your Sunday to actually relax.
I encourage you to make this recipe your own. Add extra veggies, swap the protein, or spice it up. The base recipe is forgiving and flexible, so don’t be afraid to experiment. If you try a variation you love, I’d genuinely love to hear about it—drop a comment below and tell me what you changed. That’s how we all get better in the kitchen.
Whether you’re a meal-prep skeptic like I was or a seasoned pro looking for a new rotation recipe, these bowls deserve a spot in your weekly lineup. They’re proof that eating well during a busy week doesn’t have to mean sad salads or boring leftovers. Sometimes, the best meals are the ones you planned ahead for.
Frequently Asked Questions
Can I use chicken breasts instead of thighs?
You can, but they won’t be as juicy after a few days in the fridge. If you do use breasts, reduce the cooking time to 15-18 minutes total and check the internal temperature at 15 minutes. Chicken breasts dry out fast, so watch them closely.
How long do these bowls last in the fridge?
They stay good for up to 4 days in an airtight container. I find they’re best on days 2 and 3. By day 4, the broccoli has softened quite a bit, but the flavor is still great. Don’t freeze them—the texture suffers too much.
Can I make this recipe gluten-free?
Absolutely. Just swap the soy sauce for tamari or coconut aminos. Everything else in the recipe is naturally gluten-free. Double-check your rice vinegar to make sure it doesn’t have any additives, but most brands are fine.
What’s the best way to reheat these without a microwave?
Transfer the bowl contents to an oven-safe dish, cover with foil, and bake at 350°F for 10-12 minutes. You can also reheat them in a skillet over medium heat with a splash of water, stirring frequently, for about 5-7 minutes. The stovetop method gives you more control over the broccoli texture.
Can I add other vegetables to the bowl?
Definitely. Bell peppers, snap peas, carrots, and zucchini all roast beautifully alongside the chicken. Just cut them to similar sizes so they cook evenly. If you’re adding denser vegetables like carrots, cut them smaller or give them a head start in the oven before adding the chicken.
If you’re looking for other easy meal-prep ideas, you might enjoy these creamy thermos cheesy broccoli rice lunches for something completely different. For a lighter option, these healthy no-mayo chicken salad lunchbox scoops are perfect for warm days. And if you’re feeding little ones, these easy mini muffin tin egg bites are a breakfast game-changer.
Pin This Recipe!
Easy Meal-Prep Teriyaki Chicken and Rice Bowls
These Easy Meal-Prep Teriyaki Chicken and Rice Bowls are juicy, flavorful, and perfect for busy weeks. With a clever double-bake method, the chicken stays tender, the sauce stays glossy, and the broccoli keeps its texture—even after days in the fridge.
- Prep Time: 15 minutes
- Cook Time: 30 minutes
- Total Time: 45 minutes
- Yield: 4-5 servings 1x
- Category: Main Course
- Cuisine: Japanese-inspired
Ingredients
- 1.5 lbs (680g) boneless, skinless chicken thighs
- ½ cup (120ml) low-sodium soy sauce
- ⅓ cup (110g) honey
- 3 tablespoons (45ml) rice vinegar
- 4 cloves fresh garlic, minced
- 1-inch piece fresh ginger, grated
- 1 tablespoon (15ml) toasted sesame oil
- 3 cups broccoli florets (about 1 large head)
- 4 cups cooked white rice (about 1.5 cups dry)
- 2 tablespoons sesame seeds, for garnish
- 3–4 green onions, sliced
Instructions
- Make the Teriyaki Sauce: In a medium saucepan, combine ½ cup low-sodium soy sauce, ⅓ cup honey, 3 tablespoons rice vinegar, 4 minced garlic cloves, 1 tablespoon grated ginger, and 1 tablespoon toasted sesame oil. Whisk until honey dissolves. Bring to a gentle simmer over medium heat, then reduce heat to low. Let bubble softly for 8-10 minutes, stirring occasionally, until thickened slightly and coats the back of a spoon. Remove from heat and let cool for 5 minutes.
- Prep the Chicken: Pat chicken thighs dry with paper towels. Trim excess fat and cut into roughly 2-inch chunks. Place in a mixing bowl and pour half of the cooled sauce over the chicken. Toss well to coat. Let sit while preheating oven to 400°F (200°C).
- Roast the Chicken and Broccoli: Line a rimmed baking sheet with parchment paper. Arrange marinated chicken pieces in a single layer, leaving space between pieces. Scatter broccoli florets around the chicken. Drizzle broccoli with a tiny bit of olive oil and a pinch of salt. Roast for 15 minutes, then flip chicken pieces and stir broccoli. Roast for another 5-7 minutes until chicken is cooked through (internal temperature 165°F/74°C) and broccoli has charred edges.
- Glaze the Chicken: Remove baking sheet from oven. Drizzle remaining sauce over hot chicken and broccoli. Toss gently to coat. Let rest for 5 minutes to allow sauce to set.
- Assemble the Bowls: Divide cooked rice evenly among 4-5 meal-prep containers. Top each with a generous portion of teriyaki chicken and broccoli. Sprinkle with sesame seeds and sliced green onions. Let containers cool completely (about 30 minutes) before sealing and refrigerating.
- Reheating: Remove lid and microwave for 2-3 minutes, stirring halfway through. For crispier broccoli, give it a quick 30-second blast of heat alone first.
Notes
Double the sauce if you love extra for drizzling. Use day-old rice for best texture. Let assembled bowls cool completely before refrigerating to prevent sogginess. Chicken thighs are non-negotiable for juiciness. For gluten-free, use tamari or coconut aminos instead of soy sauce.
Nutrition
- Serving Size: 1 bowl
- Calories: 540
- Sugar: 18
- Sodium: 800
- Fat: 16
- Saturated Fat: 3
- Carbohydrates: 52
- Fiber: 4
- Protein: 38
Keywords: meal prep, teriyaki chicken, rice bowls, easy dinner, healthy lunch, chicken thighs, broccoli, Asian-inspired


