Thursday nights in my kitchen have a specific rhythm. The fridge is usually a collection of odds and ends, the sink might have a few lingering dishes, and the last thing I want is a recipe with a laundry list of steps. I had been looking for a chicken dinner that actually delivered deep, savory flavor without demanding a long marinade or a complicated pan sauce. For a while, I just accepted that quick weeknight chicken was going to taste a little… forgettable. You know the kind—dry, bland, or swimming in a sauce that tastes more like a jar than a meal.
Then, one evening, I was staring at a pack of boneless thighs, a half-used stick of butter, and a head of garlic that was starting to sprout. I was tired, hungry, and frankly, a little grumpy. I thought, “There has to be a way to get that rich, garlicky, restaurant-quality flavor in the time it takes to boil pasta.” I didn’t want a compromise. I wanted the real thing—crispy skin, juicy meat, and a glossy, buttery sauce that clings to every bite. That night, out of pure stubbornness and a growling stomach, this quick garlic butter chicken thighs skillet was born. It was so good, I actually stopped mid-bite to just stare at the pan. It wasn’t just a meal; it was a solution.
This isn’t a recipe that requires a special trip to the store or a culinary degree. It is the kind of honest, satisfying cooking that relies on technique and good ingredients. That first bite of crispy, golden skin, slick with melted garlic butter, told me I had finally found my go-to. It’s the one you’ll make without thinking, the one that saves your evening, and the one you’ll text your friends about. Honestly, it changed how I think about quick dinners.
Why You’ll Love This Recipe
Let me be straight with you—there are a million chicken thigh recipes out there. But this one is different. It’s built on a few key principles that make it a standout in my kitchen, and I think it will be in yours, too.
- Quick & Easy: From the moment you pull out the pan to the moment you’re sitting down, it’s about 20 minutes. No joke. This is the perfect solution for those “I forgot to defrost something” nights.
- Simple Ingredients: You likely have everything you need right now. Butter, garlic, chicken, salt, pepper, and maybe a few fresh herbs if you’re feeling fancy. No obscure ingredients or specialty items.
- Perfect for Busy Weeknights: This isn’t a weekend project. It’s the reliable workhorse of your weekly meal plan. It’s great for a quick dinner after a long day or a last-minute meal for unexpected guests.
- Crowd-Pleaser: I have served this to picky kids, in-laws, and friends who claim they “don’t cook.” It gets rave reviews every single time. The rich, savory flavor is universally loved.
- Unbelievably Delicious: The magic is in the simplicity. The chicken gets perfectly crispy on the outside while staying impossibly juicy on the inside. The garlic butter sauce is the stuff of dreams—rich, nutty, and perfect for sopping up with crusty bread.
What makes this recipe different from the rest is the technique. We aren’t just melting butter and pouring it over chicken. We are browning the butter just slightly to create a nutty depth, and we are crisping the chicken skin to absolute perfection in that same pan. It’s a one-skillet wonder that feels much more special than the sum of its parts. This recipe is the kind that makes you close your eyes after the first bite—comfort food reimagined for a busy life, faster, but with the same soul-soothing satisfaction.
What Ingredients You Will Need
This recipe uses simple, wholesome ingredients to deliver bold flavor and satisfying texture without the fuss. Each component plays a crucial role, so let’s break down what you need and why.
- Boneless, Skin-On Chicken Thighs (1.5 lbs / 680g): This is the star of the show. I strongly recommend skin-on thighs. The skin renders fat and gets incredibly crispy, which is the foundation of the dish. Boneless thighs cook quickly and stay juicy. If you only have bone-in, just increase the cooking time by 5-7 minutes per side.
- Unsalted Butter (3 tbsp / 42g): We use unsalted so we can control the salt level. The butter is our cooking fat and the base of our sauce. As it browns slightly, it develops a nutty, caramelized flavor that is irreplaceable.
- Garlic (6-8 cloves, minced): Fresh garlic is non-negotiable here. Pre-minced garlic from a jar will burn and turn bitter. We want the sweet, pungent aroma of fresh garlic that mellows beautifully in the hot butter. I usually use about 6 large cloves, but if you love garlic, go for 8.
- Kosher Salt (1 tsp): Use a good quality kosher salt for seasoning the chicken. It helps draw out moisture and season the meat deeply.
- Black Pepper (1/2 tsp, freshly ground): Freshly ground pepper adds a subtle heat and aromatic quality that pre-ground pepper just can’t match.
- Chicken Broth (1/4 cup / 60ml): This deglazes the pan, lifting up all those delicious browned bits (the fond) and creating a quick, flavorful sauce. Use low-sodium broth to control the salt.
- Fresh Parsley (2 tbsp, chopped): A sprinkle of fresh parsley at the end adds a pop of color and a fresh, clean flavor that cuts through the richness of the butter. It’s optional, but highly recommended.
- Optional: Red Pepper Flakes (1/4 tsp): If you like a little heat, add a pinch of red pepper flakes when you add the garlic. It adds a lovely warmth without being overwhelming.
- Optional: Lemon Juice (1 tbsp): A squeeze of fresh lemon juice at the very end brightens the whole dish and balances the richness of the butter. I often do this.
I prefer using Kerrygold unsalted butter for its superior flavor, but any good quality butter works. For the chicken, look for thighs that are evenly sized so they cook at the same rate. If you’re looking for another quick, flavor-packed skillet meal, you might love this quick garlic butter shrimp pasta for a change of pace.
Equipment Needed
You don’t need a kitchen full of fancy gadgets for this one. Here’s what you’ll need to get the job done perfectly.
- Large Cast Iron Skillet or Heavy-Bottomed Skillet (12-inch): This is the most important tool. A heavy skillet distributes heat evenly and retains it well, which is essential for getting that beautiful, crispy skin. Cast iron is my go-to, but a good stainless steel or non-stick pan will work too. Just make sure it’s oven-safe if you plan to finish the chicken in the oven (though we don’t need to for this quick version).
- Tongs: A good pair of tongs is your best friend for flipping the chicken without piercing the skin and losing those precious juices.
- Sharp Knife and Cutting Board: For mincing the garlic and chopping the parsley. A sharp knife makes the prep work effortless.
- Measuring Spoons: For accurate measurements of salt, pepper, and other seasonings.
- Wooden Spoon or Silicone Spatula: For stirring the garlic and scraping up the browned bits from the bottom of the pan.
- Paper Towels: Essential for patting the chicken skin dry. This is a non-negotiable step for achieving crispiness.
If you don’t have a cast iron skillet, don’t worry! A heavy-bottomed stainless steel pan works wonderfully. Just be careful not to overcrowd the pan, as this will steam the chicken instead of searing it.
Preparation Method
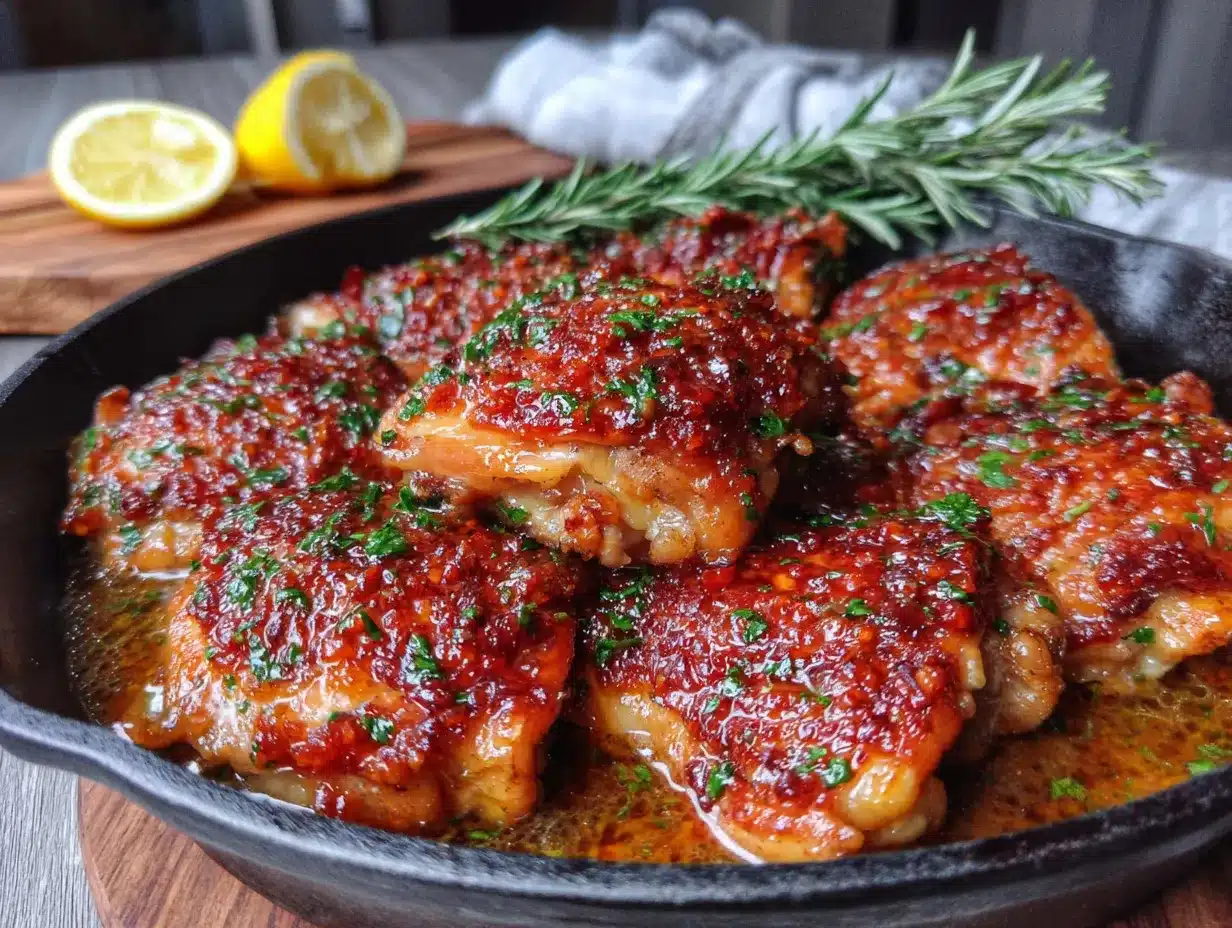
Alright, let’s get cooking. This process is fast, so I recommend having all your ingredients prepped and ready to go before you turn on the heat. Trust me on this one.
- Prep the Chicken (5 minutes): Start by patting the chicken thighs completely dry with paper towels. This is the single most important step for crispy skin. Don’t skip it! Season both sides generously with the kosher salt and freshly ground black pepper. Let them sit at room temperature for about 10 minutes while you prep the garlic and parsley. This helps the chicken cook more evenly.
- Heat the Skillet (2 minutes): Place your large skillet over medium-high heat. Let it get hot for a good 2 minutes. You want it screaming hot so the chicken sears immediately. Add the butter and let it melt. It will sizzle and foam. Swirl the pan to coat the bottom. Let the butter cook for about 30-60 seconds until it starts to turn a light golden brown and smells nutty. Be careful not to burn it.
- Sear the Chicken (8 minutes): Carefully place the chicken thighs skin-side down in the hot skillet. Lay them away from you to avoid splattering. Do not overcrowd the pan; if necessary, cook in two batches. Let them cook undisturbed for 4-5 minutes. I know it’s tempting to peek, but leave them alone! You want that skin to turn a deep, golden brown and release naturally from the pan. After 4-5 minutes, use your tongs to check the skin. It should be beautifully crispy and browned. Flip the chicken over.
- Cook the Second Side (5 minutes): Cook the chicken on the second side for another 4-5 minutes, or until the internal temperature reaches 165°F (74°C) when checked with an instant-read thermometer. The juices should run clear when you pierce the thickest part. Once cooked, transfer the chicken to a clean plate and tent loosely with foil to keep warm. Don’t wipe out the skillet!
- Make the Garlic Butter Sauce (3 minutes): Reduce the heat to low. The skillet should still have some butter and rendered chicken fat in it. Add the minced garlic (and red pepper flakes if using) to the pan. Stir constantly for about 30-45 seconds until the garlic is fragrant. Do not let it burn, or it will become bitter. Pour in the chicken broth and immediately scrape up all the browned bits from the bottom of the pan with your wooden spoon. This is called deglazing, and it’s where all the flavor lives. Let the sauce simmer for about 1 minute until it thickens slightly.
- Finish and Serve (1 minute): Return the chicken thighs to the skillet, nestling them into the sauce. Spoon some of the garlic butter sauce over the top of each piece. If using, squeeze in the fresh lemon juice. Let everything warm through for about 30 seconds. Remove from the heat. Sprinkle the fresh chopped parsley over the top and serve immediately.
The whole process, from start to finish, should take you about 20 minutes. It’s fast, it’s efficient, and the result is a restaurant-quality meal that tastes like you spent all day in the kitchen.
Cooking Tips & Techniques
I have made this recipe more times than I can count, and I have learned a few things the hard way. Here are my best tips to ensure your success every single time.
- The Dry Skin is Non-Negotiable: I cannot stress this enough. Moisture is the enemy of crispiness. If you don’t pat the chicken skin bone-dry, it will steam instead of sear, and you will end up with rubbery, pale skin. Use multiple paper towels if you have to.
- Don’t Crowd the Pan: If you put too many chicken thighs in the skillet at once, the temperature of the pan will drop dramatically. This will cause the chicken to release its juices and steam, rather than sear. If your pan is too small, cook the chicken in two batches. It’s worth the extra few minutes.
- Resist the Urge to Move the Chicken: Once the chicken hits the hot pan, let it be. Don’t poke it, prod it, or try to move it for at least 4 minutes. The skin needs time to form a golden brown crust and release naturally from the pan. If you try to flip it too early, it will stick and tear.
- Use an Instant-Read Thermometer: This is the best way to guarantee perfectly cooked chicken. The USDA recommends an internal temperature of 165°F (74°C). Insert the thermometer into the thickest part of the thigh, avoiding the bone. This takes the guesswork out of cooking.
- Watch Your Garlic: Garlic burns in seconds. Once you add it to the pan, keep it moving. The residual heat from the pan will continue to cook it even after you add the broth. Burnt garlic will ruin the entire dish, so keep a close eye on it.
- Let the Chicken Rest: After you sear the chicken and before you make the sauce, let it rest on a plate. This allows the juices to redistribute throughout the meat, resulting in a juicier final product. A 5-minute rest is plenty for these thin thighs.
I once made the mistake of using a non-stick pan that wasn’t heavy enough. The chicken seared unevenly, and the skin never got truly crispy. Now, I always reach for my trusty cast iron. For another one-pan meal that’s just as forgiving, try this easy maple Dijon chicken thighs recipe for a different flavor profile.
Variations & Adaptations
This recipe is a fantastic base, and it’s incredibly easy to adapt to your tastes or what you have on hand. Here are a few of my favorite ways to change it up.
- Herb-Infused Butter: After you add the garlic, toss in a few sprigs of fresh thyme or rosemary. Let them infuse the butter for a minute before adding the broth. The aromatic herbs add a wonderful earthy depth. I love this version with roasted potatoes.
- Creamy Garlic Butter Chicken: For an even richer sauce, stir in 1/4 cup (60ml) of heavy cream after you deglaze the pan with the broth. Let it simmer for a minute until it thickens. This creates a luscious, creamy sauce that is absolutely divine.
- Spicy Kick: Add 1/2 teaspoon of red pepper flakes along with the garlic. For an even bigger punch, you can also add a finely chopped fresh serrano or jalapeño pepper. This is perfect for those who like a little heat.
- Mushroom & Garlic Butter Chicken: Before searing the chicken, add 8 oz (225g) of sliced cremini mushrooms to the pan with a little extra butter. Cook them until they are golden brown and have released their moisture. Remove them from the pan, sear the chicken, and then add them back in with the sauce. It’s a fantastic, earthy addition.
- Low-Carb/Keto Adaptation: This recipe is already naturally low-carb and keto-friendly! Skip the lemon juice if you are strictly limiting carbs and serve it with a side of steamed broccoli or a big green salad instead of potatoes or rice.
- Chicken Thighs with Onions: Add one thinly sliced yellow onion to the pan after you remove the chicken. Cook it in the remaining butter and fat until it’s soft and caramelized, about 5-7 minutes. Then add the garlic and proceed with the recipe. The sweet, jammy onions are a perfect complement to the savory chicken.
Serving & Storage Suggestions
This dish is incredibly versatile and pairs well with so many sides. Here’s how to serve it up and store any leftovers (if you have any!).
Serving: Serve the chicken hot, with plenty of that glorious garlic butter sauce spooned over the top. It’s wonderful alongside creamy mashed potatoes, fluffy rice, or crusty bread to soak up every last drop of the sauce. For a lighter meal, serve it with a simple arugula salad tossed in lemon vinaigrette or steamed green beans. The bright, fresh flavors cut through the richness beautifully. I often serve it with a side of crispy air fryer corn on the cob for a complete, satisfying meal.
Storage: Store any leftover chicken in an airtight container in the refrigerator for up to 3-4 days. The flavors will actually meld together and become even more delicious overnight. The garlic butter sauce will solidify, but that’s perfectly normal.
Reheating: The best way to reheat this chicken is in a skillet over medium-low heat. Add a splash of chicken broth or water to the pan to help rehydrate the sauce. Cover the pan and let it gently warm through for 5-7 minutes. This will help the skin get slightly crispy again. You can also reheat it in the microwave, but the skin will lose its crispiness. I don’t recommend freezing this dish, as the texture of the sauce can change upon thawing.
Nutritional Information & Benefits
This recipe is not only delicious but also provides a good balance of nutrients. Please note that these are estimates and can vary based on specific ingredients and portion sizes. This is based on 4 servings.
| Nutrient | Amount per Serving |
|---|---|
| Calories | 450-500 kcal |
| Protein | 35-40 g |
| Fat | 30-35 g |
| Saturated Fat | 12-15 g |
| Carbohydrates | 2-3 g |
| Fiber | 0 g |
| Sugar | 1 g |
| Sodium | 600-700 mg |
Pin This Recipe!

Quick Garlic Butter Chicken Thighs Skillet in 20 Minutes

This quick garlic butter chicken thighs skillet delivers crispy skin, juicy meat, and a glossy, buttery sauce in just 20 minutes. It’s the perfect weeknight dinner that tastes like a restaurant-quality meal without the fuss.
- Prep Time: 5 minutes
- Cook Time: 15 minutes
- Total Time: 20 minutes
- Yield: 4 servings 1x
- Category: Main Course
- Cuisine: American
Ingredients
- 1.5 lbs (680g) boneless, skin-on chicken thighs
- 3 tbsp (42g) unsalted butter
- 6–8 cloves garlic, minced
- 1 tsp kosher salt
- 1/2 tsp freshly ground black pepper
- 1/4 cup (60ml) low-sodium chicken broth
- 2 tbsp fresh parsley, chopped
- 1/4 tsp red pepper flakes (optional)
- 1 tbsp fresh lemon juice (optional)
Instructions
- Pat the chicken thighs completely dry with paper towels. Season both sides generously with kosher salt and black pepper. Let sit at room temperature for 10 minutes.
- Heat a large cast iron or heavy-bottomed skillet over medium-high heat for 2 minutes. Add the butter and let it melt, swirling the pan. Cook for 30-60 seconds until it turns light golden brown and smells nutty.
- Place the chicken thighs skin-side down in the hot skillet. Cook undisturbed for 4-5 minutes until the skin is deep golden brown and crispy. Flip the chicken.
- Cook the second side for 4-5 minutes until the internal temperature reaches 165°F (74°C). Transfer chicken to a plate and tent loosely with foil.
- Reduce heat to low. Add minced garlic (and red pepper flakes if using) to the skillet. Stir constantly for 30-45 seconds until fragrant. Pour in chicken broth and scrape up browned bits from the bottom. Simmer for 1 minute until slightly thickened.
- Return chicken to the skillet, spoon sauce over the top. Add lemon juice if using. Warm through for 30 seconds. Sprinkle with fresh parsley and serve immediately.
Notes
Pat the chicken skin bone-dry for maximum crispiness. Do not overcrowd the pan; cook in batches if needed. Watch the garlic carefully to prevent burning. Use an instant-read thermometer for perfectly cooked chicken.
Nutrition
- Serving Size: 1 serving (1 chicken
- Calories: 475
- Sugar: 1
- Sodium: 650
- Fat: 33
- Saturated Fat: 14
- Carbohydrates: 2
- Protein: 38
Keywords: garlic butter chicken, quick chicken thighs, skillet chicken, weeknight dinner, crispy chicken, easy chicken recipe


