The pie dish came back to the kitchen with nothing but crumbs stuck to the edge. My sister-in-law looked at me, fork still in hand, and said, “You need to make this every Thanksgiving from now on. I’m serious.”
I had just thrown it together that morning—no baking, no fussing, no stress. Honestly, I wasn’t sure it would even set properly. But there she was, scraping the last bits of gingersnap crust off the plate like it was the most precious thing she’d eaten all year. And that’s how this easy no-bake pumpkin pie with gingersnap crust became my secret weapon for fall gatherings.
It wasn’t some grand family recipe passed down through generations. It came from a moment of pure desperation—I needed a dessert for a potluck, the oven was already occupied with a cozy crockpot beef stew, and I had a can of pumpkin puree staring at me from the pantry. So I experimented. I crossed my fingers. And somehow, it worked better than any baked pumpkin pie I’d ever made.
That’s the thing about this recipe—it doesn’t need an oven to impress. The filling is silky, spiced just right, and sets up beautifully in the fridge. And that gingersnap crust? It adds a warm, molasses-y crunch that regular pastry crust just can’t compete with. Every time I make it, someone asks for the recipe. Every single time.
So if you’re looking for a dessert that looks like you spent hours in the kitchen but actually comes together in minutes, this is it. No oven required. No pie crust rolling anxiety. Just pure, creamy, spiced pumpkin perfection.
Why You’ll Love This Recipe
Let me tell you why this easy no-bake pumpkin pie with gingersnap crust has earned a permanent spot in my fall rotation. It’s not just good—it’s the kind of dessert that makes people close their eyes after the first bite.
- No Oven Needed: This is a game-changer during the holidays when your oven is packed with stuffing, casseroles, and that cozy one loaf pumpkin banana bread. You can make this pie while everything else bakes.
- Simple Ingredients: You probably already have most of these in your kitchen. No fancy extracts, no hard-to-find spices—just real, recognizable ingredients.
- Perfect for Fall Gatherings: Whether it’s Thanksgiving, Friendsgiving, or just a cozy Sunday dinner, this pie fits right in. It’s elegant enough to impress but simple enough to make on a whim.
- Crowd-Pleaser: I’ve served this to kids, grandparents, and picky eaters. Everyone loves it. The creamy texture and spicy-sweet crust combo is irresistible.
- Make-Ahead Friendly: This pie actually gets better after a day in the fridge. The flavors meld together, and the texture becomes even silkier. Perfect for busy holiday prep.
What sets this recipe apart is the texture. Most no-bake pumpkin pies use instant pudding mix, which can feel a bit… artificial. My version uses cream cheese and real pumpkin puree, giving you that rich, velvety mouthfeel without any weird aftertaste. And the gingersnap crust isn’t just a container—it’s a flavor partner. The warm ginger, cinnamon, and clove notes in the crust complement the pumpkin filling in a way that regular graham cracker crust just can’t match.
This isn’t just another no-bake pie recipe. It’s the one you’ll come back to year after year.
What Ingredients You Will Need
This recipe uses simple, wholesome ingredients to deliver bold flavor and satisfying texture without any fuss. Here’s what you’ll need to gather:
For the Gingersnap Crust
- 2 cups gingersnap cookie crumbs (about 8 ounces or 225g of cookies, finely crushed)
- 6 tablespoons unsalted butter (85g), melted
- 2 tablespoons granulated sugar (25g) – optional, if your gingersnaps aren’t very sweet
- Pinch of salt – just a tiny one, to balance the sweetness
For the Pumpkin Filling
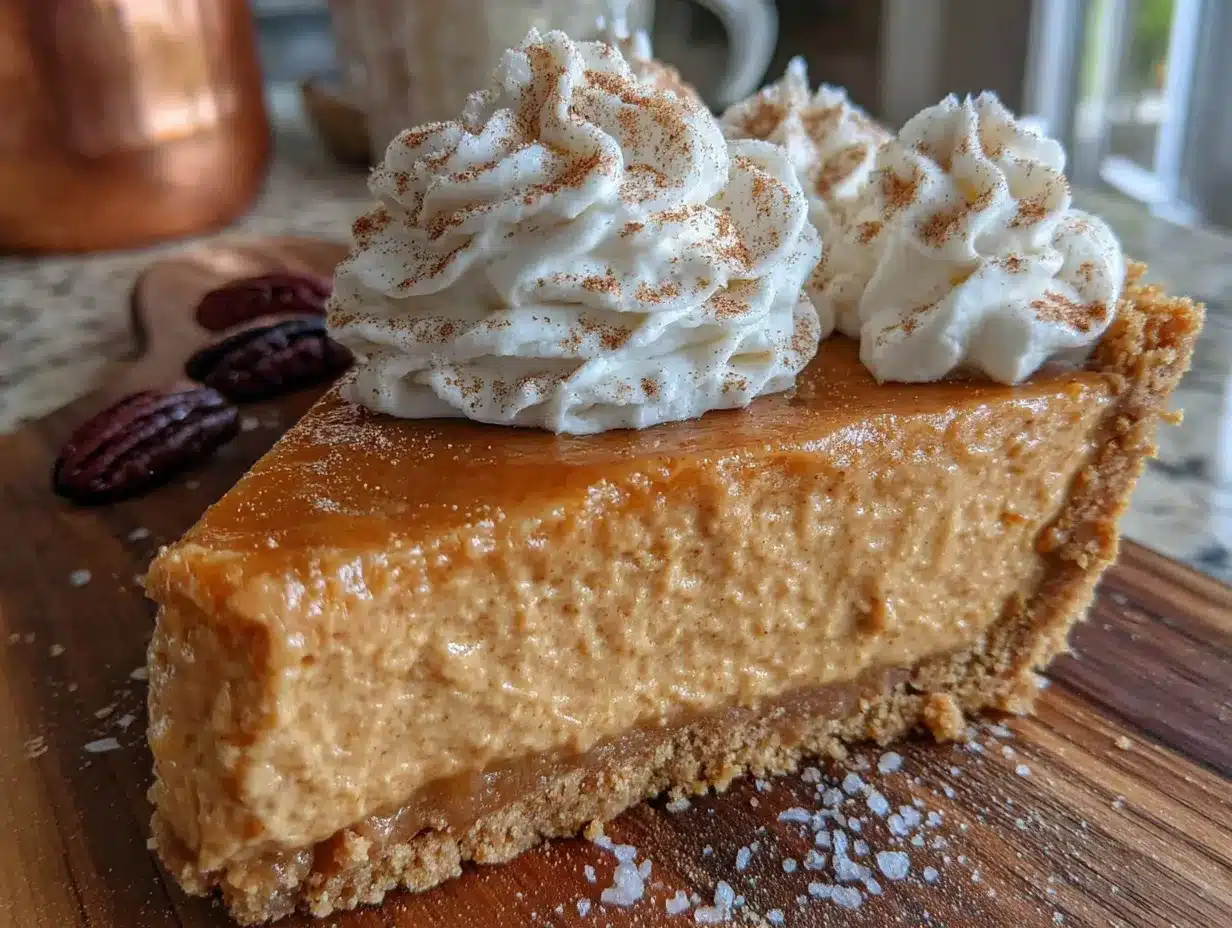
- 8 ounces cream cheese (226g), softened to room temperature
- 1 cup pumpkin puree (240g) – not pumpkin pie filling, just pure pumpkin
- 1/2 cup packed brown sugar (100g) – light or dark both work
- 1/4 cup granulated sugar (50g)
- 1 teaspoon vanilla extract
- 1 1/2 teaspoons pumpkin pie spice – or make your own blend (see note below)
- 1/2 teaspoon ground cinnamon
- 1/4 teaspoon ground ginger
- 1 cup heavy cream (240ml), cold
- 1/4 cup powdered sugar (30g)
For the Topping (Optional but Recommended)
- 1 cup heavy cream (240ml), cold
- 2 tablespoons powdered sugar (15g)
- 1/2 teaspoon vanilla extract
- Crushed gingersnaps for garnish
- Ground cinnamon for dusting
Ingredient Notes: I recommend using full-fat cream cheese for the best texture—low-fat versions can make the filling a bit grainy. For the gingersnaps, I love the ones from the bakery section at most grocery stores. They’re crispier and have a stronger ginger flavor than the soft, chewy kind. If you’re using store-bought gingersnaps, look for brands that list real ginger and molasses as ingredients. For the pumpkin puree, Libby’s is my go-to brand because it’s consistently thick and not watery. If you’re using a different brand, you might need to drain off any excess liquid before measuring.
Substitution Guidance: You can use dairy-free cream cheese and coconut cream (chilled, solid part only) for a dairy-free version. For a gluten-free option, use gluten-free gingersnap cookies. And if you don’t have pumpkin pie spice, just mix 1/2 teaspoon cinnamon, 1/4 teaspoon nutmeg, 1/4 teaspoon ginger, and 1/8 teaspoon cloves.
Equipment Needed
You don’t need a fancy kitchen to make this easy no-bake pumpkin pie with gingersnap crust. Here’s what you’ll need:
- 9-inch pie dish – A standard glass or ceramic pie dish works perfectly. I prefer glass because you can see if the crust is evenly pressed.
- Food processor or rolling pin – For crushing the gingersnaps. A food processor gives you the most consistent crumbs, but a rolling pin and a zip-top bag work just fine (and give you a little arm workout).
- Electric mixer – A hand mixer or stand mixer with the paddle attachment. You need this to whip the cream and cream cheese properly. Whisking by hand is possible but your arm will hate you.
- Medium mixing bowls – Two or three, for different components.
- Rubber spatula – For folding the whipped cream into the pumpkin mixture gently.
- Measuring cups and spoons – Standard set.
- Plastic wrap – To cover the pie while it chills.
Budget-Friendly Tips: If you don’t have a food processor, place the gingersnaps in a sturdy zip-top bag and crush them with a rolling pin or even a heavy-bottomed skillet. It’s a little more work, but the result is the same. A hand mixer is perfectly fine for this recipe—no need for a fancy stand mixer. And honestly, I’ve made this pie in a disposable aluminum pie pan before when I was traveling, and it worked great.
One thing I’ve learned the hard way: make sure your mixing bowls are completely dry before whipping the cream. Any trace of water or grease can prevent the cream from whipping properly. Learned that one during a particularly frustrating Thanksgiving prep session!
Preparation Method
Let’s walk through this step by step. I promise, it’s easier than you think.
Step 1: Make the Gingersnap Crust
Start by crushing your gingersnap cookies into fine crumbs. If using a food processor, pulse until you have uniform crumbs—about 30 seconds. If using the bag-and-rolling-pin method, seal the bag tightly and go to town until no large pieces remain. You should have about 2 cups of crumbs.
In a medium bowl, combine the gingersnap crumbs with the melted butter, sugar (if using), and a pinch of salt. Stir with a fork until the mixture looks like wet sand and holds together when pressed between your fingers. If it crumbles apart, add another tablespoon of melted butter.
Press the crumb mixture firmly into the bottom and up the sides of your 9-inch pie dish. Use the bottom of a measuring cup or a flat glass to press it down evenly. Don’t forget to press the sides firmly too—this prevents crumbling when you slice the pie later. Place the crust in the refrigerator to set while you prepare the filling, at least 15 minutes.
Step 2: Prepare the Pumpkin Base
In a large mixing bowl, beat the softened cream cheese with an electric mixer on medium speed until smooth and creamy—about 2 minutes. Scrape down the sides of the bowl with a rubber spatula. Add the pumpkin puree, brown sugar, granulated sugar, vanilla extract, pumpkin pie spice, cinnamon, and ginger. Beat on medium speed until everything is well combined and smooth. The mixture should look thick and glossy. Set aside.
Pro tip: Make sure your cream cheese is truly at room temperature. Cold cream cheese will leave lumps in your filling that no amount of mixing can fix. Take it out of the fridge at least an hour before you start.
Step 3: Whip the Cream
In a separate clean, cold bowl, pour the cold heavy cream. Add the powdered sugar. Using the electric mixer with clean beaters, whip the cream on medium-high speed until stiff peaks form. You’ll know it’s ready when you lift the beaters and the cream stands up in firm peaks that don’t droop. Be careful not to over-whip, or you’ll end up with butter. Trust me, I’ve done it—it’s not pretty.
Step 4: Fold It All Together
This is the most important step. Take about one-third of the whipped cream and gently fold it into the pumpkin mixture using a rubber spatula. This lightens the mixture and makes it easier to incorporate the rest. Then add the remaining whipped cream and fold gently until no white streaks remain. Be patient here—you want to keep as much air in the mixture as possible for that light, mousse-like texture.
The final filling should be pale orange, smooth, and fluffy. Taste it (I always do) and adjust the spices if needed. Remember, the flavors will meld and deepen as it chills.
Step 5: Assemble and Chill
Remove the crust from the refrigerator. Spoon the pumpkin filling into the crust and spread it evenly with a spatula. Smooth the top as much as you can—it’ll look prettier after it sets. Cover the pie loosely with plastic wrap and refrigerate for at least 6 hours, but preferably overnight. The longer it chills, the cleaner your slices will be.
I know waiting is the hardest part. But this is where the magic happens. The filling firms up, the spices settle, and the crust absorbs just a tiny bit of moisture from the filling, making every bite perfect.
Step 6: Make the Whipped Topping
Just before serving, whip the remaining heavy cream with powdered sugar and vanilla until soft peaks form. Spread or pipe it over the chilled pie. Sprinkle with crushed gingersnaps and a dusting of cinnamon.
Cooking Tips & Techniques
After making this pie more times than I can count (and messing it up a few times too), here are my best tips:
Don’t skip chilling the crust. I know it’s tempting to just pour the filling in right away, but a well-chilled crust holds together much better when you slice the pie. If you’re in a rush, pop it in the freezer for 10 minutes instead.
Room temperature ingredients matter. Cold cream cheese creates lumps. Cold pumpkin puree can make the filling seize up. Take everything out of the fridge an hour before you start. Your future self will thank you.
Fold, don’t stir. When combining the whipped cream with the pumpkin mixture, use a gentle folding motion—cut through the center, scrape along the bottom, and turn the mixture over. Stirring vigorously will deflate all that lovely air you whipped into the cream.
Watch your cream. Heavy cream whips best when everything is cold—the bowl, the beaters, and the cream itself. If your kitchen is warm, set the mixing bowl in a larger bowl filled with ice water while you whip. And stop as soon as you see stiff peaks. Over-whipped cream turns grainy and eventually becomes butter.
Slice with a hot knife. For clean, beautiful slices, run your knife under hot water, dry it off, then slice. Wipe the blade clean between each cut. This trick works for any creamy pie, but especially this one.
One mistake I made early on: I tried to rush the chilling process by putting the pie in the freezer for an hour. The edges froze while the center was still soft, and the texture was all wrong. Give it the full 6 hours in the fridge. Overnight is even better.
Variations & Adaptations
This easy no-bake pumpkin pie with gingersnap crust is wonderfully adaptable. Here are some variations I’ve tried and loved:
Dairy-Free Version
Use dairy-free cream cheese (I like Kite Hill or Miyoko’s) and replace the heavy cream with full-fat coconut cream. Chill a can of coconut milk overnight, scoop off the solid top layer, and whip it just like regular cream. The texture is slightly different but still delicious. The gingersnap crust works perfectly with coconut oil instead of butter—just use a 1:1 ratio.
Maple Pumpkin Pie
Replace the brown sugar with maple syrup (use 1/3 cup instead of 1/2 cup, since maple syrup is sweeter). Add an extra tablespoon of cornstarch to help the filling set. The maple flavor pairs beautifully with the gingersnap crust. This version is especially good in the fall when you want something a little different.
Chocolate-Pumpkin Swirl
Melt 4 ounces of dark chocolate and let it cool slightly. After filling the pie crust, drop spoonfuls of melted chocolate on top and swirl it with a knife. The chocolate adds a rich, almost mocha-like depth that complements the pumpkin spices. My kids go crazy for this version.
Individual Mini Pies
Use a muffin tin lined with paper liners instead of a pie dish. Press the crust into the bottom of each liner, fill with the pumpkin mixture, and chill. These are perfect for parties or portion control. You’ll get about 12 mini pies from this recipe.
Low-Carb Adaptation
Use a nut-based crust (almond flour, melted butter, and sweetener) instead of gingersnaps. Replace the sugars with your preferred low-carb sweetener (erythritol or monk fruit blend works well). The texture will be slightly less creamy, but the flavor is still fantastic.
Serving & Storage Suggestions
This pie is best served cold, straight from the refrigerator. The filling should be firm but still creamy—think cheesecake texture, not pudding. I like to let it sit at room temperature for about 10 minutes before slicing, just to take the chill off.
Presentation Ideas: Pipe the whipped cream in rosettes around the edge of the pie for a fancy look. Sprinkle crushed gingersnaps and a light dusting of cinnamon over the top. For an extra touch, add a few candied pecans or a drizzle of caramel sauce. A dollop of creamy homemade pumpkin spice cold foam on the side would be absolutely divine.
What to Serve With It: This pie pairs beautifully with a hot cup of coffee or spiced cider. For a full fall dessert spread, serve it alongside flavorful brown butter pumpkin chocolate chip cookies for a variety of textures. A scoop of vanilla ice cream or a drizzle of warm caramel sauce takes it over the top.
Storage Instructions: Cover the pie tightly with plastic wrap or aluminum foil and store in the refrigerator for up to 5 days. The crust will soften slightly over time, but the flavor actually improves after a day or two. I don’t recommend freezing this pie—the texture becomes watery and grainy when thawed. If you must freeze it, do so without the whipped topping, and expect some texture changes.
Reheating: This is a no-bake pie, so there’s no need to reheat it. But if you prefer a softer texture, let a slice sit at room temperature for 15-20 minutes before eating.
Nutritional Information & Benefits
Here’s the approximate nutritional breakdown for one slice (based on 8 servings, with whipped topping):
- Calories: 425
- Fat: 28g
- Saturated Fat: 16g
- Carbohydrates: 40g
- Fiber: 2g
- Sugar: 28g
- Protein: 5g
- Sodium: 280mg
Health Benefits: Pumpkin is packed with vitamin A (over 200% of your daily needs per serving), which supports eye health and immune function. It’s also a good source of fiber and antioxidants. The ginger in the crust has anti-inflammatory properties, and cinnamon may help regulate blood sugar. Of course, this is still a dessert—it’s meant to be enjoyed in moderation as part of a balanced diet.
Dietary Considerations: This recipe contains gluten (gingersnaps), dairy (cream cheese, heavy cream, butter), and eggs (no eggs in this version, surprisingly!). For gluten-free or dairy-free options, see the variations section above.
Conclusion
This easy no-bake pumpkin pie with gingersnap crust has become my most-requested dessert, and I think it’s about to become yours too. It’s everything you want in a fall pie—creamy, spiced, comforting—without any of the stress of baking a traditional pumpkin pie.
What I love most about this recipe is how forgiving it is. You don’t need to worry about cracks in the filling, a soggy bottom crust, or over-baking. Just mix, pour, and chill. It’s the kind of recipe that makes you look like a hero in the kitchen with minimal effort.
I’d love to hear how yours turns out! Did you try any of the variations? Did your family fight over the last slice? Drop a comment below and let me know. And if you share a photo on social media, tag me—I always love seeing your creations. Happy fall, friends. Go make some pie.
Frequently Asked Questions
Can I use pumpkin pie filling instead of pumpkin puree?
No, please don’t. Pumpkin pie filling is already sweetened and spiced, so using it would throw off the entire recipe. Stick with 100% pure pumpkin puree. Your pie will taste much better.
How far in advance can I make this pie?
You can make this pie up to 2 days ahead of time. In fact, it tastes even better the next day because the flavors have time to meld. Just wait to add the whipped topping until right before serving.
My crust keeps falling apart. What am I doing wrong?
You probably need more butter. The crust mixture should feel like wet sand and hold together when you squeeze it in your fist. If it’s crumbly, add melted butter one tablespoon at a time until it holds. Also, make sure you’re pressing it firmly enough into the pie dish.
Can I use a graham cracker crust instead of gingersnap?
Absolutely. A graham cracker crust works fine, but you’ll lose that warm, spicy flavor that makes this pie so special. If you use graham crackers, consider adding an extra teaspoon of pumpkin pie spice to the crust to compensate. Or try it with vanilla wafers for a different twist.
Why is my filling not setting?
This usually happens for one of two reasons: either you didn’t chill it long enough (it needs at least 6 hours), or your cream cheese wasn’t at room temperature and created lumps that prevented the filling from setting properly. If you’re short on time, you can pop it in the freezer for 2 hours, but check it frequently so it doesn’t freeze solid.
Pin This Recipe!
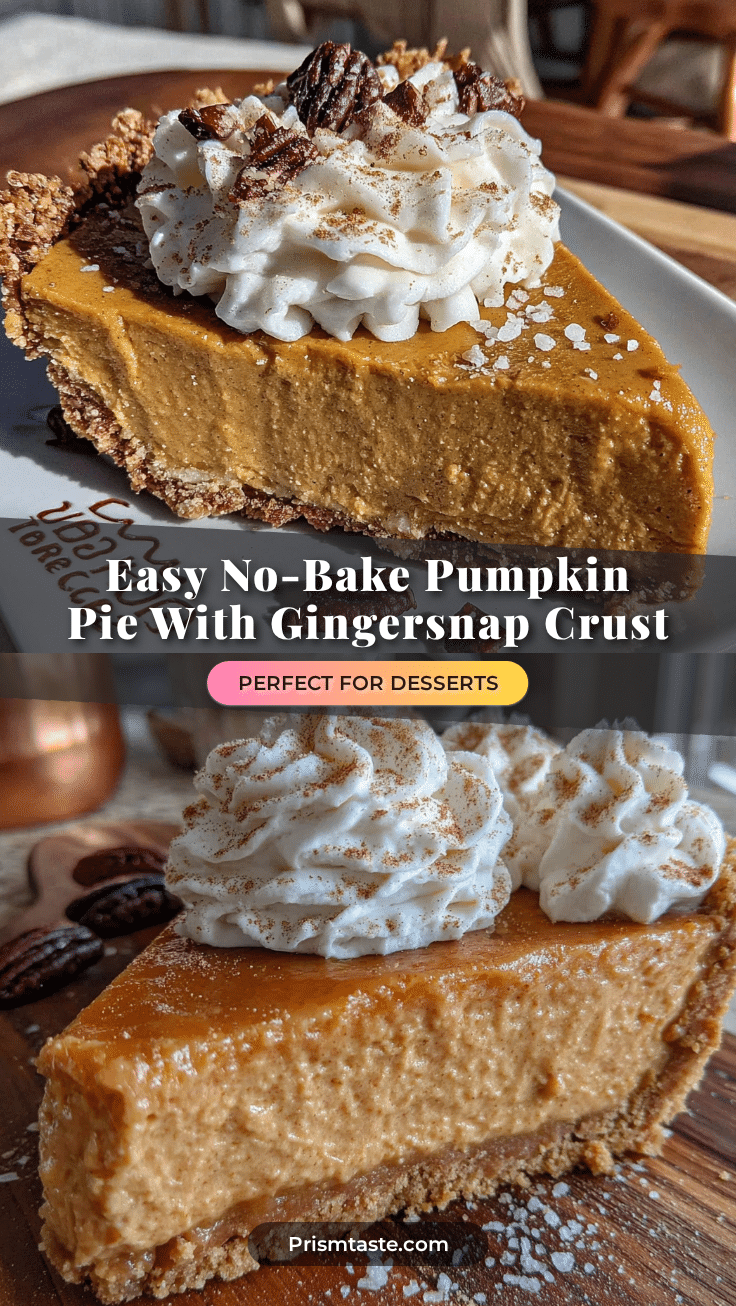
Easy No-Bake Pumpkin Pie with Gingersnap Crust
A creamy, spiced no-bake pumpkin pie with a crunchy gingersnap crust that sets beautifully in the fridge. Perfect for fall gatherings and holiday tables without any oven time.
- Prep Time: 20 minutes
- Cook Time: 0 minutes
- Total Time: 6 hours 20 minutes (includes chilling)
- Yield: 8 servings 1x
- Category: Dessert
- Cuisine: American
Ingredients
- 2 cups gingersnap cookie crumbs (about 8 ounces or 225g of cookies, finely crushed)
- 6 tablespoons unsalted butter (85g), melted
- 2 tablespoons granulated sugar (25g) – optional, if your gingersnaps aren’t very sweet
- Pinch of salt
- 8 ounces cream cheese (226g), softened to room temperature
- 1 cup pumpkin puree (240g) – not pumpkin pie filling
- 1/2 cup packed brown sugar (100g) – light or dark both work
- 1/4 cup granulated sugar (50g)
- 1 teaspoon vanilla extract
- 1 1/2 teaspoons pumpkin pie spice
- 1/2 teaspoon ground cinnamon
- 1/4 teaspoon ground ginger
- 1 cup heavy cream (240ml), cold
- 1/4 cup powdered sugar (30g)
- 1 cup heavy cream (240ml), cold (for topping)
- 2 tablespoons powdered sugar (15g) (for topping)
- 1/2 teaspoon vanilla extract (for topping)
- Crushed gingersnaps for garnish
- Ground cinnamon for dusting
Instructions
- Make the gingersnap crust: Crush gingersnap cookies into fine crumbs (using a food processor or a rolling pin and zip-top bag). In a medium bowl, combine crumbs with melted butter, sugar (if using), and a pinch of salt. Stir until mixture resembles wet sand and holds together when pressed. Press firmly into the bottom and up the sides of a 9-inch pie dish. Refrigerate for at least 15 minutes.
- Prepare the pumpkin base: In a large bowl, beat softened cream cheese with an electric mixer on medium speed until smooth (about 2 minutes). Add pumpkin puree, brown sugar, granulated sugar, vanilla extract, pumpkin pie spice, cinnamon, and ginger. Beat until well combined and smooth. Set aside.
- Whip the cream: In a separate clean, cold bowl, pour cold heavy cream and add powdered sugar. Whip on medium-high speed until stiff peaks form. Be careful not to over-whip.
- Fold it all together: Gently fold about one-third of the whipped cream into the pumpkin mixture to lighten it. Then fold in the remaining whipped cream until no white streaks remain. The filling should be pale orange, smooth, and fluffy.
- Assemble and chill: Remove crust from refrigerator. Spoon filling into crust and spread evenly. Cover loosely with plastic wrap and refrigerate for at least 6 hours, preferably overnight.
- Make the whipped topping: Just before serving, whip remaining heavy cream with powdered sugar and vanilla until soft peaks form. Spread or pipe over chilled pie. Sprinkle with crushed gingersnaps and a dusting of cinnamon.
Notes
Use full-fat cream cheese for best texture. For dairy-free, use dairy-free cream cheese and coconut cream. For gluten-free, use gluten-free gingersnaps. Chill at least 6 hours or overnight for best results. Slice with a hot knife for clean cuts.
Nutrition
- Serving Size: 1 slice (1/8 of pie)
- Calories: 425
- Sugar: 28
- Sodium: 280
- Fat: 28
- Saturated Fat: 16
- Carbohydrates: 40
- Fiber: 2
- Protein: 5
Keywords: no-bake pumpkin pie, gingersnap crust, easy pumpkin pie, Thanksgiving dessert, fall dessert, no-bake pie


