My husband took a bite of the first one, chewed for a second, and then just stared at the bagel in his hand like he was trying to figure out if it was real. He said, “This tastes like fall had a baby with a New York deli.” I honestly wasn’t sure if that was a compliment or a weird observation, but he reached for a second one before I could even ask. That’s when I knew this recipe was something different.
I’ve been on a bit of a pumpkin kick this season (who isn’t, right?), but I wanted something that wasn’t just sweet. Don’t get me wrong, I love a good pumpkin banana bread situation, but I was craving that savory-sweet balance. The kind of thing that feels indulgent but also, you know, like a proper breakfast. These pumpkin bagels with everything seasoning hit that spot perfectly. They’re soft, chewy, and have that subtle earthy sweetness from the pumpkin that plays so well with the salty, garlicky, seedy crunch of the everything topping.
Making bagels from scratch sounds like a project, and honestly, it kind of is. But it’s the rewarding kind of project. The kind where you get your hands dirty, the kitchen smells amazing, and you end up with a dozen beautiful, golden-brown rings of bread that you made with your own two hands. There’s something deeply satisfying about that. And when you bite into one that’s still warm from the oven, slathered with a little butter or cream cheese? That’s the good stuff. This recipe is my attempt to bottle that feeling and make it a little more accessible for a regular Tuesday morning.
Why You’ll Love This Recipe
I’ve tested this recipe about four times to get the texture just right. Bagels can be tricky. Too dense, and they’re like hockey pucks. Too airy, and they’re just round bread rolls. These pumpkin bagels hit that perfect middle ground—chewy with a soft, tender crumb. Here’s why I think you’ll really enjoy making these:
- Savory-Sweet Magic: The pumpkin adds a subtle sweetness and moisture that balances the bold, salty everything seasoning. It’s not a sweet bagel; it’s a perfectly balanced one.
- No Fancy Equipment: You don’t need a stand mixer (though it helps). A bowl and a strong arm work just fine. This is old-school baking at its best.
- Freezer-Friendly: Make a double batch. They freeze beautifully, and having a homemade bagel in the freezer is a game-changer for busy mornings.
- Better Than Store-Bought: Once you taste a bagel fresh from the oven, with that crackly crust and soft inside, you’ll never look at the grocery store bagels the same way again.
- Perfect for Fall Mornings: It’s the kind of breakfast that makes you want to sit down with a hot coffee and just enjoy the moment. No rushing.
What makes this recipe different from the standard bagel recipe is the pumpkin puree and the touch of brown sugar in the dough. The pumpkin doesn’t just add flavor—it changes the texture, making the crumb slightly more tender without losing that signature bagel chew. And the everything seasoning isn’t just sprinkled on top; it gets pressed in so it stays put through the boiling and baking process. I learned that trick the hard way after losing half the seasoning into the boiling water on my first try.
What Ingredients You Will Need
This recipe uses simple, wholesome ingredients that you probably already have in your pantry. The pumpkin puree is the star here, adding both flavor and moisture to the dough. Let’s break down what you’ll need.
For the Bagel Dough:
- 1 ½ cups warm water (110°F to 115°F) — Not too hot, or you’ll kill the yeast. Think warm bathwater temperature.
- 2 ¼ teaspoons active dry yeast (one packet) — This is what gives the bagels their rise and that airy interior.
- 1 tablespoon brown sugar, packed — Feeds the yeast and adds a subtle molasses note that pairs beautifully with the pumpkin.
- 1 cup pumpkin puree — Make sure it’s 100% pure pumpkin, not pumpkin pie filling. I like Libby’s for consistent results.
- 4 cups bread flour (plus more for kneading) — Bread flour has a higher protein content, which gives bagels their signature chew. All-purpose will work in a pinch, but the texture won’t be quite the same.
- 1 ½ teaspoons salt — Don’t skip this; it’s crucial for flavor and gluten structure.
For the Boiling & Topping:
- 8 cups water — For the boiling bath that gives bagels their shiny, chewy crust.
- 2 tablespoons baking soda — This alkalizes the water, which helps create that deep golden-brown crust during baking.
- 1 tablespoon honey or barley malt syrup — Adds a touch of sweetness to the crust and helps with browning. I prefer barley malt syrup for authenticity, but honey works great.
- 3 tablespoons everything bagel seasoning — You can buy this pre-made or make your own with equal parts white sesame seeds, black sesame seeds, poppy seeds, dried minced garlic, dried minced onion, and flaky sea salt.
Ingredient Selection Tips: For the pumpkin puree, I recommend sticking with a trusted brand like Libby’s. Homemade pumpkin puree tends to be more watery and can throw off the hydration of the dough. If you’re using homemade, you’ll want to strain it through cheesecloth for a few hours to remove excess moisture. For the everything seasoning, I’ve found that Trader Joe’s has a great pre-made blend, or you can mix your own in about two minutes. Just make sure your garlic and onion flakes are dried, not fresh, or they’ll burn in the oven.
Substitution Guidance: For a dairy-free option, you’re already good since this recipe contains no dairy. For a whole wheat version, swap up to half the bread flour for whole wheat flour. The bagels will be denser and nuttier, but still delicious. If you don’t have bread flour, all-purpose flour will work—just expect a slightly softer, less chewy bagel.
Equipment Needed
You don’t need a professional bakery setup for these pumpkin bagels, but a few key tools will make the process much smoother. Here’s what I recommend:
- Stand mixer with dough hook (optional but helpful) — Kneading bagel dough by hand is a solid arm workout. A stand mixer does the heavy lifting in about 8 minutes.
- Large mixing bowl — For proofing the dough. Glass or ceramic works best.
- Baking sheets (2) — Lined with parchment paper or a silicone baking mat.
- Large pot or Dutch oven — For boiling the bagels. You need enough room for them to float without crowding.
- Slotted spoon or spider strainer — For gently lowering and removing bagels from the boiling water.
- Kitchen thermometer — For checking water temperature. This is important for activating the yeast correctly.
- Plastic wrap or a damp kitchen towel — For covering the dough while it rises.
Budget-Friendly Alternatives: If you don’t have a stand mixer, you can absolutely knead the dough by hand. It’ll take about 10 to 12 minutes of solid kneading. Think of it as a stress reliever. No kitchen thermometer? You can test the water temperature by dripping a little on your inner wrist—it should feel neutral, not hot or cold. And if you don’t have a slotted spoon, a regular spatula can work for gently moving the bagels in the water, though it’s a bit trickier.
Preparation Method
Alright, let’s get into the actual process. This is where the magic happens. I’ll walk you through each step with all the little details I’ve learned from my test batches.
Step 1: Activate the Yeast
In the bowl of your stand mixer (or a large mixing bowl if doing this by hand), combine the warm water, active dry yeast, and brown sugar. Give it a gentle stir and let it sit for 5 to 10 minutes. You should see it become frothy and bubbly on top. If it doesn’t, your yeast might be dead, and you’ll need to start over with fresh yeast. This is the most important step—don’t rush it.
Step 2: Mix the Dough
Add the pumpkin puree, 4 cups of bread flour, and salt to the yeast mixture. If using a stand mixer, attach the dough hook and mix on low speed for about 2 minutes until the dough starts to come together. Then increase to medium speed and knead for 6 to 8 minutes. The dough should be smooth, elastic, and slightly tacky but not sticky. If it’s too sticky, add a tablespoon of flour at a time. If it’s too dry, add a teaspoon of water. By hand, turn the dough out onto a lightly floured surface and knead for 10 to 12 minutes.
Step 3: First Rise
Shape the dough into a smooth ball and place it in a lightly oiled bowl, turning to coat all sides. Cover the bowl tightly with plastic wrap or a damp kitchen towel. Let it rise in a warm, draft-free spot for 1 to 1 ½ hours, or until it has doubled in size. I usually put mine in the microwave with the door closed (turned off, of course) because it’s a consistent temperature.
Step 4: Shape the Bagels
Punch down the risen dough to release the air. Turn it out onto a clean work surface (no extra flour needed if it’s not sticky). Divide the dough into 8 equal pieces. A kitchen scale is your best friend here for consistency—each piece should weigh about 120 to 130 grams. Roll each piece into a smooth ball, then poke your thumb through the center to create a hole. Gently stretch the hole to about 1 ½ inches in diameter. Place the shaped bagels on a parchment-lined baking sheet, leaving a few inches between them. Cover loosely with a towel and let them rest for 15 minutes.
Step 5: The Boiling Bath
While the bagels rest, preheat your oven to 425°F (220°C). In your large pot, bring 8 cups of water to a boil. Add the baking soda and honey (or barley malt syrup). Be careful—the water might foam up a bit when you add the baking soda. Reduce the heat to a gentle simmer. Working in batches of 2 or 3, carefully drop the bagels into the simmering water. Boil for 1 minute on each side. This is what gives bagels that shiny, chewy crust. Use your slotted spoon to flip them gently. After boiling, return them to the parchment-lined baking sheet.
Step 6: Add the Topping
While the bagels are still wet from the boiling water, generously sprinkle the everything bagel seasoning over the tops. Press the seasoning in gently with your fingers so it sticks. Don’t skimp here—this is where the flavor lives. I like to use about a heaping teaspoon per bagel.
Step 7: Bake to Golden Perfection
Place the baking sheets in the preheated oven. Bake for 20 to 25 minutes, rotating the pans halfway through. The bagels are done when they are deep golden brown and sound hollow when tapped on the bottom. Let them cool on a wire rack for at least 15 minutes before slicing. I know it’s hard to wait, but cutting them too early can make them gummy inside.
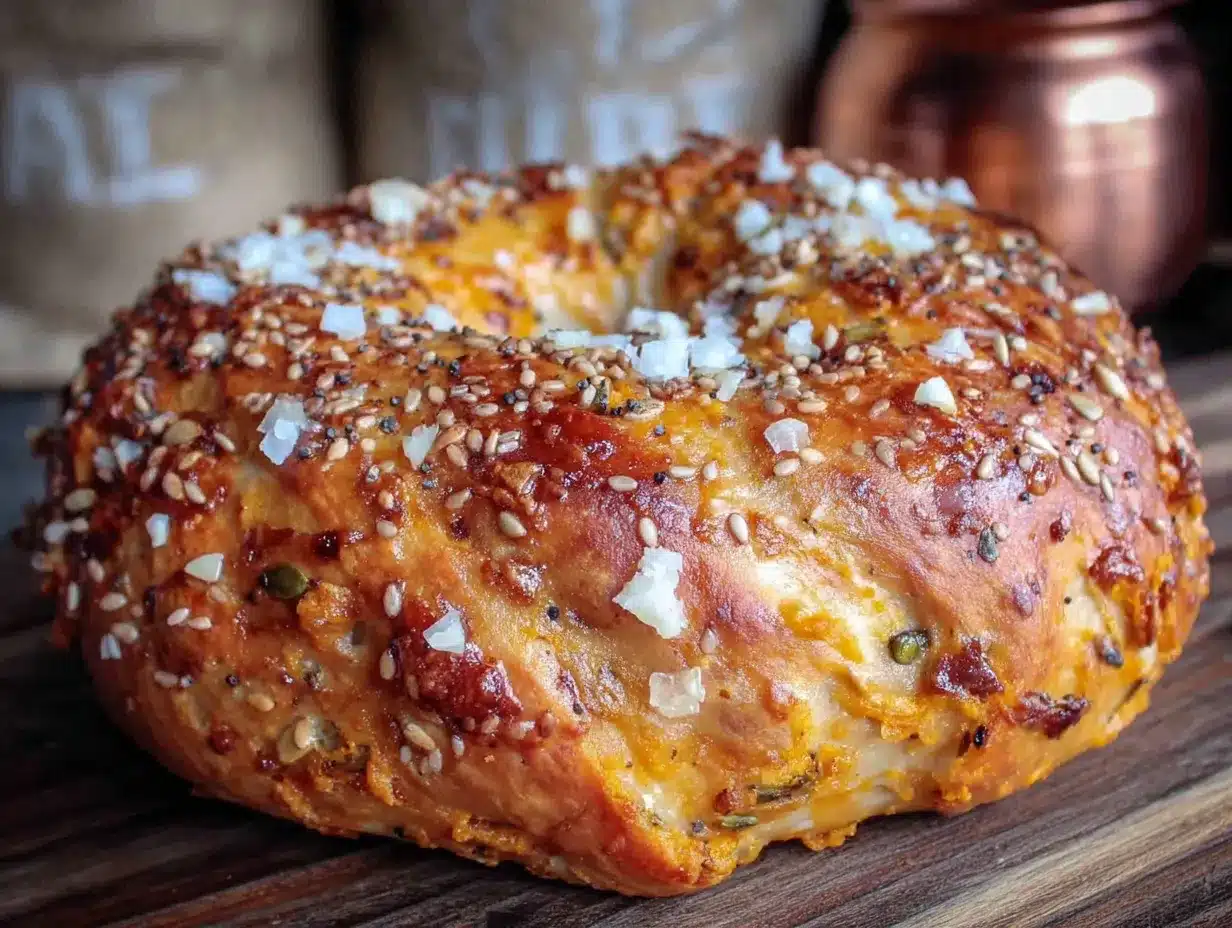
Sensory Cues: The dough should feel smooth and springy, like a baby’s cheek, after kneading. When boiling, the bagels should float and puff up slightly. You’ll smell a toasty, yeasty aroma as they bake, and the kitchen will smell like a real bagel shop. The finished bagels should have a crackly crust that gives way to a soft, chewy interior when you bite in.
Cooking Tips & Techniques
I’ve made plenty of mistakes with bagels over the years, so you don’t have to. Here are the biggest lessons I’ve learned:
- Don’t skip the boiling step. I know it seems like an extra hassle, but it’s non-negotiable. Boiling gelatinizes the starch on the outside of the dough, creating that signature chewy crust. Without it, you just have round bread rolls.
- Watch your water temperature. If your water is too hot (above 120°F), it will kill the yeast. Too cold, and the yeast won’t activate. Aim for that 110°F to 115°F sweet spot. I use a kitchen thermometer every single time.
- Let them cool completely. I know the temptation is real, but cutting into a hot bagel will result in a gummy, dense texture. The interior needs time to set. Trust me on this one—I’ve ruined a few good bagels by being impatient.
- Use bread flour. The higher protein content in bread flour is what gives bagels their chew. All-purpose flour has less protein and will produce a softer, less authentic bagel.
- Don’t over-proof the shaped bagels. The 15-minute rest after shaping is plenty. If you let them sit too long, they’ll deflate in the boiling water and turn out flat.
Multitasking Strategy: While the dough is doing its first rise (about an hour), use that time to clean up your kitchen, prep your boiling water setup, and measure out your everything seasoning. It makes the later steps feel much less chaotic.
Variations & Adaptations
One of the best things about this recipe is how adaptable it is. Here are a few ways I’ve played around with it:
- Cinnamon Sugar Pumpkin Bagels: Skip the everything seasoning and instead mix 2 tablespoons of cinnamon with ¼ cup of granulated sugar. Sprinkle this on the bagels right after boiling. Bake as directed. These are amazing with cream cheese.
- Cheesy Everything Bagels: After boiling, sprinkle the bagels with everything seasoning and then top with ¼ cup of shredded sharp cheddar or parmesan cheese per bagel. Bake as directed. The cheese gets all crispy and golden on top. It’s ridiculous.
- Gluten-Free Option: Substitute the bread flour with a high-quality gluten-free flour blend that contains xanthan gum. The dough will be stickier and harder to shape, so you might want to use a bagel mold or shape them with wet hands. The texture won’t be exactly the same, but it’s a solid alternative.
- Pumpkin Spice Bagels: Add 1 teaspoon of pumpkin pie spice to the flour mixture before mixing the dough. Top with a simple cinnamon-sugar mixture instead of everything seasoning. These are perfect for a cozy fall breakfast.
Personal Variation: I once tried adding a handful of dried cranberries and some chopped pecans to the dough. It made for a really interesting sweet-savory bagel that was fantastic with a smear of honey butter. Just fold them in after the dough has come together in the mixer.
Serving & Storage Suggestions
These pumpkin bagels are best served warm, within an hour of baking. The crust is at its crackliest, and the interior is perfectly soft and chewy. Slice them in half and toast them lightly if you’re eating them later—it brings back that fresh-baked texture.
Serving Ideas:
- Classic cream cheese is always a winner. Try a chive or scallion cream cheese for an extra savory kick.
- Smoked salmon, capers, and a thin layer of cream cheese is a classic combo that works beautifully here.
- For a breakfast sandwich, toast the bagel, add a fried egg, some crispy bacon, and a slice of cheddar. It’s a meal that will keep you full for hours.
- They’re also fantastic just slathered with salted butter. Sometimes simple is best.
Storage Instructions:
- Room Temperature: Store in a paper bag at room temperature for up to 2 days. Do not use plastic bags—they’ll make the crust soggy.
- Refrigerator: I don’t recommend refrigerating bagels. The cold air dries them out and changes the texture.
- Freezer: These freeze beautifully. Let them cool completely, then wrap each bagel individually in plastic wrap and place them in a freezer-safe bag. They’ll keep for up to 3 months. To reheat, thaw at room temperature, then toast or warm in a 350°F oven for 5 to 7 minutes.
Flavor Development: Honestly, these bagels are best the day they’re made. The crust stays crisp, and the interior is at its peak chewiness. By day two, they’re still good, but the crust softens. That’s why I always freeze half the batch.
Nutritional Information & Benefits
Here’s an approximate nutritional breakdown per bagel (based on 8 servings):
| Nutrient | Amount per Bagel |
|---|---|
| Calories | 280 |
| Total Fat | 4g |
| Saturated Fat | 0.5g |
| Cholesterol | 0mg |
| Sodium | 520mg |
| Total Carbohydrates | 52g |
| Dietary Fiber | 3g |
| Sugars | 5g |
| Protein | 9g |
Health Benefits: Pumpkin is packed with vitamin A (beta-carotene), which is great for eye health and immune function. It’s also a good source of fiber, which helps with digestion and keeps you feeling full longer. The pumpkin puree adds moisture to the bagels without needing extra fat, keeping the calorie count reasonable. The everything seasoning provides a small amount of healthy fats from the sesame seeds, as well as antioxidants from the garlic and onion.
Dietary Considerations: This recipe is dairy-free and vegetarian. It’s not gluten-free (unless you use the substitution mentioned above), and it contains wheat. The everything seasoning is generally free of common allergens, but always check the label on pre-made blends, as some may contain traces of soy or other allergens.
Conclusion
These homemade everything bagel pumpkin bagels are worth every minute of effort. They’re the kind of recipe that makes you feel like a real baker, even if you’re just starting out. The combination of soft, pumpkin-infused dough with that salty, crunchy everything topping is something you just can’t buy at a store. It’s a taste of fall that feels both comforting and special.
I love making these on a Sunday afternoon when I have a little time to myself. The process is almost meditative—kneading, shaping, boiling, baking. And when the house fills with that warm, yeasty smell, I know I’ve made something good. I hope you give these a try and make them your own. Maybe you’ll add a little extra garlic to the seasoning, or maybe you’ll try the cinnamon sugar version. That’s the beauty of baking from scratch—you get to decide.
If you do make these pumpkin bagels, I’d love to hear about it. Drop a comment below and let me know how they turned out, or share your own twist on the recipe. Happy baking, friends!
Frequently Asked Questions
Can I use canned pumpkin pie filling instead of pumpkin puree?
No, I wouldn’t recommend it. Pumpkin pie filling is pre-sweetened and spiced, which will throw off the balance of the dough. Stick with 100% pure pumpkin puree for the best results. If you only have pumpkin pie filling, you’d need to adjust the sugar and spices in the recipe, and it’s just not worth the guesswork.
Why did my bagels turn out flat?
This usually happens for one of two reasons: either the dough was over-proofed (left to rise too long after shaping), or the water wasn’t hot enough during the boiling step. Make sure your water is at a gentle simmer, not just warm, and don’t let the shaped bagels rest for more than 15 to 20 minutes before boiling.
Can I make the dough ahead of time?
Yes! You can prepare the dough through the first rise, then punch it down, wrap it tightly in plastic wrap, and refrigerate it for up to 24 hours. When you’re ready to bake, let it come to room temperature for about 30 minutes before shaping and proceeding with the recipe. The cold fermentation actually adds more flavor to the bagels.
My everything seasoning keeps falling off. What am I doing wrong?
The key is to add the seasoning while the bagels are still wet from the boiling water. Don’t let them dry off at all. Also, gently press the seasoning into the dough with your fingers. If you’re still having trouble, you can brush the boiled bagels with a little egg wash (one egg beaten with a tablespoon of water) before adding the seasoning. That acts like glue.
Can I double this recipe?
Absolutely. This recipe doubles beautifully. Just make sure you have enough space in your oven to bake all the bagels, or bake them in batches. You’ll also need a larger pot for boiling, or you can work in more batches. The only thing to watch is the yeast—use two packets (4 ½ teaspoons) for a double batch.
Pin This Recipe!
Homemade Everything Bagel Pumpkin Bagels Recipe

Soft, chewy pumpkin bagels topped with everything bagel seasoning, offering a perfect savory-sweet balance that tastes like fall. These homemade bagels are freezer-friendly and better than store-bought.
- Prep Time: 30 minutes
- Cook Time: 25 minutes
- Total Time: 2 hours 10 minutes
- Yield: 8 bagels 1x
- Category: Breakfast
- Cuisine: American
Ingredients
- 1 ½ cups warm water (110°F to 115°F)
- 2 ¼ teaspoons active dry yeast (one packet)
- 1 tablespoon brown sugar, packed
- 1 cup pumpkin puree (100% pure pumpkin)
- 4 cups bread flour (plus more for kneading)
- 1 ½ teaspoons salt
- 8 cups water (for boiling)
- 2 tablespoons baking soda
- 1 tablespoon honey or barley malt syrup
- 3 tablespoons everything bagel seasoning
Instructions
- In the bowl of a stand mixer (or a large mixing bowl), combine warm water, active dry yeast, and brown sugar. Stir gently and let sit for 5 to 10 minutes until frothy and bubbly.
- Add pumpkin puree, 4 cups bread flour, and salt to the yeast mixture. Using a dough hook, mix on low speed for 2 minutes, then increase to medium speed and knead for 6 to 8 minutes until dough is smooth, elastic, and slightly tacky. If kneading by hand, turn out onto a floured surface and knead for 10 to 12 minutes.
- Shape dough into a smooth ball and place in a lightly oiled bowl, turning to coat. Cover with plastic wrap or a damp towel and let rise in a warm, draft-free spot for 1 to 1 ½ hours until doubled in size.
- Punch down the risen dough and turn out onto a clean surface. Divide into 8 equal pieces (about 120 to 130 grams each). Roll each into a smooth ball, then poke a thumb through the center to create a hole. Stretch the hole to about 1 ½ inches in diameter. Place on a parchment-lined baking sheet, cover loosely, and let rest for 15 minutes.
- Preheat oven to 425°F (220°C). In a large pot, bring 8 cups water to a boil. Add baking soda and honey (or barley malt syrup). Reduce heat to a gentle simmer. Working in batches of 2 or 3, carefully drop bagels into the simmering water. Boil for 1 minute on each side. Use a slotted spoon to flip gently. Return to the parchment-lined baking sheet.
- While bagels are still wet from boiling, generously sprinkle everything bagel seasoning over the tops. Press seasoning in gently with your fingers.
- Bake for 20 to 25 minutes, rotating pans halfway through, until deep golden brown and hollow-sounding when tapped on the bottom. Let cool on a wire rack for at least 15 minutes before slicing.
Notes
Don’t skip the boiling step; it creates the chewy crust. Use bread flour for best texture. Let bagels cool completely before slicing to avoid gumminess. Freeze individually for up to 3 months.
Nutrition
- Serving Size: 1 bagel
- Calories: 280
- Sugar: 5
- Sodium: 520
- Fat: 4
- Saturated Fat: 0.5
- Carbohydrates: 52
- Fiber: 3
- Protein: 9
Keywords: pumpkin bagels, everything bagel, homemade bagels, fall breakfast, savory-sweet bagels


