Sticky fingers all over the remote control and the first quarter already half over when I realized I had completely forgotten to plan the game day snacks. Three hungry friends were due in twenty minutes and all I had in the fridge was a bag of frozen chicken wings, a jar of honey that was crystallizing at the bottom, and a head of garlic that was starting to sprout little green shoots. Not exactly the spread I had envisioned for the big game.
Honestly, I almost just ordered pizza. But something about the challenge of pulling off something good from what looked like nothing got me moving. I grabbed that bag of wings, threw them in a bowl to start thawing under cold water, and started mixing things together in a panic. Soy sauce, honey, garlic, a little bit of that sad crystallized stuff I microwaved for ten seconds. It smelled promising, which felt like a small miracle.
I tossed the wings in that makeshift sauce and threw them into a hot oven, praying they would at least be edible. When I pulled them out, they were sticky, caramelized, and honestly? Perfect. Everyone devoured them before halftime, asking if I had a secret recipe. I didn’t, not really. But after tweaking that accidental blend over the next few weekends, these best honey garlic glazed chicken wings for game day became the thing I am actually known for now. And I never worry about what’s in the fridge anymore.
Why You’ll Love This Recipe
These wings are the kind of snack that disappears before you even sit down. They have that perfect balance of sweet and savory that hits every single craving, and they are way easier to make than you think. No deep frying, no complicated steps, just real food that tastes like you spent hours on it.
- Quick & Easy: From fridge to table in under an hour, with only about 10 minutes of active prep. Perfect for those last-minute game day gatherings or Tuesday night cravings.
- Simple Ingredients: You probably have everything in your pantry right now. Honey, soy sauce, garlic, and a few pantry staples are all it takes to create something spectacular.
- Perfect for Game Day: These wings are made for sharing. They hold up well on a buffet table, taste great at room temperature, and pair perfectly with cold drinks and good company.
- Crowd-Pleaser: I have made these for super bowl parties, casual hangouts, and even family dinners. Kids love them, adults fight over the last one, and someone always asks for the recipe before they leave.
- Unbelievably Delicious: The glaze gets sticky and caramelized in the oven, creating this incredible coating that is both crispy and tender. It is the kind of wing that makes you close your eyes after the first bite.
What makes these different from every other honey garlic wing recipe out there? It is the balance. Most versions are either too sweet or too salty, but this one hits that sweet spot where the honey and soy sauce work together perfectly. Plus, I use a simple baking powder trick to get the skin extra crispy without frying. It is not just another wing recipe. It is the one you will make over and over again.
What Ingredients You Will Need
This recipe relies on simple, everyday ingredients that come together to create something surprisingly complex. The magic is in the glaze, which balances sweetness, saltiness, and a little tang from the vinegar.
- Chicken wings: 2 pounds (about 900g), separated into drumettes and flats. You can buy them already separated or do it yourself at home. Pat them very dry with paper towels before starting. This is the most important step for crispy skin.
- Honey: 1/3 cup (120ml). Use a good quality honey for the best flavor. If your honey has crystallized, warm it gently in the microwave for 10-15 seconds or place the jar in a bowl of hot water. I prefer local honey when I can get it, but any pure honey works well.
- Soy sauce: 1/4 cup (60ml). Use low-sodium soy sauce so you can control the salt level. Tamari or coconut aminos work great if you need a gluten-free option.
- Garlic: 4-5 cloves, minced. Fresh garlic makes a big difference here. Do not use the pre-minced stuff from a jar, it lacks the punch you need for this glaze. Grate it on a microplane for the most even distribution.
- Rice vinegar: 2 tablespoons (30ml). This adds a subtle tang that cuts through the sweetness. Apple cider vinegar or white wine vinegar can be used in a pinch.
- Baking powder: 1 teaspoon. This is the secret to crispy oven-baked wings. It helps dry out the skin and create those little bubbles that get golden and crunchy. Make sure it is baking powder, not baking soda.
- Cornstarch: 1 tablespoon. Tossing the wings in a little cornstarch before baking helps absorb moisture and creates an even crispier exterior. Arrowroot powder works the same way.
- Sesame oil: 1 tablespoon. A little goes a long way, but it adds that nutty, toasty flavor that makes these wings taste like they came from a restaurant. Toasted sesame oil, not the light kind.
- Salt and black pepper: To taste. Go easy on the salt since the soy sauce already brings plenty of sodium.
- Optional garnishes: Sliced green onions, toasted sesame seeds, and a squeeze of fresh lime juice. These add color and freshness that balance the rich glaze.
Equipment Needed
You do not need a lot of fancy gear for these wings, which is part of what makes them so great. A few basic kitchen tools are all it takes.
- Large baking sheet: A rimmed baking sheet works best to catch any drips. Line it with aluminum foil for easier cleanup, then place a wire rack on top for the crispiest results. If you do not have a wire rack, you can bake the wings directly on the foil, just flip them halfway through.
- Mixing bowls: One large bowl for tossing the wings with the dry ingredients, and one medium bowl for whisking the glaze. Stainless steel or glass is best since plastic can hold onto garlic smell.
- Whisk or fork: For mixing the glaze ingredients together until smooth. Nothing fancy needed here.
- Tongs: For flipping the wings halfway through baking and for tossing them in the glaze without burning your fingers. Silicone-tipped tongs are gentle on the non-stick coating if you use a lined pan.
- Small saucepan: For simmering the glaze to thicken it slightly before tossing with the wings. A non-stick pan works well here to prevent the honey from sticking.
- Pastry brush (optional): If you prefer to brush the glaze on rather than tossing, a silicone pastry brush makes it easy to coat each wing evenly.
I have made these wings with just a baking sheet and a fork before, and they still turned out great. Do not let a missing piece of equipment stop you from making these.
Preparation Method
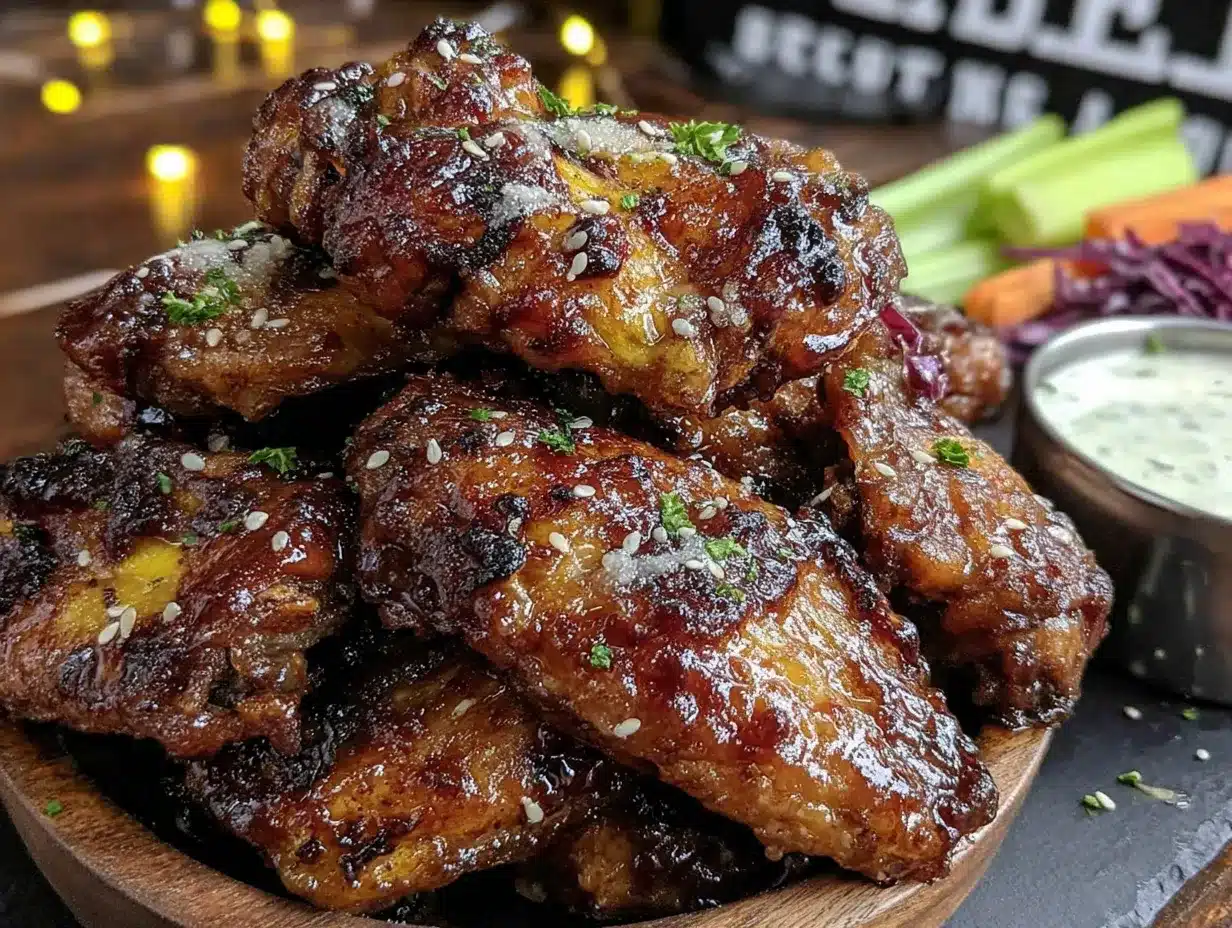
Getting these wings right comes down to a few key steps. Follow them closely and you will have the crispiest, most flavorful wings of your life.
- Preheat your oven to 400°F (200°C). Place a wire rack on a rimmed baking sheet lined with foil. This setup allows hot air to circulate all around the wings, which is what makes them crispy without frying.
- Prepare the wings: Pat the chicken wings completely dry with paper towels. This is not a step you can skip. Moisture is the enemy of crispy skin. If you have time, let them sit uncovered in the fridge for 30 minutes to dry out even more.
- Season the wings: In a large bowl, combine the baking powder, cornstarch, 1/2 teaspoon salt, and 1/4 teaspoon black pepper. Add the dried wings and toss until every piece is evenly coated. The mixture should look like a light dusting of powder on each wing.
- Arrange on the rack: Place the wings in a single layer on the wire rack, making sure they are not touching. Crowding the pan will steam the wings instead of crisping them. If you need to, use two baking sheets.
- Bake for 45-50 minutes: Bake for 25 minutes, then flip each wing using tongs. Continue baking for another 20-25 minutes until the skin is golden brown and crispy. The internal temperature should reach 165°F (74°C) when checked with a meat thermometer.
- Make the glaze: While the wings are baking, combine the honey, soy sauce, minced garlic, rice vinegar, and sesame oil in a small saucepan. Bring to a gentle simmer over medium heat, then reduce the heat to low and let it cook for 5-7 minutes, stirring occasionally. The glaze will thicken slightly and become fragrant. Do not let it boil too hard or the honey can burn.
- Toss the wings: Once the wings are done baking, transfer them to a large clean bowl. Pour the warm glaze over the top and toss gently with tongs until every wing is coated. The glaze will be sticky and glossy, clinging to every surface.
- Serve immediately: Transfer the glazed wings to a serving platter and sprinkle with sliced green onions and toasted sesame seeds. A squeeze of fresh lime juice right before serving brightens up all the flavors.
The first time I made these, I skipped the baking powder step and the skin came out flabby and sad. Do not be like me. That little teaspoon of baking powder makes all the difference between good wings and great wings.
Cooking Tips & Techniques
After making these wings more times than I can count, I have picked up a few tricks that make the process smoother and the results better.
Dry those wings thoroughly: I cannot stress this enough. Even a little bit of moisture on the skin will prevent it from getting crispy. Use paper towels and really press them dry. If you have time, leave them uncovered in the fridge for an hour or two. The air circulation dries out the surface even more.
Do not skip the wire rack: Baking wings directly on a baking sheet traps steam underneath, which softens the skin. A wire rack lifts them up so the hot air can circulate all around. If you do not have a wire rack, flip the wings every 15 minutes and drain any rendered fat from the pan.
Watch the glaze carefully: Honey burns quickly. When you are simmering the glaze, keep the heat low and stir frequently. If it starts to smell caramelized or looks too dark, pull it off the heat immediately. You want it thick and syrupy, not like candy.
Glaze at the very end: Do not brush the glaze on before baking. The sugar in the honey will burn in the oven and you will end up with bitter, blackened wings. Always bake the wings plain, then toss them in the warm glaze right before serving.
Work in batches if needed: If you are making a big batch for a party, do not overcrowd the pan. Bake in batches and keep the finished wings warm in a low oven (200°F) while the rest cook. They hold up well for about 30 minutes.
I once tried to rush the drying step and ended up with soggy wings that nobody wanted to eat. It was a sad game day. Learn from my mistakes and give those wings the time they deserve.
Variations & Adaptations
This recipe is flexible enough to adapt to different tastes and dietary needs. Here are a few ways I have changed it up over the years.
Spicy Honey Garlic Wings: Add 1-2 teaspoons of sriracha or red pepper flakes to the glaze while it simmers. The heat balances the sweetness beautifully. I love this version when I want a little kick with my game day snacks.
Air Fryer Method: Cook the seasoned wings in an air fryer at 375°F (190°C) for 20-25 minutes, shaking the basket halfway through. The air fryer gets the skin incredibly crispy in less time. Toss with the glaze right after cooking.
Smoky Version: Add 1 teaspoon of smoked paprika to the dry seasoning mix. It gives the wings a subtle smokiness that pairs perfectly with the honey garlic glaze. This is my go-to for summer cookouts.
Gluten-Free Option: Use tamari or coconut aminos instead of soy sauce. The rest of the ingredients are naturally gluten-free. Always check the labels on your baking powder and cornstarch to be sure.
Lemon Garlic Twist: Replace the rice vinegar with fresh lemon juice and add the zest of one lemon to the glaze. It brightens everything up and makes the wings feel lighter. Perfect for spring gatherings.
I have also tried these wings with chicken thighs cut into strips, and they work great as a main dish over rice. The glaze is versatile enough to use on just about anything.
Serving & Storage Suggestions
These wings are best served hot and fresh, right after tossing in the glaze. The sticky coating is at its peak when it is still warm and glossy.
Serving temperature: Serve immediately while the glaze is sticky and the skin is still crispy. They are also delicious at room temperature, which makes them perfect for buffets and party tables. If you are hosting a game day gathering, keep them warm in a low oven (200°F) for up to 30 minutes.
What to serve with them: These wings pair beautifully with classic game day sides. Try them alongside flavorful jalapeño popper deviled eggs for a spread that will steal the show. A creamy crockpot buffalo chicken dip rounds out the table perfectly. Cold beer, crunchy celery sticks with ranch dressing, and extra napkins are non-negotiable.
Storage: Store leftover wings in an airtight container in the refrigerator for up to 3 days. The glaze will soften the skin over time, so they will not be as crispy as when they were fresh. They still taste great though.
Reheating: The best way to reheat these wings is in the oven or air fryer. Place them on a wire rack over a baking sheet and bake at 350°F (175°C) for 8-10 minutes until heated through and the skin crisps up again. The microwave will make them soggy, so avoid it if you can.
Freezing: You can freeze the baked but unglazed wings for up to 2 months. Let them cool completely, then freeze in a single layer on a baking sheet. Transfer to a freezer bag once frozen. When ready to eat, reheat in the oven and toss with fresh glaze.
The flavors actually deepen a little after a day in the fridge, so leftovers make an amazing lunch the next day. Just do not expect them to last that long.
Nutritional Information & Benefits
These wings are a treat, but they do offer some nutritional benefits worth noting. Here is a rough breakdown per serving (about 4-5 wings).
Estimated nutrition per serving: Calories 380, Fat 22g, Protein 28g, Carbohydrates 18g, Sugar 15g, Sodium 680mg. These values will vary based on exact ingredients and portion sizes.
Protein punch: Chicken wings are a good source of high-quality protein, which helps keep you full and supports muscle health. Each serving provides about 28 grams of protein.
Honey benefits: Raw honey contains antioxidants and has natural antibacterial properties. While the honey in this recipe is cooked, it still adds a touch of natural sweetness without refined sugar.
Garlic goodness: Garlic is known for its immune-boosting properties and adds significant flavor without extra calories or sodium. Plus, it makes your kitchen smell amazing while it cooks.
Dietary considerations: These wings are naturally dairy-free and can be made gluten-free with a simple soy sauce swap. They are not low-carb due to the honey, but you can reduce the honey slightly if needed.
I am not a nutritionist, so take these numbers as a general guide. Enjoy these wings as part of a balanced diet and do not stress too much about the numbers. Game day is about enjoying yourself.
Conclusion
These best honey garlic glazed chicken wings for game day have saved me more times than I can count. They started as a desperate kitchen experiment and became the recipe my friends request every single time we get together. That sticky, sweet, savory glaze combined with perfectly crispy skin is just hard to beat.
What I love most about this recipe is how forgiving it is. You can tweak the sweetness, add heat, swap ingredients, and it still turns out delicious. It is the kind of recipe that builds your confidence in the kitchen because it works every single time. Whether you are hosting a super bowl party or just want a fun dinner, these wings deliver.
I would love to hear how yours turn out. Did you add extra garlic? Try the spicy version? Serve them with something unexpected? Drop a comment below and let me know. Share this recipe with your friends, pin it for later, and make these wings your own. Game day has never tasted this good.
Frequently Asked Questions
Can I use frozen wings without thawing them first?
You can, but the results will not be as crispy. Frozen wings release a lot of moisture as they cook, which steams the skin instead of crisping it. If you are in a hurry, thaw them under cold running water for about 30 minutes, then pat them very dry before seasoning.
Why did my glaze turn out too thick or too thin?
Glaze consistency depends on how long you simmer it. If it is too thin, let it simmer for a few more minutes until it reduces and thickens. If it is too thick, whisk in a tablespoon of warm water to loosen it up. Remember that the glaze will thicken more as it cools.
Can I make these wings in an air fryer instead of the oven?
Absolutely. The air fryer gets the skin incredibly crispy in less time. Cook the seasoned wings at 375°F (190°C) for 20-25 minutes, shaking the basket halfway through. Toss with the warm glaze right after cooking. You may need to work in batches depending on the size of your air fryer.
How do I get the skin extra crispy without frying?
The combination of baking powder and cornstarch is the key. The baking powder raises the pH of the skin, which helps it brown faster and become crispy. The cornstarch absorbs excess moisture. Patting the wings very dry before seasoning and using a wire rack also makes a huge difference.
Can I prepare these wings ahead of time for a party?
You can bake the wings ahead of time without the glaze, then reheat and glaze right before serving. Bake them as directed, let them cool completely, and store them in the refrigerator for up to 2 days. When you are ready to serve, reheat them in a 350°F (175°C) oven for 10 minutes, then toss with fresh glaze. This way the skin stays crispy and the glaze is fresh and sticky.
Pin This Recipe!
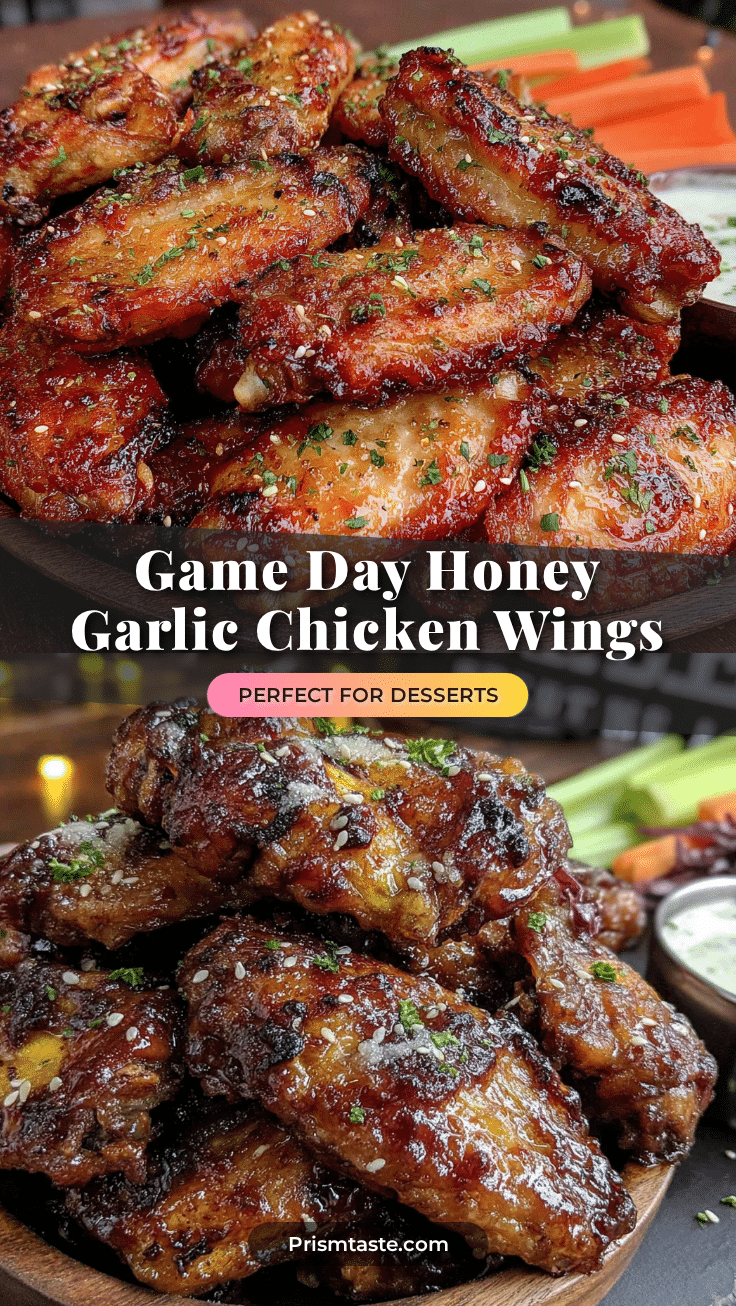
Best Honey Garlic Glazed Chicken Wings for Easy Game Day
These honey garlic glazed chicken wings are sticky, sweet, and savory with perfectly crispy skin. Made with simple pantry ingredients and ready in under an hour, they are the ultimate game day snack that disappears before halftime.
- Prep Time: 10 minutes
- Cook Time: 45-50 minutes
- Total Time: 55-60 minutes
- Yield: 4 servings 1x
- Category: Appetizer
- Cuisine: American
Ingredients
- 2 pounds (about 900g) chicken wings, separated into drumettes and flats
- 1/3 cup (120ml) honey
- 1/4 cup (60ml) low-sodium soy sauce
- 4–5 cloves garlic, minced
- 2 tablespoons (30ml) rice vinegar
- 1 teaspoon baking powder
- 1 tablespoon cornstarch
- 1 tablespoon toasted sesame oil
- Salt and black pepper to taste
- Optional garnishes: sliced green onions, toasted sesame seeds, fresh lime juice
Instructions
- Preheat your oven to 400°F (200°C). Place a wire rack on a rimmed baking sheet lined with foil.
- Pat the chicken wings completely dry with paper towels.
- In a large bowl, combine the baking powder, cornstarch, 1/2 teaspoon salt, and 1/4 teaspoon black pepper. Add the dried wings and toss until evenly coated.
- Arrange the wings in a single layer on the wire rack, making sure they are not touching.
- Bake for 25 minutes, then flip each wing using tongs. Continue baking for another 20-25 minutes until the skin is golden brown and crispy, and the internal temperature reaches 165°F (74°C).
- While the wings are baking, combine the honey, soy sauce, minced garlic, rice vinegar, and sesame oil in a small saucepan. Bring to a gentle simmer over medium heat, then reduce heat to low and cook for 5-7 minutes, stirring occasionally, until the glaze thickens slightly.
- Once the wings are done, transfer them to a large clean bowl. Pour the warm glaze over the top and toss gently with tongs until every wing is coated.
- Serve immediately, garnished with sliced green onions, toasted sesame seeds, and a squeeze of fresh lime juice if desired.
Notes
Pat the wings very dry for crispy skin. Do not skip the baking powder and cornstarch coating. Glaze the wings only after baking to prevent burning. For extra crispiness, let the seasoned wings sit uncovered in the fridge for 30 minutes before baking.
Nutrition
- Serving Size: 4-5 wings
- Calories: 380
- Sugar: 15
- Sodium: 680
- Fat: 22
- Saturated Fat: 6
- Carbohydrates: 18
- Protein: 28
Keywords: honey garlic chicken wings, game day wings, crispy baked wings, sticky wings, party appetizer


